Love this? Save it for later!
Share the inspiration with your friends
My sister-in-law Gina wasn’t trying to impress anyone. I’d stopped by her place on a dreary Tuesday in early November to drop off a casserole dish she’d lent me, and the smell hit me before I even got through the front door. It was warm, buttery, and sweet—but not in that predictable chocolate-chip way. There was something deeper going on, something almost caramelized and a little bit smoky. She shrugged when I asked what she was baking. “Oh, just trying to get rid of this,” she said, waving a hand at a mountain of foil-wrapped candy on her kitchen counter. Halloween had come and gone, and her kids had amassed enough sugar to fuel a small army. She wasn’t making a masterpiece. She was making space in her pantry. But the cookies cooling on her stovetop? They were absolutely, unfairly perfect. I stood there eating one, then two, honestly losing count, while she told me about her method. She wasn’t following a recipe. She was just throwing chopped-up candy bars into a basic cookie dough and hoping for the best. And somehow, that casual chaos produced the best cookie I’d ever eaten. Maybe you’ve been there—staring down a bowl of half-eaten fun-size bars, wondering what on earth to do with them. Well, this is your answer. These leftover Halloween candy cookies are the kind of thing you make when you’re not trying, and that’s exactly why they work so beautifully.
Why You’ll Love This Recipe
Let me tell you, I’ve tested this recipe about a dozen times since that afternoon at Gina’s house. I’ve tweaked, adjusted, and perfected it until it became something I’m genuinely proud to share. Here’s why this version is the one you’ll come back to year after year.
- Uses Up Leftover Candy: No more picking around half-eaten candy bars in your pantry. This recipe transforms even the most random mix of sweets into something incredible.
- Simple Ingredients: You likely already have butter, sugar, eggs, and flour in your kitchen. The candy does the heavy lifting for flavor.
- Perfect for Hosting: If you’re putting together a post-Halloween dinner or a casual gathering, these cookies are a conversation starter. Everyone wants to know what candy you used.
- Crowd-Pleaser: I’ve brought these to potlucks, game nights, and family dinners. They disappear faster than anything else on the table.
- Unbelievably Delicious: The candy melts into pockets of gooey caramel, chocolate, and crispy bits. Each bite is different, and that’s the magic.
What makes this recipe different from every other candy cookie out there? It’s the technique. Most recipes tell you to just toss chopped candy into standard dough. But I’ve learned that chilling the dough for at least 30 minutes prevents the candy from sinking to the bottom and burning. Plus, using a mix of soft and crunchy candies creates a texture that’s next-level. This isn’t just another version—it’s the best version. And honestly, it’s the kind of cookie that makes you close your eyes after the first bite. It’s comfort food reimagined, perfect for impressing guests without any stress.
What Ingredients You Will Need
This recipe uses simple, wholesome ingredients to deliver bold flavor and satisfying texture without the fuss. Most of these are pantry staples, which means you can whip up a batch whenever the leftover candy situation gets out of hand. Here’s what you’ll need:
For the Cookie Dough
- 1 cup (226g) unsalted butter, softened (I prefer Kerrygold for its rich flavor)
- 1 cup (200g) granulated sugar
- 1 cup (220g) packed light brown sugar (adds moisture and depth)
- 2 large eggs, room temperature
- 2 teaspoons vanilla extract (use pure, not imitation, for best flavor)
- 3 cups (375g) all-purpose flour
- 1 teaspoon baking soda
- 1/2 teaspoon baking powder
- 1 teaspoon salt (balances the sweetness)
For the Candy Mix
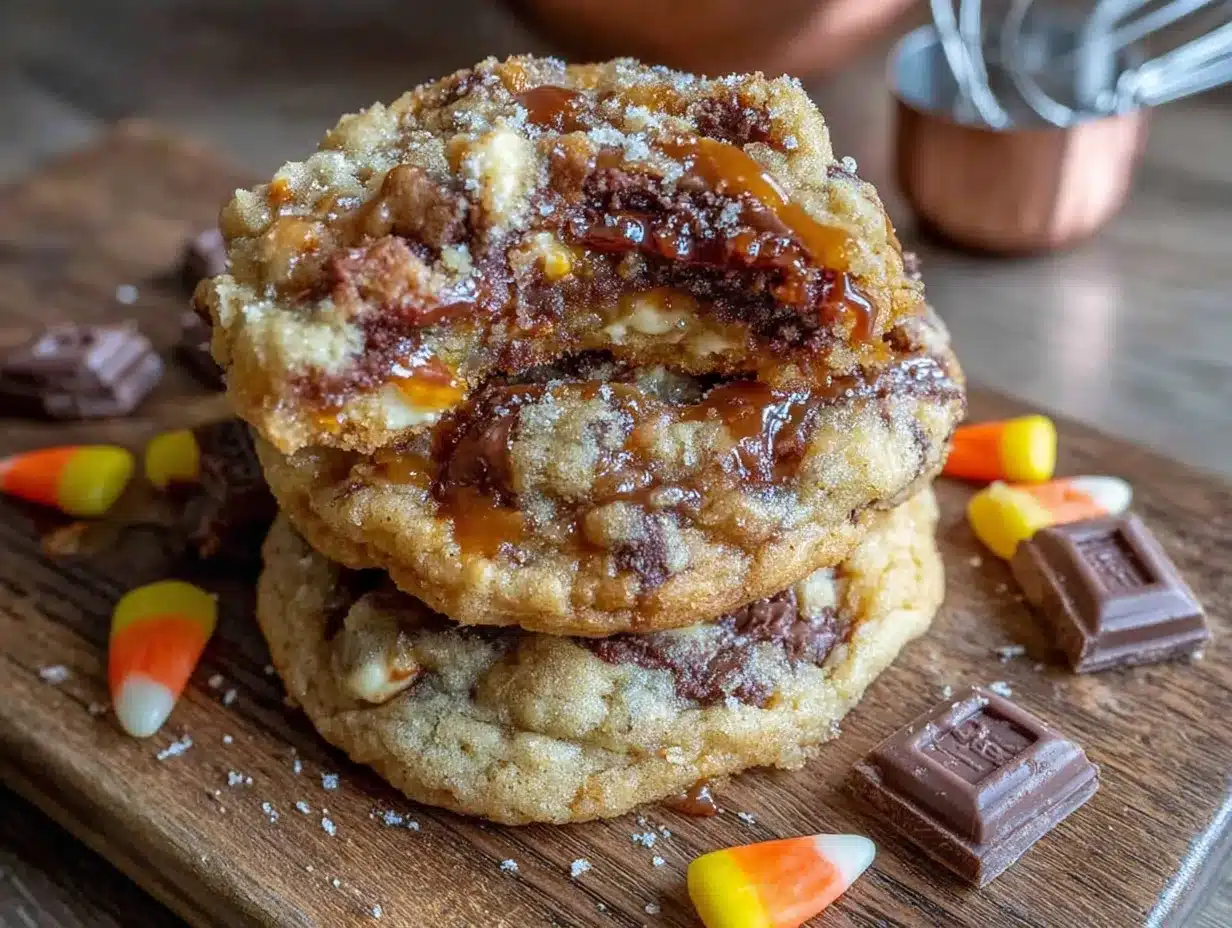
- 2 cups (about 300g) assorted leftover Halloween candy, chopped into small pieces (aim for 1/2-inch chunks)
- 1/2 cup (85g) semi-sweet chocolate chips (optional, but I add them for extra chocolatey goodness)
When it comes to candy selection, variety is your friend. I recommend using a mix of chocolate bars (like Snickers, Milky Way, or Twix), caramel-filled candies, and something crunchy (like Kit Kats or Butterfingers). Avoid anything with a hard, brittle shell that could break your teeth—looking at you, jawbreakers. If you have peanut butter cups, those are amazing too. Just chop everything into roughly equal-sized pieces so they distribute evenly. For a gluten-free option, use a 1:1 gluten-free flour blend. And if you’re dairy-free, swap the butter for a high-quality vegan butter stick.
Equipment Needed
- Large mixing bowls (one for wet ingredients, one for dry)
- Electric hand mixer or stand mixer (a wooden spoon works too, but your arm will thank you for the mixer)
- Sharp chef’s knife and cutting board (for chopping candy—use a serrated knife for sticky bars)
- Baking sheets (I use Nordic Ware for even browning)
- Parchment paper or silicone baking mats
- Cookie scoop (a 2-tablespoon scoop makes uniform cookies)
- Wire cooling rack
- Plastic wrap (for chilling the dough)
If you don’t have a stand mixer, don’t sweat it. A hand mixer works perfectly, and honestly, I sometimes prefer it because I can feel when the butter and sugar are properly creamed. For the baking sheets, any light-colored pan will do—dark pans can cause the bottoms to brown too quickly. And if you don’t have a cookie scoop, just use two spoons. No judgment here.
Preparation Method
- Preheat your oven to 350°F (175°C). Line two baking sheets with parchment paper or silicone mats. This ensures even baking and easy cleanup.
- Cream the butter and sugars together. In a large mixing bowl, beat the softened butter, granulated sugar, and brown sugar on medium speed for about 3 minutes until light and fluffy. You want the mixture to look pale and airy—this is where the tenderness of your cookies comes from. Scrape down the sides of the bowl halfway through.
- Add the eggs and vanilla. Beat in the eggs one at a time, making sure each is fully incorporated before adding the next. Then add the vanilla extract and mix until combined. The mixture might look a little curdled at this point—that’s totally normal, don’t panic.
- Whisk the dry ingredients together. In a separate bowl, whisk the flour, baking soda, baking powder, and salt. This ensures the leavening agents are evenly distributed so your cookies rise properly.
- Combine wet and dry ingredients. Gradually add the dry ingredients to the wet mixture, mixing on low speed until just combined. Stop as soon as you don’t see any streaks of flour—overmixing will make your cookies tough.
- Fold in the candy and chocolate chips. Using a spatula, gently fold in the chopped candy and chocolate chips. Don’t overwork the dough. You want the candy distributed evenly without breaking it into smaller pieces.
- Chill the dough. Cover the bowl with plastic wrap and refrigerate for at least 30 minutes, or up to 24 hours. This step is non-negotiable. Chilling prevents the candy from sinking to the bottom and burning, and it deepens the flavor. I learned this the hard way after my first batch came out with a layer of burnt caramel stuck to the baking sheet.
- Scoop and bake. Use a 2-tablespoon cookie scoop to portion the dough onto the prepared baking sheets, spacing them about 2 inches apart. Bake for 10-12 minutes, or until the edges are golden brown and the centers look slightly underdone. The cookies will continue to set on the baking sheet as they cool.
- Cool on the baking sheet. Let the cookies rest on the baking sheet for 5 minutes before transferring them to a wire cooling rack. This allows them to firm up without breaking apart. The melted candy can be very hot, so be careful.
Your cookies should be golden around the edges, slightly soft in the center, and studded with pockets of melted candy. If you notice the candy leaking out too much, your dough might have been too warm—pop it back in the fridge for 15 minutes before baking the next batch.
Cooking Tips & Techniques
I’ve made more batches of these cookies than I can count, and I’ve collected a few tricks along the way. First, always chop your candy into uniform pieces. If you leave some chunks too large, they’ll create hollow spots in the cookie where the candy melts away completely. Aim for pieces about the size of a pea. Second, don’t skip the chilling step. I know it’s tempting to rush, but warm dough spreads too much and the candy sinks. I once tried to save time by skipping the chill, and my cookies turned into flat, burnt discs with all the candy stuck to the pan. It was a mess, and I had to start over.
Another thing I’ve learned: use a mix of soft and crunchy candies. Soft candies like caramel or nougat create gooey pockets, while crunchy ones like Kit Kats or Butterfingers add texture. If you only use soft candies, the cookies can become one-note and overly sweet. And here’s a pro tip—if your candy is very sticky, lightly dust your knife with powdered sugar before chopping. It prevents the pieces from clumping together. Finally, if you’re baking for a crowd, you can freeze the scooped dough balls on a baking sheet, then transfer them to a freezer bag. Bake from frozen, adding 2-3 minutes to the bake time. Fresh cookies whenever you want them.
Variations & Adaptations
This recipe is incredibly flexible, so feel free to experiment. Here are a few variations I’ve tried and loved:
- Peanut Butter Lovers: Swap 1/2 cup of the all-purpose flour for 1/2 cup of peanut butter powder. Add 1 cup of chopped Reese’s cups and 1/2 cup of salted peanuts. The salty-sweet combination is addictive.
- White Chocolate & Caramel: Use white chocolate chips instead of semi-sweet, and add chopped Milky Way bars or caramel candies. The white chocolate pairs beautifully with the caramel.
- Gluten-Free Version: Use a 1:1 gluten-free flour blend. Add 1/4 teaspoon of xanthan gum if your blend doesn’t already include it. The texture will be slightly more tender, but just as delicious.
- Vegan Adaptation: Use vegan butter sticks and flax eggs (1 tablespoon ground flaxseed + 3 tablespoons water per egg). Most dark chocolate is vegan, but check the labels on your candy. Some caramel candies contain dairy.
- Mint Chocolate: Add 1/2 teaspoon of peppermint extract to the dough and use chopped Andes mints or York Peppermint Patties. This is amazing around the holidays.
I once made a batch with leftover Halloween candy that included a few fun-size Skittles. I figured, why not? Honestly, it was a mistake. The Skittles turned into hard, chewy bits that were unpleasant to bite into. Stick with chocolate and caramel-based candies for the best results.
Serving & Storage Suggestions
These cookies are best served slightly warm, when the candy is still soft and gooey. If you’re hosting a gathering, bake them just before guests arrive so they’re fresh from the oven. Arrange them on a large platter with a few extra chopped candy pieces sprinkled on top for visual appeal. They pair beautifully with a cold glass of milk, a hot cup of coffee, or even a scoop of vanilla ice cream for an indulgent dessert.
For storage, keep the cookies in an airtight container at room temperature for up to 5 days. Layer them with parchment paper to prevent sticking, especially if the candy is gooey. You can also freeze the baked cookies for up to 3 months. Just wrap them individually in plastic wrap, then place them in a freezer bag. To reheat, pop them in a 300°F (150°C) oven for 5 minutes, or microwave for 10-15 seconds. The flavors actually develop over time—I think the cookies taste even better on day two, after the candy has had time to meld with the dough.
Nutritional Information & Benefits
These are cookies, so let’s be real—they’re a treat. But here’s the estimated nutritional breakdown per cookie (based on 36 cookies): approximately 180 calories, 9g fat, 24g carbohydrates, 2g protein, and 15g sugar. The exact values will vary depending on the candy you use.
On the bright side, this recipe uses real butter and eggs, so you’re getting some protein and healthy fats. The brown sugar adds a touch of molasses, which contains small amounts of minerals like calcium and potassium. And if you use dark chocolate, you’ll get a dose of antioxidants. This recipe is not suitable for vegans or those with dairy allergies unless modified. It contains gluten, dairy, and eggs, and may contain peanuts and tree nuts depending on your candy selection. As always, enjoy these in moderation—they’re meant to be a celebration of leftover candy, not a daily indulgence.
Conclusion
These leftover Halloween candy cookies have become a November tradition in my house, and I hope they become one in yours too. They’re easy, forgiving, and endlessly customizable—exactly what you need when you’re staring down a mountain of fun-size candy bars. Whether you’re hosting a post-Halloween dinner, bringing a plate to a potluck, or just treating yourself after a long day, these cookies deliver every single time. I love that they turn something chaotic and random into something warm and comforting. So go ahead, raid your kids’ candy stash (they won’t miss a few bars), and make a batch. And when you do, come back and tell me what candy combination you used. I’m always looking for new ideas. Happy baking!
Frequently Asked Questions
Can I use regular chocolate chips instead of candy?
Absolutely. If you don’t have leftover candy, you can substitute 2 cups of chocolate chips or chopped chocolate bars. The cookies will still be delicious, though you’ll miss out on the fun variety of flavors and textures that candy provides.
Why did my cookies spread too much?
This usually happens when the dough is too warm. Make sure you chill the dough for at least 30 minutes before baking. Also, check that your butter is softened, not melted. Melted butter will cause excessive spreading.
Can I freeze the cookie dough?
Yes! Scoop the dough into balls, place them on a baking sheet, and freeze until solid. Transfer the frozen dough balls to a freezer bag. Bake from frozen, adding 2-3 minutes to the bake time. No need to thaw.
What’s the best candy to use?
Chocolate-based candies with caramel, nougat, or peanut butter work best. Snickers, Milky Way, Twix, Kit Kat, Reese’s cups, and Butterfingers are all excellent choices. Avoid hard candies, gummies, or anything with a brittle shell.
How do I prevent the candy from burning on the bottom?
Chilling the dough is key. Cold dough prevents the candy from sinking to the bottom and coming into direct contact with the baking sheet. Also, line your baking sheet with parchment paper or a silicone mat for extra protection.
Pin This Recipe!

The Ultimate Leftover Halloween Candy Cookies

Transform your leftover Halloween candy into the most incredible cookies. These easy, forgiving cookies are packed with gooey caramel, chocolate, and crunchy bits, making them the perfect post-Halloween treat.
- Prep Time: 15 minutes
- Cook Time: 12 minutes
- Total Time: 57 minutes
- Yield: 36 cookies 1x
- Category: Dessert
- Cuisine: American
Ingredients
- 1 cup (226g) unsalted butter, softened
- 1 cup (200g) granulated sugar
- 1 cup (220g) packed light brown sugar
- 2 large eggs, room temperature
- 2 teaspoons vanilla extract
- 3 cups (375g) all-purpose flour
- 1 teaspoon baking soda
- 1/2 teaspoon baking powder
- 1 teaspoon salt
- 2 cups (about 300g) assorted leftover Halloween candy, chopped into small pieces (1/2-inch chunks)
- 1/2 cup (85g) semi-sweet chocolate chips (optional)
Instructions
- Preheat your oven to 350°F (175°C). Line two baking sheets with parchment paper or silicone mats.
- Cream the butter and sugars together. In a large mixing bowl, beat the softened butter, granulated sugar, and brown sugar on medium speed for about 3 minutes until light and fluffy. Scrape down the sides of the bowl halfway through.
- Add the eggs and vanilla. Beat in the eggs one at a time, ensuring each is fully incorporated before adding the next. Then add the vanilla extract and mix until combined.
- Whisk the dry ingredients together. In a separate bowl, whisk the flour, baking soda, baking powder, and salt.
- Combine wet and dry ingredients. Gradually add the dry ingredients to the wet mixture, mixing on low speed until just combined. Stop as soon as you don’t see any streaks of flour.
- Fold in the candy and chocolate chips. Using a spatula, gently fold in the chopped candy and chocolate chips. Don’t overwork the dough.
- Chill the dough. Cover the bowl with plastic wrap and refrigerate for at least 30 minutes, or up to 24 hours.
- Scoop and bake. Use a 2-tablespoon cookie scoop to portion the dough onto the prepared baking sheets, spacing them about 2 inches apart. Bake for 10-12 minutes, or until the edges are golden brown and the centers look slightly underdone.
- Cool on the baking sheet. Let the cookies rest on the baking sheet for 5 minutes before transferring them to a wire cooling rack.
Notes
Chilling the dough is non-negotiable to prevent candy from sinking and burning. Use a mix of soft and crunchy candies for best texture. For sticky candy, lightly dust your knife with powdered sugar before chopping. Cookies can be frozen for up to 3 months.
Nutrition
- Serving Size: 1 cookie
- Calories: 180
- Sugar: 15
- Sodium: 120
- Fat: 9
- Saturated Fat: 5
- Carbohydrates: 24
- Fiber: 1
- Protein: 2
Keywords: leftover Halloween candy cookies, candy cookies, Halloween cookies, chocolate chip cookies, easy cookie recipe



