Love this? Save it for later!
Share the inspiration with your friends
I was standing in the dairy aisle of our local grocery store last December, staring at a shelf of fancy coffee creamers, when the smell hit me—not from the store, but from somewhere deep in my memory. It was the sharp, cool scent of peppermint mixed with rich chocolate, and suddenly I was seven years old at my Aunt Lena’s tiny kitchen table, watching her stir a candy cane into her steaming mug of hot cocoa. She’d always let me have the last sip, that magical combination of mint and chocolate warming me from the inside out. Aunt Lena passed away a few years ago, and honestly, I’d forgotten all about those winter mornings until that moment in the grocery aisle.
I grabbed a bottle of the store-bought stuff anyway, you know, hoping it would hit the spot. But when I got home and poured it into my coffee, it was all wrong. Too sweet, too artificial, that weird oily aftertaste that coats your tongue. I mean, it wasn’t bad exactly, but it wasn’t that—that simple, honest flavor I remembered. So I did what I always do when store-bought lets me down: I figured out how to make it myself. And let me tell you, this homemade peppermint mocha coffee creamer is the one. It takes four ingredients and about five minutes, and it brings back that exact feeling of sitting at Aunt Lena’s table, the whole world outside covered in snow.
Maybe you’ve been there too—chasing a flavor from your past that you can’t quite find on any shelf. If that’s the case, this recipe is for you. It’s not fancy, but it’s real. And honestly, that’s what makes it so good.
Why You’ll Love This Recipe
Let me be straight with you—this isn’t just another coffee creamer recipe. I tested this thing about six times before I got it right. The first batch was too thin. The second was so sweet my teeth hurt. The third? Well, let’s just say I learned that peppermint extract is no joke. But this version? This is the one I serve to guests at holiday brunches, the one my friends now ask me to bring to every gathering. It’s the kind of recipe that makes you look like you spent way more effort than you actually did.
- Only 4 Ingredients : No weird chemicals, no preservatives, no ingredients you can’t pronounce. You probably have most of these in your kitchen right now.
- Ready in 5 Minutes : I’m not exaggerating. Stir, heat, and done. Perfect for those mornings when guests are arriving and you realize you forgot the creamer.
- Perfect for Holiday Hosting : Set up a little coffee bar with this creamer and watch your guests light up. It’s a conversation starter, I promise.
- Better Than Store-Bought : The flavor is cleaner, brighter, and you control the sweetness. No more guessing what’s in that bottle.
- Budget-Friendly : A batch costs pennies compared to those fancy glass bottles at the store. And you can make exactly as much as you need.
What makes this different from every other peppermint mocha recipe out there? It’s the balance. Most recipes either drown you in mint or forget the chocolate entirely. This one hits that sweet spot where neither flavor overwhelms the other. Plus, using real cocoa powder instead of chocolate syrup gives it a deeper, more adult flavor that doesn’t taste like a candy bar in your coffee. It’s comfort food for your morning cup, reimagined for real life.
What Ingredients You Will Need
This recipe uses simple, everyday ingredients to create something that tastes like it came from a fancy coffee shop. No hunting down obscure items or spending a fortune at specialty stores. Here’s what you’ll need:
- 1 cup whole milk (or any milk you prefer—I’ve used oat milk and it works great, just know the texture will be thinner)
- 1 cup heavy cream (this is what makes it rich and luxurious; for a lighter version, use half-and-half)
- 1/4 cup unsweetened cocoa powder (I recommend Ghirardelli or Hershey’s Special Dark for the best chocolate flavor; don’t use Dutch-process here, it changes the taste)
- 1/2 cup sweetened condensed milk (this is your sweetener and thickener all in one; if you’re dairy-free, there are good coconut-based versions now)
- 1 teaspoon peppermint extract (this is where quality matters—I use Nielsen-Massey because it’s pure and doesn’t have that fake candy cane taste)
A few things to keep in mind when shopping: Look for peppermint extract, not peppermint oil. The oil is super concentrated and can easily ruin a batch. Also, if you’re using a plant-based milk, go for one that’s barista-style or extra creamy. Regular almond milk will make your creamer watery, and nobody wants that.
For the cocoa powder, sift it before adding it to the milk mixture. I learned this the hard way after finding little cocoa lumps floating in my coffee. A quick sift takes ten seconds and saves you from that sad moment of biting into a dry pocket of powder.
If you want to make this vegan, swap the heavy cream for full-fat coconut cream and use a dairy-free sweetened condensed milk. The flavor changes slightly—you’ll get a hint of coconut—but honestly, it’s still delicious. I tried it for a friend who’s vegan and she asked for the recipe twice.
Equipment Needed
You don’t need much for this recipe, which is part of why I love it. Here’s what you’ll need:
- Medium saucepan (any non-reactive pan works—stainless steel or enameled is best; avoid aluminum as it can give a metallic taste)
- Whisk (a balloon whisk works best for getting out cocoa lumps; if you only have a fork, sift your cocoa powder extra well)
- Fine-mesh strainer (optional but recommended for catching any stray lumps)
- Glass jar or bottle for storage (a 16-ounce mason jar works perfectly; I use a swing-top bottle because it looks pretty on the counter)
- Measuring cups and spoons (the usual suspects)
If you don’t have a saucepan, you can absolutely use a microwave-safe bowl. Just heat the milk and cream in 30-second bursts, whisking between each, then stir in the rest. It’s not quite as smooth, but it works in a pinch. I’ve done this at a friend’s cabin when the stove was acting up, and it turned out just fine.
Pro tip: If you’re making this for a party, double the batch and store it in a pretty pitcher. Your guests will think you bought it from some fancy creamery, and you can just smile and nod.
Preparation Method
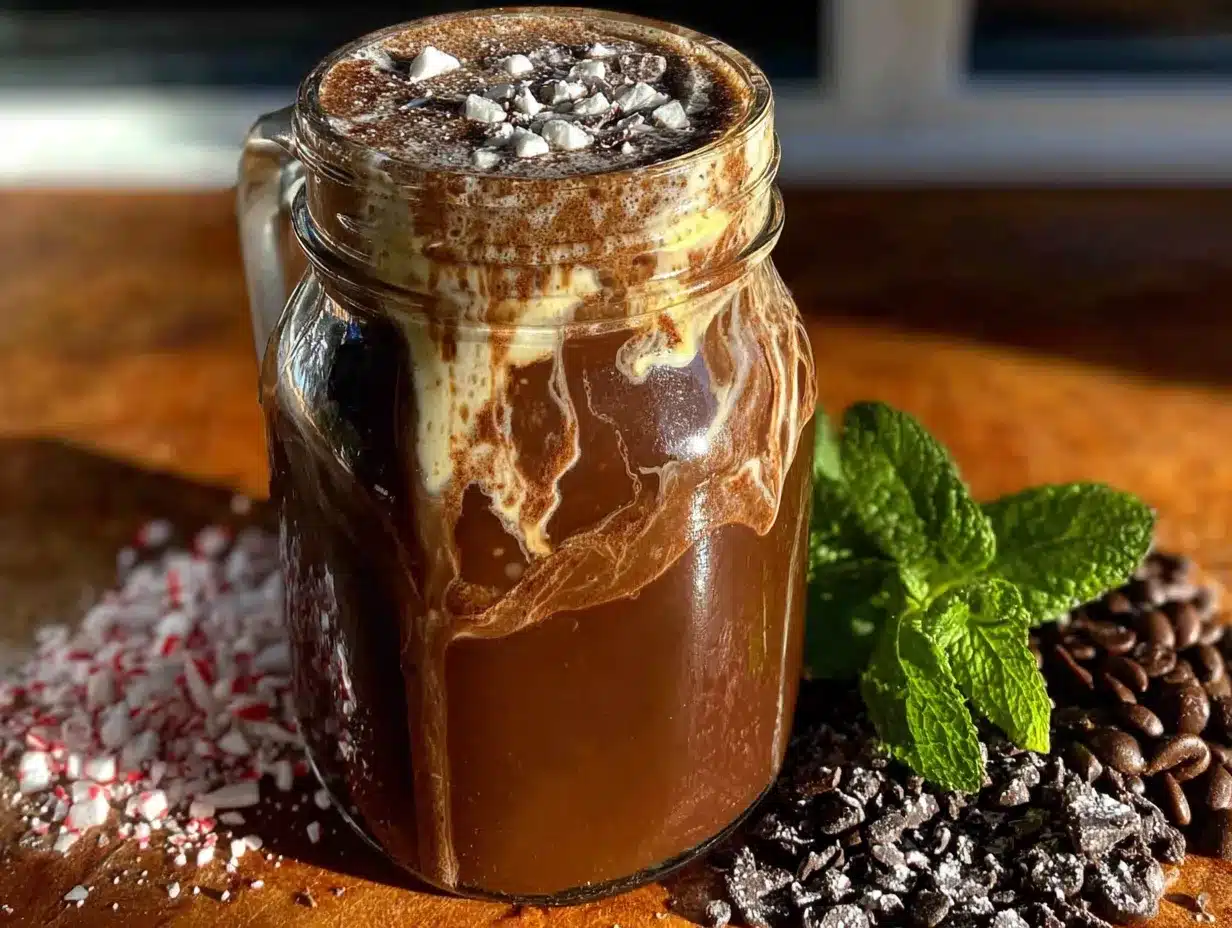
This comes together faster than you’d think. Here’s how to do it:
- Sift the cocoa powder into a small bowl. I know, I know, it seems fussy. But trust me on this one. Set it aside for now.
- Pour the milk and heavy cream into your saucepan. Heat over medium-low heat, stirring occasionally, until it’s warm but not boiling. You should see tiny bubbles around the edges, but no rolling boil. This takes about 3-4 minutes.
- Whisk in the sifted cocoa powder slowly. Add it a little at a time, whisking constantly. This prevents lumps from forming. Keep whisking until the cocoa is fully incorporated and the mixture looks smooth and dark. It should smell like hot chocolate at this point—heavenly.
- Remove from heat and stir in the sweetened condensed milk. Whisk until everything is combined and the mixture looks silky. The color should be a rich, dark brown.
- Add the peppermint extract and stir. Taste it here. If you want more mint, add another 1/4 teaspoon. But go slow—peppermint is bossy and can take over fast.
- Pour through a fine-mesh strainer into your storage jar. This catches any tiny lumps you missed. Let it cool completely before putting the lid on.
- Refrigerate for at least 30 minutes before using. The flavors meld together as it chills, and the texture thickens up nicely.
A few things to watch for: If your milk mixture starts to boil, you’ve gone too far. Turn the heat down immediately. Boiling can make the cream separate later. Also, if you’re using a plant-based milk, the creamer will be thinner. That’s normal—just give it a good shake before each use.
The first time I made this, I added the peppermint extract while the mixture was still hot. Big mistake. The heat made the mint flavor evaporate, and I ended up with chocolate milk that barely tasted like peppermint. Let it cool for a minute or two before adding the extract. That little tip changed everything.
Cooking Tips & Techniques
I’ve made this creamer enough times to have a few tricks up my sleeve. Here’s what I’ve learned:
Temperature matters. If you heat the milk too fast, it can scorch on the bottom of the pan. That burnt flavor will ruin your whole batch. Keep the heat on medium-low and be patient. I ruined my first batch this way—it smelled like a campfire, not a coffee shop.
Whisk like you mean it. Cocoa powder is stubborn. It wants to clump. The key is to add it slowly while whisking in a figure-eight pattern. This incorporates air and breaks up any lumps before they form. If you’re feeling lazy and just dump it all in, you’ll be fishing out cocoa lumps for the next ten minutes.
Let it rest overnight. I know, I know, you want to use it right away. But if you can wait, the flavor is so much better the next day. The peppermint mellows out, the chocolate deepens, and everything comes together in a way that’s just… right. Make it the night before your holiday brunch and thank me later.
Scale it up for crowds. If you’re hosting a party, triple the recipe. It keeps for two weeks in the fridge, and you’ll be amazed how fast it goes. I made a double batch for Christmas morning last year, and it was gone by noon.
Don’t skip the strainer. Even if you think you whisked perfectly, pour it through a strainer anyway. There’s always one little lump hiding somewhere, and you don’t want it ending up in your guest’s coffee.
Variations & Adaptations
Once you’ve mastered the basic recipe, here are some fun ways to change it up:
Dark Chocolate Peppermint : Use dark cocoa powder instead of regular. The bitterness balances the sweetened condensed milk beautifully. This is my personal favorite for afternoon coffee when I want something less sweet.
White Chocolate Peppermint : Swap the cocoa powder for 1/2 cup of melted white chocolate chips. The result is creamy, sweet, and perfect for those who find regular chocolate too heavy. Just make sure you use real white chocolate, not white baking chips—the flavor difference is huge.
Vegan Version : Use full-fat oat milk (barista style) and coconut cream instead of heavy cream. For the sweetened condensed milk, there are great dairy-free options from Nature’s Charm. The texture is slightly thinner, but the flavor is still spot-on.
Extra Minty : Add a crushed candy cane to the warm creamer and let it dissolve. This gives you little flecks of red throughout and an extra pop of mint. I do this for Christmas morning and it’s always a hit.
Mocha Latte Version : Add 1/2 teaspoon of instant espresso powder to the milk mixture. It deepens the chocolate flavor and gives your coffee an extra kick. Try it once and you might never go back.
Serving & Storage Suggestions
This creamer is best served cold, straight from the fridge. Pour about 2-3 tablespoons into your coffee and stir. The cold creamer will cool your coffee down to the perfect drinking temperature instantly—no waiting around.
For a festive touch, rim your coffee mug with crushed candy canes. Just wet the rim with a little water or chocolate syrup, dip it in crushed peppermint, and let it set for a minute. It looks gorgeous and tastes amazing.
Store this creamer in a sealed jar in the refrigerator for up to two weeks. Give it a good shake before each use because the cocoa powder can settle at the bottom. I keep mine in a swing-top bottle on the fridge door so I can grab it easily.
If you’re making this for a party, set up a little coffee station with the creamer in a pretty pitcher, some crushed candy canes for garnish, and maybe some cinnamon sticks for stirring. Your guests will feel like they’re at a fancy café.
The flavor actually gets better after a day or two in the fridge. The peppermint mellows out and blends with the chocolate in a way that’s hard to describe. So don’t worry if you make it ahead—it only improves.
Nutritional Information & Benefits
Here’s the honest truth: this is a treat, not a health food. But it’s made with real ingredients, which already puts it ahead of most store-bought creamers. Here’s what you’re looking at per 2-tablespoon serving:
- Calories: 65
- Fat: 4g
- Carbohydrates: 7g
- Sugar: 6g
- Protein: 1g
The cocoa powder contains antioxidants called flavonoids, which can help reduce inflammation. The milk and cream provide calcium and vitamin D. And the peppermint? It’s known to aid digestion and can help settle an upset stomach—perfect after a heavy holiday meal.
If you’re watching your sugar intake, you can reduce the sweetened condensed milk to 1/3 cup. The creamer will be less sweet, but still plenty flavorful. Just know it won’t be as thick.
This recipe is naturally gluten-free and doesn’t contain any artificial ingredients or preservatives. It’s also nut-free if you use regular dairy products. If you have a dairy allergy, the vegan version works beautifully.
Conclusion
This homemade peppermint mocha coffee creamer is more than just a recipe—it’s a way to bring a little holiday magic into your everyday routine. With just four ingredients and five minutes, you can create something that tastes like it came from a fancy coffee shop, but costs a fraction of the price and has none of the weird additives.
I love this recipe because it reminds me that the best things don’t have to be complicated. A few simple ingredients, a little patience, and you’ve got something that makes people smile. Every time I pour this into my coffee, I think of Aunt Lena and those snowy mornings at her kitchen table. And honestly, that’s worth more than any fancy bottle on a store shelf.
Give this recipe a try, and don’t be afraid to make it your own. Add a little more mint, a little less sugar, or try the white chocolate version. The beauty of homemade is that you’re in control. And when your friends ask for the recipe—because they will—just smile and tell them it’s your little secret.
I’d love to hear how it turns out for you! Drop a comment below and let me know if you tried any fun variations. And if you’re feeling generous, share this recipe with someone who could use a little holiday cheer in their morning cup.
Frequently Asked Questions
Can I use this creamer in iced coffee?
Absolutely! This creamer works beautifully in iced coffee. Just pour it in and stir—it blends right in even with cold coffee. In fact, I prefer it in iced coffee during warmer months because the mint flavor feels extra refreshing.
How long does this creamer last in the fridge?
It stays fresh for up to two weeks in a sealed container in the refrigerator. I always make a batch on Sunday and use it throughout the week. Just give it a good shake before each use since the cocoa powder can settle.
Can I freeze this creamer?
Yes, you can! Pour it into an ice cube tray and freeze. Pop a cube or two into your hot coffee for instant creamer. The texture might be slightly different after thawing, but the flavor stays great. I do this when I make a big batch for holiday travel.
What if I don’t have sweetened condensed milk?
You can substitute 1/2 cup of regular milk mixed with 3 tablespoons of sugar and 1 tablespoon of butter. Heat it until the sugar dissolves and the butter melts. It won’t be quite as thick, but it works in a pinch. I’ve done this when I ran out of condensed milk mid-recipe.
Can I make this sugar-free?
Definitely! Use a sugar-free sweetened condensed milk (there are good options from brands like Lakanto) or make your own by simmering unsweetened almond milk with a sugar substitute like allulose or monk fruit until it reduces and thickens. Just know the texture will be slightly different, but the flavor is still delicious.
Pin This Recipe!
Best Homemade Peppermint Mocha Coffee Creamer Recipe

This homemade peppermint mocha coffee creamer is made with just four ingredients and takes about five minutes to prepare. It brings back the comforting flavor of mint and chocolate, perfect for holiday mornings or any time you want a special coffee treat.
- Prep Time: 5 minutes
- Cook Time: 5 minutes
- Total Time: 10 minutes
- Yield: 16 servings (2 tablespoons per serving) 1x
- Category: Beverage
- Cuisine: American
Ingredients
- 1 cup whole milk (or any milk you prefer)
- 1 cup heavy cream (or half-and-half for a lighter version)
- 1/4 cup unsweetened cocoa powder (recommended: Ghirardelli or Hershey’s Special Dark)
- 1/2 cup sweetened condensed milk
- 1 teaspoon peppermint extract (recommended: Nielsen-Massey)
Instructions
- Sift the cocoa powder into a small bowl to remove lumps.
- Pour the milk and heavy cream into a medium saucepan. Heat over medium-low heat, stirring occasionally, until warm but not boiling (about 3-4 minutes). Tiny bubbles should appear around the edges.
- Slowly whisk in the sifted cocoa powder, a little at a time, whisking constantly until fully incorporated and smooth.
- Remove from heat and stir in the sweetened condensed milk. Whisk until the mixture is silky and dark brown.
- Add the peppermint extract and stir. Taste and add more extract if desired, but go slowly.
- Pour through a fine-mesh strainer into a storage jar to catch any remaining lumps. Let cool completely before sealing.
- Refrigerate for at least 30 minutes before using. The flavors meld as it chills.
Notes
For best results, let the creamer rest overnight in the refrigerator to allow flavors to meld. If using plant-based milk, choose barista-style or extra creamy varieties to avoid a watery texture. Do not add peppermint extract while the mixture is hot, as heat can cause the mint flavor to evaporate. Store in a sealed container in the refrigerator for up to two weeks; shake well before each use.
Nutrition
- Serving Size: 2 tablespoons
- Calories: 65
- Sugar: 6
- Sodium: 20
- Fat: 4
- Saturated Fat: 2.5
- Carbohydrates: 7
- Protein: 1
Keywords: peppermint mocha, coffee creamer, homemade creamer, holiday coffee, peppermint coffee, mocha creamer



