Love this? Save it for later!
Share the inspiration with your friends
Halloween was in three days and I’d completely forgotten to plan for the post-Halloween party at work. Everyone else would be bringing those perfectly curated, Pinterest-worthy treats made from their kids’ hoarded candy stashes. I had a half-eaten bag of fun-sized Snickers, some crushed-up Kit Kats that had fallen behind the couch, and a serious lack of time. Honestly, I was panicking. I mean, you know that feeling when you’re staring into your pantry and all you see are ingredients that don’t seem to belong together? That was me, at 10 PM on a Tuesday, with a bag of mixed candy and no real plan.
I grabbed a box of brownie mix I’d been saving for a rainy day, some butter, and an egg. The candy was a mess—some were melted, some were broken, and there was definitely a rogue lollipop wrapper mixed in. I just chopped everything up, chucked it into a bowl, and hoped for the best. I threw it in the oven, set a timer, and pretty much forgot about it until the smell of caramel and chocolate started filling my apartment.
Let me tell you, when I pulled those bars out of the oven, I almost cried. They were golden on the edges, gooey in the middle, and studded with chunks of melted candy that had turned into these little pockets of caramel and chocolate. The next day at the party, my sad little cookie bars—the ones I’d thrown together in a panic—were the first thing to disappear. Someone actually asked me if I’d gone to culinary school. I just smiled and said it was a family recipe. The truth? It was a happy accident. And honestly, that’s why I keep making them. They’re proof that you don’t need a perfect plan to make something unforgettable.
Why You’ll Love This Recipe
These cookie bars are not just another dessert. They are the ultimate solution to that post-Halloween candy mountain that’s taking over your kitchen counter. I’ve tested this recipe about a dozen times now, tweaking the ratios and trying different candy combinations, and I can confidently say this version is the best.
- Quick & Easy: Comes together in under 30 minutes with just one bowl. Perfect for when you need a last-minute dessert for a gathering.
- Simple Ingredients: You only need basic baking staples plus your leftover candy. No fancy grocery trips needed.
- Perfect for Hosting: Great for potlucks, office parties, and post-Halloween get-togethers. They slice cleanly and travel well.
- Crowd-Pleaser: Always gets rave reviews from kids and adults alike. The combination of textures is pure magic.
- Unbelievably Delicious: The edges get slightly crisp while the center stays chewy and loaded with melted candy pockets.
What makes this recipe different from all the other leftover candy recipes out there? It’s the ratio. This isn’t just a brownie with candy thrown in. The base is a buttery, brown sugar cookie dough that actually supports the candy rather than being overwhelmed by it. I spent weeks perfecting the balance so that every bite has enough dough to hold the candy without becoming a sticky mess.
This recipe is the kind that makes you close your eyes after the first bite. It’s comfort food reimagined—faster, simpler, but with the same soul-soothing satisfaction. Perfect for impressing guests without stress, or turning a pile of leftover candy into something memorable.
What Ingredients You Will Need
This recipe uses simple, wholesome ingredients to deliver bold flavor and satisfying texture without the fuss. Most of these are pantry staples, which means you can whip these up anytime the candy bowl starts calling your name.
For the Cookie Bar Base
- 1/2 cup unsalted butter, softened (use good quality butter for best flavor)
- 3/4 cup packed light brown sugar (adds moisture and that deep caramel note)
- 1/4 cup granulated sugar
- 1 large egg, room temperature
- 1 teaspoon vanilla extract (pure vanilla makes a difference here)
- 1 1/2 cups all-purpose flour
- 1/2 teaspoon baking soda
- 1/4 teaspoon salt (I prefer fine sea salt)
For the Candy
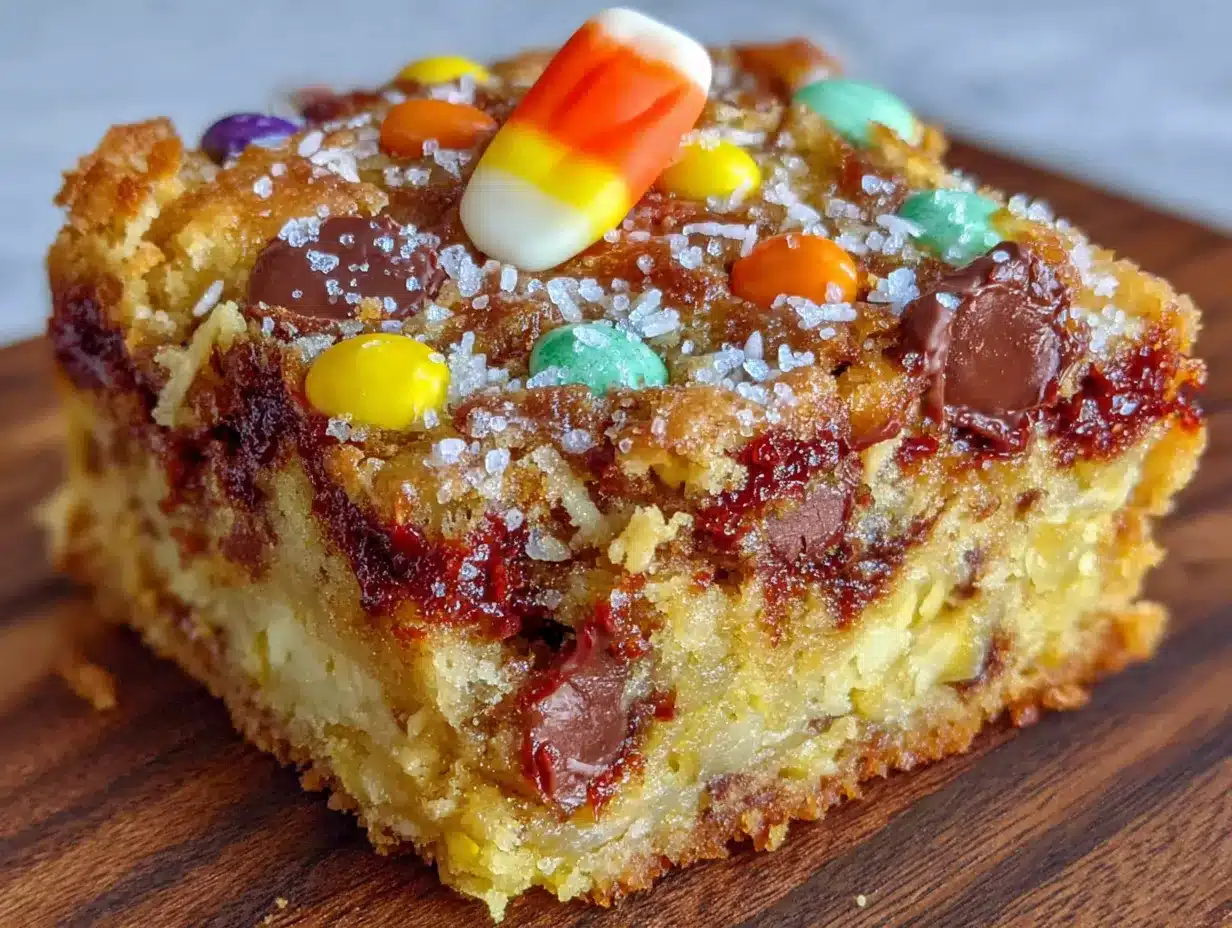
- 2 cups chopped leftover Halloween candy (about 12-15 fun-sized pieces)
Here’s where it gets fun. You can use any combination of chocolate bars, caramel candies, or even peanut butter cups. I’ve found that a mix works best—something chocolatey, something chewy, and something with a crunch. My go-to combination is roughly equal parts chopped Snickers, Kit Kat, and Reese’s Peanut Butter Cups. The Snickers provides that caramel and nougat texture, the Kit Kat adds a nice crunch, and the peanut butter cups melt into these fudgy pockets.
If you have a lot of one type of candy, that works too. I once made these with just chopped Milky Way bars and they turned out fantastic. The key is to chop everything into roughly 1/2-inch pieces so they distribute evenly through the dough. And don’t worry about being too precise—imperfect chunks are part of the charm.
For candy selection tips, avoid anything with a hard candy shell or sticky filling that might burn. Things like Skittles or Starburst don’t work well here. Stick with chocolate-based candies for the best results. If you’re using candy bars with wafers or crispy bits, even better—they add texture.
Equipment Needed
You don’t need fancy equipment for these bars. Here’s what you’ll need:
- 8×8-inch baking pan (a 9×9 works too, but the bars will be slightly thinner)
- Parchment paper (for easy lifting and cleanup)
- Large mixing bowl
- Hand mixer or stand mixer (a wooden spoon works too if you’re patient)
- Sharp knife for chopping candy
- Cutting board
- Measuring cups and spoons
- Rubber spatula
If you don’t have an 8×8 pan, you can use a 9-inch round cake pan or even a small cast-iron skillet. Just adjust the baking time slightly—check for doneness a few minutes early. I’ve made these in a disposable foil pan before and they worked perfectly, so don’t stress about having the “right” equipment.
Preparation Method
- Preheat your oven to 350°F (175°C). Line your 8×8 baking pan with parchment paper, leaving an overhang on two sides. This makes lifting the bars out later so much easier.
- Chop your candy. Take all your leftover Halloween candy and chop it into roughly 1/2-inch pieces. Set aside. This is the most fun part of the recipe—just be careful with sticky caramel pieces.
- Cream the butter and sugars. In a large mixing bowl, beat the softened butter, brown sugar, and granulated sugar together until light and fluffy. This takes about 2-3 minutes with a hand mixer. The mixture should look pale and slightly increased in volume.
- Add the egg and vanilla. Beat in the egg and vanilla extract until fully combined. Scrape down the sides of the bowl with your spatula to make sure everything is incorporated.
- Mix the dry ingredients. In a separate small bowl, whisk together the flour, baking soda, and salt. Gradually add this to the wet mixture, mixing on low speed until just combined. Don’t overmix—stop as soon as you don’t see any more streaks of flour.
- Fold in the candy. Gently fold in the chopped candy with your spatula. The dough will be thick and studded with colorful candy pieces. It should look a bit like a confetti cookie dough.
- Press into the pan. Transfer the dough to your prepared pan and press it into an even layer. The dough is thick, so use your hands or the back of a spoon to spread it evenly. Wet your fingers slightly if the dough sticks.
- Bake for 20-25 minutes. The edges should be golden brown and the center should look set but still slightly soft. A toothpick inserted in the center should come out with a few moist crumbs, not wet batter. The candy on top might look a little melty—that’s perfect.
- Cool completely. Let the bars cool in the pan for at least 20 minutes, then use the parchment overhang to lift them out. Transfer to a wire rack to cool completely before slicing. This is important—if you cut them while they’re warm, they’ll fall apart.
- Slice and serve. Use a sharp knife to cut into 9 or 16 squares, depending on how generous you want to be. Wipe the knife clean between cuts for neater slices.
A quick note: if your candy has any hard chocolate coatings that seem like they might melt oddly, don’t worry. The oven heat will soften everything and create these beautiful marbled pockets of flavor. I once used a bunch of random chocolate truffles from a holiday tin and they turned into these incredible fudgy swirls.
Cooking Tips & Techniques
Let me share some things I’ve learned the hard way so you don’t have to. The first time I made these, I used too much candy and the bars didn’t hold together. Aim for about 2 cups of chopped candy—it’s plenty.
Another mistake I made was using candy with a lot of sticky caramel or nougat. It melted through the bottom of the bars and stuck to the pan like glue. That’s why parchment paper is non-negotiable here. Trust me, I learned this lesson with a very sticky spatula and a lot of swearing.
For timing and multitasking, here’s my strategy: chop the candy while the butter comes to room temperature. Then mix the dough while the oven preheats. By the time the oven beeps, you’re ready to bake. It’s a smooth rhythm that makes the whole process feel effortless.
If you want extra crispy edges, press the dough slightly thinner at the edges of the pan. This creates a lovely contrast between the chewy center and the crisp edges. I learned this trick from a pastry chef friend and it makes a real difference.
One more tip: if you’re making these for a party, bake them the night before. They actually taste better the next day after the flavors have had time to meld together. Just store them in an airtight container at room temperature.
Variations & Adaptations
These bars are incredibly versatile. Here are some variations I’ve tried and loved:
- Gluten-Free Version: Substitute the all-purpose flour with a 1:1 gluten-free baking blend. I’ve used Bob’s Red Mill and King Arthur brands with great results. The texture is slightly more delicate, so let them cool completely before slicing.
- White Chocolate Dream: Use only white chocolate-based candies like Milky Way or white Kit Kats. Add 1/2 cup of dried cranberries for a tart contrast. This version is dangerously addictive.
- Peanut Butter Lover’s: Replace 1/4 cup of the butter with creamy peanut butter. Use only peanut butter-based candies like Reese’s cups and peanut butter M&Ms. The result is a rich, nutty bar that’s pure comfort.
- Salted Caramel Twist: Sprinkle flaky sea salt over the top before baking. The salt cuts through the sweetness and makes the caramel notes pop. This is my personal favorite for adult gatherings.
- Double Chocolate: Replace 1/4 cup of the flour with unsweetened cocoa powder. Use dark chocolate candies like Hershey’s Special Dark or chocolate truffles. These are intensely chocolatey and perfect for serious chocolate lovers.
For different cooking methods, you can make these as individual cookies instead of bars. Just scoop the dough into 2-tablespoon balls and bake on a parchment-lined sheet for 10-12 minutes. The baking time is shorter, so keep an eye on them.
Serving & Storage Suggestions
These cookie bars are best served at room temperature. The texture is perfect—chewy with slightly crisp edges. If you want to gild the lily, serve them warm with a scoop of vanilla ice cream. The contrast between the warm, gooey bar and the cold, creamy ice cream is absolutely divine.
For presentation, I like to dust the bars with a little powdered sugar before serving. It makes them look almost elegant, which is funny considering they started as a pile of Halloween candy. You can also drizzle them with melted chocolate or caramel sauce for extra flair.
These bars pair beautifully with a cold glass of milk, a hot cup of coffee, or even a glass of red wine if you’re feeling fancy. For parties, I often serve them alongside a platter of fresh fruit to balance the sweetness.
For storage, keep the bars in an airtight container at room temperature for up to 5 days. They’ll stay soft and chewy for the first 3 days, then gradually become more firm. I actually prefer them on day 2 or 3 when the flavors have really melded together.
You can also freeze these bars for up to 3 months. Wrap them individually in plastic wrap, then place them in a freezer bag. To thaw, just leave them at room temperature for about 30 minutes. They’re perfect for unexpected guests or late-night cravings.
For reheating, pop a bar in the microwave for 10-15 seconds. It’ll soften the chocolate and make the bar taste freshly baked. Or warm them in a 300°F oven for 5 minutes if you’re reheating a whole batch.
Nutritional Information & Benefits
Let’s be honest—these are a treat, not a health food. But here’s the estimated nutritional breakdown per bar (based on 9 servings):
- Calories: Approximately 320-350
- Fat: 16g
- Carbohydrates: 45g
- Protein: 4g
- Sugar: 30g
Now, the good news: dark chocolate candies contain antioxidants, and the nuts in candy bars like Snickers provide some protein and healthy fats. The butter and eggs offer calcium and vitamin D. It’s not a superfood, but it’s not pure emptiness either.
If you’re watching your sugar intake, you can reduce the amount of candy by half and add some chopped nuts or dark chocolate chips instead. The bars will still be delicious, just less sweet.
These bars are not gluten-free as written, but the variation above works well. They contain dairy and eggs, so they’re not suitable for vegan diets either. But for an occasional indulgence, they’re absolutely worth it.
Conclusion
These leftover Halloween candy cookie bars are proof that some of the best recipes come from happy accidents. They’re quick, forgiving, and endlessly adaptable. Whether you’re using up a mountain of fun-sized Snickers or trying to make a dent in that bag of assorted chocolates, this recipe delivers every time.
I love that this recipe takes something that feels like a problem—too much candy—and turns it into something worth celebrating. It’s the kind of dessert that makes people smile, and honestly, that’s the whole point of cooking for others. So go ahead, raid that candy bowl, and make something amazing. Your friends and family will thank you.
I’d love to hear how yours turn out! Drop a comment below with the candy combination you used, or tag me in your photos on social media. Happy baking!
Frequently Asked Questions
Can I use any type of Halloween candy?
Most chocolate-based candies work great. Avoid hard candies, lollipops, or anything with a sticky filling that might burn. Stick with candy bars, peanut butter cups, and chocolate truffles for the best results.
Can I make these ahead of time?
Absolutely! These bars actually taste better the next day. Bake them up to 2 days in advance and store them in an airtight container at room temperature. They’re perfect for party prep.
How do I prevent the candy from sinking to the bottom?
Make sure your dough is thick enough—it should be slightly stiff, not runny. Also, toss the chopped candy in a tablespoon of flour before folding it in. This helps suspend the candy in the dough during baking.
Can I freeze the dough?
Yes! Press the dough into your lined pan, wrap it tightly in plastic wrap and foil, and freeze for up to 3 months. When you’re ready to bake, just pop it in the oven straight from the freezer, adding 5-7 minutes to the baking time.
Why did my bars turn out too crumbly?
This usually happens if you used too much candy or if the bars weren’t cooled completely before slicing. Let them cool fully—at least 1 hour—before cutting. Also, make sure your butter isn’t too soft; it should be softened but still cool to the touch.
Pin This Recipe!
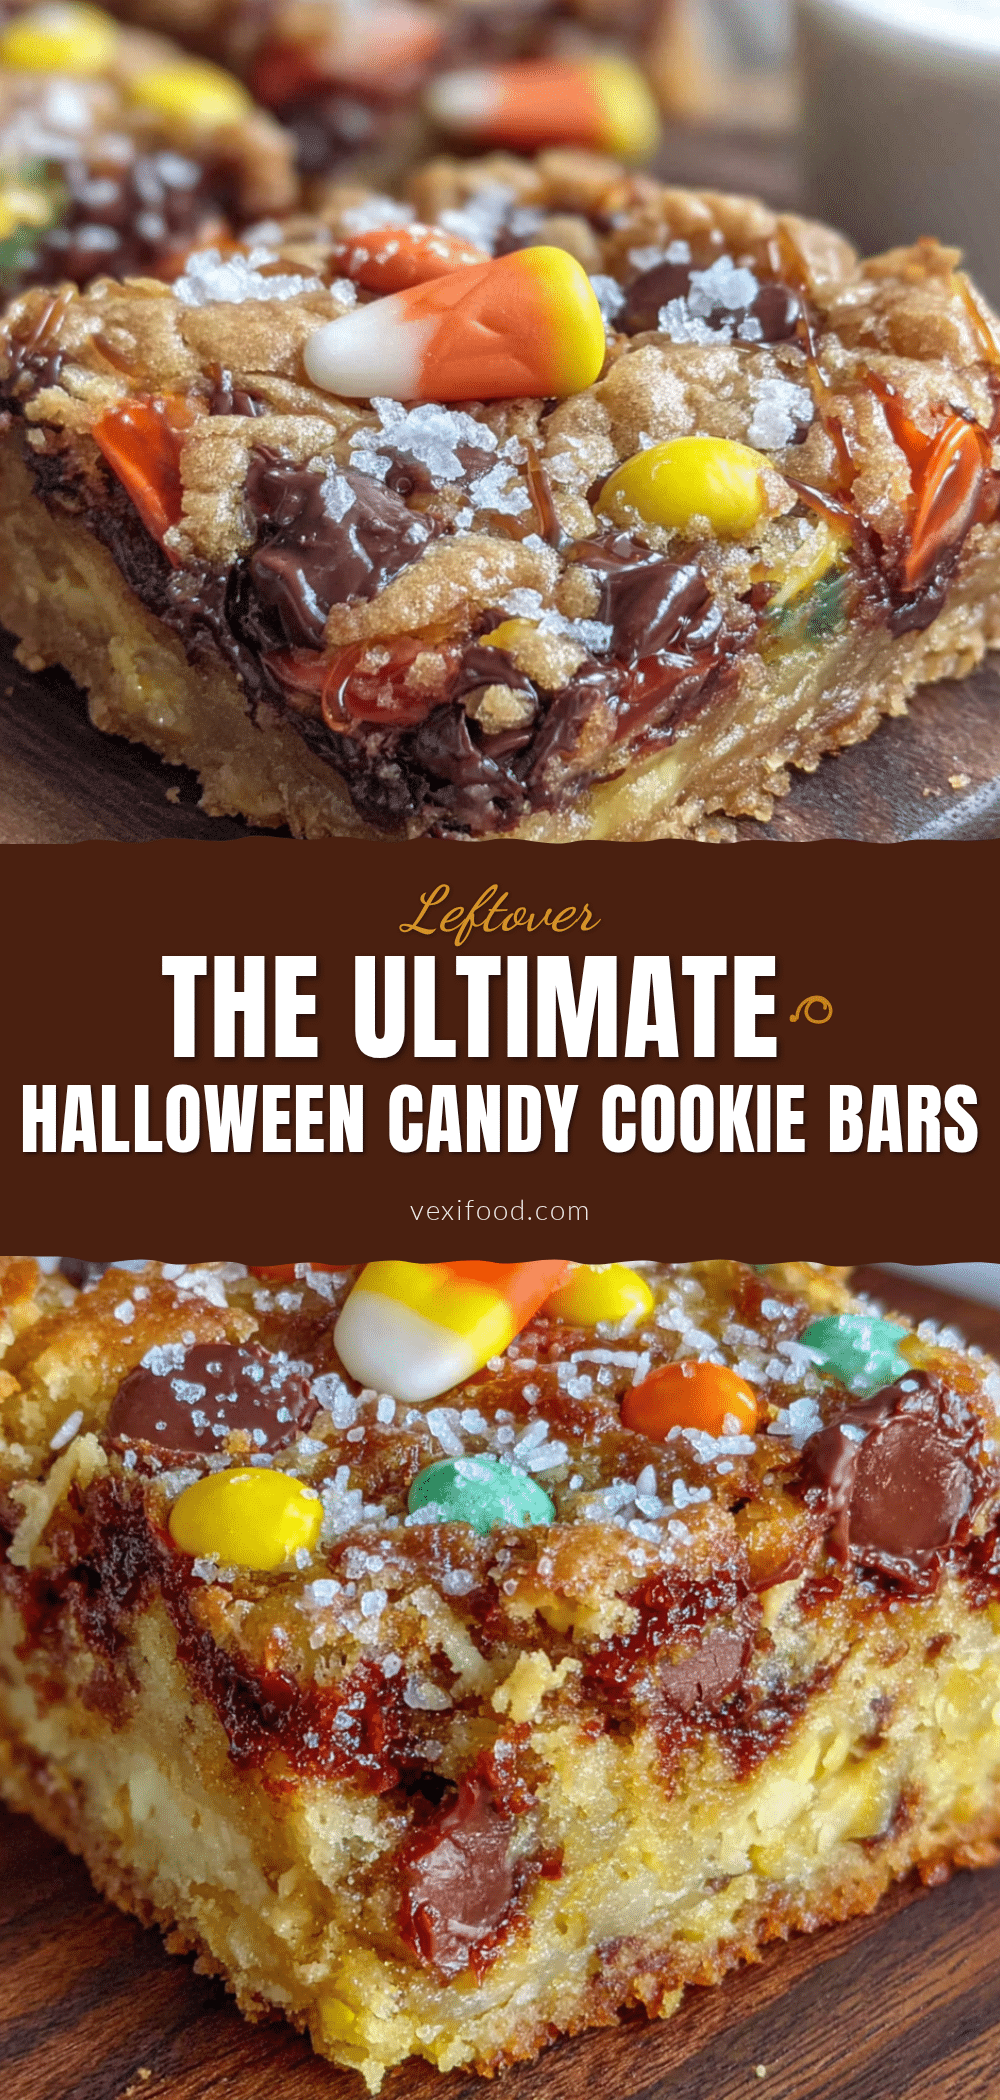
The Best Leftover Halloween Candy Cookie Bars Recipe
These cookie bars are the ultimate solution to that post-Halloween candy mountain. Made with a buttery brown sugar cookie dough and loaded with chopped leftover candy, they come together in under 30 minutes with just one bowl and are always a crowd-pleaser.
- Prep Time: 10 minutes
- Cook Time: 25 minutes
- Total Time: 35 minutes
- Yield: 9 servings 1x
- Category: Dessert
- Cuisine: American
Ingredients
- 1/2 cup unsalted butter, softened
- 3/4 cup packed light brown sugar
- 1/4 cup granulated sugar
- 1 large egg, room temperature
- 1 teaspoon vanilla extract
- 1 1/2 cups all-purpose flour
- 1/2 teaspoon baking soda
- 1/4 teaspoon salt
- 2 cups chopped leftover Halloween candy (about 12–15 fun-sized pieces)
Instructions
- Preheat your oven to 350°F (175°C). Line your 8×8 baking pan with parchment paper, leaving an overhang on two sides.
- Chop your leftover Halloween candy into roughly 1/2-inch pieces. Set aside.
- In a large mixing bowl, beat the softened butter, brown sugar, and granulated sugar together until light and fluffy, about 2-3 minutes.
- Beat in the egg and vanilla extract until fully combined. Scrape down the sides of the bowl.
- In a separate small bowl, whisk together the flour, baking soda, and salt. Gradually add this to the wet mixture, mixing on low speed until just combined.
- Gently fold in the chopped candy with a spatula until evenly distributed.
- Transfer the dough to the prepared pan and press it into an even layer.
- Bake for 20-25 minutes, until the edges are golden brown and the center is set but still slightly soft.
- Let the bars cool in the pan for at least 20 minutes, then use the parchment overhang to lift them out. Transfer to a wire rack to cool completely before slicing.
- Slice into 9 or 16 squares using a sharp knife.
Notes
For best results, use chocolate-based candies like Snickers, Kit Kat, and Reese’s Peanut Butter Cups. Avoid hard candies or sticky fillings. The bars taste even better the next day. Store in an airtight container at room temperature for up to 5 days or freeze for up to 3 months.
Nutrition
- Serving Size: 1 bar (based on 9 se
- Calories: 335
- Sugar: 30
- Sodium: 180
- Fat: 16
- Saturated Fat: 9
- Carbohydrates: 45
- Fiber: 1
- Protein: 4
Keywords: leftover Halloween candy, cookie bars, easy dessert, one bowl, potluck, party dessert



