Love this? Save it for later!
Share the inspiration with your friends
I met Margie at the community garden two summers ago. She was tending to a patch of mint that had completely taken over her raised bed, and I was failing spectacularly at keeping my tomatoes alive. She didn’t say anything at first—just handed me a trowel and started digging around my sad, drooping plants. By the time we finished, we’d talked about everything except gardening. Somewhere between the compost talk and her telling me about her grandkids, she mentioned these little dirt cake cups she made every Halloween. She called them “graveyard cups” and said they were the only reason her teenage grandson still came to family parties. I laughed, but I wrote down every word she said.
I messed up the first batch, honestly. Too much pudding, not enough crushing on the cookies. The worms looked like they were drowning in mud instead of wiggling through soil. But Margie’s recipe stayed with me because it wasn’t really about the dessert—it was about making something that made people smile. That’s the thing about these cozy graveyard dirt cake cups with gummy worms. They’re silly and a little spooky and completely ridiculous, but they work. You know that feeling when you see a kid’s face light up over something simple? That’s what this is.
Maybe you’ve been there—trying to find a Halloween treat that isn’t just another bag of candy. Something that feels special without requiring a pastry degree. These dirt cups are that. They take maybe 15 minutes to throw together, they use ingredients you probably already have, and they make everyone at the table grin. I’ve made them for Halloween parties, for cozy movie nights, and honestly, for random Tuesdays when I needed a little fun. They never last long.
Why You’ll Love This Recipe
Let me tell you why these cozy graveyard dirt cake cups with gummy worms have become my go-to dessert for pretty much any occasion that calls for a little whimsy. I’ve tested this recipe about six times now, tweaking the pudding ratio and the cookie crumb texture until it felt just right. Here’s what makes it stand out:
- Quick & Easy: You’re looking at about 15 minutes of active prep time. No baking, no complicated techniques, no stress. Just mix, layer, and chill.
- Simple Ingredients: Chocolate pudding, cream cheese, whipped topping, Oreos, and gummy worms. That’s it. You probably have most of this in your kitchen right now.
- Perfect for Halloween: These are the star of any spooky gathering. Kids love them, adults secretly love them more, and they look impressive without any fancy decorating skills.
- Crowd-Pleaser: I’ve brought these to potlucks, classroom parties, and family dinners. They disappear faster than anything else on the table.
- Unbelievably Delicious: The creamy, rich pudding mixture paired with the crunchy cookie “dirt” and chewy gummy worms creates this incredible texture combo that’s pure comfort food heaven.
What makes this recipe different from the dozens of other dirt cake recipes out there? It’s the cream cheese. Most versions just use pudding and Cool Whip, but adding softened cream cheese gives the filling this tangy richness that balances the sweetness perfectly. It’s not just another version—it’s the one that makes people close their eyes after the first bite. Trust me on this.
This is comfort food reimagined. It’s nostalgic and playful, but it also feels like a warm hug on a cold October evening. Perfect for impressing guests without stress, or turning a simple Tuesday into something memorable.
What Ingredients You Will Need
This recipe uses simple, wholesome ingredients to deliver that rich, creamy texture and satisfying crunch. Most of these are pantry staples, which makes these cozy graveyard dirt cake cups with gummy worms perfect for last-minute cravings or unexpected guests.
For the Creamy Pudding Layer
- 1 (3.9 oz) package instant chocolate pudding mix – I recommend Jell-O brand for the smoothest texture, but any brand works fine. (Makes the filling silky and rich)
- 2 cups cold whole milk – Whole milk gives the creamiest result, but 2% works too. Avoid skim—it makes the pudding watery. (Use almond or oat milk for a dairy-free option)
- 8 oz cream cheese, softened to room temperature – This is my secret ingredient. It adds a tangy richness that elevates the whole dessert. Philadelphia brand is my go-to. (Let it sit out for 30 minutes before mixing)
- 1/2 cup powdered sugar – Helps the cream cheese blend smoothly into the pudding without graininess.
- 1 (8 oz) tub frozen whipped topping, thawed – Cool Whip or any store brand works. For a homemade version, whip 1 cup of heavy cream with 2 tablespoons of powdered sugar until stiff peaks form.
For the “Dirt” Layer
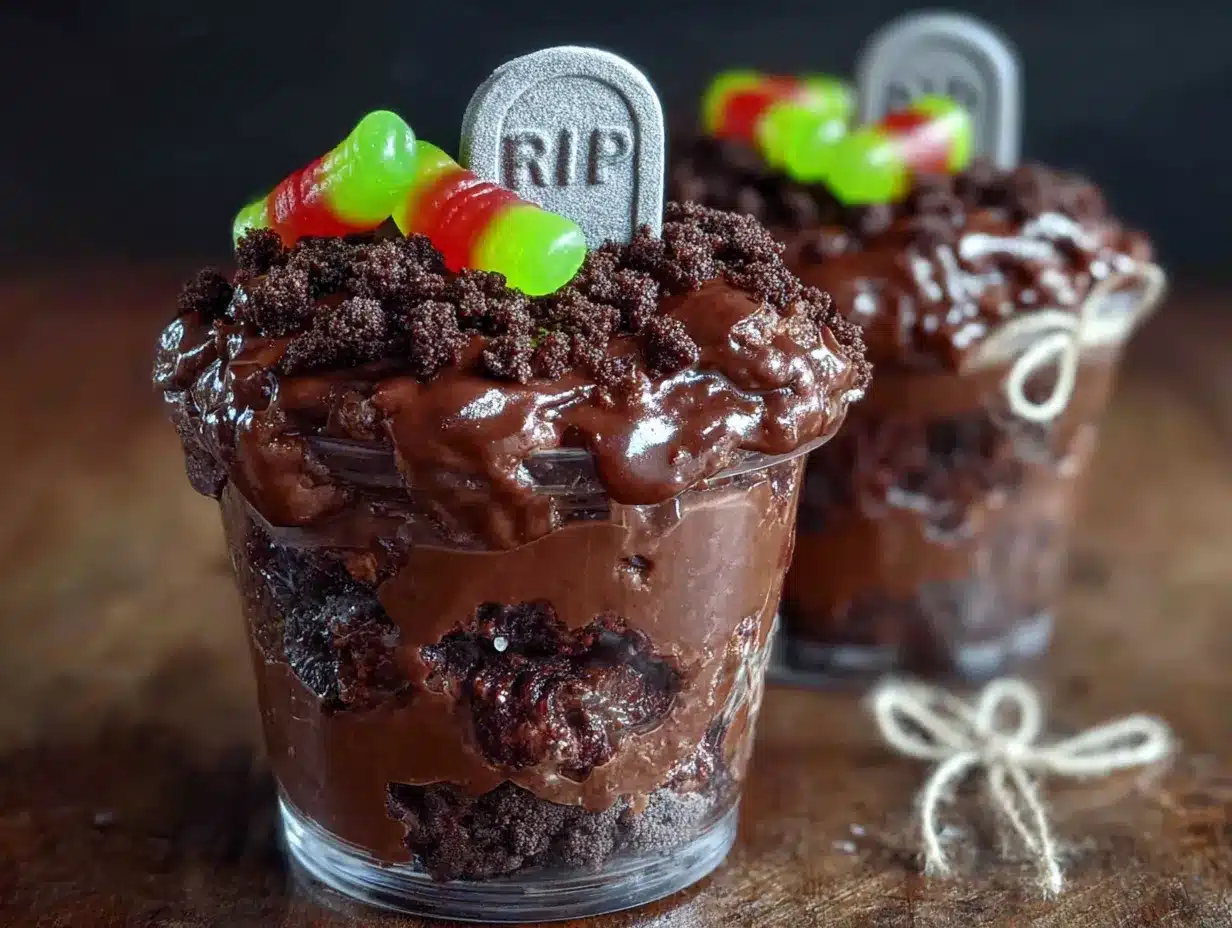
- 1 (14.3 oz) package chocolate sandwich cookies – Oreos are the classic choice. You’ll use the whole cookie, cream filling and all. (Regular or Double Stuf both work—just adjust the crunch factor)
- 2 tablespoons melted unsalted butter – This helps the cookie crumbs hold together slightly, giving that realistic soil texture. (Use vegan butter if needed)
For the Graveyard Decorations
- 1 cup gummy worms – Any brand works. I like the sour ones for extra zing, but classic sweet worms are perfect too. (Look for black and green worms for the spookiest effect)
- Optional decorations: Candy pumpkins, skeleton bone candies, or small tombstone cookies. (Adds extra spooky charm)
Ingredient Selection Tip: For the best texture, look for gummy worms that are soft and chewy, not hard or stale. Fresh worms bend easily and look more realistic poking out of the “dirt.” If your gummy worms are from last Halloween and have turned rock-hard, soak them in warm water for 5 minutes, then pat dry before using.
Equipment Needed
You don’t need fancy equipment for these cozy graveyard dirt cake cups with gummy worms. Here’s what I use:
- 8 small clear cups or glasses – Plastic cups work great for parties, but glass ones show off the layers better. I use 8-ounce mason jars or small dessert glasses. (Budget tip: Solo cups from the dollar store work perfectly)
- Electric hand mixer or stand mixer – Makes blending the cream cheese smooth and lump-free. A whisk works too, but your arm will get tired. (I’ve done it by hand—it’s doable, just takes elbow grease)
- Food processor or zip-top bag and rolling pin – For crushing the cookies into fine crumbs. A food processor gives the most consistent texture, but smashing them in a bag is oddly satisfying. (I actually prefer the bag method—it’s therapeutic)
- Medium mixing bowls (2-3) – One for the pudding, one for the cream cheese mixture, and one for the cookie crumbs.
- Rubber spatula – For scraping every last bit of that creamy goodness into the cups. Don’t waste a drop.
- Measuring cups and spoons – Precision matters for the pudding consistency.
- Small offset spatula or butter knife – For smoothing the pudding layers evenly.
Maintenance Tip: If you’re using a food processor for the cookies, wipe it out with a dry paper towel between batches to prevent the crumbs from getting greasy. And wash your clear cups by hand—dishwashers can make them cloudy over time.
Preparation Method
Ready to make these cozy graveyard dirt cake cups with gummy worms? Let me walk you through it step by step. I’ve included all the little tricks I’ve learned from making these about a dozen times.
- Crush the cookies. Place the entire package of Oreos (cream filling and all) into a food processor. Pulse about 10-12 times until you get fine crumbs that resemble potting soil. No food processor? Put the cookies in a large zip-top bag, seal it tight (leave a little air in there), and go to town with a rolling pin. It takes about 5 minutes of solid smashing. Pour the crumbs into a medium bowl and stir in the melted butter until evenly moistened. Set aside.
- Make the pudding. In a medium bowl, whisk together the instant chocolate pudding mix and 2 cups cold milk. Whisk vigorously for about 2 minutes until it starts to thicken. It will be loose at first—that’s normal. Pop it in the fridge while you work on the cream cheese mixture. (This gives it time to set up properly.)
- Whip the cream cheese. In a separate large bowl, beat the softened cream cheese with an electric hand mixer on medium speed until smooth and fluffy, about 1-2 minutes. Add the powdered sugar and beat for another 30 seconds until fully incorporated. Scrape down the sides of the bowl with a rubber spatula.
- Combine the fillings. Take the pudding out of the fridge—it should be thickened by now. Add the pudding to the cream cheese mixture and beat on low speed until combined, about 30 seconds. Don’t overmix or it’ll get runny. Fold in the thawed whipped topping with a rubber spatula until no white streaks remain. The mixture should be light, fluffy, and a deep chocolate color.
- Layer the cups. Grab your 8 clear cups. Start with a generous tablespoon of cookie crumbs in the bottom of each cup—about 1-2 tablespoons, depending on cup size. Press them down gently with the back of a spoon. This creates the “underground” layer.
- Add the pudding mixture. Spoon or pipe the creamy pudding mixture evenly among the cups, filling them about halfway. You can use a piping bag for cleaner layers, but a spoon works just fine. Tap each cup gently on the counter to settle the filling and remove air bubbles.
- More dirt, please. Add another layer of cookie crumbs on top of the pudding—about 1-2 tablespoons per cup. This is your “topsoil.” Reserve about 2 tablespoons of crumbs for the final garnish.
- Chill out. Place the cups in the refrigerator for at least 2 hours, or up to overnight. This is crucial—the layers need time to set and meld together. The filling will firm up and the cookie crumbs will soften slightly, creating that perfect dirt-like texture.
- Add the worms and decorations. Right before serving, poke gummy worms into the “dirt” so they look like they’re crawling out of the ground. Sprinkle the reserved cookie crumbs around the worms to cover any exposed pudding. Add candy pumpkins or tombstone cookies if you’re feeling extra festive.
- Serve immediately. These are best enjoyed within a few hours of adding the worms, as the gummy candies will soften over time. Grab a spoon and dig in—literally!
Sensory Cue: When you press the cookie crumbs into the bottom of the cup, you should hear a slight crunch. The pudding mixture should be thick enough that it doesn’t immediately soak through the crumbs—if it does, your pudding wasn’t set enough. And when you poke the worms in, they should stand upright without falling over. That’s how you know the texture is perfect.
Cooking Tips & Techniques
After making these cozy graveyard dirt cake cups with gummy worms more times than I care to admit, I’ve picked up a few tricks that make a real difference. Let me share what I’ve learned—including the mistakes I’ve made so you don’t have to.
Don’t skip softening the cream cheese. I learned this the hard way. Cold cream cheese creates lumps that no amount of mixing will fix. Leave it on the counter for at least 30 minutes before you start. If you’re in a hurry, cut it into small cubes and microwave it for 10-15 seconds. Just be careful not to melt it—warm cream cheese is fine, hot cream cheese is a disaster.
Let the pudding set before combining. The first time I made these, I was impatient and mixed the pudding into the cream cheese while it was still loose. The whole filling turned soupy, and the layers looked like a muddy mess. Give the pudding a full 5 minutes in the fridge to thicken up. You’ll thank me later.
Crush the cookies consistently. You want fine, even crumbs—not big chunks. Big cookie pieces create air pockets that make the layers unstable. Pulse your food processor in short bursts and check the texture frequently. For the bag method, really commit to the smashing. Put on some music and make it a moment.
Chill overnight for best results. Two hours is the minimum, but overnight is magical. The flavors meld together, the texture becomes perfectly creamy, and the cookie crumbs soften into something that genuinely resembles moist soil. I’ve made these a day ahead for parties more times than I can count, and they’re always better the next day.
Add worms right before serving. Gummy worms absorb moisture from the pudding and crumbs over time. If you add them too early, they’ll get soft and droopy. Nobody wants a sad, floppy worm. Poke them in just before you bring the cups to the table.
Use a piping bag for clean layers. If you want those Instagram-worthy layers, spoon the pudding mixture into a piping bag or a zip-top bag with the corner snipped off. Pipe it into the cups instead of spooning it. It takes an extra 30 seconds but makes the layers look so much cleaner.
Variations & Adaptations
One of the best things about these cozy graveyard dirt cake cups with gummy worms is how easy they are to customize. Here are some variations I’ve tried and loved:
Dairy-Free Version
Use dairy-free cream cheese (Kite Hill is my favorite), coconut milk or oat milk for the pudding, and a vegan whipped topping like CocoWhip. Most Oreos are accidentally vegan, so the cookie crumbs are already good to go. The texture is slightly less rich, but honestly, it’s still delicious.
Gluten-Free Option
Swap the Oreos for gluten-free chocolate sandwich cookies. Brands like Glutino or Kinnikinnick make excellent alternatives. Everything else in the recipe is naturally gluten-free, so this is an easy swap. Just double-check your gummy worm labels—some brands use wheat starch.
Pumpkin Patch Variation
For a fall twist, add a layer of pumpkin pudding before the chocolate layer. Mix one box of instant vanilla pudding with 1 cup of milk and 1/2 cup of pumpkin puree, plus 1 teaspoon of pumpkin pie spice. Layer it between the chocolate pudding and the cookie crumbs. Top with candy pumpkins instead of gummy worms. This version is dangerously good.
Peanut Butter Cup Graveyard
Fold 1/2 cup of creamy peanut butter into the cream cheese mixture before adding the pudding. Use peanut butter Oreos for the crumbs. Top with mini peanut butter cups and Reese’s Pieces instead of gummy worms. Warning: this version disappears even faster than the original.
Individual Trifle Jars
Layer the ingredients in small mason jars for a portable version. These travel beautifully for picnics or classroom parties. Just keep the worms separate and add them at the last minute. I’ve brought these to potlucks in a cooler and assembled them on site—works like a charm.
Serving & Storage Suggestions
These cozy graveyard dirt cake cups with gummy worms are best served cold, straight from the fridge. The contrast between the chilled, creamy filling and the slightly softened cookie crumbs is what makes them so satisfying. Here’s how to make the most of them:
Serving Temperature: Serve chilled, but not ice-cold. Let them sit at room temperature for about 5 minutes before serving—this takes the edge off the chill and lets the flavors shine. If you’re serving them at a party, keep them in the fridge until the last possible moment.
Presentation Ideas: Arrange the cups on a black platter or a wooden board for maximum spooky effect. Sprinkle extra cookie crumbs around the base of the cups to look like scattered dirt. Add a few loose gummy worms on the platter for a “crawling out” effect. I like to place a small tombstone cookie in each cup—you can find them at most grocery stores around Halloween.
Storage Instructions: Store any leftovers (if you have any!) in the refrigerator, covered with plastic wrap or in an airtight container. They’ll keep for up to 3 days, but the texture is best within the first 24 hours. The cookie crumbs will continue to soften over time, so don’t make them more than a day ahead if you want that crunchy dirt texture.
Freezing Notes: I don’t recommend freezing these. The pudding mixture becomes watery when thawed, and the cookie crumbs turn into a soggy mess. These are strictly a fridge dessert. But honestly, they never last long enough to worry about freezing.
Reheating: Don’t. Just don’t. These are meant to be eaten cold. If you want a warm chocolate dessert, make brownies instead.
Flavor Development: Here’s something interesting—the flavors actually get better after about 4-6 hours in the fridge. The chocolate pudding deepens, the cream cheese tang mellows out, and everything comes together in this harmonious way. If you can resist eating them right away, you’ll be rewarded.
Nutritional Information & Benefits
Let’s be real—these cozy graveyard dirt cake cups with gummy worms are a treat, not a health food. But here’s the breakdown so you know what you’re working with:
Estimated Nutrition Per Serving (1 cup):
- Calories: 380-420
- Fat: 22g
- Carbohydrates: 48g
- Protein: 6g
- Sugar: 34g
- Fiber: 2g
Health Highlights: The cream cheese adds a small amount of calcium and protein. The cocoa in the pudding and cookies contains antioxidants called flavonoids, which are good for heart health. The gummy worms? Well, they make you smile, and that counts for something.
Dietary Considerations: This recipe contains dairy, wheat, and soy (from the Oreos). For gluten-free and dairy-free options, check the variations section above. This is not a low-sugar dessert, but you can reduce the powdered sugar in the cream cheese mixture to 1/4 cup if you prefer a less sweet filling.
My Take: Look, I’m not here to pretend these are healthy. They’re a celebration dessert, a fun treat, something you make for Halloween parties and movie nights. But I do believe that food should bring joy, and these bring a lot of it. Sometimes the most nourishing thing you can eat is something that makes you feel like a kid again.
Conclusion
These cozy graveyard dirt cake cups with gummy worms are more than just a Halloween dessert—they’re a little moment of joy in a cup. They’re the kind of recipe that brings people together, makes kids giggle, and reminds adults not to take themselves too seriously. Margie was right: sometimes the simplest things are the ones that stick with us.
I hope you’ll try these for your next Halloween party, or honestly, for no reason at all. Customize them however you like—swap the worms for candy corn, add a layer of crushed pretzels for saltiness, or go all out with the pumpkin version. The beauty of this recipe is that it’s a canvas for your own creativity.
I’d love to hear how yours turn out. Did your kids help smash the cookies? Did you try a crazy variation that actually worked? Drop a comment below and let me know. And if you snap a photo of your graveyard cups, tag me—I want to see those wiggly worms poking out of the dirt. Happy Halloween, friends. Go make something that makes you smile.
Frequently Asked Questions
Can I make these graveyard dirt cake cups ahead of time?
Absolutely! You can assemble the cups up to 24 hours in advance. Just wait to add the gummy worms and any decorations until right before serving. The filling actually gets better after a few hours in the fridge as the flavors meld together.
Can I use homemade whipped cream instead of Cool Whip?
Yes, and it’s delicious! Whip 1 cup of heavy cream with 2 tablespoons of powdered sugar until stiff peaks form. Fold it into the pudding mixture just like you would with Cool Whip. The texture will be slightly lighter and less stable, but the flavor is incredible.
Why did my pudding mixture turn out runny?
This usually happens for one of three reasons: the pudding wasn’t fully set before mixing, the cream cheese wasn’t softened properly, or the whipped topping was overmixed. Make sure your pudding thickens in the fridge for at least 5 minutes, your cream cheese is at room temperature, and you fold the whipped topping gently until just combined.
Can I use sugar-free pudding and cookies?
You can, but the texture and flavor will be different. Sugar-free pudding tends to be less creamy, and sugar-free cookies often have a different crumb texture. If you’re watching sugar intake, I’d recommend using the full-sugar versions but reducing the portion size instead.
How do I keep the gummy worms from getting soggy?
The key is adding them right before serving. Gummy worms absorb moisture from the pudding and cookie crumbs over time, so they’ll soften within a few hours. For best results, poke them into the dirt cups no more than 30 minutes before you plan to serve them. If you’re making these for a party, set out the worms separately and let guests add their own.
Pin This Recipe!
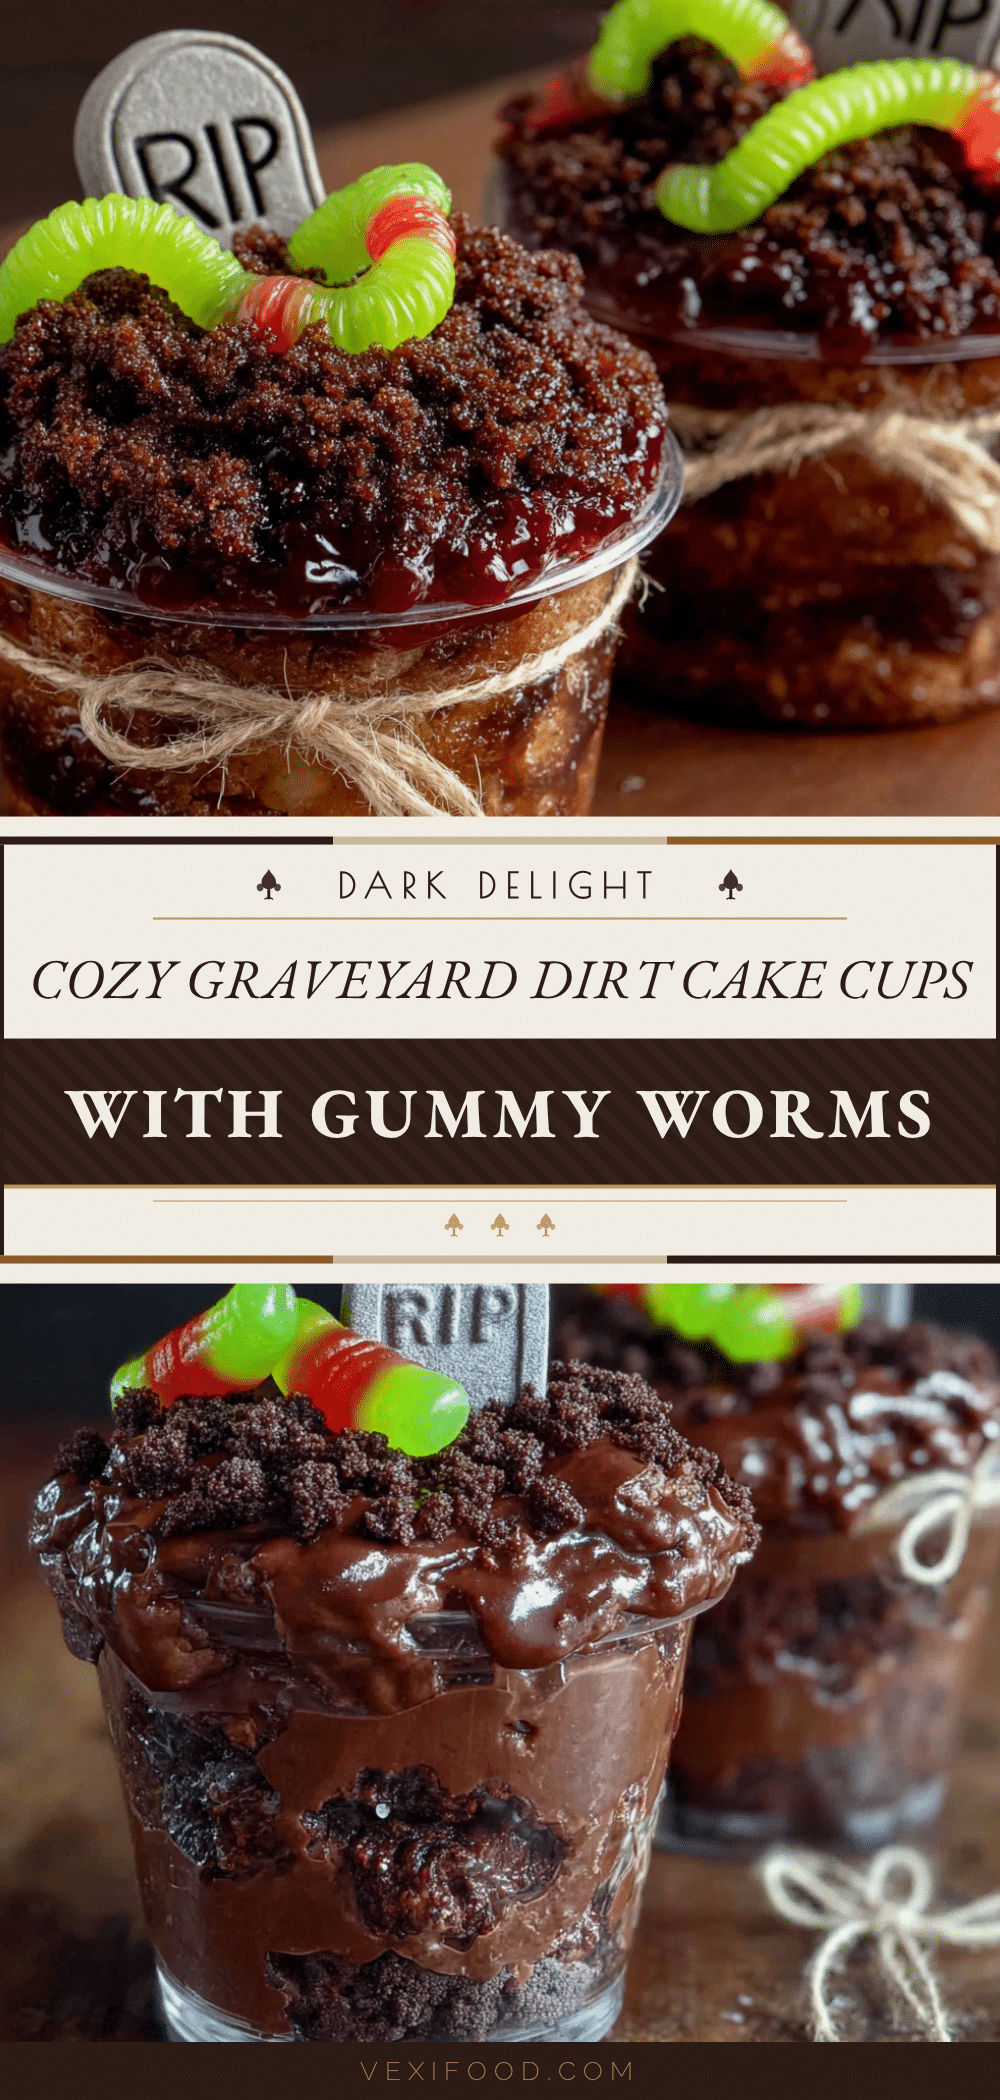
Cozy Graveyard Dirt Cake Cups: Easy Gummy Worm Dessert
These no-bake graveyard dirt cake cups with gummy worms are a fun and easy Halloween treat. Layers of creamy chocolate pudding, crushed Oreo ‘dirt,’ and wiggly gummy worms create a spooky dessert that kids and adults love.
- Prep Time: 15 minutes
- Cook Time: 0 minutes
- Total Time: 2 hours 15 minutes (includes chilling)
- Yield: 8 servings 1x
- Category: Dessert
- Cuisine: American
Ingredients
- 1 (3.9 oz) package instant chocolate pudding mix
- 2 cups cold whole milk
- 8 oz cream cheese, softened to room temperature
- 1/2 cup powdered sugar
- 1 (8 oz) tub frozen whipped topping, thawed
- 1 (14.3 oz) package chocolate sandwich cookies (e.g., Oreos)
- 2 tablespoons unsalted butter, melted
- 1 cup gummy worms
- Optional: candy pumpkins, skeleton bone candies, or small tombstone cookies
Instructions
- Crush the cookies: Place the entire package of Oreos (cream filling and all) into a food processor. Pulse 10-12 times until fine crumbs form. Alternatively, place cookies in a zip-top bag and crush with a rolling pin. Transfer crumbs to a bowl and stir in melted butter until evenly moistened. Set aside.
- Make the pudding: In a medium bowl, whisk together the instant chocolate pudding mix and 2 cups cold milk. Whisk vigorously for about 2 minutes until it starts to thicken. Refrigerate while preparing the cream cheese mixture.
- Whip the cream cheese: In a separate large bowl, beat the softened cream cheese with an electric hand mixer on medium speed until smooth and fluffy, about 1-2 minutes. Add the powdered sugar and beat for another 30 seconds until fully incorporated. Scrape down the sides of the bowl.
- Combine the fillings: Remove the pudding from the fridge (it should be thickened). Add the pudding to the cream cheese mixture and beat on low speed until combined, about 30 seconds. Fold in the thawed whipped topping with a rubber spatula until no white streaks remain.
- Layer the cups: In 8 clear cups, add a generous tablespoon of cookie crumbs to the bottom of each cup (about 1-2 tablespoons). Press down gently with the back of a spoon.
- Add the pudding mixture: Spoon or pipe the creamy pudding mixture evenly among the cups, filling them about halfway. Tap each cup gently on the counter to settle the filling.
- Add more dirt: Add another layer of cookie crumbs on top of the pudding (about 1-2 tablespoons per cup). Reserve about 2 tablespoons of crumbs for final garnish.
- Chill: Refrigerate the cups for at least 2 hours, or up to overnight, to allow the layers to set.
- Add worms and decorations: Right before serving, poke gummy worms into the ‘dirt’ so they look like they’re crawling out. Sprinkle reserved cookie crumbs around the worms. Add optional decorations like candy pumpkins or tombstone cookies.
- Serve immediately: Enjoy within a few hours of adding the worms for best texture.
Notes
For best results, soften cream cheese to room temperature and let pudding set before combining. Add gummy worms just before serving to prevent them from getting soggy. The filling can be made a day ahead; add decorations right before serving.
Nutrition
- Serving Size: 1 cup
- Calories: 400
- Sugar: 34
- Sodium: 380
- Fat: 22
- Saturated Fat: 12
- Carbohydrates: 48
- Fiber: 2
- Protein: 6
Keywords: Halloween dessert, dirt cake, gummy worms, no-bake dessert, chocolate pudding, Oreo dirt, graveyard cups, easy Halloween treat