Love this? Save it for later!
Share the inspiration with your friends
It was 11:47 PM on a random Wednesday in mid-September, and I had this ridiculous craving for something chocolatey with a side of festive. I didn’t have the energy for a full layer cake or a complicated cookie project, but I had a box of brownie mix, a bag of Hershey’s Kisses, and this half-baked idea that wouldn’t leave me alone. Honestly, my kitchen looked like a small hurricane had passed through—cocoa powder on the counter, a stray candy wrapper stuck to my sleeve—but that’s when the best ideas happen, right?
I’d been scrolling through Halloween party ideas for a friend’s gathering, and everything felt either too fussy or too boring. Then I saw a picture of a witch hat cookie, but I thought, “Why not brownies? Brownies are the people-pleaser of the dessert world.” So I grabbed my favorite muffin tin, unwrapped a dozen chocolate kisses, and started improvising. I mean, I wasn’t even sure if the kisses would stay put or melt into a chocolate puddle of regret, but at 11:47 PM, you stop overthinking and start doing.
The first batch came out a little lopsided—one hat looked more like a sad top hat from a cartoon—but the second batch? Pure magic. The brownie bites had that perfect fudgy center, the kisses stood tall like little witch hats, and when I added a dab of orange frosting as a buckle, my neighbor (who I texted a photo to at midnight) said they looked “professionally spooky.” Maybe you’ve been there, standing in your kitchen at an ungodly hour, covered in flour, grinning at a tray of treats that just worked. That’s this recipe. It’s the one that stays with you because it’s easy enough for a Tuesday night and cute enough to steal the show at any Halloween party.
Why You’ll Love This Recipe
Let’s be real—Halloween treats can be a pain. Between carving pumpkins and wrangling kids into costumes, the last thing you need is a fussy dessert that takes three hours and a pastry degree. These Witch Hat Brownie Bites are the opposite of that. They’re the kind of recipe that makes you look like a kitchen hero without breaking a sweat.
- Quick & Easy: From start to finish, you’re looking at about 30 minutes. The brownie batter comes together in one bowl, and the assembly is so simple, you can do it while answering the door for trick-or-treaters.
- Simple Ingredients: No weird candy you have to hunt down at a specialty store. Boxed brownie mix, chocolate kisses, and a little frosting—that’s it. I bet you have most of this stuff in your pantry right now.
- Perfect for Halloween Parties: Whether it’s a school potluck, a neighborhood gathering, or a spooky dinner party, these little hats are conversation starters. They’re bite-sized, mess-free, and everyone from kids to grandparents goes nuts for them.
- Crowd-Pleaser: I’ve brought these to three different Halloween events now, and they disappear faster than the candy bowl. There’s something about the combination of fudgy brownie and creamy chocolate kiss that hits every sweet tooth.
- Unbelievably Delicious: The texture is what gets me every time—soft, gooey brownie with a solid chocolate peak on top. It’s like a brownie and a chocolate truffle had a baby, and that baby is wearing a tiny hat.
What makes this recipe different from the dozens of other witch hat desserts out there is the technique. Instead of using cookies or pretzels as the base, I use a mini brownie bite that stays fudgy in the center. The chocolate kiss is pressed in at just the right moment—after baking but while the brownie is still warm—so it melts slightly and fuses to the top. That little detail makes all the difference. It’s not just a hat sitting on a brownie; it’s a hat that belongs there.
Honestly, this recipe is the kind that makes you close your eyes after the first bite. It’s comfort food with a spooky twist—faster, easier, and way more fun than you’d expect. Perfect for impressing your Halloween guests without spending all day in the kitchen.
What Ingredients You Will Need
This recipe uses simple, mostly pantry-staple ingredients to deliver that perfect fudgy texture and festive look. You don’t need to hunt down anything fancy—just grab these items on your next grocery run.
- For the Brownie Bites:
- 1 box (18.4 oz) brownie mix (I prefer Ghirardelli or Duncan Hines for the fudgiest texture)
- 1/3 cup vegetable oil (or melted coconut oil for a subtle flavor twist)
- 1/4 cup water
- 1 large egg (room temperature helps it mix evenly)
- 1/2 cup semi-sweet chocolate chips (optional, but I add these for extra gooeyness—trust me on this)
- For the Witch Hats:
- 24 Hershey’s Kisses (unwrapped—this is the tedious part, so bribe a kid or put on a podcast)
- 1/4 cup orange frosting (store-bought is fine, or make your own with buttercream and orange gel food coloring)
- 24 small candy corn pieces (for the hat buckle—yes, it’s a tiny detail, but it makes them look legit)
- Green or purple sprinkles (optional, for a magical dusting effect)
A few notes on ingredient selection. For the brownie mix, I’ve tested this with both “fudge” and “original” varieties, and the fudge version gives you a denser, more stable bite that holds the kiss better. If you’re using a gluten-free brownie mix, that works too—just add an extra tablespoon of oil to keep them from drying out. For the chocolate kisses, stick with the classic milk chocolate or dark chocolate. I tried the caramel-filled ones once, and they got a little messy when pressed into the warm brownie. Still delicious, just not as photogenic.
If you’re dairy-free, swap the regular kisses for a dairy-free chocolate brand like Enjoy Life. The orange frosting can also be swapped with a simple glaze made from powdered sugar and orange juice—it sets up nicely and adds a citrus kick that cuts through the chocolate richness.
Equipment Needed
You don’t need a professional bakery setup for these, but a few key tools make the process smoother.
- Mini muffin tin (24-cup size)—this is non-negotiable. A regular muffin tin makes them too big and the proportions get weird.
- Non-stick cooking spray or paper mini muffin liners (I prefer liners for easy cleanup, but spray works fine if you let them cool completely)
- Mixing bowl and whisk or spatula
- Small cookie scoop or tablespoon for portioning the batter evenly
- Cooling rack—essential for letting the brownies set before adding the kisses
- Piping bag or small zip-top bag for the frosting (snip a tiny corner off the bag for precision)
If you don’t have a mini muffin tin, you can use a silicone candy mold or even a regular muffin tin and cut the brownies into rounds with a biscuit cutter. But honestly, the mini muffin tin is worth the $10 investment for this recipe alone. I’ve had mine for years, and it’s paid for itself in Halloween treats.
Preparation Method
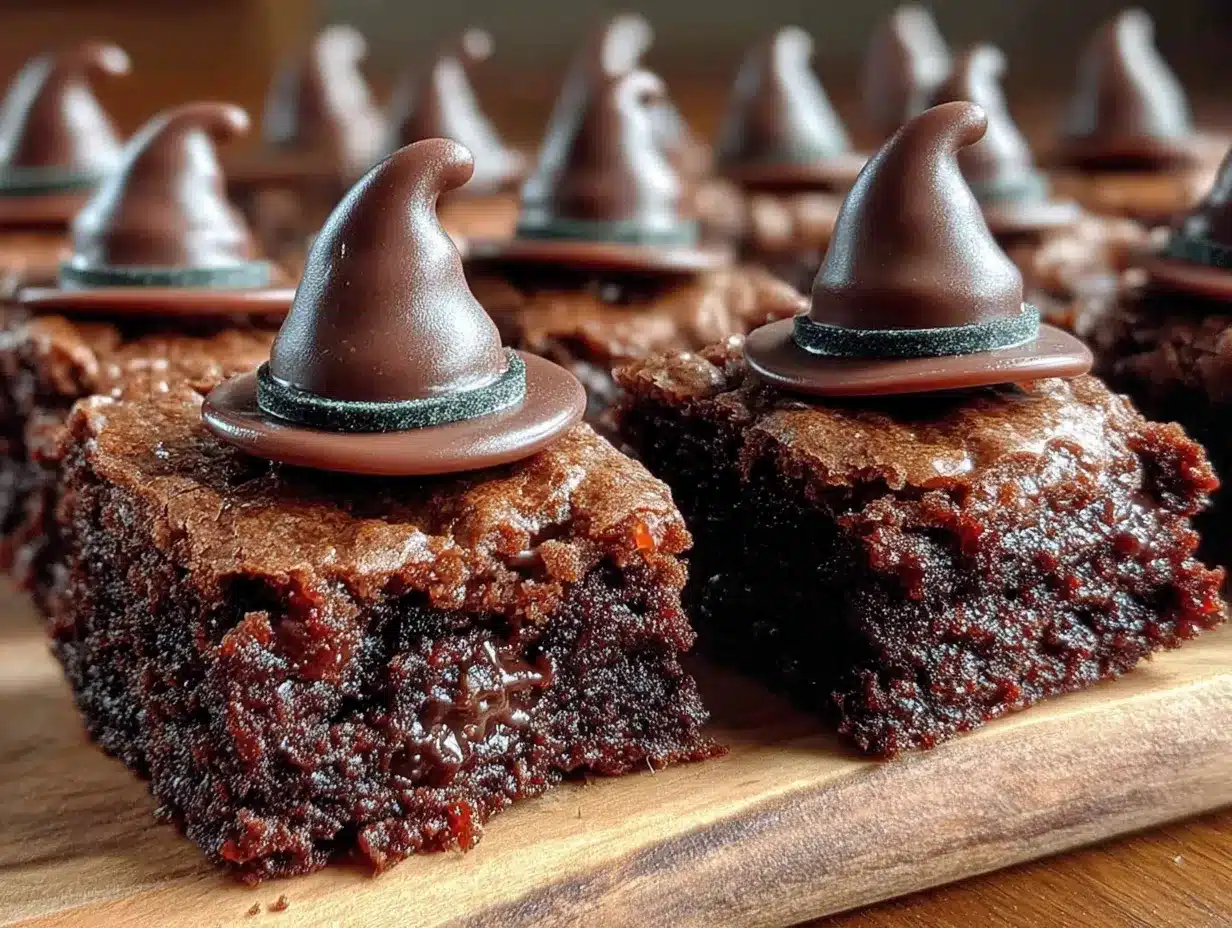
Alright, let’s get into the nitty-gritty. This is where the magic happens.
- Preheat and Prep: Preheat your oven to 350°F (175°C). Spray your mini muffin tin with non-stick spray or line with paper liners. If you’re using liners, give them a quick spritz too—the brownies stick less that way.
- Mix the Brownie Batter: In a large mixing bowl, combine the brownie mix, vegetable oil, water, and egg. Stir until just combined—about 30 strokes. Don’t overmix, or the brownies will be cakey instead of fudgy. If you’re adding the extra chocolate chips, fold them in gently at the end.
- Fill the Muffin Cups: Using a small cookie scoop or a tablespoon, fill each mini muffin cup about 3/4 full. The batter will rise slightly, so don’t fill to the brim. You should get exactly 24 bites if you’re portioning evenly. (Pro tip: if you have extra batter, bake it in a ramekin for a personal chef’s treat.)
- Bake the Brownie Bites: Place the tin in the preheated oven and bake for 12-14 minutes. At 12 minutes, the edges should be set but the center should still look slightly underdone—that’s the sweet spot for fudgy brownies. If you prefer a firmer bite, go to 14 minutes, but don’t push past 15 or they’ll dry out.
- The Critical Moment—Adding the Kisses: As soon as the brownie bites come out of the oven, let them cool in the pan for exactly 2 minutes. Then, while they’re still warm, press one Hershey’s Kiss into the center of each brownie bite, pointed side up. Press gently but firmly—the kiss should sink about halfway in. The residual heat will soften the base of the kiss, fusing it to the brownie. If you wait too long and the brownies cool completely, the kiss won’t stick and will fall off when you move them.
- Cool Completely: Let the brownie bites cool in the pan for another 10 minutes, then transfer them to a wire rack to cool completely. This step is crucial—if you try to add the frosting while they’re still warm, it’ll melt into a orange puddle.
- Add the Hat Brim and Buckle: Once the brownie bites are completely cool, pipe a small dollop of orange frosting around the base of each chocolate kiss. This forms the “brim” of the witch hat. Immediately press a candy corn piece into the center of the frosting as the buckle. If you’re adding sprinkles, dust them over the frosting while it’s still wet.
- Set and Serve: Let the frosting set for about 15 minutes at room temperature, or pop them in the fridge for 5 minutes if you’re in a hurry. Then arrange them on a platter and watch them disappear.
A quick sensory note: when you press the kiss into the warm brownie, you should feel a slight resistance, then a soft give. If the brownie feels hard, you’ve waited too long. If the kiss sinks all the way in, the brownie is too hot—next time, let them cool an extra minute. You’ll get the feel for it after the first batch.
Cooking Tips & Techniques
I’ve made these Witch Hat Brownie Bites about a dozen times now, and I’ve learned a few things the hard way. Let me save you some trouble.
Don’t overbake the brownies. This is the number one mistake. Fudgy brownies are your friend here because they’re sturdy enough to hold the kiss but soft enough to bite into. Overbaked brownies turn into crumbly messes, and the kiss will just fall off. Set a timer for 12 minutes and check them. The toothpick test? Ignore it for this recipe—you want a few moist crumbs on the toothpick, not a clean one.
Timing is everything with the kisses. I learned this the hard way when I got distracted answering the door and came back to completely cooled brownies. The kisses just sat on top like sad little hats that didn’t belong. If you miss the window, you can microwave the kisses for 5 seconds to soften them slightly, then press them in. But honestly, it’s better to just set a timer and stay close.
Use a piping bag for the frosting. I tried using a butter knife for the first batch, and it looked like a toddler decorated them. A piping bag gives you that clean, professional look that makes people think you bought them from a bakery. If you don’t have a piping bag, a zip-top bag with a tiny corner snipped off works perfectly.
Make extra kisses. Someone in your house will eat a few while you’re working. It’s inevitable. Buy an extra bag so you don’t run short.
Work in batches if you’re making a double batch. Only bake one tin at a time so you can press the kisses in while they’re hot. Two tins coming out at once means half of them will cool too much before you get to them.
Variations & Adaptations
One of the best things about this recipe is how easy it is to tweak. Here are a few variations I’ve tried and loved.
Gluten-Free Version: Use a gluten-free brownie mix (King Arthur Flour makes a great one) and double-check that your chocolate kisses are certified gluten-free. The texture will be slightly more cake-like, but the flavor is still spot-on.
Vegan Witch Hats: Swap the egg for a flax egg (1 tablespoon ground flaxseed + 3 tablespoons water, let sit for 5 minutes) and use a vegan brownie mix. For the kisses, look for dairy-free chocolate brands. The frosting can be made with vegan butter and plant-based milk. I tested this for a friend’s vegan Halloween party, and honestly, no one could tell the difference.
Peanut Butter Twist: Before pressing in the chocolate kiss, add a tiny dollop of peanut butter on top of the warm brownie. The peanut butter melts slightly and creates a Reese’s-like flavor combo. My husband says this version is “dangerously good.”
White Chocolate Hats: Use white chocolate kisses instead of milk chocolate for a “ghostly” look. Pair with purple frosting and silver sprinkles for a magical, celestial vibe. These are great for a Harry Potter-themed party.
Spicy Chocolate Version: Add 1/4 teaspoon of cayenne pepper and a pinch of cinnamon to the brownie batter. The heat sneaks up on you after the sweetness, and it’s a total crowd-pleaser for adults who want something a little different.
Air Fryer Method: If you don’t want to heat up the whole oven, you can bake these in an air fryer. Set it to 325°F (160°C) and cook for 8-10 minutes. Check at 8 minutes—air fryers run hot, and you don’t want to overbake. The kisses go in the same way, right after they come out.
Serving & Storage Suggestions
These little hats are best served at room temperature, arranged on a platter with some fake spiderwebs or orange sprinkles scattered around for effect. I like to serve them on a black or orange platter to make the chocolate pop.
For a Halloween party spread, pair them with:
- A bowl of caramel popcorn for salty-sweet contrast
- Spiderweb cupcakes (chocolate with white icing webs)
- A pitcher of “witches’ brew” punch (lemonade with green food coloring and dry ice for effect)
If you’re making them ahead of time, store them in an airtight container at room temperature for up to 3 days. Don’t refrigerate them—the brownies will dry out and the kisses might get that weird white bloom on them. If you need to store them longer, freeze them without the frosting for up to a month. Add the frosting and candy corn after thawing.
One thing I love about these is that the flavors actually get better after a day. The chocolate kiss melds with the brownie base, and the frosting sets into a slightly firm, candylike texture. So if you’re hosting, you can absolutely make them the night before without sacrificing quality.
For reheating, pop them in the microwave for 8-10 seconds to warm the brownie slightly. It makes the chocolate kiss get a little melty on the inside—heavenly.
Nutritional Information & Benefits
Let’s be honest—these are a treat, not a health food. But here’s the breakdown so you can plan accordingly.
Per brownie bite (approximate):
- Calories: 180
- Fat: 9g
- Carbohydrates: 24g
- Sugar: 17g
- Protein: 2g
The dark chocolate in the kisses does offer a small dose of antioxidants, and if you use a dark chocolate kiss, you’ll get a little less sugar and more flavonoids. The brownie base provides a quick energy boost, which is perfect for powering through a night of trick-or-treating or dancing at a Halloween party.
For those with dietary restrictions, this recipe can be adapted to be gluten-free, dairy-free, or vegan as noted in the variations section. Always check labels on your brownie mix and chocolate kisses to ensure they meet your dietary needs.
My personal take? Everything in moderation. I make these once a year for Halloween, and I don’t feel a bit guilty about having two (or three). They’re a celebration, and celebrations deserve a little indulgence.
Conclusion
These Witch Hat Brownie Bites are the kind of recipe that makes you the hero of Halloween without spending all day in the kitchen. They’re quick, they’re cute, and they taste like a million bucks—but they cost about $10 to make. What’s not to love?
I’ve made these for three different Halloween gatherings now, and every single time, someone asks for the recipe. I’ve even had people text me photos of their own versions, with different frosting colors or candy toppings. That’s the beauty of this recipe—it’s a canvas for your creativity. Swap the orange frosting for purple, use candy eyes instead of candy corn, or drizzle with white chocolate for a “spiderweb” effect. Make it your own.
I’d love to see how yours turn out! Drop a comment below with your variations, or tag me in your photos on social media. Did you try the peanut butter version? The spicy one? Did your kids help with the frosting? (Mine made a huge mess, but the hats looked amazing.) Let’s make this Halloween the tastiest one yet.
Happy haunting, and happy baking!
Frequently Asked Questions
Can I use homemade brownie batter instead of a box mix?
Absolutely! Use your favorite from-scratch brownie recipe, but adjust the baking time since homemade batters can vary in density. Aim for the same fudgy texture—about 12-14 minutes in a mini muffin tin.
How do I keep the chocolate kisses from falling off?
The key is pressing them in while the brownie is still warm (after 2 minutes of cooling). The residual heat softens the base of the kiss, creating a bond. If they still fall off, dip the base of the kiss in melted chocolate before pressing it in.
Can I make these ahead of time for a party?
Yes! Make the brownie bites and add the kisses up to 2 days ahead. Store in an airtight container at room temperature. Add the frosting and candy corn the day of the party for the freshest look.
What if I don’t have a mini muffin tin?
You can use a regular muffin tin, but the proportions will be different. Bake for 18-20 minutes, then use a round cookie cutter to cut the brownies into smaller rounds. Press the kiss into the center of each round.
Can I freeze these Witch Hat Brownie Bites?
Yes, but freeze them before adding the frosting. Place the cooled brownie bites (with kisses attached) in a single layer in a freezer-safe container for up to 1 month. Thaw at room temperature, then add the frosting and decorations.
Pin This Recipe!
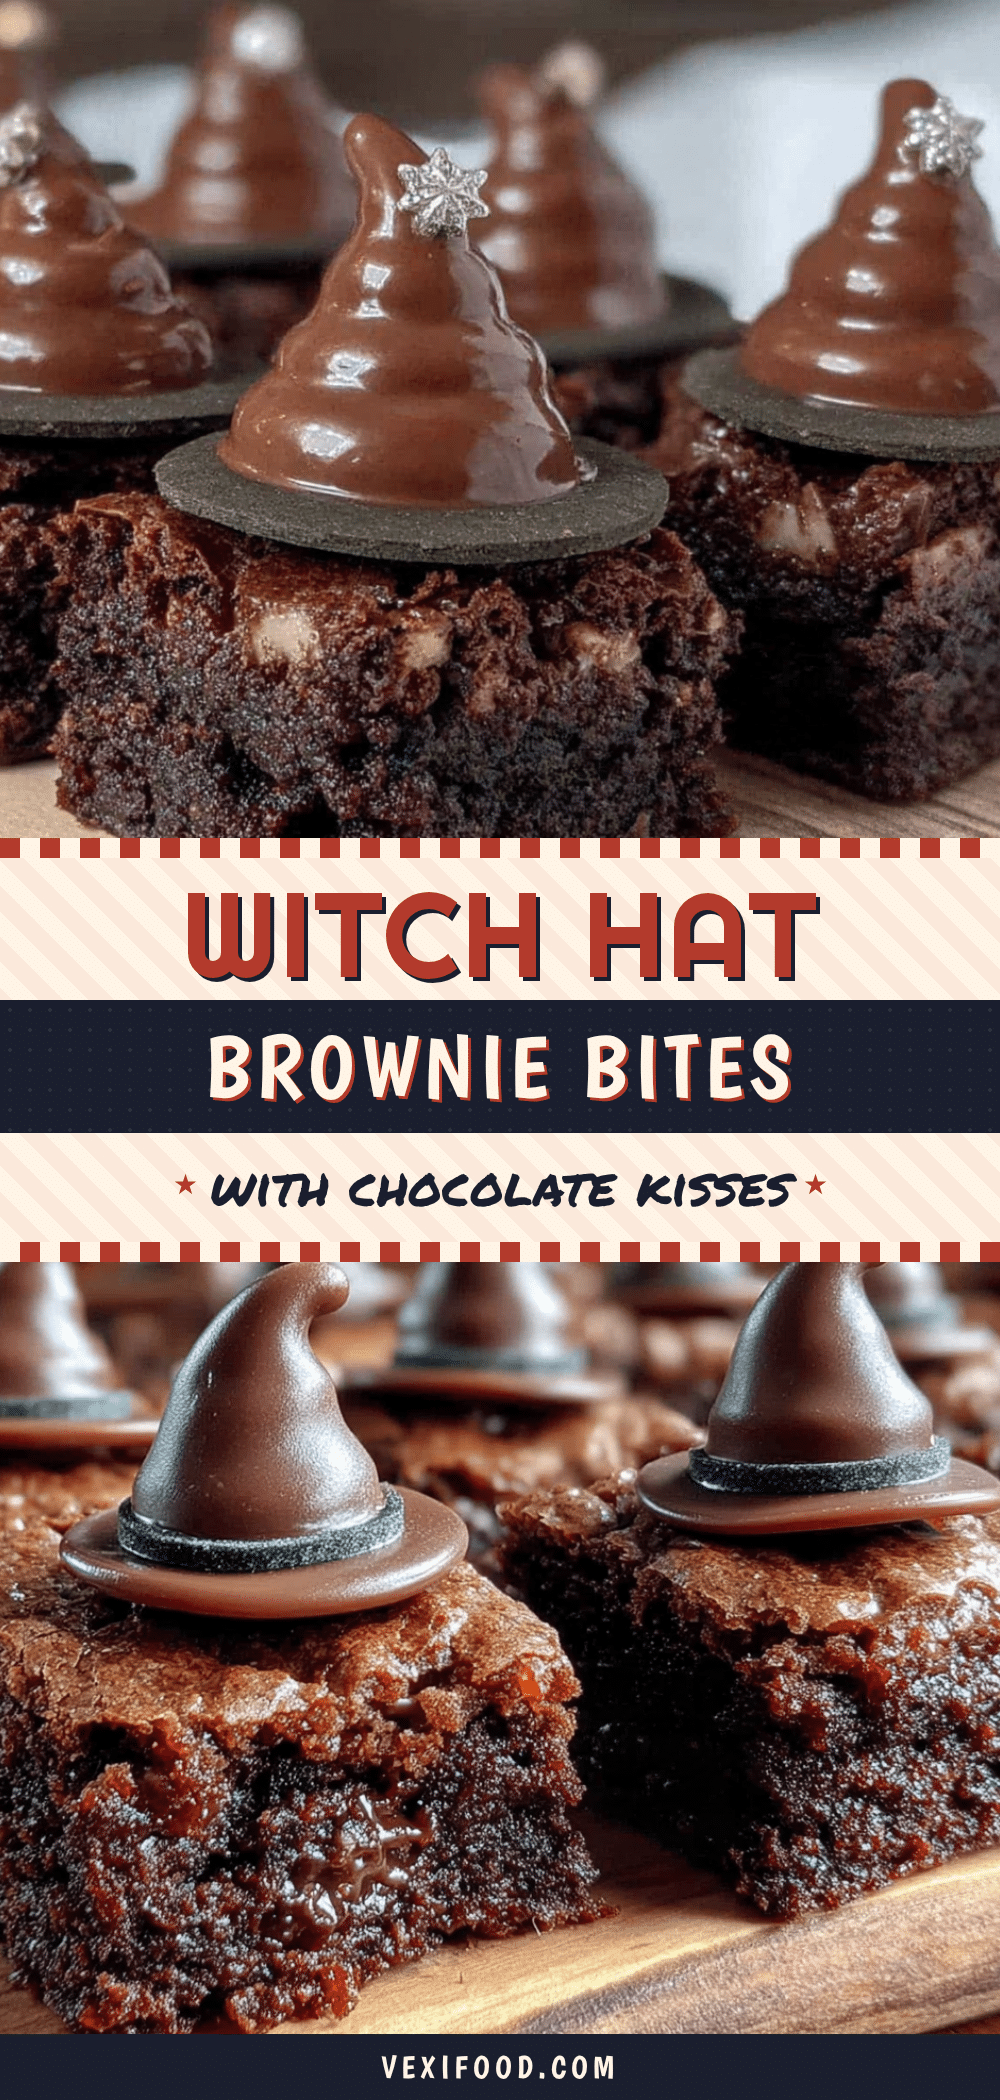
Witch Hat Brownie Bites: Easy Halloween Treat
These Witch Hat Brownie Bites are fudgy, festive, and incredibly easy to make. With a box of brownie mix and Hershey’s Kisses, you can create adorable Halloween treats that look professionally spooky.
- Prep Time: 15 minutes
- Cook Time: 12-14 minutes
- Total Time: 30 minutes
- Yield: 24 servings 1x
- Category: Dessert
- Cuisine: American
Ingredients
- 1 box (18.4 oz) brownie mix (fudge variety recommended)
- 1/3 cup vegetable oil (or melted coconut oil)
- 1/4 cup water
- 1 large egg (room temperature)
- 1/2 cup semi-sweet chocolate chips (optional)
- 24 Hershey’s Kisses (unwrapped)
- 1/4 cup orange frosting (store-bought or homemade)
- 24 small candy corn pieces
- Green or purple sprinkles (optional)
Instructions
- Preheat oven to 350°F (175°C). Spray a 24-cup mini muffin tin with non-stick spray or line with paper liners.
- In a large mixing bowl, combine brownie mix, vegetable oil, water, and egg. Stir until just combined (about 30 strokes). Fold in chocolate chips if using.
- Fill each mini muffin cup about 3/4 full using a small cookie scoop or tablespoon.
- Bake for 12-14 minutes. The edges should be set but the center slightly underdone for fudgy texture.
- Remove from oven and let cool in the pan for exactly 2 minutes.
- While still warm, press one Hershey’s Kiss into the center of each brownie bite, pointed side up, until about halfway sunk in.
- Let cool in the pan for 10 minutes, then transfer to a wire rack to cool completely.
- Once completely cool, pipe a small dollop of orange frosting around the base of each chocolate kiss to form the hat brim.
- Immediately press a candy corn piece into the center of the frosting as the buckle. Add sprinkles if desired.
- Let frosting set for 15 minutes at room temperature (or 5 minutes in the fridge) before serving.
Notes
Don’t overbake the brownies—fudgy texture is key. Press kisses in while brownies are still warm (after 2 minutes of cooling) for best adhesion. If kisses fall off, dip base in melted chocolate before pressing. Make ahead: prepare brownie bites with kisses up to 2 days ahead, add frosting and candy corn day of serving. For gluten-free, use gluten-free brownie mix and certified gluten-free kisses. For vegan, use flax egg and vegan brownie mix.
Nutrition
- Serving Size: 1 brownie bite
- Calories: 180
- Sugar: 17
- Sodium: 95
- Fat: 9
- Saturated Fat: 3
- Carbohydrates: 24
- Fiber: 1
- Protein: 2
Keywords: Halloween treats, witch hat brownies, easy Halloween dessert, brownie bites, chocolate kiss brownies, festive desserts



