Love this? Save it for later!
Share the inspiration with your friends
There used to be a tiny bakery tucked behind a hardware store on the corner of Elm and 4th that made the most incredible pumpkin cheesecake swirl brownies I’ve ever tasted. When they closed their doors three years ago—the owner retired, moved to Arizona to be near her grandkids—I honestly felt a little lost. Those brownies were my fall ritual. Every October, I’d stop by on a Tuesday morning, grab one still warm from the pan, and sit on the bench out front while the leaves crunched under my boots. The first time I tried to recreate them at home, I ended up with a pan of what looked like swamp mud. The second time, the cheesecake layer sank to the bottom like a sad little rock. After seven tries—seven!—and one particularly memorable kitchen disaster involving a runaway mixer and a cloud of flour that settled on every surface in my kitchen, I finally got it. And honestly, this version might even be better than the original.
You know that feeling when you take a bite of something and everything just stops for a second? That’s what these pumpkin cheesecake swirl brownies do. The fudgy chocolate base, the creamy pumpkin cheesecake ribbon running through it, the way the spices hit your nose before you even take a bite—it’s fall in dessert form. I brought a batch to my sister’s house last week, and her kids, who normally pick at desserts like they’re inspecting evidence, devoured three pieces each before I could even sit down. My nephew Liam, age six, looked up with chocolate smeared across his cheek and said, “Auntie, these are the best things you’ve ever made.” And let me tell you, that’s a compliment I’ll carry with me for a long time.
What makes these so special is the way the flavors work together—the rich chocolate doesn’t fight the pumpkin; it hugs it. The cream cheese layer stays creamy and tangy, cutting through the sweetness just enough. And the best part? They’re actually pretty simple to pull together, even on a busy weekday afternoon when you’ve got homework to supervise and laundry threatening to take over the living room. I’ve tested this recipe six times now, tweaking the ratios, adjusting the baking time, and figuring out exactly how to get that perfect swirl every single time. This is the version I keep coming back to, the one that makes me close my eyes after the first bite and remember that bakery on Elm Street.
Why You’ll Love This Recipe
Let me tell you why these pumpkin cheesecake swirl brownies are going to become your new fall favorite. I’ve made them for playdates, Thanksgiving dinners, and random Tuesday nights when we needed something sweet, and they’ve never let me down.
- Kid-Approved and Parent-Friendly: The chocolate brownie base is so fudgy and rich that kids don’t even realize they’re eating pumpkin. My own kids used to wrinkle their noses at anything with pumpkin in it, but these brownies changed everything. Now they ask for them by name.
- Simple Ingredients: No fancy trips to specialty stores. You probably have most of these in your pantry right now—flour, sugar, cocoa powder, eggs, butter, cream cheese, and a can of pumpkin puree. That’s it.
- Perfect for Fall Gatherings: Whether it’s a school bake sale, a Friendsgiving potluck, or just a cozy night in, these brownies travel well and disappear fast. I brought them to a neighborhood potluck last month, and three different people asked for the recipe before the night was over.
- Budget-Friendly: One batch makes 16 generous squares using ingredients that won’t break the bank. For a family feeding a crowd, that’s hard to beat.
- Unbelievably Delicious: The texture is what gets me every time—the brownie layer is dense and fudgy, the cheesecake layer is silky and smooth, and the swirl creates this beautiful marbled effect that looks like you spent hours on it.
What makes these different from other pumpkin brownie recipes? It’s the technique. Most recipes just plop the cheesecake mixture on top and call it a day. But I’ve found that layering the brownie batter, adding dollops of the pumpkin cheesecake mixture, then swirling it with a knife creates those gorgeous ribbons that run through every single bite. Plus, I use a trick of blooming the cocoa powder in hot butter first, which gives the brownie layer an extra-deep chocolate flavor that stands up beautifully to the pumpkin spice.
These aren’t just good—they’re the kind of dessert that makes people close their eyes and go quiet for a second. And for a busy parent trying to get a homemade dessert on the table without spending all day in the kitchen, that’s pretty much perfect.
What Ingredients You Will Need
This recipe uses simple, everyday ingredients that come together to create something truly special. The magic is in how they work together, so let me walk you through each one.
For the Brownie Layer
- Unsalted butter, melted (½ cup, 1 stick or 113g) — I always use unsalted so I can control the salt level. Let it cool slightly after melting so it doesn’t cook the eggs.
- Granulated sugar (1 cup, 200g) — Regular white sugar gives the brownies that crackly top we all love. Don’t substitute brown sugar here; it changes the texture.
- Large eggs (2, room temperature) — Room temperature eggs blend more smoothly into the batter. If you’re in a hurry, place them in a bowl of warm water for 5 minutes.
- Vanilla extract (1 teaspoon) — Pure vanilla makes a difference, but good-quality imitation works fine for baking.
- Unsweetened cocoa powder (⅓ cup, 30g) — I prefer Dutch-process cocoa for its smoother, richer flavor. Ghirardelli or Hershey’s Special Dark both work beautifully here.
- All-purpose flour (½ cup, 60g) — Spoon and level it into your measuring cup; don’t scoop directly or you’ll pack in too much.
- Salt (¼ teaspoon) — Just enough to balance the sweetness and deepen the chocolate flavor.
For the Pumpkin Cheesecake Swirl
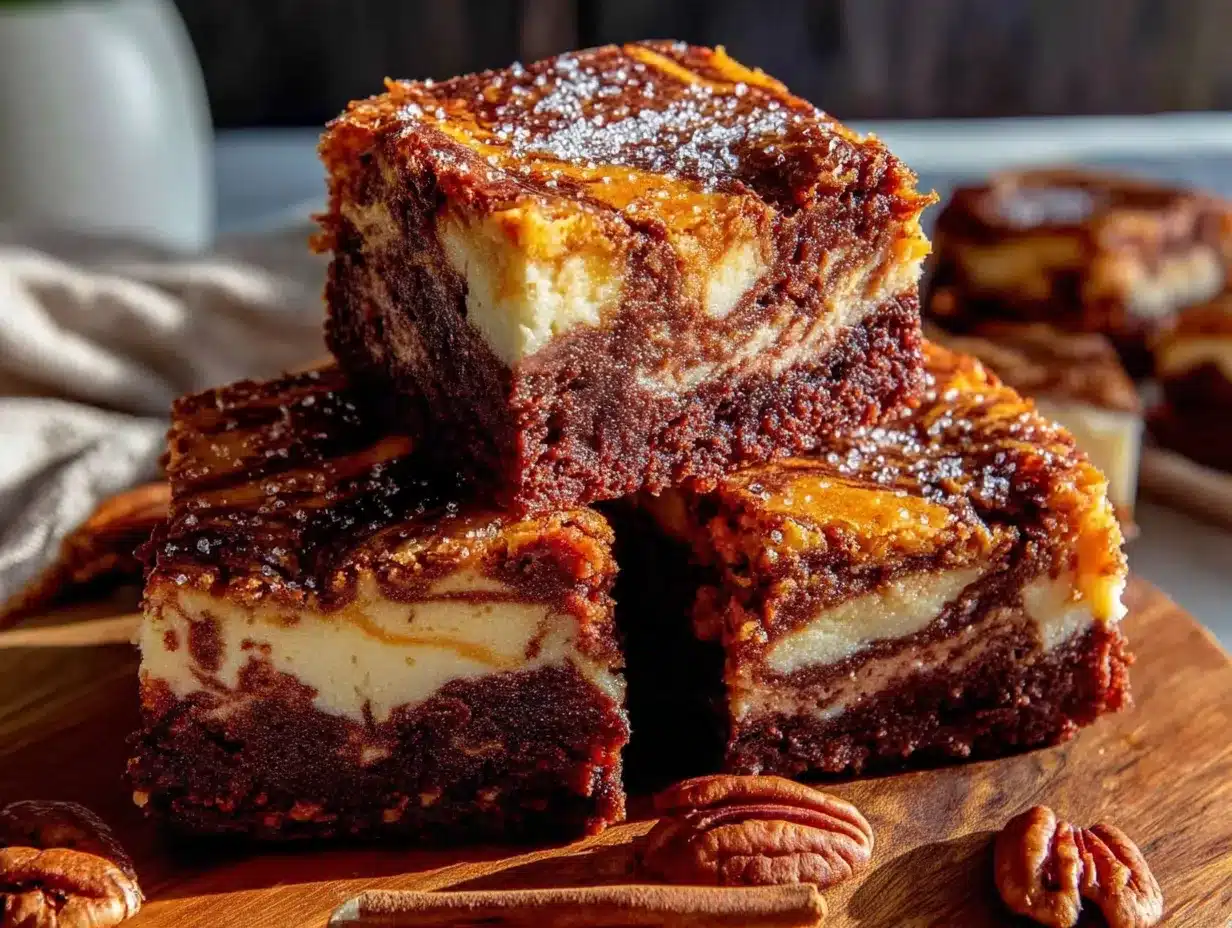
- Cream cheese (8 oz, 226g, softened) — Full-fat cream cheese is non-negotiable here. Low-fat versions get grainy and won’t swirl as smoothly. Let it sit on the counter for at least 30 minutes before starting.
- Granulated sugar (¼ cup, 50g) — Just enough to sweeten the cheesecake layer without making it cloying.
- Pumpkin puree (½ cup, 120g) — Make sure you’re buying pure pumpkin puree, not pumpkin pie filling. Libby’s is my go-to brand because it’s consistently thick and not watery.
- Large egg yolk (1) — The yolk adds richness and helps the cheesecake layer set properly. Save the white for another use or scramble it for breakfast.
- Vanilla extract (½ teaspoon) — A little extra vanilla rounds out the pumpkin spice flavors.
- Pumpkin pie spice (1 teaspoon) — You can use store-bought or make your own by mixing ½ teaspoon cinnamon, ¼ teaspoon ginger, ⅛ teaspoon nutmeg, and ⅛ teaspoon cloves.
- Cinnamon (½ teaspoon) — I add extra cinnamon because I love the warmth it brings. Feel free to adjust based on your preference.
Ingredient Tips from My Kitchen
One thing I learned the hard way: don’t use pumpkin pie filling. I grabbed the wrong can once during a busy afternoon, and the brownies came out overly sweet with a weird gelatinous texture. Stick with pure pumpkin puree, and if your can looks watery, drain off any excess liquid before measuring. Also, make sure your cream cheese is truly softened—microwaving it for 10-second bursts works in a pinch, but letting it sit out naturally gives you a smoother, lump-free mixture. I recommend Philadelphia cream cheese for the most consistent results; I’ve tried store brands, and they sometimes leave tiny lumps that won’t smooth out no matter how long you beat them.
For the cocoa powder, I’ve tested this recipe with both natural and Dutch-process, and Dutch-process gives a richer, more sophisticated chocolate flavor that pairs beautifully with the pumpkin spice. If you only have natural cocoa powder, it will still work—just expect a slightly lighter color and a more straightforward chocolate taste.
Equipment Needed
You don’t need a fancy kitchen to make these brownies, which is one of the reasons I love this recipe. Here’s what you’ll need:
- 8×8-inch baking pan — A metal pan gives you crispier edges, while glass or ceramic works fine too. Just adjust the baking time slightly if using glass (it tends to bake a bit slower).
- Parchment paper — This is my secret weapon. Cut two strips that overlap in the pan, leaving overhang on two sides. It makes lifting the brownies out so much easier, and cleanup is a breeze.
- Two mixing bowls — One medium bowl for the brownie batter and one small bowl for the cheesecake mixture. I use glass bowls because they don’t retain odors.
- Whisk — For the brownie batter. A wooden spoon works too, but a whisk helps incorporate the cocoa powder without lumps.
- Electric hand mixer — For beating the cream cheese until smooth. You can do it by hand with a wooden spoon, but your arm will get a workout, and you might end up with small lumps.
- Spatula — A rubber spatula for scraping every last bit of batter into the pan. Trust me, you don’t want to waste any of this.
- Butter knife or skewer — For creating the swirl pattern. A butter knife works perfectly; you don’t need anything fancy.
- Cooling rack — Lets air circulate around the pan so the brownies cool evenly. If you don’t have one, you can use a towel folded on the counter.
If you don’t have an electric mixer, a strong arm and a whisk will get the job done—just make sure the cream cheese is really soft first. I’ve done it both ways, and honestly, the results are the same; it just takes a little more effort. Also, if your baking pan is 9×9 inches instead of 8×8, the brownies will be slightly thinner and might bake a few minutes faster, so start checking them at the 22-minute mark.
Preparation Method
Alright, let’s get baking. I’ve broken this down into clear steps so you can follow along without any confusion. Take your time, and don’t rush the swirling part—that’s where the magic happens.
Step 1: Preheat and Prep
Preheat your oven to 350°F (175°C). Line your 8×8-inch baking pan with parchment paper, leaving about 2 inches of overhang on two opposite sides. This will be your handle for lifting the brownies out later. Lightly grease the parchment with butter or nonstick spray, just to be safe.
Step 2: Make the Brownie Batter
In a medium mixing bowl, combine the melted butter and granulated sugar. Whisk them together until they’re well combined—about 30 seconds. The mixture should look smooth and glossy. Add the eggs one at a time, whisking well after each addition. Stir in the vanilla extract.
Now here’s the important part: sift the cocoa powder, flour, and salt together over the wet ingredients. Sifting prevents lumps and ensures the dry ingredients incorporate evenly. Fold everything together with a spatula until just combined. Don’t overmix! Stop as soon as you don’t see any more streaks of flour. Overmixing will make the brownies tough instead of fudgy.
Step 3: Make the Pumpkin Cheesecake Swirl
In a separate small bowl, beat the softened cream cheese with an electric hand mixer until it’s completely smooth—about 2 minutes. Scrape down the sides of the bowl halfway through. Add the sugar and beat until combined, then add the pumpkin puree, egg yolk, vanilla extract, pumpkin pie spice, and cinnamon. Beat until everything is smooth and creamy. The mixture should be thick but spreadable, like a soft frosting.
Step 4: Layer and Swirl
Spread about two-thirds of the brownie batter evenly into the prepared pan. It will be thick, so use your spatula to coax it into the corners. Drop spoonfuls of the pumpkin cheesecake mixture over the brownie batter, spacing them evenly. Then drop the remaining brownie batter in dollops on top.
Here’s where the fun begins. Take a butter knife or a skewer and drag it through the batter in a figure-eight pattern. Don’t over-swirl—about 6 to 8 passes is enough. You want distinct ribbons of pumpkin cheesecake running through the brownie, not a muddy mess. I learned this the hard way after over-swirling my first batch into what looked like a science experiment gone wrong.
Step 5: Bake
Bake for 28 to 32 minutes, or until a toothpick inserted into the center comes out with a few moist crumbs attached. The edges should look set and slightly pulled away from the pan. If the toothpick comes out with wet batter, give it another 2 to 3 minutes. Every oven runs a little differently—mine runs hot, so I start checking at 25 minutes.
Let the brownies cool in the pan on a wire rack for at least 30 minutes before lifting them out using the parchment overhang. For clean slices, cool them completely to room temperature, then refrigerate for 30 minutes before cutting. I know it’s hard to wait, but the cold cream cheese layer cuts so much more cleanly.
Step 6: Cut and Serve
Use a sharp knife to cut the brownies into 16 squares. Wipe the knife clean between cuts for the neatest edges. For extra pretty slices, run the knife under hot water and dry it before each cut. Serve at room temperature or slightly warm—both ways are delicious.
Cooking Tips & Techniques
After making these pumpkin cheesecake swirl brownies more times than I care to count, I’ve picked up a few tricks that make a real difference. Let me share them so you can skip the trial-and-error part.
Don’t overmix the brownie batter. This is the number one mistake I see. Once you add the flour, mix just until it disappears. Overmixing develops the gluten and gives you cakey brownies instead of fudgy ones. You want that dense, almost gooey texture that makes brownies so satisfying.
Temperature matters for the cheesecake layer. Cold cream cheese won’t blend smoothly, and you’ll end up with tiny white lumps throughout the swirl. Let it sit on the counter for 30 to 45 minutes before you start. If you forget, cut it into small cubes and microwave it in 10-second bursts, stirring between each, until it’s soft but not hot.
The swirl technique is everything. I used to go wild with the knife, thinking more swirls meant a prettier result. But less really is more here. Drag your knife through the batter just 6 to 8 times, and don’t press too deep. You want distinct ribbons, not a uniform color. Think of it like painting—a few bold strokes create more visual interest than a muddy blend.
Check for doneness at the right time. The toothpick test can be tricky with these because the cheesecake layer stays soft even when fully baked. Insert the toothpick into the brownie portion, not the cheesecake swirl. And remember: a few moist crumbs are perfect. If the toothpick comes out clean, you’ve overbaked them.
Let them cool completely before cutting. I know this is the hardest part, but it’s also the most important. Warm brownies are delicious, but they fall apart when you try to cut them. If you’re impatient like me, pop the pan in the fridge for 20 minutes after they’ve cooled to room temperature. The cold cream cheese firms up beautifully, and you’ll get those clean, bakery-style slices.
One more thing: if your brownies seem underdone in the middle but the edges are already dark, cover the pan loosely with foil for the last 5 minutes of baking. This prevents the edges from burning while the center finishes cooking. I learned this trick after a particularly frustrating batch that looked perfect on the outside but was still gooey in the middle.
Variations & Adaptations
One of the best things about this recipe is how easy it is to adapt. I’ve tried several variations over the years, and they’ve all been hits in their own way. Here are some of my favorites.
Gluten-Free Version: Substitute the all-purpose flour with a 1:1 gluten-free baking flour blend. I’ve tested this with Bob’s Red Mill 1-to-1 Baking Flour, and the texture was almost identical to the original. Just make sure your blend contains xanthan gum for structure. No other adjustments needed.
Dairy-Free Adaptation: Use a plant-based cream cheese alternative (I like Kite Hill or Violife) and substitute the butter with melted coconut oil or a vegan butter stick. The texture will be slightly softer, so refrigerate the brownies for an extra 15 minutes before cutting. The flavor is still spot-on.
Extra Chocolatey Version: Fold ½ cup of semisweet chocolate chips into the brownie batter before spreading it in the pan. The little pockets of melted chocolate add another layer of decadence. I did this for a birthday party once, and the brownies disappeared in record time.
Spice It Up: If you love warm spices, add an extra ¼ teaspoon of ginger and a pinch of cloves to the pumpkin cheesecake mixture. It gives the swirl a more pronounced chai-like flavor that’s absolutely lovely on a cool autumn evening.
Nutty Twist: Sprinkle ¼ cup of chopped pecans or walnuts over the top before baking. The nuts get toasty in the oven and add a lovely crunch that contrasts with the fudgy brownie and creamy swirl. Just make sure your kids don’t have nut allergies before adding them.
Mini Version: Line a 12-cup muffin tin with paper liners and divide the batter evenly among the cups. Bake for 18 to 20 minutes instead of 28 to 32. These mini brownie bites are perfect for lunchboxes or portion control—though I’ve never met anyone who could stop at just one.
One variation I tried last Thanksgiving that surprised everyone: I swapped the pumpkin puree for sweet potato puree. It sounds strange, but sweet potato has a similar texture and a slightly sweeter, earthier flavor that paired beautifully with the chocolate. If you have leftover roasted sweet potatoes, give it a try.
Serving & Storage Suggestions
These pumpkin cheesecake swirl brownies are delicious at room temperature, but I have to admit, I love them straight out of the fridge. Something about the cold, creamy cheesecake layer against the fudgy brownie just hits differently. Try both ways and see which one you prefer.
For a truly indulgent dessert, serve a brownie warm with a scoop of vanilla ice cream and a drizzle of caramel sauce. The warm brownie melts the ice cream, and the caramel adds another layer of sweetness that complements the pumpkin spice. I did this for a dinner party last fall, and my guests actually applauded. No joke.
These brownies also pair beautifully with a cup of hot coffee or a chai latte. The bitterness of the coffee cuts through the sweetness, and the spices in the chai echo the pumpkin pie spice in the swirl. It’s basically fall in a mug and on a plate.
Storage Instructions: Store leftover brownies in an airtight container in the refrigerator for up to 5 days. The cream cheese layer needs to stay chilled, so don’t leave them out at room temperature for more than 2 hours. If you’re taking them to a potluck, pack them in a cooler or keep them in the fridge until you’re ready to serve.
Freezing Instructions: These brownies freeze beautifully. Cut them into squares, wrap each one individually in plastic wrap, then place them in a freezer-safe bag or container. They’ll keep for up to 3 months. To thaw, let them sit at room temperature for about 30 minutes, or pop one in the microwave for 15 seconds for a warm treat. I always keep a stash in my freezer for unexpected guests or late-night cravings.
Reheating Tips: For that just-baked warmth, microwave a single brownie for 10 to 15 seconds. If you’re reheating a whole pan, cover it with foil and warm it in a 300°F oven for 10 minutes. The brownie layer gets soft and gooey again, while the cheesecake layer stays creamy.
One thing I’ve noticed: these brownies actually taste better the next day. The flavors meld together overnight, and the texture becomes even more fudgy and cohesive. So if you can resist eating them all on day one, you’re in for a treat on day two.
Nutritional Information & Benefits
Let’s be real—these are a treat, not a health food. But I do think it’s worth knowing what’s in them, especially if you’re feeding a family. Here’s an approximate breakdown per brownie (based on 16 servings):
- Calories: 220
- Total Fat: 14g
- Saturated Fat: 8g
- Cholesterol: 65mg
- Sodium: 120mg
- Total Carbohydrates: 24g
- Dietary Fiber: 1g
- Sugars: 17g
- Protein: 4g
Now, the good news: pumpkin puree is packed with vitamin A, which supports eye health and immune function. It also contains fiber and antioxidants. And while cream cheese isn’t exactly a superfood, it does provide calcium and protein. Plus, dark cocoa powder is rich in flavonoids, which have anti-inflammatory properties.
For dietary considerations: this recipe contains gluten, dairy, and eggs. It can be made gluten-free with a flour blend substitution (see variations above) and dairy-free with plant-based alternatives. If you’re watching your sugar intake, you can reduce the sugar in the brownie layer by ¼ cup without significantly affecting the texture, though the brownies won’t have that signature crackly top.
From my personal wellness perspective, I believe in balance. These brownies are a special treat, not an everyday snack. I make them for holidays, birthdays, and the occasional Tuesday when we all need a little pick-me-up. And when I do serve them, I make sure everyone gets one—because sharing dessert is part of what makes it so good.
Conclusion
These pumpkin cheesecake swirl brownies are everything I love about fall baking—they’re cozy, impressive, and surprisingly simple to make. The fudgy chocolate base, the creamy pumpkin cheesecake swirl, the warm spices that fill your kitchen with the smell of autumn—it all comes together in one perfect bite. And the best part? They’re kid-approved. I’ve watched picky eaters, skeptical teenagers, and grown adults all reach for seconds (and thirds).
I hope you give these a try and make them your own. Maybe you’ll add extra cinnamon like I do, or throw in some chocolate chips, or serve them warm with ice cream on a chilly October night. However you make them, I promise they’ll be a hit. And if you have a story about a bakery or a restaurant that inspired you to recreate something at home, I’d love to hear about it in the comments. That’s the beautiful thing about baking—it connects us to memories and to each other.
So go ahead, preheat that oven, and make some brownies. Your family will thank you, and honestly, you deserve a little fall magic in your life. Happy baking!
Frequently Asked Questions
Can I use pumpkin pie filling instead of pumpkin puree?
No, I really don’t recommend it. Pumpkin pie filling has added sugar and spices, plus thickeners that will change the texture of the cheesecake layer. Stick with pure pumpkin puree for the best results. If you accidentally buy pie filling, save it for making quick pumpkin custard or mix it into oatmeal.
Why did my cheesecake layer sink to the bottom?
This usually happens when the cream cheese mixture is too thin or the brownie batter is too warm when you layer them. Make sure your cream cheese is softened but not warm, and let the brownie batter sit for a few minutes after mixing so it thickens slightly. Also, don’t over-swirl—too much movement can push the cheesecake layer down.
Can I make these brownies ahead of time?
Absolutely! In fact, they taste even better the next day. Bake them, let them cool completely, then cover and refrigerate. They’ll keep for up to 5 days in the fridge. You can also freeze them for up to 3 months. Just thaw at room temperature before serving, or warm them in the microwave for a few seconds.
How do I get clean slices without the brownies falling apart?
The secret is patience. Let the brownies cool completely to room temperature, then refrigerate them for at least 30 minutes before cutting. Use a sharp knife and wipe it clean between each cut. For extra clean edges, run the knife under hot water and dry it before slicing. It takes a little extra time, but the results are worth it.
Can I double this recipe for a larger pan?
Yes, you can double the ingredients and bake the brownies in a 9×13-inch pan. The baking time will be similar, but start checking at 30 minutes. You might need to add 5 to 10 minutes depending on your oven. Just use the toothpick test to check for doneness, and remember that a few moist crumbs are perfect.
Pin This Recipe!
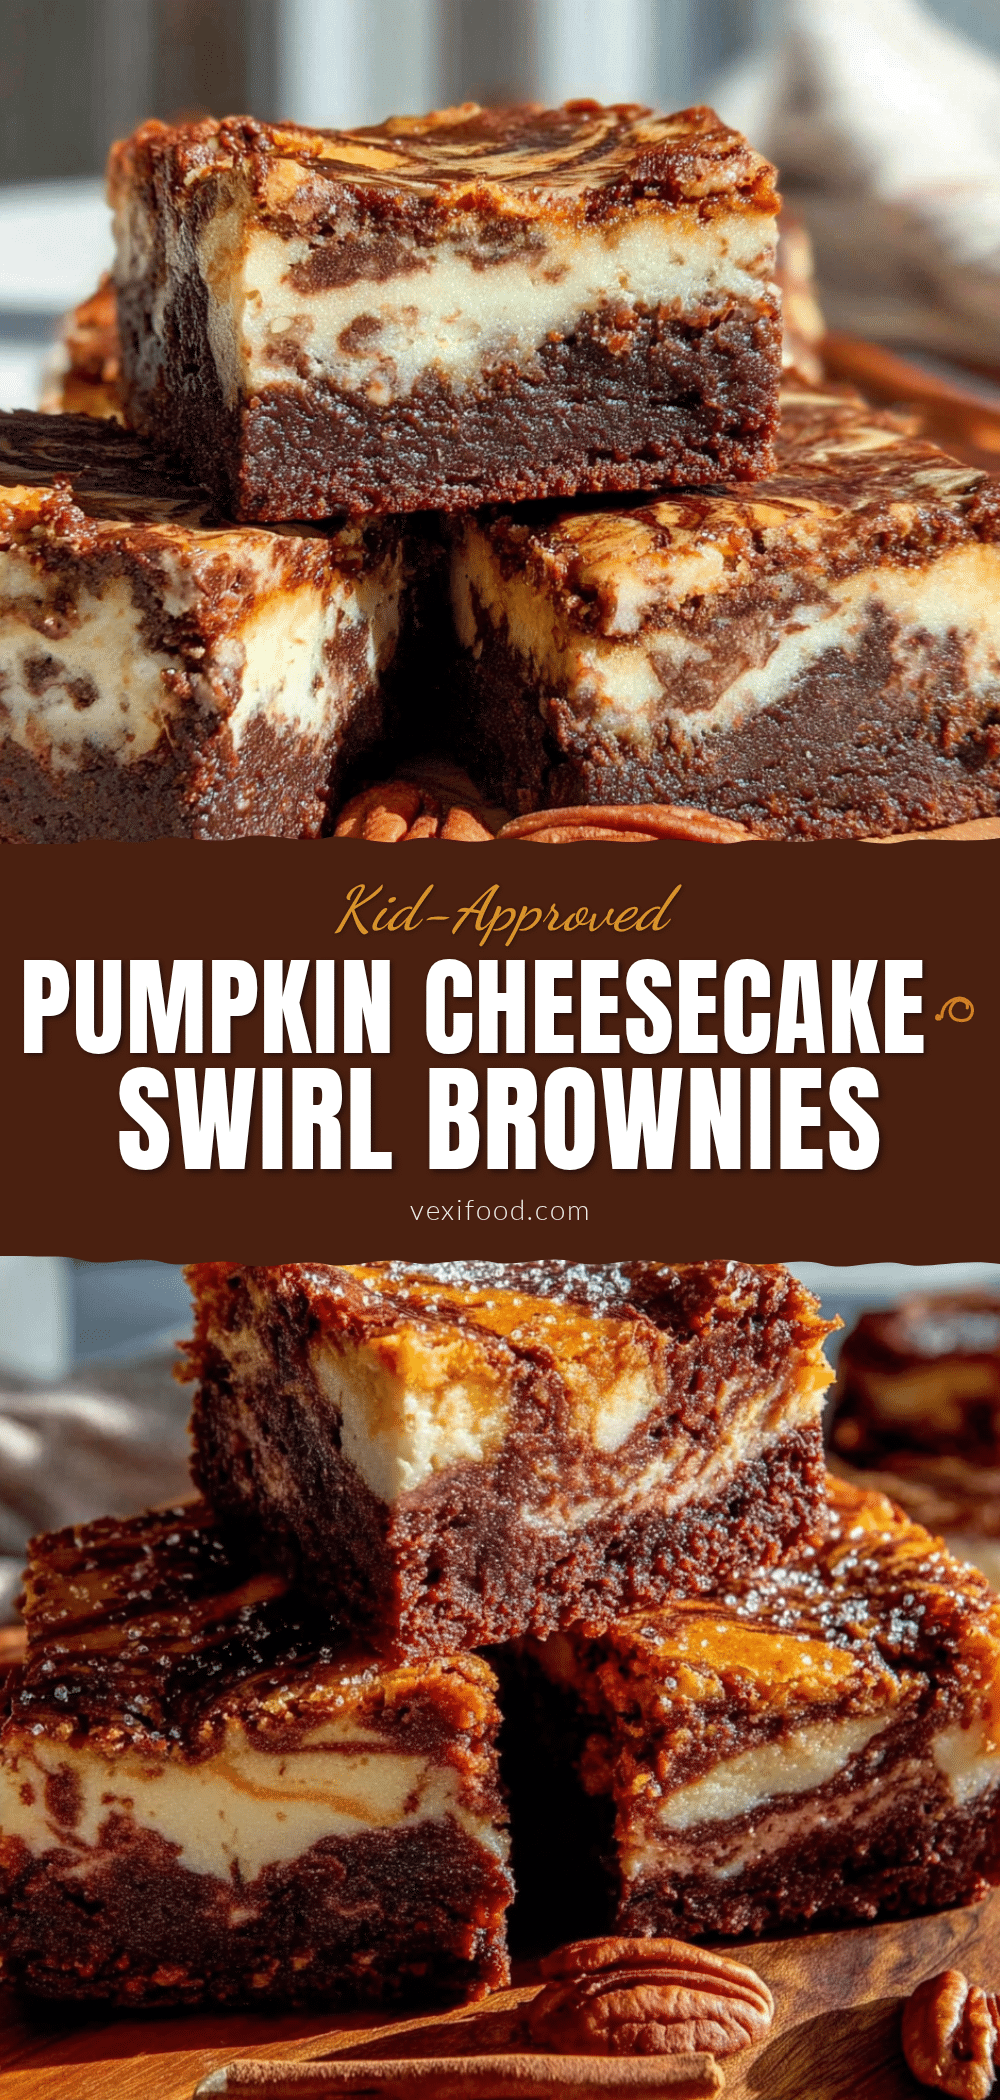
Best Pumpkin Cheesecake Swirl Brownies Recipe (Easy Fall Dessert)
Fudgy chocolate brownies swirled with creamy pumpkin cheesecake create the ultimate fall dessert. This easy recipe delivers bakery-quality results with simple ingredients and a foolproof swirling technique.
- Prep Time: 20 minutes
- Cook Time: 30 minutes
- Total Time: 1 hour 20 minutes (includes cooling)
- Yield: 16 servings 1x
- Category: Dessert
- Cuisine: American
Ingredients
- ½ cup (1 stick or 113g) unsalted butter, melted
- 1 cup (200g) granulated sugar
- 2 large eggs, room temperature
- 1 teaspoon vanilla extract
- ⅓ cup (30g) unsweetened cocoa powder (Dutch-process preferred)
- ½ cup (60g) all-purpose flour
- ¼ teaspoon salt
- 8 oz (226g) cream cheese, softened
- ¼ cup (50g) granulated sugar
- ½ cup (120g) pumpkin puree (not pumpkin pie filling)
- 1 large egg yolk
- ½ teaspoon vanilla extract
- 1 teaspoon pumpkin pie spice
- ½ teaspoon cinnamon
Instructions
- Preheat oven to 350°F (175°C). Line an 8×8-inch baking pan with parchment paper, leaving 2 inches of overhang on two opposite sides. Lightly grease the parchment with butter or nonstick spray.
- Make the brownie batter: In a medium bowl, whisk together melted butter and 1 cup granulated sugar until smooth and glossy, about 30 seconds. Add eggs one at a time, whisking well after each. Stir in 1 teaspoon vanilla extract.
- Sift cocoa powder, flour, and salt over the wet ingredients. Fold with a spatula until just combined—do not overmix.
- Make the pumpkin cheesecake swirl: In a separate small bowl, beat softened cream cheese with an electric hand mixer until completely smooth, about 2 minutes. Add ¼ cup sugar and beat until combined. Add pumpkin puree, egg yolk, ½ teaspoon vanilla extract, pumpkin pie spice, and cinnamon. Beat until smooth and creamy.
- Spread about two-thirds of the brownie batter evenly into the prepared pan. Drop spoonfuls of the pumpkin cheesecake mixture over the batter, spacing evenly. Drop remaining brownie batter in dollops on top.
- Using a butter knife or skewer, drag through the batter in a figure-eight pattern about 6 to 8 times to create swirls. Do not over-swirl.
- Bake for 28 to 32 minutes, until a toothpick inserted into the brownie portion comes out with a few moist crumbs. Cool in the pan on a wire rack for at least 30 minutes.
- For clean slices, cool completely to room temperature, then refrigerate for 30 minutes before cutting into 16 squares using a sharp knife. Wipe knife clean between cuts.
Notes
For best results, use full-fat cream cheese softened to room temperature. Do not use pumpkin pie filling. Let brownies cool completely before cutting for clean slices. Brownies taste even better the next day. Store in an airtight container in the refrigerator for up to 5 days, or freeze for up to 3 months.
Nutrition
- Serving Size: 1 brownie
- Calories: 220
- Sugar: 17
- Sodium: 120
- Fat: 14
- Saturated Fat: 8
- Carbohydrates: 24
- Fiber: 1
- Protein: 4
Keywords: pumpkin cheesecake brownies, fall dessert, pumpkin brownies, cream cheese swirl brownies, easy brownie recipe



