Love this? Save it for later!
Share the inspiration with your friends
My neighbor Maria wasn’t trying to impress anyone that Tuesday afternoon. I’d stopped by to borrow a garden rake — spring had finally decided to show up, and my yard was a mess — and the smell hit me before I even got to her back door. Something fruity and creamy, with a hint of vanilla, drifting through the screen. She was standing at her counter, spoon in one hand, phone wedged between her ear and shoulder, layering something into little glasses like it was the most casual thing in the world.
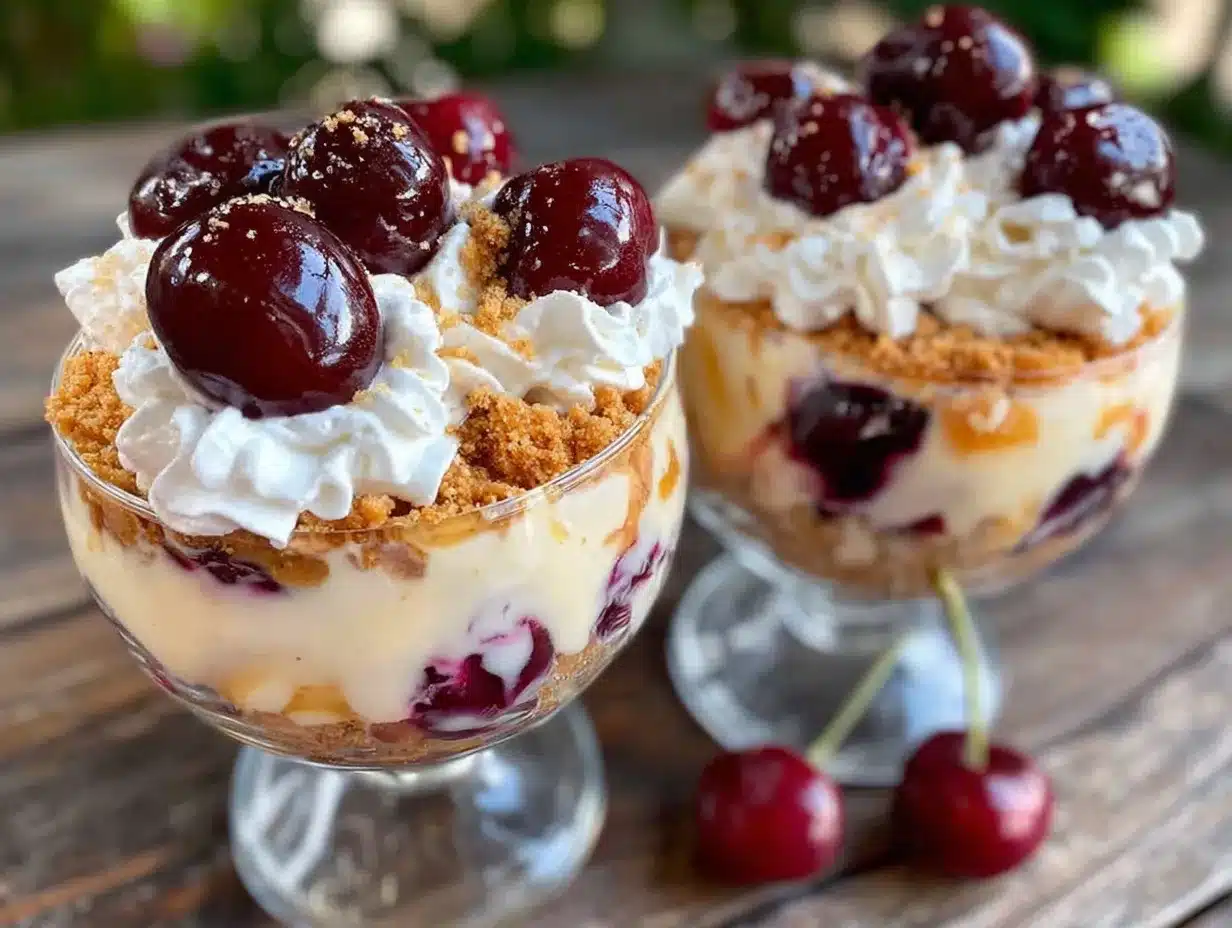
“Oh, these?” she said when I asked, barely looking up. “Just some cherry thing. My mom used to make it.” She shrugged like it was nothing. But I’d already spotted the deep red cherry layer, the creamy pale middle, the crumbly buttery top — and honestly, I was already planning to ask for the recipe before she even offered. She finally hung up, handed me a spoon, and said “Taste it. Tell me if it needs more sugar.” Let me tell you, I almost forgot about the rake entirely.
That’s the thing about the best recipes, isn’t it? They never come from someone trying to show off. They come from someone’s mom, or someone’s grandmother, or someone who’s been making the same thing for thirty years and doesn’t even think about it anymore. These no-bake cherry cream cheese dessert cups are exactly that kind of recipe — unassuming, effortless, and absolutely perfect for spring. The kind of dessert you can throw together in twenty minutes, no oven required, and people will swear you spent hours on it. I’ve made them for Easter brunch, for baby showers, for random Tuesday nights when I wanted something pretty without the fuss. And every single time, someone asks for the recipe.
Why You’ll Love These No-Bake Cherry Cream Cheese Dessert Cups
Let me tell you why these little cups have become my go-to spring dessert — and trust me, I’ve tested a lot of them over the years. As someone who’s developed recipes for everything from elaborate layer cakes to five-minute microwave mug cakes, I can say with confidence: these no-bake cherry cream cheese dessert cups hit that sweet spot between impressive and ridiculously easy.
- No Oven Required — Spring weather is unpredictable, and the last thing you want is to heat up your kitchen. These come together on the countertop, no baking involved.
- Simple Ingredients — Cream cheese, cherry pie filling, graham crackers, butter, sugar. That’s it. You probably have most of this in your kitchen right now.
- Perfect for Spring Gatherings — Easter brunch, Mother’s Day luncheon, bridal shower, or just a sunny afternoon with friends — these cups look fancy without the stress.
- Crowd-Pleaser — I’ve served these to kids, grandparents, picky eaters, and dessert snobs. Empty cups every single time.
- Make-Ahead Friendly — They actually get better after a few hours in the fridge. One less thing to worry about when you’re hosting.
What makes these different from every other no-bake dessert out there? It’s the texture, honestly. The creamy, tangy cheesecake layer against the sweet cherry topping, with that buttery graham cracker crunch on the bottom — it’s a perfect bite every time. I’ve tried versions with pudding mix, with whipped topping straight from the tub, with all sorts of shortcuts. But this version? This is the one that makes people close their eyes after the first bite. It’s comfort food reimagined for spring — lighter, brighter, but with the same soul-soothing satisfaction. Perfect for impressing guests without breaking a sweat.
What Ingredients You Will Need
This recipe uses simple, wholesome ingredients to deliver that creamy, fruity, satisfying texture without the fuss. Most of these are pantry staples or easy to find at any grocery store — especially now that cherry season is starting to peek through.
For the Crust Layer
- Graham crackers — 1 ½ cups crushed (about 12 full sheets). I prefer Honey Maid for consistent texture, but any brand works. You can also use digestive biscuits or vanilla wafers in a pinch.
- Unsalted butter — 6 tablespoons, melted. Salted butter works too, just skip the added salt. Let it cool slightly so it doesn’t make the crumbs soggy.
- Granulated sugar — 2 tablespoons. Adds a touch of sweetness to balance the buttery crumbs.
- Pinch of salt — Just a tiny one. It makes the crust taste more like, well, crust.
For the Cream Cheese Layer
- Full-fat cream cheese — 8 ounces, softened to room temperature. This is non-negotiable for that silky texture. I’ve tried low-fat versions and they just don’t set up the same way.
- Powdered sugar — ½ cup, sifted if you’re feeling fancy (or just whisk it well to avoid lumps).
- Heavy whipping cream — 1 cup, cold. You’ll whip this yourself — trust me, it’s worth the extra two minutes. The texture is so much better than store-bought whipped topping.
- Vanilla extract — 1 teaspoon. Pure vanilla if you have it, but good quality imitation works fine too.
- Lemon zest — From ½ a lemon. This is my secret ingredient — it brightens the whole thing and cuts through the richness.
For the Cherry Topping
- Cherry pie filling — 1 can (21 ounces). I like Duncan Hines or Lucky Leaf for consistent flavor. If you’re feeling ambitious, homemade cherry compote works beautifully too.
- Fresh cherries — A handful for garnish, if they’re in season. Totally optional but pretty.
Substitution Notes: For a gluten-free version, use gluten-free graham crackers or crushed gluten-free shortbread cookies. For a lower-sugar option, use sugar-free cherry pie filling and reduce the powdered sugar to ¼ cup. If you’re dairy-free, there are good plant-based cream cheese options now — just make sure they’re the block style, not the spreadable kind in a tub.
Equipment Needed
- Mixing bowls — You’ll need at least two medium bowls. One for the crust, one for the cream cheese mixture.
- Electric hand mixer or stand mixer — For whipping the cream and beating the cream cheese. A whisk and some elbow grease works too, but your arm will thank you for the mixer.
- Food processor or zip-top bag + rolling pin — For crushing the graham crackers. I’ve done both methods countless times. The food processor is faster and gives you more even crumbs, but honestly? The bag-and-rolling-pin method is oddly satisfying and works perfectly fine.
- Small glasses or dessert cups — 6 to 8 cups, depending on size. Mason jars, wine glasses, or even small bowls work. I like using 6-ounce clear cups so you can see the pretty layers.
- Spatula — For scraping every last bit of that cream cheese mixture. You don’t want to waste any.
- Measuring cups and spoons — Standard set. Nothing fancy needed.
I picked up a set of those little glass dessert cups at a thrift store for three dollars, and they’re perfect for this recipe. You don’t need anything special — just something clear enough to show off those layers.
Preparation Method
-
Make the crust. Crush your graham crackers into fine crumbs. If you’re using a food processor, pulse until you have uniform crumbs — about 10-15 seconds. If you’re using the bag method, seal the crackers in a zip-top bag and go to town with a rolling pin. You want crumbs, not dust. Transfer to a medium bowl, add the sugar and salt, then pour in the melted butter. Stir with a fork until every crumb is coated. It should look like wet sand and hold together when you squeeze it.
-
Divide the crust among your cups. Spoon about 2 tablespoons of the crumb mixture into each cup. Press it down firmly with the back of a spoon or the bottom of a small shot glass. You want a compact, even layer — this is what keeps the crust from getting soggy later. Pop the cups in the fridge while you work on the next layer.
-
Whip the cream. Pour the cold heavy cream into a chilled bowl (pop your bowl and beaters in the freezer for 10 minutes if you remember — it makes a difference). Beat on medium-high speed until soft peaks form — about 2-3 minutes. You’re looking for peaks that flop over slightly when you lift the beaters. Don’t over-whip or you’ll end up with butter. Set aside.
-
Make the cream cheese layer. In another bowl, beat the softened cream cheese with the powdered sugar until smooth and fluffy — about 2 minutes. Scrape down the sides halfway through. Add the vanilla extract and lemon zest, then beat for another 30 seconds. There should be no lumps. If there are lumps, your cream cheese wasn’t soft enough — let it sit out longer next time.
-
Fold it all together. Take about a third of the whipped cream and stir it into the cream cheese mixture to lighten it up. Then gently fold in the rest of the whipped cream with a spatula. Fold, don’t stir — you want to keep that airy texture. Stop when you don’t see any more white streaks. Taste it. Yes, it’s good. Yes, you’ll want to eat it with a spoon. Resist the urge — we’re almost there.
-
Layer the cups. Spoon or pipe the cream cheese mixture over the crust in each cup. I like to use a piping bag (or a zip-top bag with the corner snipped off) for clean layers, but a spoon works fine too. Fill each cup about halfway. Smooth the tops gently.
-
Add the cherry topping. Spoon about 2-3 tablespoons of cherry pie filling over the cream cheese layer. If your cherries are huge, give them a rough chop first so they distribute evenly. Let some of that gorgeous red syrup cascade down the sides of the cream cheese layer — it looks beautiful.
-
Chill and set. Cover the cups with plastic wrap and refrigerate for at least 4 hours, but overnight is better. I know, I know — waiting is the hardest part. But this is where the magic happens. The layers set up, the flavors meld, and everything becomes one cohesive, creamy, dreamy dessert.
-
Garnish and serve. Right before serving, top each cup with a fresh cherry if you have them, maybe a tiny mint leaf. The green against the red against the cream — it’s spring in a glass.
Cooking Tips & Techniques
Let me save you from the mistakes I’ve already made so you don’t have to learn the hard way.
Room temperature cream cheese is not optional. I cannot stress this enough. Cold cream cheese will give you lumpy, sad filling no matter how long you beat it. Take it out of the fridge at least 30 minutes before you start. If you forgot (I forget all the time), unwrap it, cut it into cubes, and microwave it in 10-second bursts until it’s soft but not warm.
Don’t skip the lemon zest. I know it seems like a small thing, but it makes the cream cheese layer taste lighter and brighter. Without it, the filling can be a little one-note. The lemon cuts through the richness in a way that makes you want another bite. And another.
Press that crust down firmly. I learned this one the hard way after my first batch turned into a crumbly mess. If you don’t pack the crust tightly enough, it will fall apart when you try to eat it. Use the bottom of a glass or a small measuring cup to really press it in. You want it compact and even.
Chill time matters. I know you’re going to want to eat these immediately — I’ve been there. But trust me on this one. Four hours is the minimum. Overnight is ideal. The cream cheese layer needs time to firm up so you get clean layers when you dig in. Plus, the flavors just taste better after they’ve had time to get to know each other.
Make extra. Seriously. Double the recipe. These disappear fast, and you’ll be sad when you only have one left. I speak from experience.
Variations & Adaptations
One of the best things about these no-bake cherry cream cheese dessert cups is how easy they are to adapt. Here are some of my favorite variations:
Berry Blast — Swap the cherry pie filling for blueberry, strawberry, or mixed berry. Each one gives a different flavor profile. Blueberry feels more summer, strawberry feels more spring. Mix and match based on what looks good at the store.
Chocolate Cherry Dream — Add 2 tablespoons of cocoa powder to the graham cracker crust and use chocolate graham crackers instead of regular. The chocolate-cherry combination is classic for a reason. Top with a few chocolate shavings if you’re feeling fancy.
Lemon Lover’s Version — Add the zest of a whole lemon to the cream cheese mixture and use lemon curd instead of cherry pie filling. It’s bright, tangy, and incredibly refreshing. Perfect for a spring bridal shower or afternoon tea.
Vegan Option — Use a plant-based cream cheese block (I like Violife or Kite Hill), coconut cream whipped with powdered sugar instead of heavy cream, and a vegan butter substitute. The texture is slightly different but still delicious. Make sure your graham crackers are vegan-friendly too — some brands use honey.
Individual Cheesecake Bites — Instead of cups, press the crust into a mini muffin tin lined with paper liners, add the filling, and top with a small spoonful of cherry pie filling. These are perfect for parties where people want to grab and go.
I once made a batch with a layer of crushed pistachios mixed into the crust, and honestly? It was incredible. The salty crunch against the sweet cherry and creamy filling was unexpected and perfect. Don’t be afraid to experiment — that’s half the fun.
Serving & Storage Suggestions
These dessert cups are best served cold, straight from the fridge. The contrast between the chilled, creamy filling and the sweet cherry topping is what makes them so satisfying. If you’ve garnished with fresh cherries, add those right before serving so they stay bright and perky.
What to serve alongside: A cup of coffee or hot tea is perfect for cutting through the richness. For brunch, I like to serve these alongside a fruit salad or a simple yogurt parfait. For dessert, a light shortbread cookie on the side adds a nice textural contrast.
Storage: Cover the cups tightly with plastic wrap or pop on lids if your cups have them. They’ll keep in the refrigerator for up to 3 days. The crust will soften slightly over time, but honestly? Some people prefer it that way. I’m a day-two fan myself — the flavors have melded and everything is perfectly creamy.
Can you freeze them? Technically yes, but I don’t recommend it. The cream cheese layer can get a little grainy when thawed, and the cherry topping gets watery. If you absolutely must freeze them, do it before adding the cherry topping — freeze the crust and cream cheese layer, then add the cherry topping after thawing in the fridge overnight.
Reheating? Nope. These are meant to be enjoyed cold. If you want a warm cherry dessert, I’d recommend a cherry crisp or cobbler instead.
One thing I love about these cups is that the flavors actually improve after a day in the fridge. The cherry syrup seeps into the cream cheese layer just a tiny bit, creating this beautiful marbled effect. So don’t stress about making them at the last minute — they actually prefer to be made ahead.
Nutritional Information & Benefits
Let’s be real — these are a treat, not a health food. But here’s the approximate nutritional breakdown per serving (based on 8 servings):
- Calories: Approximately 380-420 per cup
- Fat: 24g (14g saturated)
- Carbohydrates: 42g
- Protein: 5g
- Sugar: 32g
- Sodium: 280mg
That said, there are some redeeming qualities. Cream cheese provides calcium and a bit of protein. Cherries are packed with antioxidants and anti-inflammatory compounds — especially tart cherries, which are known for their melatonin content and potential sleep benefits. The graham crackers offer a little fiber, and the lemon zest gives you a small dose of vitamin C.
If you’re looking to lighten things up, you can reduce the sugar in the cream cheese layer, use lighter cream cheese (though the texture won’t be as luxurious), or swap the heavy cream for whipped coconut cream. But honestly? Sometimes a dessert is just a dessert, and that’s okay. These are meant to be enjoyed, not analyzed.
As someone who believes in balance, I’ll say this: life is too short to skip dessert. Make these for a special occasion, enjoy every single bite, and don’t feel guilty about it. The joy of sharing good food with people you love is its own kind of nourishment.
Conclusion
These no-bake cherry cream cheese dessert cups are everything I want in a spring dessert — easy, beautiful, and absolutely delicious. They remind me of that afternoon at Maria’s house, when something so simple stopped me in my tracks. No fancy techniques, no obscure ingredients, no stress. Just good food made with care.
Whether you’re making them for Easter brunch, a Mother’s Day gathering, or just because it’s finally warm enough to eat dessert on the porch, I hope these bring you as much joy as they’ve brought me. And honestly? Don’t be afraid to make them your own. Swap the cherries for berries, add some chocolate, throw in some lemon zest — whatever feels right. That’s the beauty of a simple recipe. It’s a starting point, not a rulebook.
I’d love to hear how yours turn out! Drop a comment below and let me know what variations you tried, or tag me in your photos if you share them online. Happy spring, and happy eating!
Frequently Asked Questions
Can I use low-fat cream cheese for this recipe?
You can, but the texture won’t be as creamy and rich. Low-fat cream cheese has more water content, which can make the filling softer and less stable. If you’re watching calories, I’d recommend using full-fat cream cheese but reducing the portion size instead.
How far in advance can I make these dessert cups?
You can make them up to 2 days ahead of time. In fact, they taste even better after a day in the fridge because the flavors have time to meld. Just wait to add any fresh garnishes until right before serving.
Can I use fresh cherries instead of canned pie filling?
Absolutely! Make a quick cherry compote by simmering 2 cups of pitted fresh or frozen cherries with ¼ cup sugar and 1 tablespoon of lemon juice for about 10 minutes until thickened. Let it cool completely before layering. It’s a bit more work, but the flavor is incredible.
What if I don’t have graham crackers for the crust?
No problem! Crushed vanilla wafers, shortbread cookies, digestive biscuits, or even animal crackers work beautifully. You can also use crushed pretzels for a sweet-salty twist — just reduce the sugar a bit since pretzels are already salty.
Can I make these in a larger dish instead of individual cups?
Yes! Press the crust into the bottom of an 8×8 inch dish, spread the cream cheese layer over top, and spoon the cherry filling over that. Chill and serve by scooping into bowls. Just keep in mind that individual cups are easier to serve and look prettier for parties.
Pin This Recipe!

No-Bake Cherry Cream Cheese Dessert Cups

These no-bake cherry cream cheese dessert cups are an easy, no-oven spring treat with a buttery graham cracker crust, creamy cheesecake filling, and sweet cherry topping. Perfect for Easter brunch, baby showers, or any spring gathering.
- Prep Time: 20 minutes
- Cook Time: 0 minutes
- Total Time: 4 hours 20 minutes (includes chilling)
- Yield: 6-8 servings 1x
- Category: Dessert
- Cuisine: American
Ingredients
- 1 ½ cups crushed graham crackers (about 12 full sheets)
- 6 tablespoons unsalted butter, melted
- 2 tablespoons granulated sugar
- Pinch of salt
- 8 ounces full-fat cream cheese, softened to room temperature
- ½ cup powdered sugar, sifted
- 1 cup heavy whipping cream, cold
- 1 teaspoon vanilla extract
- Zest of ½ lemon
- 1 can (21 ounces) cherry pie filling
- Fresh cherries for garnish (optional)
Instructions
- Crush graham crackers into fine crumbs using a food processor or a zip-top bag and rolling pin. Transfer to a medium bowl, add sugar and salt, then pour in melted butter. Stir until every crumb is coated and the mixture looks like wet sand.
- Spoon about 2 tablespoons of the crumb mixture into each of 6-8 small glasses or dessert cups. Press down firmly with the back of a spoon or the bottom of a small shot glass to form a compact, even layer. Place cups in the refrigerator while preparing the next layer.
- Pour cold heavy cream into a chilled bowl. Beat on medium-high speed until soft peaks form, about 2-3 minutes. Set aside.
- In another bowl, beat softened cream cheese with powdered sugar until smooth and fluffy, about 2 minutes. Add vanilla extract and lemon zest, then beat for another 30 seconds until no lumps remain.
- Take about one-third of the whipped cream and stir it into the cream cheese mixture to lighten it. Then gently fold in the remaining whipped cream with a spatula until no white streaks remain.
- Spoon or pipe the cream cheese mixture over the crust in each cup, filling each about halfway. Smooth the tops gently.
- Spoon about 2-3 tablespoons of cherry pie filling over the cream cheese layer. If cherries are large, give them a rough chop first.
- Cover cups with plastic wrap and refrigerate for at least 4 hours, preferably overnight.
- Just before serving, garnish each cup with a fresh cherry and a tiny mint leaf if desired.
Notes
Room temperature cream cheese is essential for a smooth filling. Don’t skip the lemon zest—it brightens the flavor. Press the crust firmly to prevent sogginess. Chilling for at least 4 hours (preferably overnight) allows the layers to set and flavors to meld. For a gluten-free version, use gluten-free graham crackers. For a lower-sugar option, use sugar-free cherry pie filling and reduce powdered sugar to ¼ cup.
Nutrition
- Serving Size: 1 dessert cup
- Calories: 400
- Sugar: 32
- Sodium: 280
- Fat: 24
- Saturated Fat: 14
- Carbohydrates: 42
- Fiber: 1
- Protein: 5
Keywords: no-bake dessert, cherry dessert, cream cheese dessert, spring dessert, easy dessert, no-bake cheesecake cups



