Love this? Save it for later!
Share the inspiration with your friends
My neighbor Clara watched me wrestling with a bag of melting marshmallows last December, my kitchen counter dusted with green food coloring. She didn’t say anything at first. Then she reached into her own bag and pulled out a box of Rice Krispies, holding it up with a knowing smile. “You’re overthinking it,” she said, which is basically Clara’s catchphrase. She showed me how her family had been making these wreath treats for decades—no fancy molds, no complicated techniques. Just sticky fingers, a little patience, and the kind of recipe that gets passed down because it actually works.
I’ll be honest, I was skeptical at first. I mean, Rice Krispies treats are already perfect, right? Why mess with a classic? But Clara’s wreaths had this charm that store-bought cookies just can’t match. They looked like something a kid would proudly bring to a school party—imperfect, a little lopsided, but absolutely bursting with holiday spirit. She told me the secret was letting the mixture cool just enough so it didn’t slide off the pan, but not so much that it became impossible to shape. “You want it to fight you a little,” she laughed, wiping green-stained hands on her apron.
The first batch I made was a disaster. The marshmallow mixture was too hot, and I ended up with a sticky blob that looked more like a swamp monster than a wreath. But the second batch? That one had me hooked. I brought them to our annual block party, and they disappeared faster than the gingerbread cookies. Someone even asked if I’d bought them from a bakery, which made me laugh out loud. Honestly, this recipe is now my go-to for holiday gatherings. It’s the kind of thing you can whip up in twenty minutes, and it somehow makes you look like you spent hours. Maybe you’ve been there—staring at a Pinterest board full of elaborate desserts and thinking, I don’t have time for that. Well, this one’s for you.
Why You’ll Love This Recipe
Let me tell you, after testing this recipe about six times (my coworkers were very happy taste-testers), I can confidently say this is the easiest holiday treat you’ll make all season. No baking, no complicated steps, and the cleanup is minimal—which matters when you’re already juggling a million things.
- Quick & Easy: You can have these ready in under 20 minutes. Seriously. From start to finish, including shaping time, you’re looking at less than half an hour.
- Simple Ingredients: You probably already have most of these in your pantry. Butter, marshmallows, Rice Krispies cereal, and green food coloring. That’s it.
- Perfect for Holiday Parties: These wreaths are showstoppers at cookie swaps, school events, and office parties. They look festive without requiring any fancy piping skills.
- Crowd-Pleaser: Kids love them, adults sneak extra ones, and they’re naturally gluten-free if you use certified gluten-free Rice Krispies.
- Unbelievably Delicious: The combination of buttery marshmallow and crispy cereal is already addictive. Add a little holiday magic, and you’ve got something special.
What makes this recipe different from the hundreds of other versions online? It’s the technique. Most recipes tell you to shape the wreaths while the mixture is piping hot, which leads to burned fingers and lopsided results. I’ve learned to let the mixture cool for exactly four minutes before shaping. That sweet spot gives you manageable warmth without the pain. Plus, I’ve figured out the perfect ratio of marshmallow to cereal—not too sticky, not too dry. It’s the Goldilocks of Rice Krispies treats.
This recipe isn’t just good—it’s the kind that makes you close your eyes after the first bite. The marshmallow stretches just a little, the cereal stays perfectly crunchy, and the butter adds this richness that elevates it from kid’s snack to adult-approved dessert. It’s comfort food reimagined for the holidays, faster than baking cookies but with the same soul-soothing satisfaction. Perfect for impressing guests without stress, or turning a simple Tuesday night into something memorable.
What Ingredients You Will Need
This recipe relies on simple, pantry-friendly ingredients to create something that looks much fancier than it actually is. Here’s what you’ll need to gather before you start.
For the Wreath Base
- 3 tablespoons unsalted butter (I use Land O’Lakes for consistent results—adds richness and helps the marshmallows melt smoothly)
- 1 package (10 ounces) regular marshmallows (not mini, not jumbo—the standard size melts most evenly. Jet-Puffed works great)
- 6 cups Rice Krispies cereal (or any crispy rice cereal. If you need gluten-free, look for the certified gluten-free label)
- Green gel food coloring (liquid food coloring works, but gel gives you a more vibrant color without thinning the mixture. I prefer Wilton brand)
- 1 teaspoon vanilla extract (optional, but it rounds out the sweetness nicely)
For Decoration
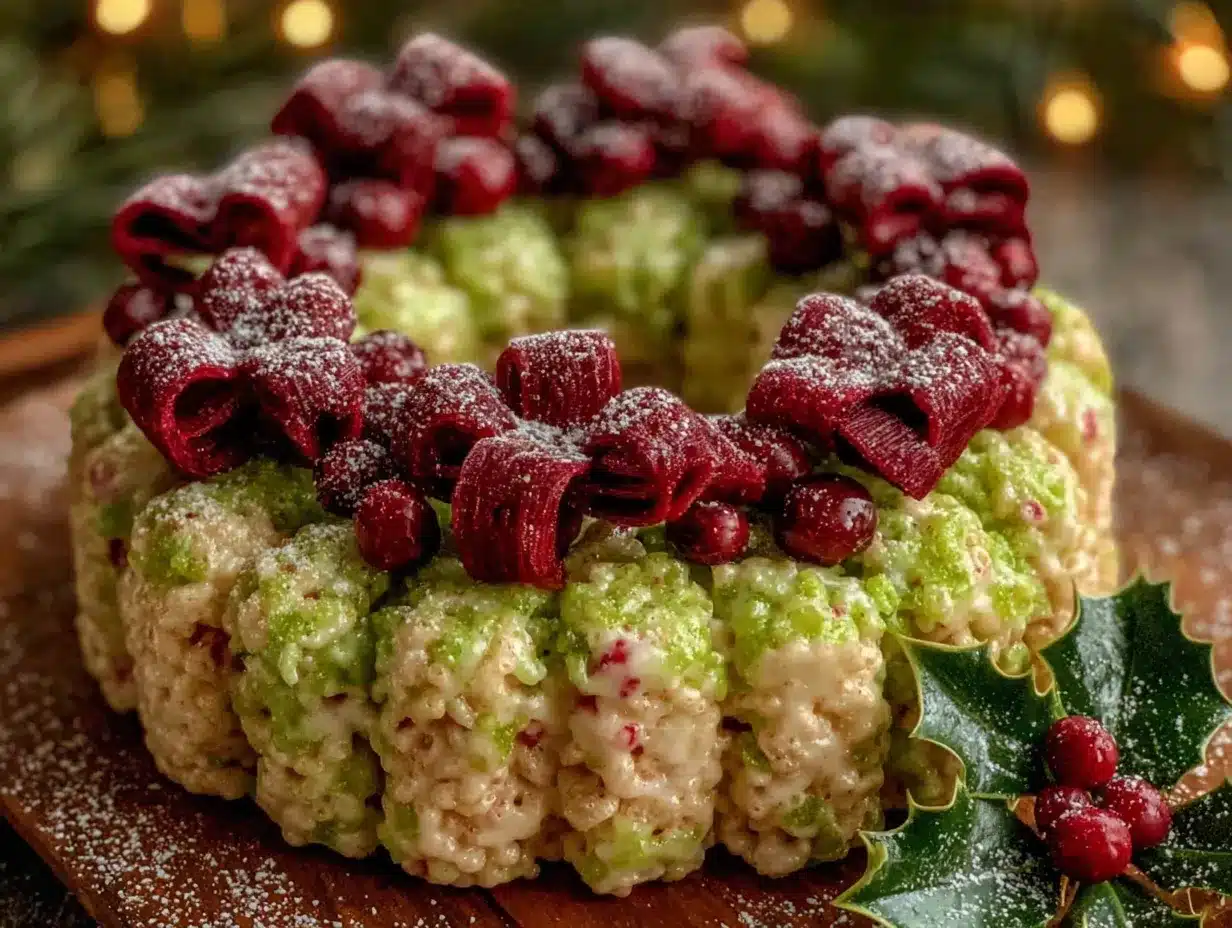
- Red cinnamon candies or red M&Ms (for the holly berries. About 24-30 pieces depending on how many wreaths you make)
- Small red or white candy pearls (optional, for extra sparkle)
- Edible glitter or sanding sugar (optional, for that festive shimmer)
- Pretzel sticks or candy canes (for a fun twist—I’ve used both, and they add a nice salty contrast)
A quick note on the marshmallows: I’ve tried this recipe with both generic and name-brand marshmallows, and the name-brand ones definitely melt more smoothly. Generic ones tend to get grainy if you overheat them. Also, if you’re making these ahead of time, consider adding a tablespoon of corn syrup to the marshmallow mixture—it keeps the treats softer for longer. I learned that trick from Clara, and it’s a game-changer if you’re prepping for a party the next day.
For the food coloring, please don’t use the neon green kind meant for cake icing. You want a forest green or leaf green gel. Start with just a few drops and add more until you get the color you want. I once added too much and ended up with wreaths that looked radioactive. Not my finest moment.
Equipment Needed
The beauty of this recipe is that you don’t need any special equipment. Here’s what you’ll need:
- Large saucepan or pot (at least 4-quart capacity—you need room to stir everything)
- Wooden spoon or silicone spatula (wooden spoons don’t scratch your pan and handle the sticky mixture well)
- Large mixing bowl (for combining the cereal and marshmallow mixture)
- Parchment paper or wax paper (essential for shaping—the mixture is incredibly sticky)
- Baking sheet (to hold the wreaths while they set)
- Measuring cups and spoons (for accurate ingredient portions)
- Small bowl of water (to keep your hands from sticking while shaping)
If you don’t have a large saucepan, you can melt the butter and marshmallows in the microwave. Just use a large microwave-safe bowl and heat in 30-second intervals, stirring between each. The microwave method is actually faster, but you have to be careful not to burn the marshmallows. I’ve done it both ways, and honestly, the stovetop method gives you more control. But on a busy weeknight? Microwave all the way.
One tip: keep a butter knife handy for scraping marshmallow residue off your hands and the pan. It works better than a sponge and saves you from scrubbing later.
Preparation Method
Let me walk you through this step by step. I’ve made these wreaths so many times I could do it in my sleep, but I’ll share all the little tricks I’ve learned along the way.
- Prepare your workspace. Line a large baking sheet with parchment paper. Lightly grease the paper with butter or non-stick spray. Fill a small bowl with cold water and set it nearby—you’ll use it to wet your hands while shaping the wreaths. This step is crucial, and I learned it the hard way after burning my fingers on the first batch.
- Melt the butter. In a large saucepan over medium-low heat, melt 3 tablespoons of unsalted butter. Don’t rush this step. If the butter browns, it’ll change the flavor of the treats. You want it just melted, not sizzling. Swirl the pan occasionally to help it melt evenly.
- Add the marshmallows. Pour in the entire 10-ounce bag of marshmallows. Stir constantly with a wooden spoon until they’re completely melted. This takes about 3-4 minutes. The mixture will look glossy and smooth. If you’re using the vanilla extract, stir it in now. Remove the pan from heat immediately—you don’t want the marshmallows to cook too long or they’ll become tough.
- Add the food coloring. Squeeze in about 6-8 drops of green gel food coloring. Stir until the color is evenly distributed. Start with less than you think you need—you can always add more. I usually add 6 drops, then add 2 more if it looks too pale. The color will lighten slightly when you add the cereal, so aim for a shade slightly darker than your desired final color.
- Mix in the cereal. Pour the 6 cups of Rice Krispies into the saucepan. Fold gently until all the cereal is coated with the green marshmallow mixture. Work quickly but carefully—over-mixing can crush the cereal and make the treats dense. You want to see individual puffs of cereal, not a solid green mass.
- Let the mixture cool slightly. Spread the mixture onto the prepared baking sheet in an even layer. Let it sit for exactly 4 minutes. I set a timer because I always get impatient. This cooling time is the secret to easy shaping. If you try to shape the wreaths immediately, the mixture will stick to everything. If you wait too long, it becomes hard to work with.
- Shape the wreaths. Lightly wet your hands with the cold water. Scoop up about 1/3 cup of the mixture. Roll it into a ball, then place it on the parchment paper. Using your fingers, create a hole in the center and shape it into a ring about 3 inches in diameter. Don’t worry if it’s not perfect—wreaths are supposed to look rustic. Repeat with the remaining mixture. You should get about 8-10 wreaths depending on size.
- Add the decorations. While the wreaths are still slightly warm and sticky, press 3-4 red cinnamon candies or M&Ms into each wreath to look like holly berries. If you’re using edible glitter or sanding sugar, sprinkle it on now before the wreaths set completely.
- Let them set. Allow the wreaths to cool completely at room temperature, about 20-30 minutes. The marshmallow mixture will firm up as it cools, creating that classic Rice Krispies treat texture. Don’t rush this by putting them in the fridge—the condensation can make them sticky.
One more thing: if the mixture starts to harden before you’ve shaped all the wreaths, pop the pan back on low heat for 30 seconds to soften it. I’ve had to do this more times than I’d like to admit, and it works perfectly.
Cooking Tips & Techniques
After making these wreaths more times than I can count, I’ve collected a few tricks that make the process smoother. Let me share the ones that save me every time.
Keep your hands wet. This is the number one tip I give everyone. The marshmallow mixture is incredibly sticky, but wet hands create a barrier. Keep that bowl of cold water nearby and dip your fingers between each wreath. If the mixture starts sticking to your hands again, just re-wet them. I learned this after my first attempt left me with green-sticky hands for an hour.
Work in batches. Don’t try to shape all the wreaths from one big pile. Instead, work with about half the mixture at a time, keeping the rest in the pan with the lid on to stay warm. This prevents the mixture from cooling too quickly and becoming hard to shape. I usually shape 4-5 wreaths, then go back for the rest.
Use the right pan size. A 4-quart saucepan gives you enough room to stir without spilling. If your pan is too small, the mixture won’t coat evenly. If it’s too large, the marshmallows might burn before they melt. Trust me on this—I’ve ruined a batch by using a pan that was too big, and the marshmallows scorched on the bottom.
Don’t skip the butter. Some recipes call for margarine or oil, but butter gives these treats their signature richness. The milk solids in butter add a depth of flavor that you just can’t replicate. Plus, it helps the marshmallows melt more smoothly.
What to do if they’re too hard. If your wreaths turn out rock-hard, it means the marshmallows were overheated. Next time, melt them on lower heat and remove from the stove as soon as they’re smooth. To salvage a hard batch, microwave them for 10 seconds—it softens them right up.
What to do if they’re too sticky. This happens when there’s too much marshmallow relative to cereal. Next time, add an extra 1/2 cup of cereal. For the current batch, dust the wreaths with powdered sugar or let them sit uncovered overnight—the air will help dry them out.
Variations & Adaptations
One of the best things about this recipe is how easy it is to customize. Here are some variations I’ve tried and loved.
Chocolate Drizzle Wreaths
Melt 1/2 cup of semi-sweet chocolate chips with 1 teaspoon of coconut oil. Drizzle the melted chocolate over the cooled wreaths using a fork. The chocolate adds a lovely bitterness that balances the sweetness of the marshmallows. I made these for a holiday party last year, and they were the first to disappear.
Peppermint Crunch Wreaths
Crush 4-5 candy canes into small pieces. Sprinkle the crushed candy over the wreaths right after shaping, while the mixture is still sticky. The peppermint adds a refreshing crunch and a festive red-and-white color. Just be careful not to add too much—the candy canes can make the wreaths overly sweet.
Gluten-Free Version
Use certified gluten-free Rice Krispies or a generic gluten-free crispy rice cereal. Everything else in the recipe is naturally gluten-free, so this swap is seamless. I’ve made this version for a friend with celiac disease, and she couldn’t tell the difference.
Vegan Adaptation
Replace the butter with vegan butter (I like Miyoko’s or Earth Balance) and use vegan marshmallows (Dandies brand works well). The texture will be slightly different—vegan marshmallows don’t stretch as much—but the flavor is still delicious. I tested this version last Christmas, and my vegan cousin was thrilled.
Mini Wreath Pops
Instead of shaping full-sized wreaths, make smaller ones about 1.5 inches in diameter. Insert a lollipop stick into each before they set. These are perfect for party favors or kids’ lunchboxes. I made these for a school holiday party, and the kids went wild for them.
Serving & Storage Suggestions
These wreaths are best served at room temperature. The texture is perfectly chewy with a satisfying crunch, and the decorations stay put. If you’re serving them at a party, arrange them on a large platter lined with a festive napkin or doily. They make a beautiful centerpiece all on their own.
For a complete holiday dessert spread, pair the wreaths with:
- A warm mug of hot chocolate or spiced apple cider
- A plate of gingerbread cookies or sugar cookies
- A bowl of fresh fruit for a light contrast
- Some peppermint bark or chocolate truffles
Storage: Store the wreaths in an airtight container at room temperature for up to 5 days. Layer them between sheets of parchment paper to prevent sticking. Do not refrigerate them—the cold air makes them hard and stale. If you live in a humid climate, add a silica gel packet to the container to absorb excess moisture.
Freezing: You can freeze these wreaths for up to 3 months. Wrap each wreath individually in plastic wrap, then place them in a freezer-safe bag. To thaw, leave them at room temperature for about 30 minutes. The texture will be slightly softer than fresh, but still delicious. I’ve frozen batches for Christmas parties, and no one could tell they weren’t freshly made.
Make-Ahead Tip: These wreaths actually taste better the next day. The flavors meld together, and the texture becomes perfectly chewy. So feel free to make them a day in advance. Just keep them in an airtight container, and add any delicate decorations (like edible glitter) right before serving.
One thing I’ve noticed: the wreaths will soften slightly over time, especially if the weather is humid. If you want them extra crunchy, serve them within 24 hours of making them. If you prefer them chewy, wait a day.
Nutritional Information & Benefits
Let’s be real—these are a treat, not a health food. But here’s the estimated nutritional breakdown per wreath (based on 10 wreaths per batch):
| Nutrient | Amount per Wreath |
|---|---|
| Calories | 185 |
| Total Fat | 5g |
| Saturated Fat | 3g |
| Carbohydrates | 35g |
| Sugar | 18g |
| Protein | 2g |
| Sodium | 180mg |
While these aren’t exactly a health food, the Rice Krispies cereal does provide some iron and B vitamins. The butter adds a small amount of vitamin A. And honestly? Sometimes the best thing for your mental health is a little holiday treat made with love.
Dietary Considerations:
– Gluten-Free: Use certified gluten-free Rice Krispies
– Vegetarian: Yes, this recipe is vegetarian-friendly
– Contains Dairy: From the butter (use vegan butter for dairy-free)
– Contains Gelatin: Marshmallows contain gelatin, so this is not vegan unless you use vegan marshmallows
Potential Allergens: Dairy (butter), gluten (cereal, unless gluten-free version is used). The decorations may contain soy (M&Ms) or corn (cinnamon candies). Always check labels if serving to someone with allergies.
My personal perspective? These wreaths are a once-a-year indulgence. They’re part of what makes the holidays special. I don’t stress about the sugar content—I just enjoy them in moderation and savor every bite.
Conclusion
These Easy Christmas Wreath Rice Krispies Treats have become a staple in my holiday baking rotation, and I think they’ll become one in yours too. They’re quick enough for a weeknight, simple enough for kids to help with, and festive enough to impress at any gathering. The best part? You don’t need any special skills or equipment. Just a little patience, some green food coloring, and a willingness to get your hands sticky.
I love how adaptable this recipe is. You can make it your own with different decorations, colors, or add-ins. Maybe you’ll add chocolate drizzle like I did last year, or maybe you’ll go full peppermint crunch. The possibilities are endless, and that’s what makes cooking so fun.
So go ahead—give these wreaths a try. I promise you’ll be surprised at how easy they are and how much joy they bring. And when you make them, I’d love to hear about it. Leave a comment below and tell me how they turned out. Did you add your own twist? Did the kids help? Did you burn your fingers like I did the first time? Share your story—I read every single comment, and I can’t wait to hear from you.
Happy holidays, and happy cooking!
Frequently Asked Questions
Can I use mini marshmallows instead of regular-sized ones?
Yes, you can use about 4 cups of mini marshmallows instead of one 10-ounce bag of regular marshmallows. Mini marshmallows melt faster, so keep a close eye on them to prevent burning. The texture will be slightly different—mini marshmallows tend to create a smoother, more uniform coating.
How do I prevent the wreaths from falling apart?
Make sure you’re using the right ratio of marshmallow to cereal—too much cereal and the wreaths won’t hold together. Also, press the mixture firmly when shaping. If your wreaths are still falling apart, try adding an extra tablespoon of butter to the marshmallow mixture next time. The extra fat helps bind everything together.
Can I make these wreaths without food coloring?
Absolutely! You can skip the green food coloring altogether and make plain wreaths, or use a different color. Red wreaths with green sprinkles look festive for Valentine’s Day, while blue and silver work for winter weddings. Just remember that the flavor won’t change—the food coloring is purely decorative.
How far in advance can I make these wreaths?
You can make them up to 5 days in advance if stored properly in an airtight container at room temperature. For best texture, I recommend making them 1-2 days before serving. If you need to make them further ahead, freeze them (wrapped individually) for up to 3 months.
Why did my wreaths turn out hard?
Hard wreaths usually mean the marshmallows were overheated. Next time, melt them over medium-low heat and remove from the stove as soon as they’re smooth. Also, avoid pressing the mixture too firmly when shaping—gentle hands create softer treats. If your wreaths are already hard, try microwaving them for 10-15 seconds to soften them.
Pin This Recipe!
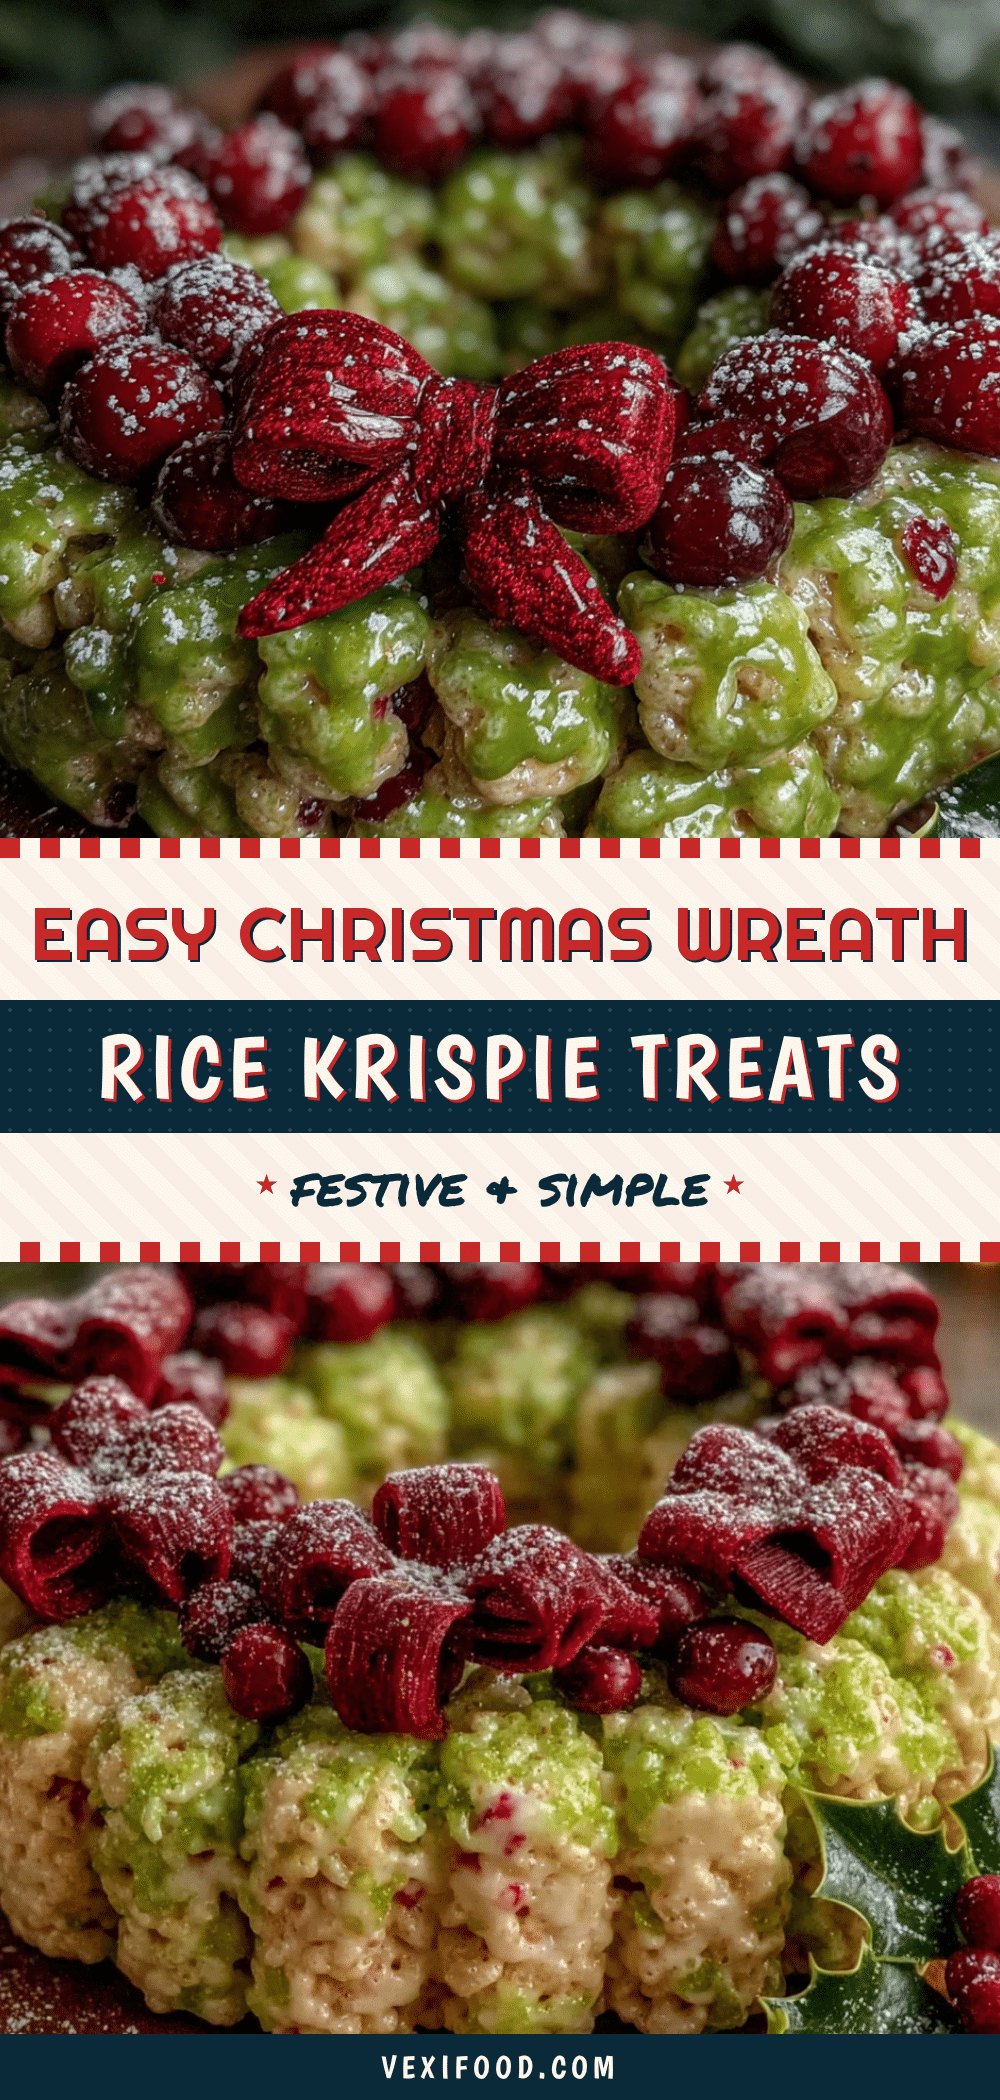
Easy Christmas Wreath Rice Krispie Treats Recipe

These no-bake Christmas wreath Rice Krispie treats are quick, festive, and perfect for holiday parties. Made with simple pantry ingredients, they come together in under 20 minutes and are a guaranteed crowd-pleaser.
- Prep Time: 10 minutes
- Cook Time: 5 minutes
- Total Time: 15 minutes
- Yield: 8-10 servings 1x
- Category: Dessert
- Cuisine: American
Ingredients
- 3 tablespoons unsalted butter
- 1 package (10 ounces) regular marshmallows
- 6 cups Rice Krispies cereal
- Green gel food coloring
- 1 teaspoon vanilla extract (optional)
- Red cinnamon candies or red M&Ms (for holly berries)
- Small red or white candy pearls (optional)
- Edible glitter or sanding sugar (optional)
- Pretzel sticks or candy canes (optional)
Instructions
- Prepare your workspace: Line a large baking sheet with parchment paper and lightly grease it with butter or non-stick spray. Fill a small bowl with cold water and set it nearby.
- Melt the butter: In a large saucepan over medium-low heat, melt 3 tablespoons of unsalted butter. Do not let it brown.
- Add the marshmallows: Pour in the entire 10-ounce bag of marshmallows. Stir constantly until completely melted and smooth, about 3-4 minutes. Remove from heat immediately.
- Add the food coloring: Stir in 6-8 drops of green gel food coloring until evenly distributed. Add vanilla extract if using.
- Mix in the cereal: Pour in 6 cups of Rice Krispies cereal and fold gently until all cereal is coated. Work quickly but avoid over-mixing.
- Let the mixture cool slightly: Spread the mixture onto the prepared baking sheet in an even layer. Let it sit for exactly 4 minutes.
- Shape the wreaths: Lightly wet your hands with cold water. Scoop about 1/3 cup of the mixture, roll into a ball, then shape into a ring about 3 inches in diameter. Repeat with remaining mixture to make 8-10 wreaths.
- Add decorations: While wreaths are still slightly warm and sticky, press 3-4 red cinnamon candies or M&Ms into each wreath. Sprinkle with edible glitter or sanding sugar if desired.
- Let them set: Allow wreaths to cool completely at room temperature, about 20-30 minutes, until firm.
Notes
Let the mixture cool for exactly 4 minutes before shaping to avoid burned fingers and ensure easy handling. Keep hands wet with cold water to prevent sticking. If mixture hardens before all wreaths are shaped, reheat on low for 30 seconds. For softer treats, add 1 tablespoon corn syrup to marshmallow mixture. Store in an airtight container at room temperature for up to 5 days; freeze for up to 3 months.
Nutrition
- Serving Size: 1 wreath
- Calories: 185
- Sugar: 18
- Sodium: 180
- Fat: 5
- Saturated Fat: 3
- Carbohydrates: 35
- Protein: 2
Keywords: Christmas wreath, Rice Krispie treats, no-bake, holiday dessert, easy recipe, marshmallow treats



