Love this? Save it for later!
Share the inspiration with your friends
This was supposed to be a simple batch of peanut butter cookies. Just a classic, no-fuss recipe I had made a hundred times before. But I grabbed the wrong measuring cup—the one for liquids instead of dry ingredients—and dumped in way too much milk. The dough turned into a sticky, hopeless mess. I was already running late for a potluck, the kitchen was a disaster zone, and I was this close to just ordering a store-bought pie. In a moment of pure desperation, I tossed in a handful of chocolate chips, rolled the sticky dough into balls, and figured I’d just bake them and hope for the best. What came out of the oven was nothing like the plan. They were thick, impossibly soft, and studded with melty chocolate. I pressed a chocolate kiss into the center of one, and honestly, it felt like a small miracle. That pan of cookies saved the night—and became the recipe I’ve been making ever since.
Maybe you’ve been there, standing in a messy kitchen, convinced you’ve ruined everything. Let me tell you, this recipe is proof that some of the best things in life come from a happy accident. These Cozy Peanut Butter Blossom Cookies are everything you want in a cookie: soft, thick, and perfectly balanced with a sweet chocolate kiss on top. They’re the kind of cookie that makes you close your eyes after the first bite, the kind that feels like a hug on a cold day. I keep making them because they remind me that it’s okay to mess up—sometimes, the mess turns into something beautiful.
Why You’ll Love This Recipe
These aren’t just any peanut butter blossoms. After countless trials—too flat, too dry, too crumbly—I finally nailed the perfect formula. This recipe has been tested by my family, my neighbors, and even a few skeptical friends who “don’t like peanut butter cookies.” They all asked for seconds. Here’s why this version stands out:
- Quick & Easy: From start to finish, these cookies come together in under 30 minutes. Perfect for a last-minute craving or a cozy evening bake.
- Simple Ingredients: You probably have everything in your pantry right now. No fancy trips to the store required.
- Perfect for Cozy Nights: Whether it’s a chilly winter evening, a rainy afternoon, or a rough day that needs fixing, these cookies deliver pure comfort.
- Crowd-Pleaser: Kids love the chocolate kiss on top, and adults can’t get enough of the soft, peanut buttery center. They disappear fast at any gathering.
- Unbelievably Delicious: The secret is in the technique—chilling the dough just enough and using the right ratio of butter to peanut butter. The result is a cookie that’s thick, tender, and melts in your mouth.
What makes this recipe different from the rest? It’s not just another version. It’s the one that uses a touch of brown sugar for extra moisture and a quick roll in granulated sugar for that perfect crinkly top. The chocolate kiss isn’t just an afterthought—it’s the crowning glory that balances the salty-sweet peanut butter base. This is comfort food reimagined: faster, easier, but with the same soul-soothing satisfaction that makes you feel like everything is going to be okay.
What Ingredients You Will Need
This recipe uses simple, wholesome ingredients to deliver bold flavor and a satisfyingly soft texture. Most of these are pantry staples, so you can whip up a batch anytime the mood strikes. Here’s what you’ll need:
- Unsalted butter, softened (1/2 cup, 1 stick) – I always use unsalted to control the salt level. Let it sit out for about 30 minutes before starting.
- Creamy peanut butter (1/2 cup) – Use a standard brand like Jif or Skippy for the best texture. Natural peanut butter can separate and make the cookies greasy.
- Granulated sugar (1/2 cup, plus extra for rolling) – The sugar in the dough adds sweetness, while the coating gives the cookies that classic crinkly look.
- Brown sugar, packed (1/2 cup) – Light or dark works fine. Dark brown sugar adds a deeper molasses flavor, which I personally love.
- Large egg (1) – Room temperature is best. If you forgot to take it out, place it in a bowl of warm water for 5 minutes.
- Vanilla extract (1 teaspoon) – Pure vanilla makes a difference, but imitation works in a pinch.
- All-purpose flour (1 1/2 cups) – Spoon and level it into your measuring cup for accuracy. Don’t scoop directly from the bag.
- Baking soda (1 teaspoon) – This helps the cookies spread just enough while staying thick.
- Salt (1/2 teaspoon) – Balances the sweetness and enhances the peanut butter flavor.
- Chocolate kisses (about 36, unwrapped) – Hershey’s are the classic choice. You can also use dark chocolate or caramel-filled kisses for a twist.
Ingredient Tips: For the best results, use a peanut butter that’s not too oily. If your dough feels sticky, pop it in the fridge for 15 minutes before rolling. I’ve tried this recipe with almond butter, and it works, but the cookies won’t be as thick. Stick with peanut butter for that signature softness.
Equipment Needed
You don’t need a fancy kitchen to make these cookies. Here’s what I use:
- Mixing bowls (one medium, one large) – Any set will do. I prefer glass or stainless steel.
- Electric hand mixer or stand mixer – A hand mixer is fine, but a stand mixer makes creaming the butter and sugars effortless. If you’re mixing by hand, expect a little arm workout.
- Measuring cups and spoons – Dry measuring cups for flour and sugar, liquid measuring cup for vanilla.
- Baking sheets (2) – Light-colored sheets work best. Dark sheets can cause the bottoms to brown too quickly.
- Parchment paper or silicone baking mat – Prevents sticking and makes cleanup a breeze. Silicone mats are my go-to.
- Wire cooling rack – Essential for cooling the cookies evenly after baking.
- Small bowl – For the extra granulated sugar used for rolling.
- Cookie scoop (optional) – A 1.5-tablespoon scoop ensures even-sized cookies. I’ve used a regular spoon in a pinch, and it works fine.
Budget-Friendly Tip: If you don’t have a mixer, a sturdy whisk and a lot of elbow grease will do the job. Just make sure the butter is very soft before you start.
Preparation Method
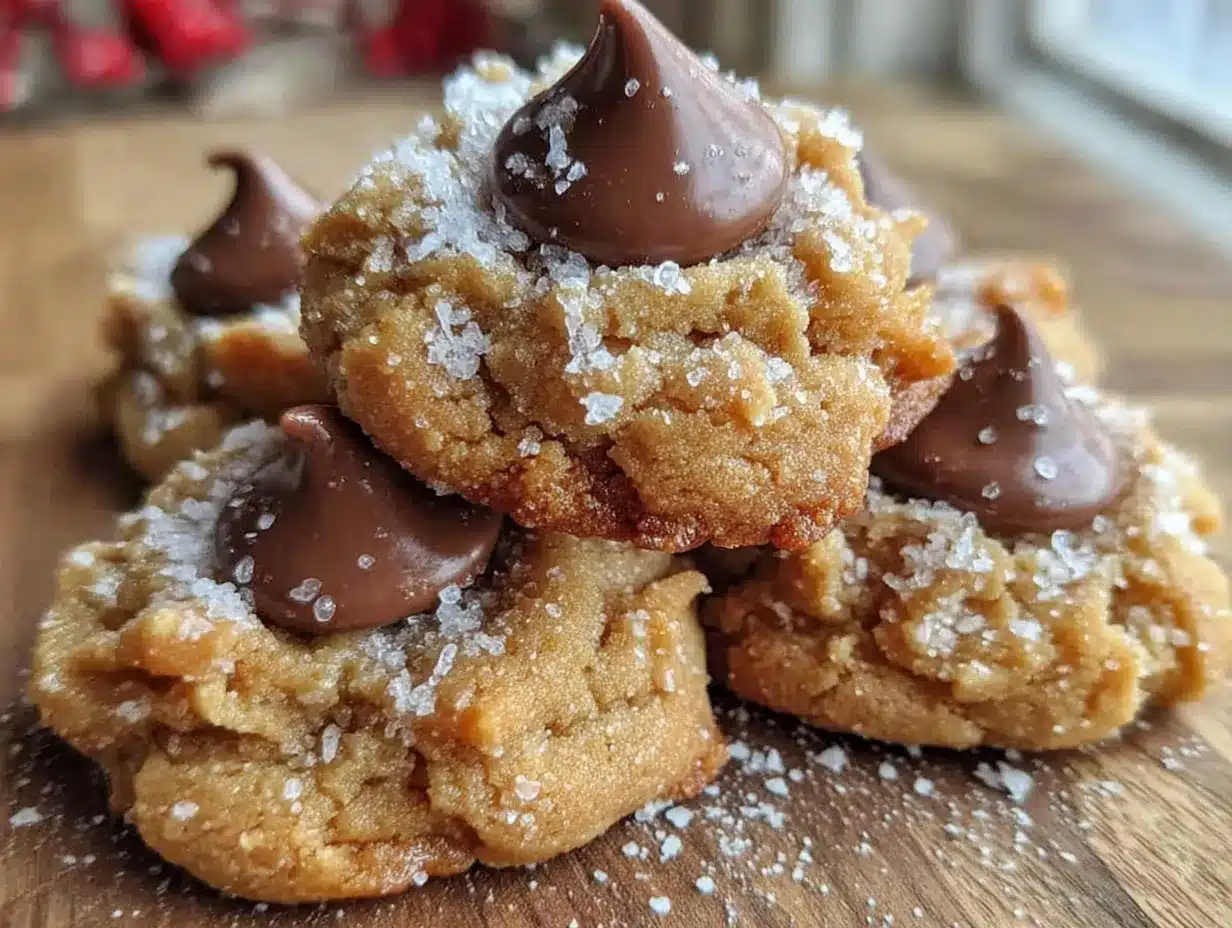
Follow these steps carefully, and you’ll have a batch of perfect cookies in no time. I’ve included sensory cues so you know exactly what to look for at each stage.
- Preheat and Prep: Preheat your oven to 375°F (190°C). Line two baking sheets with parchment paper or silicone mats. Unwrap your chocolate kisses and set them aside in a bowl. This step saves you from scrambling later.
- Cream Butter and Sugars: In a large mixing bowl, beat the softened butter, peanut butter, granulated sugar, and brown sugar together until light and fluffy. This takes about 2-3 minutes with an electric mixer on medium speed. The mixture should look pale and feel airy. Scrape down the sides of the bowl with a spatula halfway through.
- Add Egg and Vanilla: Beat in the egg and vanilla extract until just combined. Don’t overmix—stop as soon as the yolk disappears. The mixture will look a bit glossy at this point.
- Combine Dry Ingredients: In a separate medium bowl, whisk together the flour, baking soda, and salt. This ensures the leavening agent is evenly distributed.
- Mix Wet and Dry: Gradually add the dry ingredients to the wet mixture, mixing on low speed. Stop when the flour is just incorporated. The dough will be soft and slightly sticky—that’s perfect. If it feels too sticky to handle, refrigerate it for 10 minutes.
- Shape the Dough: Place the extra granulated sugar in a small bowl. Using a cookie scoop or your hands, roll the dough into 1-inch balls (about 1.5 tablespoons each). Roll each ball in the sugar until coated, then place them on the prepared baking sheets, spaced about 2 inches apart. I usually fit 12 per sheet.
- Bake: Bake one sheet at a time for 10-12 minutes. The cookies should look puffed and set around the edges, but the centers will still be soft and slightly underdone. They will continue to cook on the hot sheet after you take them out. Don’t overbake—dry cookies are a tragedy.
- Add the Kisses: Remove the baking sheet from the oven. Immediately press a chocolate kiss into the center of each cookie, pushing down gently until the cookie cracks slightly around the edges. Work quickly while the cookies are still hot. If the kiss slides off, press it in a bit deeper.
- Cool: Let the cookies cool on the baking sheet for 5 minutes. This allows them to set without breaking. Then transfer them to a wire cooling rack to cool completely. The chocolate kisses will firm up as they cool.
Troubleshooting Tip: If your cookies spread too much, your butter was too soft or you didn’t chill the dough. Next time, refrigerate the shaped dough balls for 15 minutes before baking. If the kisses melt, you pressed them in too early—wait 1-2 minutes after removing from the oven.
Cooking Tips & Techniques
After making these cookies more times than I can count, I’ve learned a few tricks that make all the difference. Here are my top tips for success:
- Don’t Skip the Chill: If your kitchen is warm, the dough can get sticky. Chilling the dough balls for 10-15 minutes before baking helps them hold their shape and stay thick. I learned this the hard way after a batch turned into flat pancakes.
- Use a Cookie Scoop: For evenly sized cookies, a scoop is your best friend. It also makes the rolling step faster. If you don’t have one, wet your hands slightly to prevent the dough from sticking.
- Watch the Oven Closely: Every oven runs a little differently. Start checking at 9 minutes. The cookies are done when the edges are lightly golden and the centers are still soft. They will look underdone—that’s the goal.
- Press the Kisses Gently: You want the chocolate to stay intact, not melt into a puddle. Press straight down, not at an angle. If the kiss starts to slide, let the cookies cool an extra minute before trying again.
- Double the Batch: These cookies freeze beautifully. I always make a double batch and freeze half of the unbaked dough balls. Then I can bake fresh cookies whenever a craving hits.
My Biggest Failure: One time, I forgot the baking soda. The cookies came out as dense, flat discs. It was a sad day. Now I always double-check my ingredients before starting. Learn from my mistake!
Variations & Adaptations
Once you’ve mastered the classic version, feel free to experiment. Here are some of my favorite twists:
- Dark Chocolate Bliss: Swap the milk chocolate kisses for dark chocolate ones. The bitterness pairs beautifully with the sweet peanut butter. I tried this for a friend who doesn’t like overly sweet desserts, and she devoured half the batch.
- Gluten-Free Option: Substitute the all-purpose flour with a 1:1 gluten-free baking blend. I recommend one that contains xanthan gum. The texture will be slightly more tender, but still delicious.
- Holiday Sparkle: For Christmas or Valentine’s Day, roll the dough balls in colored sugar or sprinkles instead of granulated sugar. It adds a festive touch without changing the flavor.
- Peanut Butter & Jelly: Press a small indentation into the center of each dough ball before baking, and fill it with a half-teaspoon of your favorite jam. Bake as directed, then top with the chocolate kiss. The jam adds a fruity surprise.
- Vegan Version: Use a flax egg (1 tablespoon ground flaxseed mixed with 3 tablespoons water) and a vegan butter substitute. The cookies will be a bit less rich, but still soft and satisfying.
Personal Favorite: I love adding a pinch of flaky sea salt on top of the chocolate kisses right after baking. The salty-sweet combo is irresistible. Try it once, and you’ll never go back.
Serving & Storage Suggestions
These cookies are best served slightly warm, when the chocolate kiss is still soft and the cookie is tender. For a cozy presentation, arrange them on a rustic wooden board or a vintage plate. They pair beautifully with a cold glass of milk, a warm mug of coffee, or a cup of hot cocoa. If you’re feeling fancy, serve them alongside a scoop of vanilla ice cream for an indulgent dessert.
Storage Instructions: Store the cookies in an airtight container at room temperature for up to 5 days. Place a slice of bread in the container to keep them soft—the cookies will absorb the moisture. For longer storage, freeze the baked cookies in a single layer on a baking sheet, then transfer them to a freezer-safe bag. They’ll keep for up to 3 months. Thaw at room temperature for about 30 minutes before serving.
Reheating Tip: Pop a cookie in the microwave for 10-15 seconds to restore that just-baked softness. The chocolate will get melty again, and it’s pure heaven.
Nutritional Information & Benefits
While these cookies are a treat, they do offer some nutritional perks. Peanut butter provides protein and healthy fats, which help keep you full and satisfied. The brown sugar and butter add richness, but the portion size is small—one cookie is usually enough to curb a sweet craving. Here’s an approximate breakdown per cookie (based on 36 cookies):
- Calories: 120
- Fat: 7g
- Carbohydrates: 14g
- Protein: 2g
- Sugar: 9g
Dietary Considerations: This recipe is vegetarian. For a lower-sugar option, reduce the granulated sugar to 1/3 cup and use a sugar-free chocolate kiss. Keep in mind that the texture may be slightly less tender. As always, check your ingredients for potential allergens—this recipe contains peanuts, wheat, and dairy.
My Wellness Perspective: I believe in balance. These cookies are a celebration, not an everyday snack. Enjoy them mindfully, and savor every bite. Life is too short for bad cookies.
Conclusion
These Cozy Peanut Butter Blossom Cookies are more than just a recipe—they’re a reminder that mistakes can lead to something wonderful. With their soft, thick centers and a sweet chocolate kiss on top, they’re the perfect treat for a slow evening at home, a cold winter night, or any time you need a little comfort. I hope you’ll make them your own, whether you stick to the classic version or try one of the variations. Don’t be afraid to experiment—that’s how this recipe was born, after all.
I’d love to hear how your batch turns out. Did you try a fun twist? Did they bring a smile to someone’s face? Drop a comment below and share your story. And if you’re looking for another cozy dessert, check out my soft and chewy chocolate chip cookies—they’re the perfect companion to these blossoms. Happy baking, friend. You’ve got this.
Frequently Asked Questions
Can I use natural peanut butter?
I don’t recommend it. Natural peanut butter separates easily and can make the cookies greasy and flat. Stick with a processed brand like Jif or Skippy for the best texture.
Why did my cookies spread too much?
This usually happens if the butter was too soft or the dough wasn’t chilled. Next time, refrigerate the dough balls for 15 minutes before baking. Also, make sure your baking soda is fresh—old leavening agents lose their power.
Can I freeze the dough?
Absolutely! Roll the dough into balls, place them on a baking sheet, and freeze until solid. Transfer to a freezer bag. When you’re ready to bake, place the frozen dough balls on a lined baking sheet and bake for an extra 2-3 minutes. No need to thaw.
How do I keep the chocolate kisses from melting?
Press the kisses into the cookies immediately after removing them from the oven, but let the cookies cool on the sheet for 1-2 minutes first. If the kisses still melt, your oven temperature might be too high. Try baking at 365°F (185°C) next time.
Can I make these cookies smaller or larger?
Yes! For smaller cookies, use a teaspoon-sized scoop and bake for 8-10 minutes. For larger cookies, use a 2-tablespoon scoop and bake for 12-14 minutes. Adjust the chocolate kiss size accordingly—mini kisses work well for smaller cookies.
Pin This Recipe!

Cozy Peanut Butter Blossom Cookies: Soft, Thick & Perfect

These soft, thick peanut butter blossom cookies are topped with a chocolate kiss and are perfect for cozy nights. They come together in under 30 minutes and are a crowd-pleaser.
- Prep Time: 15 minutes
- Cook Time: 12 minutes
- Total Time: 27 minutes
- Yield: 36 cookies 1x
- Category: Dessert
- Cuisine: American
Ingredients
- 1/2 cup unsalted butter, softened
- 1/2 cup creamy peanut butter
- 1/2 cup granulated sugar (plus extra for rolling)
- 1/2 cup brown sugar, packed
- 1 large egg
- 1 teaspoon vanilla extract
- 1 1/2 cups all-purpose flour
- 1 teaspoon baking soda
- 1/2 teaspoon salt
- About 36 chocolate kisses, unwrapped
Instructions
- Preheat oven to 375°F (190°C). Line two baking sheets with parchment paper or silicone mats. Unwrap chocolate kisses and set aside.
- In a large mixing bowl, beat softened butter, peanut butter, granulated sugar, and brown sugar together until light and fluffy, about 2-3 minutes on medium speed. Scrape down sides halfway through.
- Beat in egg and vanilla extract until just combined. Do not overmix.
- In a separate medium bowl, whisk together flour, baking soda, and salt.
- Gradually add dry ingredients to wet mixture, mixing on low speed until just incorporated. Dough will be soft and slightly sticky. If too sticky, refrigerate for 10 minutes.
- Place extra granulated sugar in a small bowl. Roll dough into 1-inch balls (about 1.5 tablespoons each). Roll each ball in sugar until coated. Place on prepared baking sheets, spaced about 2 inches apart.
- Bake one sheet at a time for 10-12 minutes. Cookies should look puffed and set around edges, with soft centers.
- Remove baking sheet from oven. Immediately press a chocolate kiss into the center of each cookie, pushing gently until cookie cracks slightly around edges.
- Let cookies cool on baking sheet for 5 minutes, then transfer to a wire cooling rack to cool completely.
Notes
For best results, use a standard creamy peanut butter like Jif or Skippy. If dough is sticky, chill for 10-15 minutes before rolling. Do not overbake; cookies should be soft in the center when removed from oven. Press chocolate kisses in immediately after baking but let cookies cool 1-2 minutes first to prevent melting.
Nutrition
- Serving Size: 1 cookie
- Calories: 120
- Sugar: 9
- Sodium: 85
- Fat: 7
- Saturated Fat: 3
- Carbohydrates: 14
- Fiber: 1
- Protein: 2
Keywords: peanut butter blossom cookies, soft peanut butter cookies, chocolate kiss cookies, easy cookie recipe, cozy cookies



