Love this? Save it for later!
Share the inspiration with your friends
“You’ve got to try my secret pie,” my neighbor Mike said one Saturday morning as he shuffled past with a box of tools and a grin. Honestly, I wasn’t expecting a dessert recommendation from the guy who fixes my leaky faucet, but curiosity got the better of me. That afternoon, I found myself sitting at his kitchen table, spoon in hand, savoring the richest, creamiest chocolate peanut butter pie I’d tasted in ages.
Mike’s recipe wasn’t just delicious—it was a no-fuss, no-bake marvel that seemed perfect for busy days when you want to treat Dad without the fuss of turning on the oven. I mean, let’s face it: Father’s Day often sneaks up on us, and this pie was the kind of dessert that says “I care” without demanding hours in the kitchen. Plus, the blend of smooth peanut butter and velvety chocolate was just the right balance to make everyone smile.
That cracked ceramic bowl, a smudge of chocolate on the counter, and Mike’s casual “it’s easy, promise” attitude made this pie feel like a gift from an unexpected friend. Maybe you’ve been there—looking for something simple yet special to celebrate the men we love—and this recipe just might be your new go-to. I keep coming back to it not just because it tastes amazing but because it carries the warmth of that lazy Saturday and a neighbor’s kindness.
Why You’ll Love This Creamy No-Bake Chocolate Peanut Butter Pie Recipe
After making this chocolate peanut butter pie for several family gatherings (and yes, testing it on some picky eaters), I can confidently say it’s one of those rare recipes that hits all the right marks. I’ve tweaked it to be the easiest no-bake pie you can pull together, and honestly, it’s foolproof.
- Quick & Easy: Ready in under 20 minutes, making it a lifesaver for last-minute Father’s Day celebrations or any sweet craving.
- Simple Ingredients: You probably have everything in your pantry already—no special trips required.
- Perfect for Father’s Day: A crowd-pleaser that feels indulgent but isn’t a hassle to prepare.
- Crowd-Pleaser: Kids, teens, and adults alike rave about the creamy texture and the peanut butter-chocolate combo.
- Unbelievably Delicious: The silky peanut butter filling pairs beautifully with a crumbly chocolate crust—comfort food with a grown-up twist.
What sets this chocolate peanut butter pie apart? Well, it’s all about the balance and texture. The filling is whipped to airy perfection with just the right sweetness and a hint of saltiness from the peanut butter. Plus, the no-bake method means that the crust stays wonderfully crunchy, which contrasts so nicely with the creamy top. I’ve found that using cream cheese and whipped cream together gives it that luxurious mouthfeel that makes you want a second slice.
This isn’t just any chocolate peanut butter pie; it’s the kind that makes you pause and savor that first bite. It’s the kind of treat that feels like a warm hug on a plate—perfect for making Father’s Day feel a little extra special without any stress in the kitchen.
What Ingredients You Will Need
This recipe uses simple, wholesome ingredients that come together to create a satisfying texture and bold flavor without fuss. Most of these are pantry staples, and substitutions are easy if you need them.
- For the Crust:
- 1 ½ cups (150g) chocolate sandwich cookies, finely crushed (Oreos or similar; I like Nabisco for consistent crunch)
- 5 tablespoons (70g) unsalted butter, melted (adds richness and helps bind the crust)
- For the Filling:
- 8 oz (225g) cream cheese, softened (room temperature for smooth mixing)
- 1 cup (250g) creamy peanut butter (smooth is best for that silky texture)
- 1 cup (120g) powdered sugar, sifted (for even sweetness)
- 1 teaspoon pure vanilla extract (trust me, it makes a huge flavor difference)
- 1 cup (240ml) heavy whipping cream, cold (whipped to soft peaks)
- For the Topping (Optional):
- ½ cup (90g) semi-sweet chocolate chips, melted (for drizzling)
- Chopped peanuts or shaved chocolate (for garnish)
Ingredient Tips: If you need a dairy-free option, swap cream cheese with a vegan cream cheese and use coconut cream instead of heavy cream. For a gluten-free crust, use gluten-free chocolate cookies or crushed gluten-free graham crackers. And yes, I’ve tried natural peanut butter, but the classic creamy style gives the best texture and taste here.
Equipment Needed
- 9-inch (23 cm) pie dish — glass or ceramic works best to keep the pie cool evenly.
- Mixing bowls — one medium for the crust and one large for the filling.
- Electric mixer or stand mixer — helpful for whipping the cream and blending the filling smoothly. If you’re going old school, a sturdy whisk and elbow grease do the trick but expect a workout!
- Measuring cups and spoons — for accuracy (I always keep a set of clear, easy-to-read ones handy).
- Spatula — for folding whipped cream gently into the peanut butter mixture.
- Plastic wrap or pie cover — to chill the pie and keep it fresh.
If you don’t have a food processor to crush the cookies, just pop them in a zip-top bag and use a rolling pin or heavy pan. That’s how I started before getting my beloved processor, and it works just fine (though it takes a little longer and makes a mess sometimes).
Preparation Method
- Prepare the crust: Place the chocolate sandwich cookies in a food processor and pulse until finely crushed. If you don’t have a processor, crush them in a sealed bag with a rolling pin until you get fine crumbs. Transfer crumbs to a medium mixing bowl.
- Add the melted unsalted butter to the cookie crumbs and mix well until the mixture looks like wet sand. It should stick together when pressed.
- Press the crumb mixture firmly into the bottom and up the sides of a 9-inch pie dish. Use the back of a spoon or your fingers to make it even and compact. Chill the crust in the refrigerator for at least 15 minutes to set.
- Make the filling: In a large bowl, beat the softened cream cheese with an electric mixer until smooth—no lumps! Add the creamy peanut butter and continue to beat until well combined.
- Sift in the powdered sugar and vanilla extract, then mix again until the filling is smooth and glossy.
- In a separate chilled bowl, whip the heavy cream to soft peaks. This means when you lift the whisk, peaks form but gently fold back.
- Gently fold the whipped cream into the peanut butter mixture using a spatula. Be careful not to deflate the mixture; you want it light and airy.
- Pour the filling into the prepared crust, smoothing the top with a spatula.
- Cover the pie loosely with plastic wrap and refrigerate for at least 4 hours, preferably overnight. This chilling step lets the pie set up beautifully.
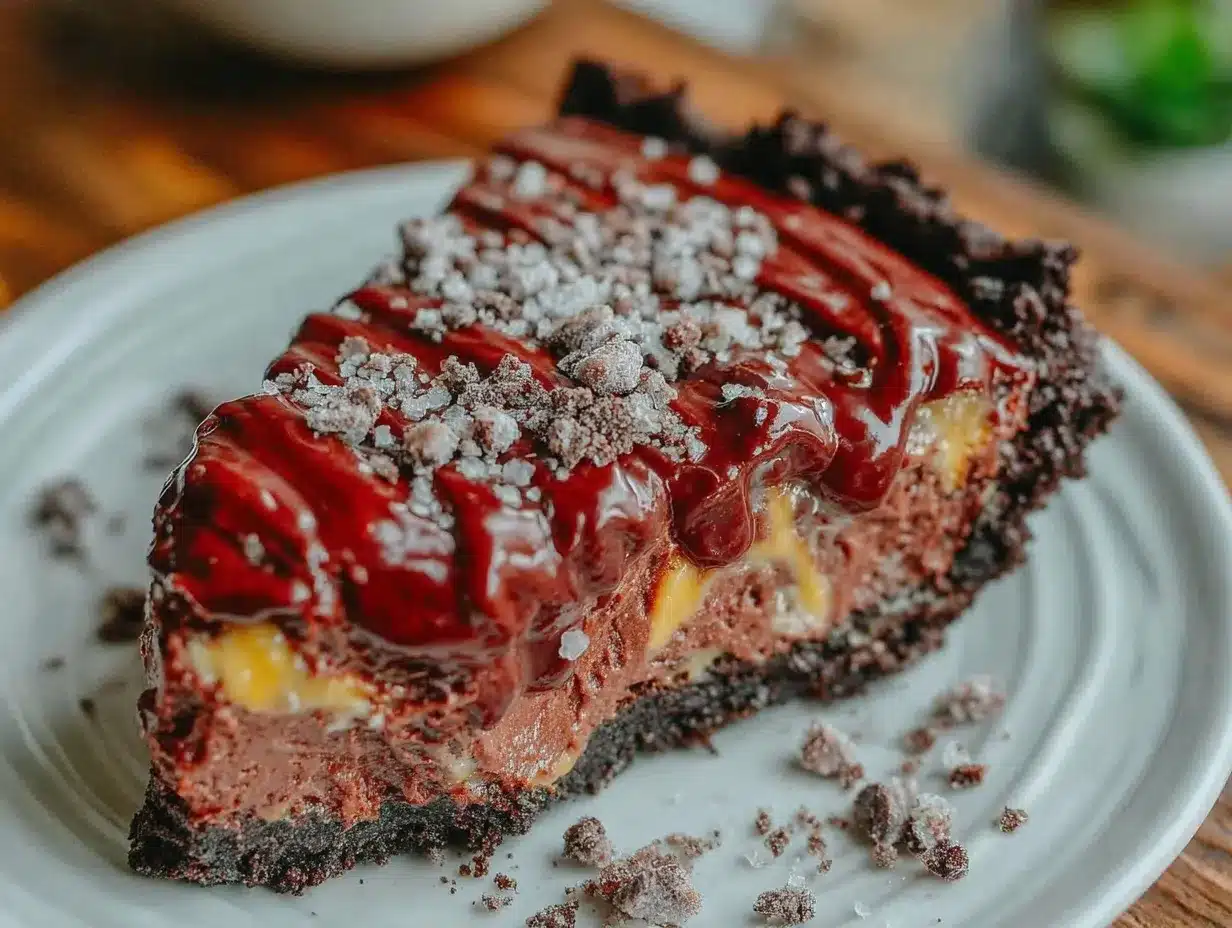
- Add toppings before serving: Drizzle melted chocolate over the pie (use a spoon or a piping bag for a neat drizzle). Sprinkle chopped peanuts or shaved chocolate for an extra touch of texture and visual appeal.
Pro Tip: If your cream cheese isn’t soft enough, zap it in the microwave for 10 seconds at a time—but don’t melt it! Also, if your peanut butter is a bit thick, warming it slightly can help with mixing.
Cooking Tips & Techniques
One key to this pie’s success is whipping the cream just right. Over-whip, and it turns grainy; under-whip, and the pie won’t be as light and fluffy. I learned this the hard way during my first batch, so I always keep an eye on the texture and stop as soon as soft peaks form.
Another tip: don’t skip chilling the crust before adding the filling. It helps it hold its shape and prevents the crust from getting soggy. Trust me, I once rushed this step and ended up with a crumbly mess that no one wanted to slice!
Folding whipped cream into the peanut butter mixture can be intimidating, but the trick is to use gentle, sweeping motions. Think of it like tucking the cream in rather than stirring aggressively. This keeps the light texture intact.
If you want to speed up the chilling process, pop the pie in the freezer for 30-45 minutes, but watch carefully so it doesn’t freeze solid. A semi-frozen pie is easier to slice cleanly.
Lastly, when melting chocolate for drizzle, use a double boiler or microwave in short bursts (15 seconds), stirring in between to avoid burning. A burnt chocolate drizzle is a sad sight and taste!
Variations & Adaptations
- Peanut Butter-Free Version: Swap peanut butter for almond or cashew butter for a different nutty twist. The flavor changes but the creamy texture stays.
- Vegan Adaptation: Use vegan cream cheese and coconut cream instead of dairy, plus a dairy-free cookie crust. I tried this once for a friend’s dairy allergy, and it impressed everyone.
- Chocolate Lovers’ Dream: Add ½ cup (90g) melted dark chocolate into the filling for a richer, more intense chocolate flavor.
- Seasonal Twist: Top with fresh berries or sliced bananas for a fruity contrast that brightens the rich flavors.
- Crunch Factor: Mix chopped peanuts or pretzels into the crust for extra texture and a salty kick.
Serving & Storage Suggestions
This creamy no-bake chocolate peanut butter pie is best served chilled, straight from the fridge. Let it sit at room temperature for about 10 minutes before slicing to soften slightly for easier cutting.
Pair it with a cold glass of milk, a robust cup of coffee, or even a smooth stout beer for an adult-only treat. I’ve seen it steal the show at brunches and casual dinners alike.
Store leftovers tightly covered in the refrigerator for up to 4 days. Freezing is possible for up to a month, but thaw overnight in the fridge before serving to keep that perfect creamy texture.
Flavors actually deepen after a day, so if you plan ahead, the pie tastes even better the next day. Just remember to add fresh toppings after chilling.
Nutritional Information & Benefits
One generous slice (about 1/8 of the pie) contains approximately 420 calories, with 28 grams of fat, 35 grams of carbohydrates, and 8 grams of protein. The peanut butter provides a good dose of healthy fats and plant-based protein, while the cream cheese adds calcium and richness.
This recipe is gluten-friendly if you use gluten-free cookies for the crust. It’s not low-calorie or low-fat, of course, but it’s a satisfying treat made from real ingredients rather than processed sugars or artificial flavors.
Personally, I appreciate that it combines indulgence with straightforward ingredients—no mystery additives. It’s a dessert that feels like a special occasion without guilt over unknown extras.
Conclusion
This creamy no-bake chocolate peanut butter pie is a simple, delicious way to celebrate Father’s Day or any day you want to impress without stress. Its smooth texture, balanced flavors, and easy prep make it a winner every time.
Feel free to tweak the recipe to match your family’s taste—add more chocolate, swap nuts, or pile on berries. Honestly, it’s hard to go wrong with this one.
Why do I keep making this pie? Because every single time, it brings smiles, nostalgia, and a little bit of magic to the table. I hope you’ll enjoy it just as much.
If you give this recipe a try, please leave a comment or share your twists—I love hearing how you make it your own!
FAQs about Creamy No-Bake Chocolate Peanut Butter Pie
Can I make this pie ahead of time?
Absolutely! Make it the day before Father’s Day and keep it refrigerated. The flavors meld beautifully overnight.
What if I don’t have cream cheese?
You can try substituting with mascarpone or ricotta for a different texture, but cream cheese works best for that classic tang and firmness.
How do I get clean slices when serving?
Use a sharp knife dipped in hot water and wiped dry between cuts. Letting the pie sit at room temperature for 10 minutes also helps.
Can I use crunchy peanut butter?
Yes, but the filling will have some texture. If you prefer silky smooth, stick with creamy peanut butter.
Is this recipe kid-friendly?
Definitely! Kids love the sweet peanut butter and chocolate combo, and it’s a great way to get them involved in easy dessert prep.
Pin This Recipe!
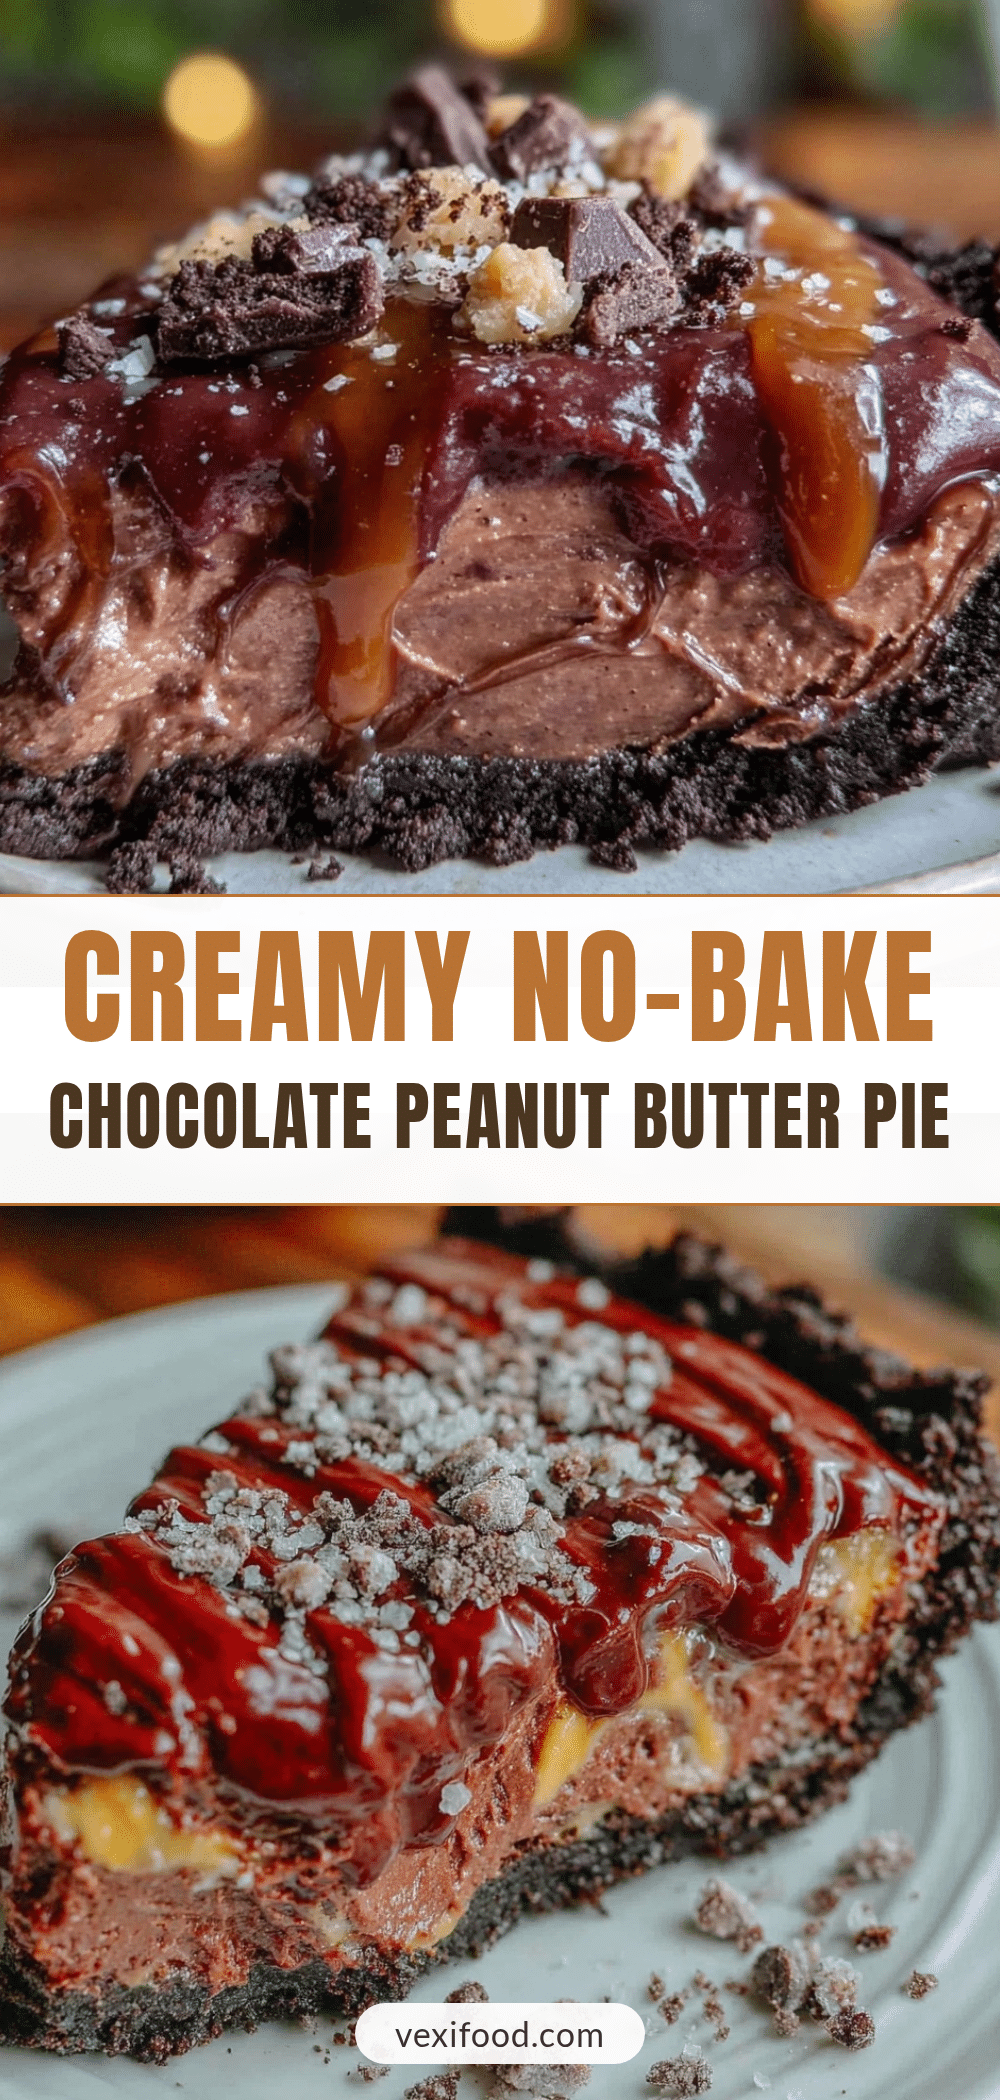
Creamy No-Bake Chocolate Peanut Butter Pie
A rich and creamy no-bake chocolate peanut butter pie perfect for easy Father’s Day treats, combining a crunchy chocolate crust with a silky peanut butter filling.
- Prep Time: 15 minutes
- Cook Time: 0 minutes
- Total Time: 4 hours 15 minutes
- Yield: 8 servings 1x
- Category: Dessert
- Cuisine: American
Ingredients
- 1 ½ cups (150g) chocolate sandwich cookies, finely crushed (Oreos or similar)
- 5 tablespoons (70g) unsalted butter, melted
- 8 oz (225g) cream cheese, softened
- 1 cup (250g) creamy peanut butter
- 1 cup (120g) powdered sugar, sifted
- 1 teaspoon pure vanilla extract
- 1 cup (240ml) heavy whipping cream, cold
- ½ cup (90g) semi-sweet chocolate chips, melted (optional for drizzling)
- Chopped peanuts or shaved chocolate (optional for garnish)
Instructions
- Place the chocolate sandwich cookies in a food processor and pulse until finely crushed. If you don’t have a processor, crush them in a sealed bag with a rolling pin until you get fine crumbs. Transfer crumbs to a medium mixing bowl.
- Add the melted unsalted butter to the cookie crumbs and mix well until the mixture looks like wet sand. It should stick together when pressed.
- Press the crumb mixture firmly into the bottom and up the sides of a 9-inch pie dish. Use the back of a spoon or your fingers to make it even and compact. Chill the crust in the refrigerator for at least 15 minutes to set.
- In a large bowl, beat the softened cream cheese with an electric mixer until smooth—no lumps!
- Add the creamy peanut butter and continue to beat until well combined.
- Sift in the powdered sugar and vanilla extract, then mix again until the filling is smooth and glossy.
- In a separate chilled bowl, whip the heavy cream to soft peaks.
- Gently fold the whipped cream into the peanut butter mixture using a spatula, being careful not to deflate the mixture.
- Pour the filling into the prepared crust, smoothing the top with a spatula.
- Cover the pie loosely with plastic wrap and refrigerate for at least 4 hours, preferably overnight.
- Before serving, drizzle melted chocolate over the pie and sprinkle chopped peanuts or shaved chocolate for garnish.
Notes
If cream cheese isn’t soft enough, microwave in 10-second intervals without melting. Warm peanut butter slightly if thick for easier mixing. Whip cream to soft peaks to avoid grainy texture. Chill crust before filling to prevent sogginess. Use a sharp knife dipped in hot water for clean slices. For faster chilling, freeze pie for 30-45 minutes but do not freeze solid.
Nutrition
- Serving Size: 1 slice (1/8 of pie)
- Calories: 420
- Fat: 28
- Carbohydrates: 35
- Protein: 8
Keywords: no-bake pie, chocolate peanut butter pie, easy dessert, Father's Day dessert, creamy pie, peanut butter dessert