Love this? Save it for later!
Share the inspiration with your friends
Introduction
“I wasn’t expecting much when I opened the fridge that Wednesday night,” I said to myself, staring at the sad, slightly dried-out burgers from last night’s barbecue. You know that feeling—leftover burgers are usually a bit of a dud by the next day. But honestly, I wasn’t ready to toss out those patties just yet.
What happened next was sort of an accident, a kitchen experiment born out of hunger and a bit of impatience. I grabbed a sturdy cast iron skillet, a spatula, and decided to give those cold, dense patties a new life. Smashing them thin, letting them crisp up, and layering in fresh toppings transformed those leftovers into a juicy, crispy delight that surprised even me.
That cracked bowl I used to press the patties down got a little messy, and I almost burnt my thumb in the process—but hey, that’s the beauty of the kitchen chaos, right? This Savory Second-Day Smash Burger Revival recipe has stuck with me ever since. Maybe you’ve been there too, staring down leftover burgers wondering if they’re destined for the trash. Let me tell you, with this method, they’ll become the star of your next meal.
Why You’ll Love This Recipe
After quite a few trials (and a few too many burnt edges), this recipe has become my go-to for leftover burgers. It’s not just about reheating; it’s about bringing back that juicy, crispy magic you get from a freshly smashed burger—and honestly, it’s pretty addictive.
- Quick & Easy: Ready in under 15 minutes, making it perfect for busy nights or unexpected cravings.
- Simple Ingredients: Uses leftovers and pantry staples you likely already have on hand.
- Perfect for Any Occasion: Whether a late-night snack or a casual dinner, it hits the spot.
- Crowd-Pleaser: Your friends and family won’t guess these burgers started as day-old leftovers.
- Unbelievably Delicious: The crispy edges and melty cheese combo bring that classic diner feel right to your kitchen.
This isn’t just reheating; it’s a little kitchen magic that turns yesterday’s burgers into today’s crave-worthy smash burgers. The trick is in the smashing technique and adding a few fresh toppings for contrast. You get all the flavor, none of the disappointment.
What Ingredients You Will Need
This recipe uses simple, wholesome ingredients to give your leftover burgers a crispy, juicy makeover without any fuss. Most of these are pantry staples or quick fresh add-ons.
- Leftover cooked burger patties: any beef, turkey, or plant-based patties work fine
- Unsalted butter or oil: for frying (I prefer Kerrygold butter for its rich flavor)
- Cheese slices: American or cheddar melt beautifully (optional but highly recommended)
- Fresh burger buns: lightly toasted for crunch
- Pickles: thinly sliced (adds tang and crunch)
- Onions: thinly sliced red or white (raw or lightly caramelized)
- Lettuce and tomato slices: fresh, for brightness
- Condiments: mayo, ketchup, mustard, or your favorite burger sauce
- Salt and pepper: to taste (freshly cracked black pepper is best!)
If you want to switch things up, feel free to swap the butter with olive oil or avocado oil for a different flavor profile. Plus, if you don’t have fresh buns, using sturdy sandwich bread toasted in butter works surprisingly well.
Equipment Needed

- Cast iron skillet or heavy non-stick pan: essential for getting that perfect sear and crisp edges.
- Spatula: a sturdy metal spatula works best for smashing burgers evenly.
- Butter knife or small bowl: for spreading condiments.
- Toaster or oven: for warming buns to a slight crunch.
If you don’t have a cast iron skillet, a heavy stainless steel pan will do—just make sure it’s hot enough before adding the patties. Personally, I’ve found that the cast iron keeps heat steady, which is key for that crispy crust. Also, keep your spatula handy for the smashing step—it’s where the magic happens!
Preparation Method
- Prepare your toppings and buns: While your pan heats up, slice onions, pickles, tomatoes, and wash lettuce. Toast buns lightly in a toaster or oven set to 350°F (175°C) for about 3-4 minutes. This prevents sogginess later.
- Heat the skillet: Place your cast iron skillet over medium-high heat and add 1 tablespoon of butter or oil. Let it melt and coat the surface evenly. You want it hot enough so the butter sizzles but doesn’t burn—about 3 minutes.
- Smash the patties: Place a leftover burger patty in the pan. Using your spatula or a heavy bowl wrapped in foil, press down firmly to flatten it to about half its original thickness. Hold for 15 seconds to get a nice crust forming. If the patty resists, give it a quick minute to warm up before smashing again.
- Season and cook: Sprinkle a pinch of salt and cracked black pepper on the patty. Let it cook for 2-3 minutes without moving. You’ll see crispy edges and a dark golden crust forming—that’s the goal!
- Add cheese: Flip the patty carefully and immediately top with a slice of cheese. Cook for another 1-2 minutes until melted and the patty is warmed through. If the cheese doesn’t melt easily, cover the pan briefly with a lid to trap heat.
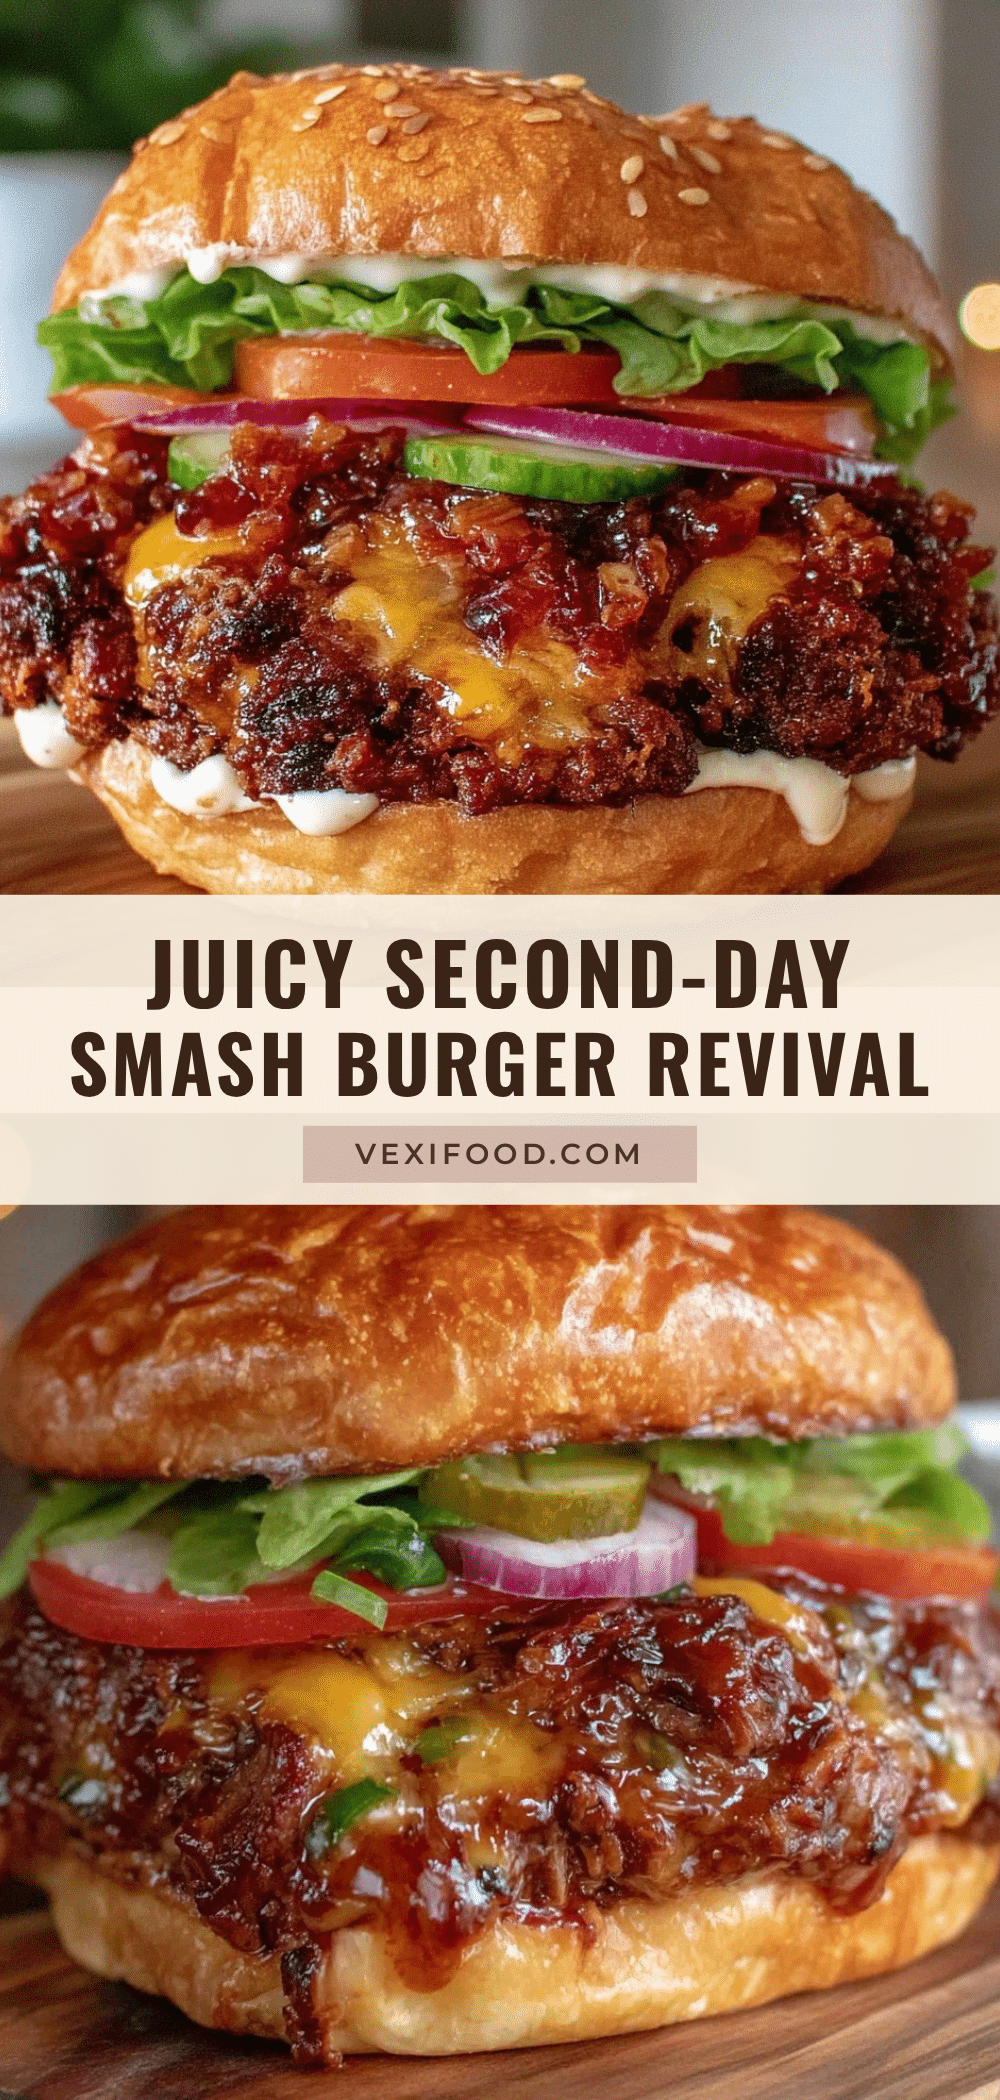
- Assemble your burger: Spread your preferred condiments on the toasted buns. Layer the melted-cheese patty, fresh lettuce, tomato slices, onions, and pickles. Finish with the top bun.
- Serve immediately: These burgers are best enjoyed hot, right off the skillet, to savor the crispy edges and melty center.
Pro tip: If you find the burgers sticking, lower the heat slightly next time and add a little more butter. Also, don’t overcrowd the pan—smash and cook in batches for best results.
Cooking Tips & Techniques
The hallmark of this recipe is that crispy, caramelized crust on the outside paired with juicy, flavorful meat inside. Here’s what I’ve learned after a few kitchen mishaps:
- Don’t skip the smashing step: Pressing the patties thin creates more surface area for browning. It’s what gives you that irresistible crust.
- Use a hot pan: A properly heated cast iron skillet is key. If the pan is too cool, you’ll end up steaming instead of searing.
- Butter vs. oil: Butter adds flavor but can burn quickly. Mixing butter with a little oil can help with higher heat cooking.
- Cheese timing: Add cheese right after flipping the patty to let it melt perfectly without overcooking the meat.
- Don’t press down after flipping: Once you flip, resist the urge to smash again—you want to keep that juicy interior intact.
- Multitasking: While patties cook, prep your toppings and toast buns so everything comes together smoothly.
I once tried smashing the patties cold and they stuck badly, so letting them warm up slightly makes smashing easier. Also, if you like a bit of smoky flavor, finish the patties with a quick broil (just a minute or two) under your oven’s broiler after cooking.
Variations & Adaptations
This recipe is super flexible and you can tweak it based on what you have or prefer:
- Protein swaps: Use leftover turkey or chicken patties for a lighter option. Plant-based burger patties work great too—just adjust cooking times slightly.
- Cheese alternatives: Try pepper jack for a spicy kick, Swiss for nuttiness, or vegan cheese for dairy-free folks.
- Seasoning twists: Add a dash of smoked paprika or garlic powder to the patties before smashing for extra flavor layers.
- Gluten-free option: Serve on gluten-free buns or lettuce wraps for a low-carb take.
Personally, I once added caramelized onions and a swipe of garlic aioli to kick things up a notch. It was a game-changer! Feel free to experiment with sauces and toppings that suit your taste buds.
Serving & Storage Suggestions
Serve your revived smash burgers hot with a side of crispy fries or a fresh salad for balance. A cold craft beer or a sparkling soda pairs nicely, cutting through the richness.
If you have leftovers (unlikely!), wrap burgers tightly in foil and refrigerate for up to 2 days. Reheat gently in a skillet over medium-low heat to keep the crust crispy; avoid microwaving to prevent sogginess.
Flavors actually meld nicely if you let the assembled burger rest for 5 minutes before serving, especially if you’re using sauces and fresh toppings. The contrast of crispy edges and juicy interior with crisp veggies is what keeps me coming back.
Nutritional Information & Benefits
This recipe offers a satisfying balance of protein and fats, making it a hearty meal option. Using leftover patties reduces food waste and keeps your kitchen efficient.
- Protein: Leftover beef or turkey patties provide muscle-building protein and essential nutrients.
- Fats: Butter and cheese add richness and satiety but you can reduce amounts if aiming for a lighter meal.
- Vegetables: Fresh lettuce, tomatoes, and onions add fiber, vitamins, and a refreshing crunch.
For gluten-free or dairy-free diets, simple swaps like gluten-free buns or vegan cheese make this recipe accessible. Personally, I find this meal hits the spot when I want comfort food without overdoing processed ingredients.
Conclusion
This Savory Second-Day Smash Burger Revival recipe has changed the way I look at leftovers. Instead of sad, dry patties, you get juicy, crispy burgers that taste like they were made fresh. It’s quick, satisfying, and lets you enjoy your favorite flavors without waste.
Feel free to customize toppings, cheese, and seasonings to make it your own. Trust me, once you try this, you’ll keep reaching for those day-old patties with excitement instead of dread. If you give it a shot, I’d love to hear your tweaks and how it turned out for you!
Now, go grab those leftover burgers and let’s get smashing!
FAQs
Can I use frozen leftover patties for this recipe?
Yes! Just thaw them completely in the fridge before smashing and cooking to ensure even heating and prevent sticking.
What if I don’t have a cast iron skillet?
A heavy stainless steel or non-stick pan works fine, but make sure it’s hot before adding the patties to get a good sear.
How do I prevent the patties from sticking to the pan?
Use enough butter or oil and let the pan heat fully before adding the patties. Avoid moving them too soon to develop a crust.
Can I add toppings before reheating the patties?
It’s best to add fresh toppings after reheating to keep them crisp and flavorful, especially lettuce and tomato.
Is this recipe suitable for plant-based burgers?
Absolutely! Just adjust cooking times as plant-based patties can cook faster and be more delicate when smashing.
Pin This Recipe!
Savory Second-Day Smash Burger Revival

A quick and easy method to transform leftover burger patties into juicy, crispy smash burgers with fresh toppings and melty cheese.
- Prep Time: 5 minutes
- Cook Time: 10 minutes
- Total Time: 15 minutes
- Yield: 2 servings 1x
- Category: Main Course
- Cuisine: American
Ingredients
- Leftover cooked burger patties (beef, turkey, or plant-based)
- 1 tablespoon unsalted butter or oil (Kerrygold butter preferred)
- Cheese slices (American or cheddar, optional but recommended)
- Fresh burger buns, lightly toasted
- Pickles, thinly sliced
- Onions, thinly sliced red or white (raw or lightly caramelized)
- Lettuce leaves
- Tomato slices
- Condiments: mayo, ketchup, mustard, or favorite burger sauce
- Salt and freshly cracked black pepper to taste
Instructions
- Prepare your toppings and buns: slice onions, pickles, tomatoes, and wash lettuce. Toast buns in a toaster or oven at 350°F for 3-4 minutes.
- Heat the skillet over medium-high heat and add 1 tablespoon of butter or oil. Let it melt and coat the surface evenly, about 3 minutes.
- Place a leftover burger patty in the pan. Using a spatula or heavy bowl wrapped in foil, press down firmly to flatten it to about half its original thickness. Hold for 15 seconds to form a crust. If the patty resists, warm it for a minute before smashing again.
- Season the patty with salt and cracked black pepper. Cook for 2-3 minutes without moving until crispy edges and a dark golden crust form.
- Flip the patty carefully and immediately top with a slice of cheese. Cook for another 1-2 minutes until melted and warmed through. Cover briefly with a lid if cheese doesn’t melt easily.
- Assemble the burger by spreading preferred condiments on toasted buns. Layer the melted-cheese patty, lettuce, tomato slices, onions, and pickles. Finish with the top bun.
- Serve immediately while hot to enjoy crispy edges and melty center.
Notes
Do not skip the smashing step to get a crispy crust. Use a hot pan to avoid steaming. Mix butter with oil to prevent burning. Add cheese immediately after flipping. Avoid pressing patties after flipping to keep them juicy. If burgers stick, lower heat and add more butter. Cook in batches to avoid overcrowding. For smoky flavor, finish with a quick broil under the oven.
Nutrition
- Serving Size: 1 burger
- Calories: 450
- Sugar: 5
- Sodium: 700
- Fat: 28
- Saturated Fat: 12
- Carbohydrates: 30
- Fiber: 2
- Protein: 25
Keywords: leftover burgers, smash burger, quick recipe, crispy burger, juicy burger, leftover makeover, easy dinner