Love this? Save it for later!
Share the inspiration with your friends
“I wasn’t even planning to make dessert that night,” I admit, chuckling as I recall that warm Saturday evening last June. I was at my friend Jamie’s house, and she was prepping dinner while I fiddled with my phone, trying to beat the summer heat. Then, out of nowhere, she pulled out these charming little jars filled with what looked like the creamiest strawberry cheesecake I’d ever seen—no oven in sight. Honestly, my curiosity was piqued, especially since the kitchen was a bit of a mess and she was in a hurry to get to her book club meeting.
Jamie confessed she’d whipped up these Easy No-Bake Strawberry Cheesecake Jars after a late-night craving, with just a handful of ingredients she had on hand. I remember watching her layer the buttery graham cracker crumbs, the silky cheesecake filling, and fresh strawberry slices with such casual ease. The best part? No baking, no fuss, just pure summer sweetness in a jar. By the time I left, I was carrying a couple of jars home, already planning to make them myself.
Maybe you’ve been there—wanting a dessert that’s simple, fresh, and perfect for warm weather without heating up your kitchen. These strawberry cheesecake jars hit that sweet spot. Let me tell you, they’ve become my go-to for impromptu guests and lazy weekend treats. And, trust me, once you try them, you’ll understand why this recipe sticks with you.
Why You’ll Love This Recipe
After dozens of tests in my kitchen (and some happy taste testers at Jamie’s book club!), I can say this Easy No-Bake Strawberry Cheesecake Jars recipe really stands out for so many reasons:
- Quick & Easy: Ready in under 20 minutes—perfect for last-minute gatherings or when you just want dessert without the drama.
- Simple Ingredients: No fancy shopping needed. You probably have cream cheese, graham crackers, and fresh strawberries in your fridge or pantry already.
- Perfect for Summer: Light, refreshing, and served chilled, these jars are a crowd-pleaser on hot days or picnics.
- Crowd-Pleaser: Kids and adults alike can’t seem to get enough of the creamy texture paired with the sweet-tart berry topping.
- Unbelievably Delicious: The balance of buttery crumb, smooth filling, and juicy strawberries really hits that comfort-food note without weighing you down.
What makes this recipe different? I blend the cream cheese with a touch of vanilla and lemon zest for a subtle zing that lifts the whole cheesecake flavor. The layering technique also creates a pretty presentation that feels special—no fancy plating skills required. Honestly, it’s the kind of dessert that makes you close your eyes after the first bite, savoring that perfect combo of creaminess and fruitiness.
It’s also versatile—you can swap in other berries or add a drizzle of balsamic glaze for a grown-up twist. But if you’re here for the classic, this is the best version I’ve found. I mean, who wouldn’t want an easy, fuss-free dessert that still feels like a treat?
What Ingredients You Will Need
This recipe uses simple, wholesome ingredients to deliver bold flavor and satisfying texture without the fuss. Most are pantry staples or easy to find at any grocery store during strawberry season.
- For the Crust Layer:
- Graham cracker crumbs (about 1 ½ cups / 150g) — I recommend Honey Maid for that perfect buttery crunch
- Unsalted butter, melted (6 tablespoons / 85g) — adds richness and helps bind the crumbs
- Granulated sugar (2 tablespoons / 25g) — balances the buttery flavor
- For the Cheesecake Filling:
- Cream cheese, softened (16 ounces / 450g) — use full-fat for that classic creamy texture
- Powdered sugar (¾ cup / 90g) — smooth sweetness without graininess
- Heavy cream (⅔ cup / 160ml) — whipped to soft peaks for lightness
- Vanilla extract (1 teaspoon) — essential for flavor depth
- Lemon zest (1 teaspoon) — adds a fresh, bright note
- For the Strawberry Topping:
- Fresh strawberries (2 cups / 300g), hulled and sliced — pick ripe, fragrant berries for best taste
- Granulated sugar (2 tablespoons / 25g) — to macerate the strawberries
- Fresh lemon juice (1 tablespoon) — to enhance the berry’s natural flavor
Substitutions: For a dairy-free option, try swapping cream cheese with a vegan alternative like cashew-based cream cheese and use coconut cream instead of heavy cream. Gluten-free graham cracker crumbs also work well if needed.
Equipment Needed
- Mixing bowls (medium and large) — glass or stainless steel preferred for easy cleanup
- Electric hand mixer or stand mixer — makes whipping cream and cream cheese smooth and easy
- Measuring cups and spoons — precision matters for balance
- Small jars or dessert glasses (about 6 to 8, 8-ounce size) — the star of the show for presentation and portion control
- Spoon or spatula — for layering
- Knife and cutting board — to slice strawberries
If you don’t have an electric mixer, a sturdy whisk and some elbow grease will do the trick, but it’ll take a bit longer. For jars, Mason jars or small clear tumblers work beautifully, turning this simple dessert into a charming summer treat. I’ve found that using similar-sized jars helps keep serving sizes consistent, which is handy if you’re hosting guests.
Preparation Method
- Prepare the crust: In a medium bowl, combine 1½ cups (150g) graham cracker crumbs, 6 tablespoons (85g) melted unsalted butter, and 2 tablespoons (25g) granulated sugar. Stir until the mixture resembles wet sand. This should take about 3 minutes. If it feels too dry, add a little more melted butter, one teaspoon at a time.
- Layer the crust: Divide the crust mixture evenly among your jars (6 to 8 jars, 8 oz each). Press down firmly with the back of a spoon or the bottom of a small glass to create an even, compact base. Chill the jars in the fridge for 10 minutes while you prepare the filling. This helps the crust set and prevents it from getting soggy.
- Make the cheesecake filling: In a large bowl, beat 16 ounces (450g) softened cream cheese with ¾ cup (90g) powdered sugar until smooth and creamy. This usually takes 2-3 minutes with an electric mixer on medium speed. Add 1 teaspoon vanilla extract and 1 teaspoon lemon zest; mix until combined.
- Whip the cream: In a separate bowl, whip ⅔ cup (160ml) heavy cream until soft peaks form. Be careful not to over-whip — the cream should be light and fluffy but not grainy. Gently fold the whipped cream into the cream cheese mixture using a spatula, folding carefully to keep the mixture airy. This step takes about 2-3 minutes.
- Prepare the strawberry topping: In a small bowl, combine 2 cups (300g) sliced fresh strawberries with 2 tablespoons (25g) granulated sugar and 1 tablespoon fresh lemon juice. Stir gently and let it sit for 10 minutes to macerate. You’ll notice the strawberries release their juices, creating a natural syrup.
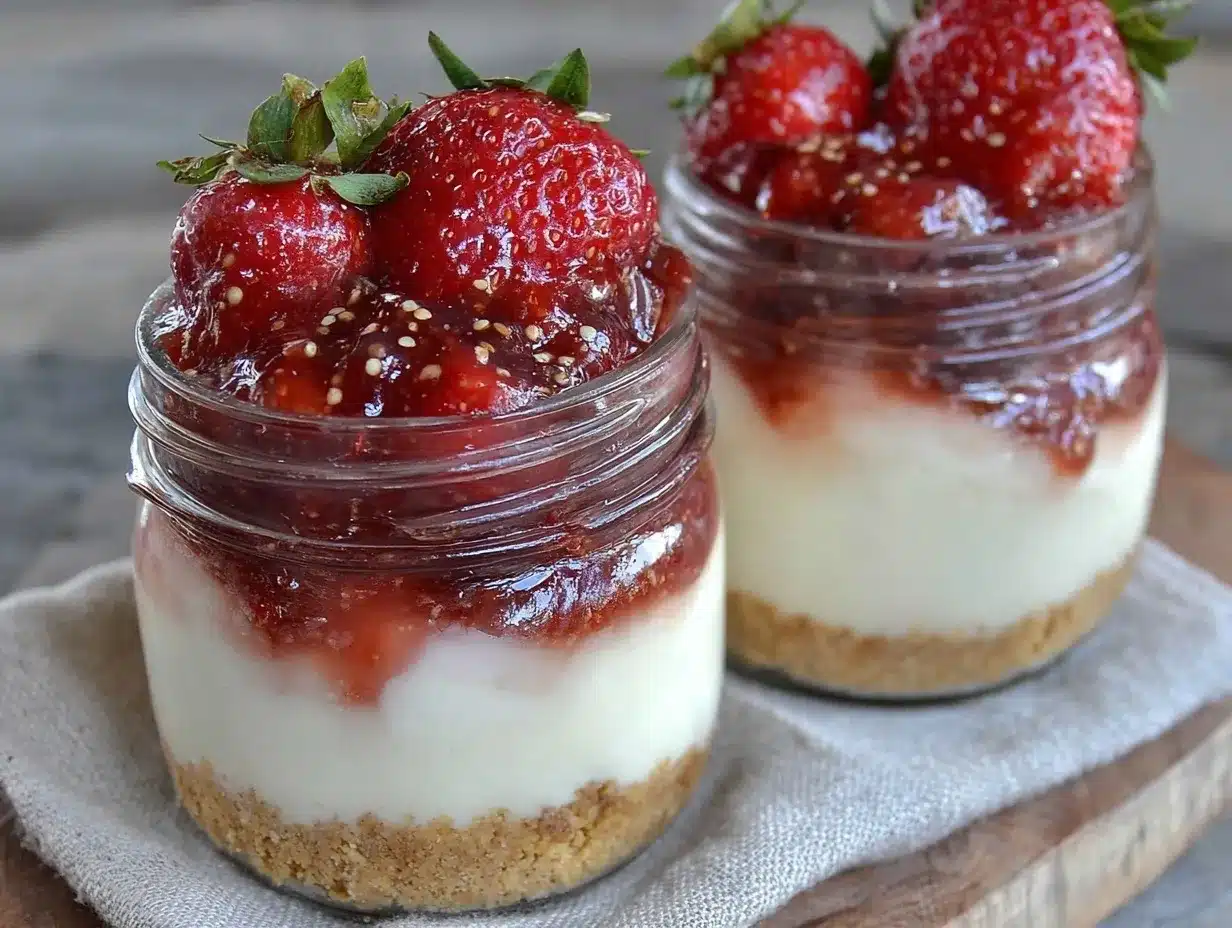
- Assemble the jars: Spoon or pipe the cheesecake filling over the chilled crust layer, filling each jar up to about ¾ full. Then top with a generous spoonful of the macerated strawberries and their syrup. The layers create a beautiful contrast of creamy white and vibrant red.
- Chill before serving: Refrigerate the jars for at least 2 hours, preferably overnight. This gives the cheesecake filling time to firm up and the flavors to meld together. If you’re in a hurry, 1 hour will do, but the texture won’t be quite as perfect.
Tip: If you’re prepping ahead for a picnic or party, these jars travel well and can be stacked in a cooler. Just keep them upright to avoid spills.
Cooking Tips & Techniques
Honestly, making no-bake cheesecake jars is forgiving, but a few things make a world of difference. First, soften your cream cheese well—take it out of the fridge at least 30 minutes ahead to avoid lumps. If you forgot, microwave it for 10 seconds at a time; patience here pays off!
When whipping the heavy cream, keep an eye on the texture—stop as soon as soft peaks form. Over-whipping leads to grainy or even butter-like lumps, which nobody wants in their cheesecake. Folding whipped cream into the cream cheese should be gentle; you want to preserve that airy, light feel rather than deflating the mixture.
Another trick: press the crust firmly into the jars but don’t pack it too hard—it needs to hold together but still crumble when you dig in. Also, macerating the strawberries isn’t optional. That step lets the fruit release natural sweetness and juiciness, which adds moisture and balance to the dessert.
Lastly, chilling time is your friend. The longer you refrigerate, the better the texture. I’ve learned the hard way by rushing to serve and ending up with a runny mess. Plan ahead if you can!
Multitasking tip: While the strawberries macerate, beat the cream cheese and whip the cream to keep things moving efficiently.
Variations & Adaptations
- Berry Swap: Use fresh blueberries, raspberries, or a mix instead of strawberries. Blueberries macerate wonderfully with a touch of orange zest.
- Chocolate Lovers’ Version: Add 2 tablespoons unsweetened cocoa powder to the cream cheese mixture and sprinkle mini chocolate chips between layers for a rich twist.
- Gluten-Free Option: Substitute graham cracker crumbs with gluten-free graham crumbs or crushed almond flour mixed with a bit of coconut oil.
- Dairy-Free Adaptation: Use vegan cream cheese and coconut cream whipped until fluffy. The texture changes slightly but still delicious.
- Personal Favorite: I once added a spoonful of homemade strawberry jam layered between the crust and cheesecake filling. It added a punch of sweetness and a nice texture contrast.
Feel free to experiment with the layering order or add toppings like toasted coconut flakes or chopped nuts for crunch.
Serving & Storage Suggestions
Serve these Easy No-Bake Strawberry Cheesecake Jars chilled, right out of the fridge. The cool temperature enhances the creamy texture and fresh strawberry flavor. They look adorable with a small spoon tucked in or a mint leaf garnish for extra flair.
Pair them with a cup of iced tea, lemonade, or a light sparkling wine for a refreshing summer combo. These jars are perfect for backyard barbecues, potlucks, or casual dinner parties where you want to impress without stress.
To store, cover the jars tightly with lids or plastic wrap and refrigerate. They keep well for up to 3 days, though honestly, they rarely last that long in my house. For longer storage, you can freeze them for up to 2 weeks; just thaw in the fridge overnight before serving.
Reheating is not recommended, but if you want to soften the filling slightly, let them sit at room temperature for 10 minutes before digging in. The flavors tend to deepen after a day or two, so if you can wait, you’ll be rewarded.
Nutritional Information & Benefits
Each jar (based on 8 servings) contains approximately:
| Calories | 320 |
|---|---|
| Fat | 22g |
| Carbohydrates | 26g |
| Protein | 5g |
| Fiber | 1.5g |
| Sugar | 18g |
Strawberries are packed with vitamin C and antioxidants, making this dessert a bit more than just tasty indulgence. Using real cream cheese and fresh fruit means no artificial additives, and the portion-controlled jars help with mindful eating.
This recipe can be adjusted for various dietary needs, including gluten-free or dairy-free, making it accessible to many. It’s a sweet treat that feels a little lighter than traditional baked cheesecakes, perfect for warmer months.
Conclusion
In the end, these Easy No-Bake Strawberry Cheesecake Jars are a simple, delightful way to enjoy a classic dessert without heating up your kitchen or stressing over complicated steps. Whether you’re new to cheesecake or a seasoned fan, this recipe offers a fresh, approachable take that’s both delicious and pretty enough to share.
I love how versatile and forgiving it is—you can customize it to your taste or whatever you have on hand. Honestly, it’s become my summer staple for quick desserts and casual entertaining. Give it a try, and I bet it’ll find a spot in your recipe rotation too.
Don’t be shy—let me know how you make it your own! Drop a comment, share your tweaks, or tell me about your first bite experience. I’m always excited to hear from fellow cheesecake lovers.
Here’s to sweet, easy summer treats that bring a little joy in every jar!
Frequently Asked Questions
Can I use frozen strawberries for this recipe?
Yes! Just thaw them completely and drain any excess liquid before macerating. Fresh berries work best for texture, but frozen are a convenient alternative.
How long can I store these cheesecake jars in the fridge?
They stay fresh for up to 3 days when covered tightly. Beyond that, the crust may get soggy, and the filling’s texture can change.
Can I prepare these jars ahead of time?
Absolutely! Assemble them a day in advance and keep refrigerated. This actually helps the flavors meld and the texture firm up nicely.
What if I don’t have graham crackers?
You can substitute with digestive biscuits, crushed vanilla wafers, or even crushed pretzels for a salty-sweet twist.
Is it possible to make these jars vegan?
Yes. Use vegan cream cheese alternatives, coconut cream for whipping, and vegan-friendly crust options like crushed nuts mixed with coconut oil.
Pin This Recipe!
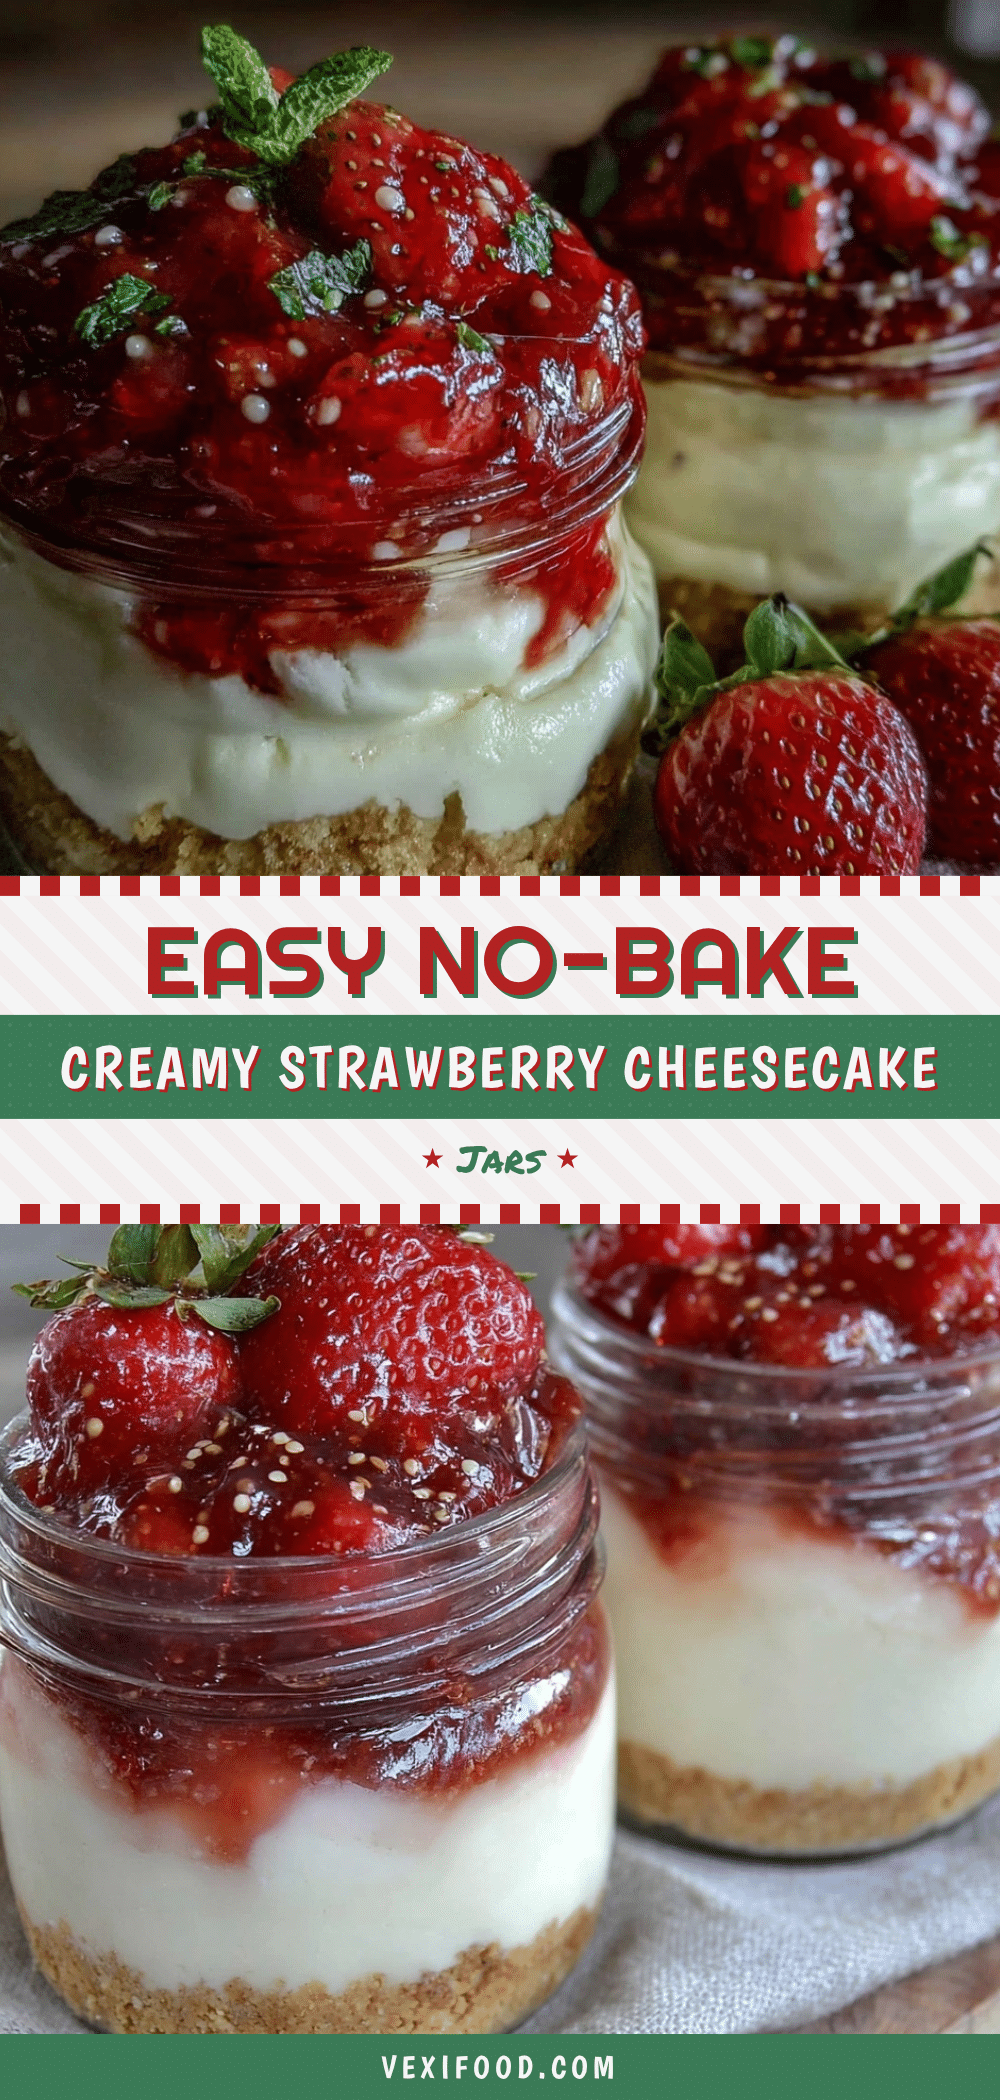
Easy No-Bake Strawberry Cheesecake Jars
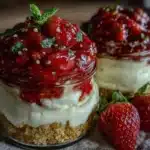
A quick and easy no-bake dessert featuring creamy cheesecake filling layered with buttery graham cracker crust and fresh macerated strawberries, perfect for summer.
- Prep Time: 15 minutes
- Cook Time: 0 minutes
- Total Time: 2 hours 15 minutes
- Yield: 6 to 8 servings 1x
- Category: Dessert
- Cuisine: American
Ingredients
- 1 ½ cups (150g) graham cracker crumbs
- 6 tablespoons (85g) unsalted butter, melted
- 2 tablespoons (25g) granulated sugar (for crust)
- 16 ounces (450g) cream cheese, softened
- ¾ cup (90g) powdered sugar
- ⅔ cup (160ml) heavy cream
- 1 teaspoon vanilla extract
- 1 teaspoon lemon zest
- 2 cups (300g) fresh strawberries, hulled and sliced
- 2 tablespoons (25g) granulated sugar (for strawberries)
- 1 tablespoon fresh lemon juice
Instructions
- In a medium bowl, combine graham cracker crumbs, melted butter, and granulated sugar. Stir until mixture resembles wet sand, about 3 minutes. Add more butter if too dry.
- Divide crust mixture evenly among 6 to 8 jars (8 oz each). Press firmly to create an even base. Chill in fridge for 10 minutes.
- In a large bowl, beat softened cream cheese with powdered sugar until smooth and creamy, about 2-3 minutes. Add vanilla extract and lemon zest; mix until combined.
- In a separate bowl, whip heavy cream until soft peaks form. Gently fold whipped cream into cream cheese mixture, keeping it airy, about 2-3 minutes.
- In a small bowl, combine sliced strawberries with granulated sugar and lemon juice. Stir gently and let sit for 10 minutes to macerate.
- Spoon or pipe cheesecake filling over chilled crust in jars, filling about ¾ full. Top with macerated strawberries and syrup.
- Refrigerate jars for at least 2 hours, preferably overnight, before serving.
Notes
Soften cream cheese well before mixing to avoid lumps. Do not over-whip heavy cream to prevent grainy texture. Macerate strawberries to release natural sweetness and moisture. Chill jars for best texture; longer chilling improves firmness. Can be prepared ahead and stored refrigerated for up to 3 days or frozen for up to 2 weeks.
Nutrition
- Serving Size: One 8-ounce jar
- Calories: 320
- Sugar: 18
- Fat: 22
- Carbohydrates: 26
- Fiber: 1.5
- Protein: 5
Keywords: no-bake cheesecake, strawberry cheesecake jars, summer dessert, easy cheesecake, no oven dessert, quick dessert, layered cheesecake