Love this? Save it for later!
Share the inspiration with your friends
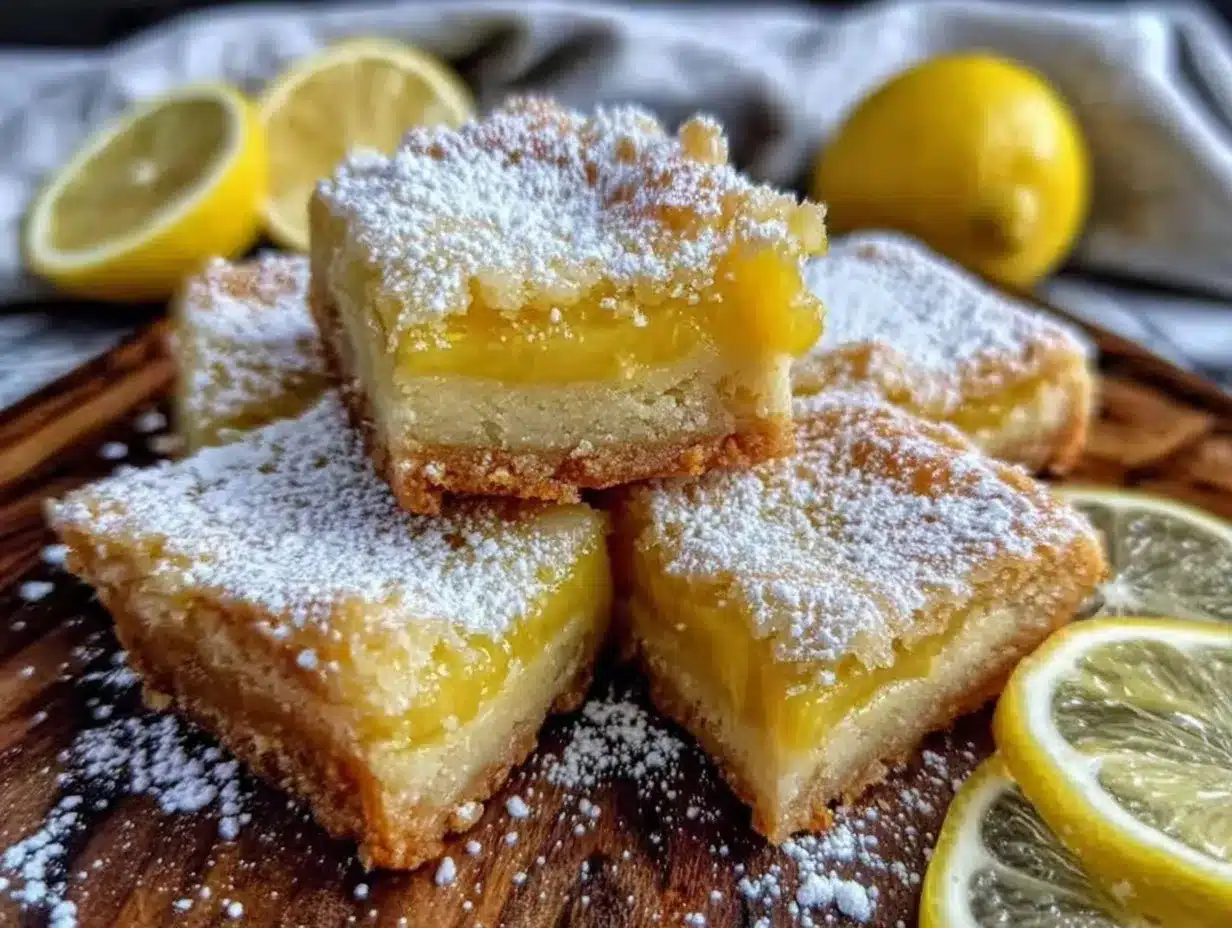
“You know that moment when you’re rummaging through your grandmother’s old recipe box and stumble upon a slightly crumpled, lemon-scented card tucked between faded photographs? That’s exactly how my journey with these classic tangy lemon bars began.” It was a lazy Saturday afternoon, and I had just pulled out a forgotten stack of recipes passed down from a neighbor named Mrs. Whitaker, who once shared a slice of her lemon bars over a cup of tea on a chilly spring day. The buttery shortbread crust was so crisp and tender, and the tangy lemon filling had this bright zing that made me pause mid-bite.
Honestly, I wasn’t expecting much when I decided to try these bars after years of ignoring them. I mean, lemon bars sounded simple, maybe even a bit boring compared to all the fancy desserts out there. But let me tell you, the way the buttery crust crumbles against the sharp citrus filling is something else. I even forgot to set the timer properly during one attempt (classic me), and somehow that slightly extra bake time gave the crust an irresistible crunch that I haven’t changed since.
Maybe you’ve been there—looking for that perfect balance of sweet and tart in a dessert that feels both comforting and special. These lemon bars have stuck with me because they’re that rare dessert where every bite is a little celebration. Plus, the recipe is straightforward enough that even if you’re juggling a hectic weekday, you can still pull off a batch that’ll impress your friends or brighten your afternoon. So, if you’re ready to get your hands a little buttery and your kitchen smelling like sunshine, let’s walk through making these classic tangy lemon bars with a buttery shortbread crust that just might become your new favorite treat.
Why You’ll Love This Recipe
After testing countless lemon bar recipes in my kitchen, I can say this one truly stands out. It’s tried and true, but with a few personal touches that make it uniquely satisfying. Here’s why this classic tangy lemon bars recipe deserves a spot in your baking rotation:
- Quick & Easy: You can have these bars ready in about 45 minutes, perfect for busy weeknights or last-minute dessert cravings.
- Simple Ingredients: No need for fancy or hard-to-find items — just pantry staples you probably already have on hand.
- Perfect for Any Occasion: Whether it’s a casual afternoon tea or a festive potluck, these lemon bars fit right in.
- Crowd-Pleaser: Kids, adults, lemon lovers, and even those who usually shy away from citrus desserts give these bars rave reviews.
- Unbelievably Delicious: The buttery shortbread crust and tangy lemon filling come together for a delightful texture and flavor combo that keeps you coming back for more.
What makes this recipe different? The crust is made with a blend of cold butter and just the right amount of sugar for that perfect snap, and the lemon filling balances tartness with a subtle sweetness that’s not overpowering. I’ve also found that allowing the bars to chill well before slicing sharpens the flavors and gives cleaner cuts. Honestly, this recipe isn’t just another lemon bar—it’s my go-to version that always brings a little sunshine to the table.
What Ingredients You Will Need
This recipe uses simple, wholesome ingredients to deliver bold flavor and a satisfying texture without any fuss. Most are staples, but a few tips will help you get the best results.
- For the Buttery Shortbread Crust:
- 1 cup (225g) unsalted butter, cold and cubed (I prefer Plugrá for a rich, creamy butter flavor)
- 2 cups (240g) all-purpose flour, sifted
- ½ cup (100g) granulated sugar
- ¼ teaspoon salt
- For the Tangy Lemon Filling:
- 4 large eggs, room temperature (helps the filling set smoothly)
- 1 ½ cups (300g) granulated sugar
- ¼ cup (30g) all-purpose flour (adds stability to the filling)
- ⅔ cup (160ml) freshly squeezed lemon juice (about 3-4 medium lemons) — fresh juice is key for that bright, natural tang
- 1 tablespoon lemon zest (for extra zing)
- For Dusting (Optional):
- Powdered sugar (adds a lovely sweet finish and pretty presentation)
If you want a gluten-free option, swapping the all-purpose flour with a gluten-free blend works, but texture might be slightly different. Also, if you prefer a dairy-free version, you can use vegan butter alternatives, though the crust won’t be quite as rich. For a seasonal twist, swapping fresh lemon juice with lime juice gives a fun variation.
Equipment Needed
- 9×13-inch (23×33 cm) baking pan — metal works best for even heat; glass pans can bake slower, so adjust baking time slightly
- Mixing bowls — one for the crust, one for the filling
- Electric mixer or hand whisk — I usually go with a hand whisk for the filling to avoid overmixing
- Microplane or fine grater — for zesting lemons
- Measuring cups and spoons — accurate measurements are important for baking success
- Parchment paper — lining the pan makes removing bars easier and keeps cleanup simple
- Spatula or wooden spoon — for folding and mixing
- Cooling rack — to prevent soggy bottoms after baking
If you don’t have a microplane, a sharp paring knife and careful zesting will do just fine. And if you’re on a budget, basic metal pans and simple utensils work perfectly — I’ve made these lemon bars dozens of times with just the basics!
Preparation Method
- Prepare the crust: Preheat your oven to 350°F (175°C). Line your 9×13-inch pan with parchment paper, leaving some overhang for easy removal later. In a large bowl, combine 2 cups (240g) sifted all-purpose flour, ½ cup (100g) granulated sugar, and ¼ teaspoon salt.
- Add 1 cup (225g) of cold, cubed unsalted butter to the flour mixture. Using a pastry blender or your fingertips, cut the butter into the dry ingredients until the mixture resembles coarse crumbs with some pea-sized bits. This usually takes about 3-5 minutes.
- Press the dough evenly into the bottom of the prepared pan, making sure it’s packed firmly and spread to the edges. This ensures the crust bakes evenly and holds together.
- Bake the crust for 18-20 minutes, or until it just begins to turn golden around the edges. You’ll notice a lovely buttery aroma filling the kitchen. Remove from the oven, but keep the oven on — you’ll be baking the filling next.
- Make the lemon filling: While the crust bakes, whisk together 4 large room-temperature eggs and 1 ½ cups (300g) granulated sugar in a bowl until well combined and slightly frothy, about 1-2 minutes.
- Add ¼ cup (30g) all-purpose flour, ⅔ cup (160ml) freshly squeezed lemon juice, and 1 tablespoon lemon zest to the egg mixture. Whisk gently until smooth and no lumps remain. The batter should be bright yellow and slightly thick.
- Pour the lemon filling over the hot baked crust, spreading it evenly with a spatula.
- Bake for an additional 20-25 minutes, or until the filling is set and no longer jiggles when gently shaken. The edges may puff slightly, but they will settle as the bars cool.
- Remove from oven and place on a cooling rack. Let the bars cool completely in the pan, then refrigerate for at least 2 hours (overnight is even better) to allow the filling to firm up for clean slicing.
- Use the parchment paper overhang to lift the bars out of the pan. Dust generously with powdered sugar before cutting into squares or rectangles. I find a serrated knife works best to slice without cracking.
Pro tip: If your crust feels too soft after baking, next time try chilling the crust dough before baking to help it hold shape better. Also, don’t skip the chilling step after baking — it’s crucial for that perfect lemon bar texture.
Cooking Tips & Techniques
Making classic tangy lemon bars with a buttery shortbread crust can feel straightforward, but a few tricks have saved me from baking disasters over the years. Here’s what I’ve learned:
- Butter temperature matters: Use cold butter for the crust to create that flaky, crumbly texture. If the butter softens too much, the crust can become greasy or dense.
- Don’t overmix the filling: Whisk just until ingredients are combined. Overbeating can incorporate too much air, causing the filling to crack or puff unevenly.
- Watch the baking time: The filling should be set but still slightly jiggly in the center when you take it out. It will firm up as it cools—overbaking leads to dryness or cracks.
- Use fresh lemons: Bottled lemon juice just doesn’t compare. Fresh juice brightens the flavor and makes a big difference in tanginess.
- Chill before slicing: This step is non-negotiable. It helps the filling firm, so your bars cut cleanly without crumbling.
- Experiment with zest: Adding lemon zest to the filling boosts depth and aroma. Don’t skip it!
- Multitasking tip: While the crust bakes, prep the filling to save time. Just be careful not to leave the eggs out too long to keep them fresh.
Once, I forgot to line my pan with parchment and spent way too long scraping bars off the bottom. Lesson learned — parchment paper is your best friend here. Trust me, these little steps make the difference between a good lemon bar and a truly memorable one.
Variations & Adaptations
Classic tangy lemon bars are endlessly adaptable depending on your mood or dietary needs. Here are a few ideas I’ve played with:
- Berry Twist: Fold in a handful of fresh raspberries or blueberries into the lemon filling before baking for a fruity burst.
- Gluten-Free Version: Swap all-purpose flour in the crust and filling with a 1:1 gluten-free baking blend. The texture is slightly different but still delicious.
- Keto-Friendly: Use almond flour and a sugar substitute like erythritol in the crust and filling. It’s a bit denser but satisfies lemon cravings without the carbs.
- Coconut Crust: Mix shredded unsweetened coconut into the crust for a tropical flair and added texture.
- Herbal Infusion: Add a teaspoon of finely chopped fresh thyme or basil to the crust for an unexpected savory note.
My personal favorite is the berry twist — the sweetness of raspberries complements the tangy lemon perfectly and adds a lovely pop of color. Plus, it’s a great way to use seasonal fruit. If you want to try a different baking method, these lemon bars can also be made in a cast-iron skillet for a rustic look, just keep an eye on baking times.
Serving & Storage Suggestions
These lemon bars are best served chilled or at room temperature. I like to dust them with powdered sugar just before serving for a pretty, snow-kissed finish. They pair beautifully with a cup of black tea or a light sparkling wine if you’re celebrating.
For storage, cover the lemon bars tightly with plastic wrap or place them in an airtight container. They last well in the refrigerator for up to 5 days. You can also freeze uncut bars for up to 3 months; just thaw in the fridge overnight before slicing.
Reheating isn’t usually necessary, but if you prefer them slightly warm, pop a slice in a microwave for 10-15 seconds. Keep in mind, flavors tend to deepen after chilling, so the bars often taste even better the next day.
Nutritional Information & Benefits
One serving (about 2×2 inches) of these classic tangy lemon bars contains approximately 220 calories, 12 grams of fat, 28 grams of carbohydrates, and 3 grams of protein. The lemon juice provides a good dose of vitamin C, which supports immune health and adds a refreshing brightness without extra sugar.
This recipe can be adapted for gluten-free or low-carb diets, making it versatile for many dietary needs. Just be mindful of allergies, especially with dairy and eggs, which are key ingredients in this recipe.
From a wellness perspective, I appreciate how these lemon bars offer a balance of indulgence and fresh citrus zing — a treat that feels lighter than heavy cakes but still satisfies sweet cravings.
Conclusion
If you’re after a dessert that’s simple but bursting with flavor, these classic tangy lemon bars with a buttery shortbread crust are a fantastic choice. They’re easy enough for weekday baking yet impressive enough to bring to a gathering or gift to a friend. I love how this recipe strikes that perfect harmony between sweet and tart, with a crust that’s just buttery enough to hold everything together without overpowering the lemony goodness.
Feel free to tweak the tartness or sweetness to your liking, or try one of the variations mentioned to make it your own. Honestly, every time I make these bars, they remind me of that serendipitous moment with Mrs. Whitaker’s recipe card and why simple recipes often create the best memories.
Give them a try, and if you have your own twist or story, I’d love to hear about it in the comments below. Happy baking!
FAQs
Can I make these lemon bars ahead of time?
Yes! They actually taste better after chilling overnight, which lets the flavors meld and the filling firm up for cleaner slices.
How do I prevent the crust from becoming soggy?
Baking the crust fully before adding the filling and chilling the bars completely before cutting helps keep the crust crisp and prevents sogginess.
What’s the best way to store leftover lemon bars?
Store them in an airtight container in the refrigerator for up to 5 days or freeze uncut bars for longer storage.
Can I use bottled lemon juice instead of fresh?
Fresh lemon juice is highly recommended for the best flavor and brightness. Bottled lemon juice can be used in a pinch but may result in a less vibrant taste.
How do I get clean slices when cutting lemon bars?
Use a sharp serrated knife and wipe it clean between cuts. Make sure the bars are fully chilled to help them hold their shape.
Pin This Recipe!

Classic Tangy Lemon Bars

These classic tangy lemon bars feature a buttery shortbread crust and a bright, tangy lemon filling. They are quick and easy to make, perfect for any occasion.
- Prep Time: 15 minutes
- Cook Time: 40 minutes
- Total Time: 2 hours 55 minutes
- Yield: 12 servings 1x
- Category: Dessert
- Cuisine: American
Ingredients
- 1 cup (225g) unsalted butter, cold and cubed
- 2 cups (240g) all-purpose flour, sifted
- ½ cup (100g) granulated sugar
- ¼ teaspoon salt
- 4 large eggs, room temperature
- 1 ½ cups (300g) granulated sugar
- ¼ cup (30g) all-purpose flour
- ⅔ cup (160ml) freshly squeezed lemon juice (about 3–4 medium lemons)
- 1 tablespoon lemon zest
- Powdered sugar (optional, for dusting)
Instructions
- Preheat oven to 350°F (175°C). Line a 9×13-inch baking pan with parchment paper, leaving overhang for easy removal.
- In a large bowl, combine 2 cups sifted all-purpose flour, ½ cup granulated sugar, and ¼ teaspoon salt.
- Add 1 cup cold, cubed unsalted butter to the flour mixture. Cut the butter into the dry ingredients using a pastry blender or fingertips until mixture resembles coarse crumbs with some pea-sized bits (3-5 minutes).
- Press the dough evenly into the bottom of the prepared pan, packed firmly and spread to edges.
- Bake the crust for 18-20 minutes until golden around edges. Remove from oven but keep oven on.
- While crust bakes, whisk 4 large room-temperature eggs and 1 ½ cups granulated sugar until well combined and slightly frothy (1-2 minutes).
- Add ¼ cup all-purpose flour, ⅔ cup freshly squeezed lemon juice, and 1 tablespoon lemon zest to the egg mixture. Whisk gently until smooth and no lumps remain.
- Pour lemon filling over the hot baked crust, spreading evenly with a spatula.
- Bake for an additional 20-25 minutes until filling is set and no longer jiggles when gently shaken.
- Remove from oven and place on a cooling rack. Let cool completely in pan, then refrigerate at least 2 hours or overnight to firm up.
- Use parchment paper overhang to lift bars from pan. Dust generously with powdered sugar before slicing into squares or rectangles.
Notes
Use cold butter for the crust to achieve a flaky texture. Do not overmix the filling to avoid cracks. Fresh lemon juice is recommended for best flavor. Chill bars before slicing for clean cuts. Parchment paper lining is essential for easy removal.
Nutrition
- Serving Size: 1 bar (about 2x2 inc
- Calories: 220
- Sugar: 20
- Sodium: 90
- Fat: 12
- Saturated Fat: 7
- Carbohydrates: 28
- Fiber: 0.5
- Protein: 3
Keywords: lemon bars, tangy lemon bars, shortbread crust, lemon dessert, easy lemon bars, homemade lemon bars, classic lemon bars