Love this? Save it for later!
Share the inspiration with your friends
Introduction
“Why can’t you just toss the cucumbers with garlic and dill, skip all the boiling and waiting?” my friend asked one Saturday afternoon while I was mid-explanation on canning safety. I started to explain why that wouldn’t work—then stopped. Honestly, the idea was so simple, it nagged at me. So, we gave it a shot, just tossing sliced cukes with garlic, dill, and a quick brine, then popping the jar in the fridge. To my surprise, by the next day, those pickles were crispy and bursting with flavor, exactly what I’d hoped for but never thought possible without the whole boiling process. That day, I learned maybe my overcomplicated methods weren’t always necessary. This quick, no-fuss approach to crispy garlic dill refrigerator pickles has stuck with me ever since, especially for when I’m craving something tangy and fresh without the wait.
Now, I’m sharing this recipe because it’s not just a shortcut—it’s a genuine way to get crunchy, garlicky pickles ready in 24 hours. Maybe you’ve been there, staring at cucumbers wondering if you really have to wait weeks for that perfect pickle crunch. This recipe says no, not at all. And if you’re anything like me, that’s a relief—and a delicious one at that.
Why You’ll Love This Recipe
This recipe is close to my heart because it proved a simple truth: sometimes, the easiest way is the best way. After testing different brines and timing, here’s what makes these crispy garlic dill refrigerator pickles stand out:
- Quick & Easy: Ready in just 24 hours, perfect for when you want pickles fast without any special equipment or fuss.
- Simple Ingredients: Uses pantry staples and fresh produce—no fancy or obscure spices needed.
- Perfect for Snacking or Sandwiches: These pickles add the perfect tang and crunch to burgers, deli sandwiches, or just by themselves.
- Crowd-Pleaser: Family and friends always ask for the recipe once they try these, which is honestly the best compliment.
- Unbelievably Delicious: The garlic and dill shine through without overpowering, balanced by a crisp texture that holds up well.
This isn’t just another pickle recipe floating around—it’s my go-to when I want fresh, sharp flavor in a hurry. The secret is the right ratio of vinegar, salt, and sugar combined with fresh dill and plenty of garlic cloves. I learned to trust the fridge method over the heat method here, and it really delivers that satisfying snap with every bite. If you’ve ever thought “I love pickles but hate the wait,” this recipe is your new best friend.
What Ingredients You Will Need
These crispy garlic dill refrigerator pickles are made with simple, straightforward ingredients that come together to make a briny, flavorful treat. Each ingredient plays a role, from the crunch of the cucumbers to the punch of garlic and the aromatic dill. Plus, most of these are things you probably already have on hand.
- Pickling cucumbers: About 1.5 pounds (700g), sliced into spears or rounds. Look for firm, small cucumbers with minimal blemishes.
- Fresh dill: 3-4 sprigs, whole. The dill is essential for that classic flavor—you can’t skip it!
- Garlic cloves: 4-5 large, peeled and lightly crushed. I like using fresh garlic from my local farmers’ market (it tastes sharper and fresher).
- White vinegar: 1 cup (240ml). This vinegar provides the tang without overpowering the other flavors.
- Water: 1 cup (240ml), preferably filtered or distilled for clean taste.
- Pickling salt or kosher salt: 1 tablespoon. Avoid iodized table salt as it can cloud the brine and affect flavor.
- Sugar: 1 teaspoon. Just enough to balance the acidity.
- Black peppercorns: 1 teaspoon, whole. Adds a subtle warmth and complexity.
- Red pepper flakes (optional): ¼ teaspoon for a slight kick, if you like a bit of heat.
You can swap ingredients to suit your needs—for example, use apple cider vinegar instead of white vinegar for a fruitier note, or try using fresh dill seeds if you don’t have sprigs. If you’re gluten-free or dairy-free, no worries here; this recipe is naturally friendly. When I first made these, I trusted Morton’s pickling salt to get the best result, but any reliable brand will work fine.
Equipment Needed
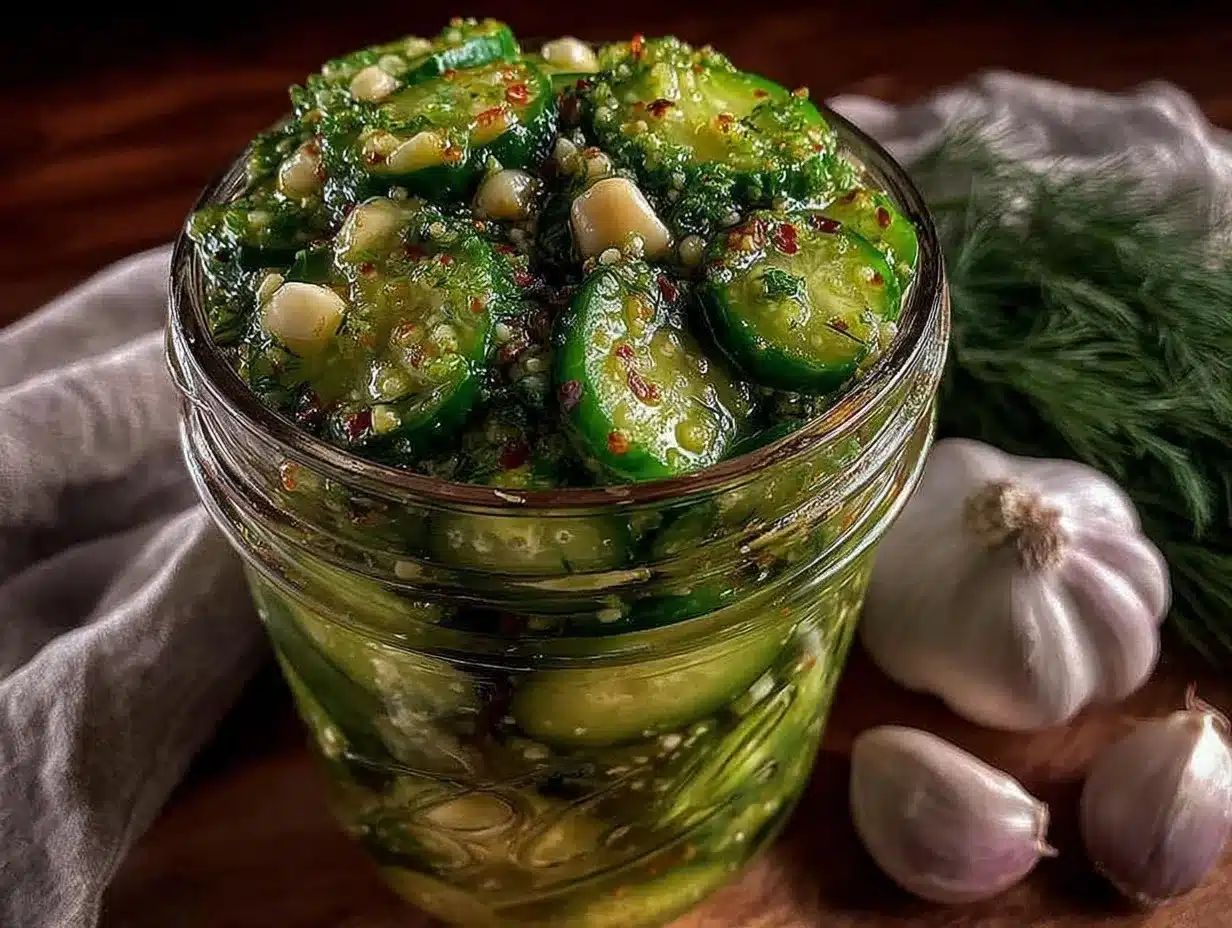
Honestly, this recipe doesn’t require anything fancy, which is one reason I love it. Here’s what you’ll want on hand:
- Glass jars with lids: Mason jars or any clean glass container that seals well. I use pint-sized jars (16 oz/475 ml) for easy fridge storage.
- Measuring cups and spoons: For precise vinegar, water, salt, and sugar measurements.
- Sharp knife and cutting board: To slice cucumbers evenly, which helps them pickle uniformly.
- Mixing bowl: To combine the brine ingredients and toss the cucumbers before packing.
- Small saucepan (optional): For warming the brine if you prefer, though it’s not necessary since this is a refrigerator pickle.
If you don’t have canning jars, any clean glass container with a tight lid will do. I once made a batch in a large Pyrex container when I was out of jars—worked just fine but took up more fridge space. Just make sure whatever you use is non-reactive and can be sealed tightly to keep your pickles fresh and crunchy. Also, keep your knives sharp to avoid crushing the cucumbers, which can lead to sogginess.
Preparation Method
- Prepare the cucumbers: Wash and dry about 1.5 pounds (700g) of pickling cucumbers. Trim off the blossom ends (this helps maintain crispness) and slice them into spears about ¼ inch thick or rounds if you prefer. Set aside.
- Make the brine: In a mixing bowl, combine 1 cup (240ml) white vinegar, 1 cup (240ml) water, 1 tablespoon pickling salt, and 1 teaspoon sugar. Stir until the salt and sugar dissolve completely. You can warm this gently over low heat to speed things up, but cold brine works fine too.
- Pack the jars: Place 3-4 sprigs of fresh dill, 4-5 lightly crushed garlic cloves, 1 teaspoon whole black peppercorns, and optional ¼ teaspoon red pepper flakes into each clean pint jar. Then tightly pack the cucumber slices into the jars—no need to cram, but they should fit snugly.
- Pour the brine: Pour the brine over the cucumbers in each jar, making sure they’re fully submerged. Leave about ½ inch (1.25 cm) of headspace to allow flavors to mingle.
- Seal and refrigerate: Screw the lids on tightly and give the jars a gentle shake to distribute the brine and spices. Place the jars in the refrigerator.
- Wait 24 hours: Let the pickles chill for at least 24 hours before tasting. This gives the cucumbers time to soak up the garlic and dill flavors while staying crisp.
- Enjoy and store: After 24 hours, your pickles are ready! Keep them refrigerated and consume within 2-3 weeks for best freshness.
Pro tip: If you find your pickles a bit too tart after 24 hours, let them sit an extra day or two—the flavor rounds out nicely. Also, don’t forget to label your jars with the date. I once lost track and ended up with some very sour pickles that could have been avoided!
Cooking Tips & Techniques
Making crisp, tasty refrigerator pickles is easier said than done without a few tricks. Here’s what I’ve learned through trial, error, and plenty of happy bites:
- Pick the right cucumbers: Smaller, firm pickling cucumbers work best. Larger slicing cucumbers tend to be watery and less crunchy.
- Trim blossom ends: The blossom end of cucumbers contains enzymes that cause softening. Snipping those off keeps your pickles snappy longer.
- Use pickling salt: Regular table salt can cloud your brine and affect flavor. I’ve found pickling salt or kosher salt gives the cleanest taste.
- Don’t overfill jars: Leave a little headspace for the brine to circulate and prevent overflow when sealing.
- Crush garlic lightly: Crushing garlic cloves releases more flavor but don’t smash them too hard or it turns bitter.
- Refrigerate promptly: Since these are not heat-processed, always keep your pickles chilled to avoid spoilage.
- Taste test early: Check your pickles after 24 hours to see if the flavor and texture match your preference—some like them crisper, others tangier.
One time, I left a batch out overnight by mistake and the cucumbers got a little mushy. Lesson learned: cold temps are the pickle’s best friend. Also, if you want to speed up the process, slicing thinner can help the flavors penetrate faster, but watch for limpness.
Variations & Adaptations
This recipe is a great base for experimenting. Here are some ways to make it your own:
- Spicy kick: Add sliced jalapeños or increase red pepper flakes for heat lovers.
- Herb swap: Try fresh tarragon or coriander seeds instead of dill for a different herbal note.
- Vinegar variations: Use apple cider vinegar or rice vinegar for unique tang and subtle sweetness.
- Garlic-free: If you’re not a garlic fan, add sliced onions or shallots for aromatic depth.
- Quick pickle slices: Instead of spears, slice cucumbers very thinly and reduce marinating time to 12 hours for a crunchier, snackable pickle chip.
Once, I tried swapping dill for fresh basil on a whim and ended up with a bright, summery pickle that paired beautifully with grilled chicken. Feel free to tweak and taste as you go—pickling is forgiving and fun!
Serving & Storage Suggestions
These crispy garlic dill refrigerator pickles are best served cold straight from the fridge. Here’s how I like to enjoy them:
- As a snack: Grab a spear or two with some sharp cheddar or crusty bread for an easy bite.
- On sandwiches and burgers: They add perfect acidity and crunch that cuts through rich meats.
- Alongside charcuterie: Their bright flavor balances salty meats and cheeses wonderfully.
Store your pickles in the refrigerator sealed tightly; they’ll stay fresh for up to 3 weeks. When reheating isn’t needed, but if you want warm pickles for dishes like fried pickles, lightly warm in a pan before breading. Also, as they sit, the flavors deepen—sometimes I prefer day three pickles over day one, but that’s just my taste.
Nutritional Information & Benefits
These pickles are low in calories (about 10-15 calories per spear), fat-free, and gluten-free, making them a light, healthy snack option. The vinegar promotes digestion, while garlic adds antioxidants and immune support. Dill contains vitamins A and C, and the salt helps replenish electrolytes. Because these are refrigerator pickles, they avoid added preservatives and are a great way to enjoy fresh cucumbers year-round.
Of course, watch the sodium if you’re on a low-salt diet, but overall, these pickles fit well into clean eating routines. I often snack on them when I want something crunchy without guilt.
Conclusion
This recipe for crispy garlic dill refrigerator pickles is worth keeping in your kitchen arsenal for quick, flavorful pickles that don’t require waiting weeks or complicated canning. I love how approachable it is, how the flavors pop in just 24 hours, and how it brings a little joy to otherwise dull sandwiches or snacks. I encourage you to make it your own—try different herbs or spice levels, and see what makes you smile.
Let me know how your batch turns out or if you’ve added your own twist. Sharing these quick pickles with friends has become one of my favorite small pleasures, and I hope they become yours too. Happy pickling!
FAQs
How long do refrigerator pickles last?
When stored properly in the fridge, these pickles remain fresh and tasty for about 2-3 weeks. Always check for any off smells or textures before eating.
Can I use regular cucumbers instead of pickling cucumbers?
You can, but pickling cucumbers are preferred because they are firmer and less watery, resulting in crisper pickles.
Do I have to boil the brine for refrigerator pickles?
Nope! This recipe works well with a cold brine, which helps keep the cucumbers crunchy and speeds up the process.
Can I make these pickles spicy?
Absolutely! Add sliced jalapeños or extra red pepper flakes to the jars for a nice spicy kick.
What’s the best way to keep pickles crispy?
Trim off the blossom ends of cucumbers and use pickling salt. Also, keep the pickles submerged in brine and always refrigerate them.
Pin This Recipe!

Crispy Garlic Dill Refrigerator Pickles Easy Recipe Ready in 24 Hours
A quick and easy refrigerator pickle recipe that yields crispy, garlicky dill pickles ready in just 24 hours without boiling or canning.
- Prep Time: 15 minutes
- Cook Time: 0 minutes
- Total Time: 24 hours 15 minutes
- Yield: 4 servings 1x
- Category: Condiment
- Cuisine: American
Ingredients
- 1.5 pounds pickling cucumbers, sliced into spears or rounds
- 3–4 sprigs fresh dill, whole
- 4–5 large garlic cloves, peeled and lightly crushed
- 1 cup (240 ml) white vinegar
- 1 cup (240 ml) water, preferably filtered or distilled
- 1 tablespoon pickling salt or kosher salt
- 1 teaspoon sugar
- 1 teaspoon whole black peppercorns
- ¼ teaspoon red pepper flakes (optional)
Instructions
- Wash and dry about 1.5 pounds (700g) of pickling cucumbers. Trim off the blossom ends and slice into spears about ¼ inch thick or rounds.
- In a mixing bowl, combine 1 cup (240 ml) white vinegar, 1 cup (240 ml) water, 1 tablespoon pickling salt, and 1 teaspoon sugar. Stir until dissolved. Optionally warm gently.
- Place 3-4 sprigs of fresh dill, 4-5 lightly crushed garlic cloves, 1 teaspoon whole black peppercorns, and optional ¼ teaspoon red pepper flakes into each clean pint jar.
- Tightly pack cucumber slices into the jars.
- Pour the brine over the cucumbers, ensuring they are fully submerged with about ½ inch headspace.
- Seal jars tightly and shake gently to distribute brine and spices.
- Refrigerate for at least 24 hours before tasting.
- Keep refrigerated and consume within 2-3 weeks for best freshness.
Notes
Trim blossom ends of cucumbers to maintain crispness. Use pickling or kosher salt to avoid cloudy brine. Do not overfill jars; leave headspace. Crush garlic lightly to avoid bitterness. Refrigerate promptly to prevent spoilage. Taste after 24 hours and adjust marinating time if needed. Label jars with date. For spicier pickles, add jalapeños or extra red pepper flakes.
Nutrition
- Serving Size: Approximately 1/4 of
- Calories: 15
- Sugar: 1
- Sodium: 600
- Carbohydrates: 3
- Fiber: 1
Keywords: refrigerator pickles, garlic dill pickles, quick pickles, easy pickles, crispy pickles, no boil pickles, refrigerator pickle recipe