Love this? Save it for later!
Share the inspiration with your friends
I was packing lunches on a Tuesday night, completely out of ideas, when my neighbor—a retired plumber named Frank who keeps to himself—knocked on my door holding a plastic container. “My wife’s tired of me eating those store-bought Lunchables,” he said, shrugging. “I figured you’d know how to make ’em better.” And honestly? He was right. I’d been staring at my fridge, ignoring the ham and cheddar blocks, thinking about how my kids always begged for those little kits with the crackers and the tiny meat slices. But Frank’s request got me thinking—why buy them when you can make Easy Ham and Cheddar Copycat Lunchable Kits at home? It’s cheaper, healthier, and you can actually pronounce every ingredient.
That night, I threw together a test batch. I sliced the cheddar into neat little squares, cubed the ham, and grabbed some mini crackers from the pantry. The first bite? Pure nostalgia. But better. The ham was thicker, the cheese actually tasted like cheese, and I didn’t have to deal with that weird plastic divider. My kids devoured them the next day, and Frank came back for the leftovers. Now, I make these Easy Ham and Cheddar Copycat Lunchable Kits every Sunday for the week ahead. It’s become a little ritual—slicing, stacking, packing—and it saves me from the 5 PM “what’s for lunch tomorrow?” panic.
Maybe you’ve been there, standing in the grocery aisle, eyeing those boxes and wondering if there’s a better way. There is. These DIY kits take ten minutes to assemble, use real ingredients, and taste way better than anything from a factory. Plus, you can customize them however you want—swap the cheddar for Swiss, add some grapes, or throw in a little treat. Honestly, once you start making these, you’ll never go back. Let me show you how.
Why You’ll Love This Recipe
These Easy Ham and Cheddar Copycat Lunchable Kits aren’t just a quick fix—they’re a game-changer for anyone tired of overpriced, processed snacks. I’ve tested this approach with my own family, and here’s why it works:
- Quick & Easy: Assemble a week’s worth in under 15 minutes. Perfect for busy mornings or last-minute lunch packing.
- Simple Ingredients: No weird preservatives or artificial flavors. Just ham, cheddar, crackers, and whatever extras you love.
- Budget-Friendly: Making your own costs half the price of store-bought kits. Plus, you control the portions.
- Perfect for Meal Prep: Great for school lunches, work snacks, picnics, or road trips. They keep beautifully in the fridge.
- Crowd-Pleaser: Kids and adults alike go crazy for these. I’ve packed them for playdates, office lunches, and even hiking trips.
- Customizable: Swap in turkey, add fruit, or change the crackers. This recipe is a template, not a rulebook.
What makes these different from the store-bought version? The quality. I use thick-cut ham from the deli counter and sharp cheddar that actually tastes like cheese. The crackers stay crunchy because I pack them separately. And honestly, there’s something satisfying about opening a container you assembled yourself—it feels like a little win every time.
These kits have saved me from countless “I forgot to pack lunch” emergencies. They’re the kind of recipe that makes you feel organized and put-together, even on chaotic days. Plus, they’re fun to make—my kids love helping me layer the ingredients into containers. It’s comfort food reimagined: faster, healthier, and way more delicious.
What Ingredients You Will Need
This recipe uses simple, wholesome ingredients that you probably already have in your fridge and pantry. The beauty of these Easy Ham and Cheddar Copycat Lunchable Kits is that they rely on quality basics—no fancy shopping trips required. Here’s what you’ll need:
For the Main Components
- Ham: 8 ounces thick-cut deli ham, cubed into bite-sized pieces (I prefer honey ham or smoked ham for extra flavor)
- Cheddar Cheese: 8 ounces sharp cheddar cheese, cut into small cubes or slices (block cheese works better than pre-shredded—it stays fresh longer)
- Crackers: 1 sleeve mini crackers (about 30-40 crackers), such as Ritz, Club, or saltines (mini size fits perfectly in lunch containers)
Optional Add-Ins (Pick Your Favorites)
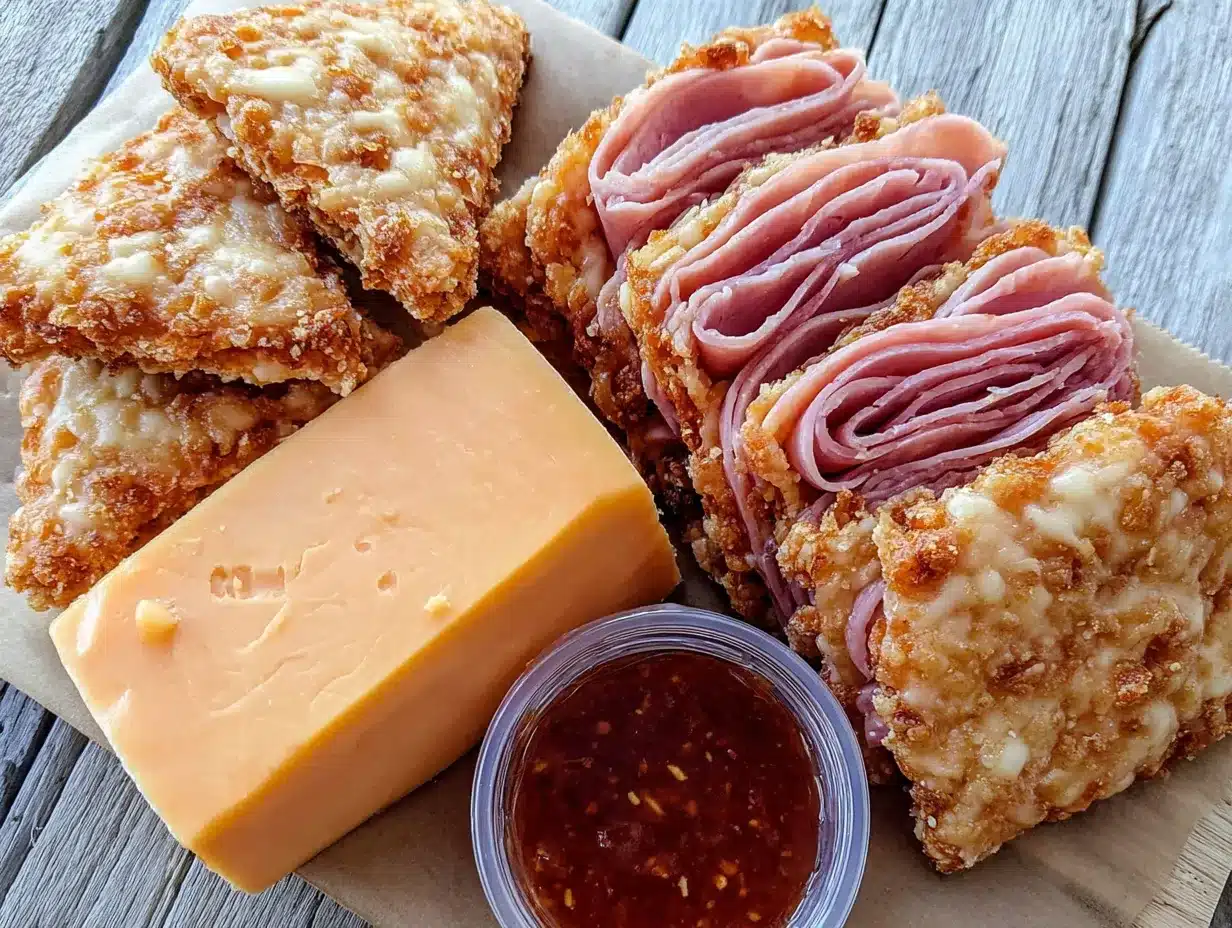
- Fresh Fruit: 1/2 cup grapes, apple slices, or berries (adds sweetness and freshness)
- Vegetables: 1/2 cup cherry tomatoes, cucumber rounds, or baby carrots (for crunch)
- Dipping Options: 2 tablespoons honey mustard, ranch dressing, or cream cheese (for extra flavor)
- Treat: 1 small cookie, chocolate square, or fruit leather (makes it feel special)
Ingredient Selection Tips
When choosing ham, I recommend getting it sliced thick at the deli counter—about 1/4 inch thick. Thin slices fall apart when cubed, and thick cuts hold their shape better. For cheese, always go with block cheddar and cut it yourself. Pre-shredded cheese has anti-caking agents that make it dry out faster. I like using Cabot or Tillamook sharp cheddar for the best flavor.
For crackers, mini versions are ideal because they fit neatly into lunch containers without breaking. If you can’t find mini crackers, regular crackers work—just break them into smaller pieces. And don’t skip the fruit or veggies! They add color, texture, and nutrition that make these kits feel like a complete meal.
Substitution Guidance
No ham? Try turkey, chicken, or roast beef instead. Need a vegetarian option? Swap in cheese cubes and hummus with veggie sticks. For a gluten-free version, use gluten-free crackers or rice cakes. And if you’re dairy-free, use your favorite plant-based cheese—just keep it firm so it cubes nicely.
Equipment Needed
You don’t need fancy gadgets to make these Easy Ham and Cheddar Copycat Lunchable Kits. Here’s what I use:
- Cutting Board: A sturdy board for cubing ham and cheese. I prefer a large wooden one—it doesn’t slip around.
- Sharp Knife: A chef’s knife or paring knife for clean cuts. Dull knives crush the cheese instead of slicing it.
- Measuring Cups: For portioning fruit and crackers. Not essential, but helpful for consistency.
- Lunch Containers: Bento-style boxes with compartments work best. I use the ones with removable dividers—they’re dishwasher safe and stack neatly.
- Small Bowls: For holding ingredients while you assemble. Keeps everything organized.
If you don’t have bento boxes, no worries! Regular meal prep containers with separate compartments work fine. I’ve even used mason jars for a fun, portable option—just layer the ingredients and shake them out when you’re ready to eat. For budget-friendly options, check dollar stores for small plastic containers with lids. They’re cheap and work perfectly for single servings.
Pro tip: Wash your containers right after lunch so they’re ready for the next batch. I keep a set of four containers dedicated just to these kits—it makes Sunday prep a breeze.
Preparation Method
Making these Easy Ham and Cheddar Copycat Lunchable Kits is incredibly straightforward. Here’s how I do it, step by step:
- Prep Your Ingredients (5 minutes): Start by taking your ham and cheddar out of the fridge. Let them sit for 5 minutes—cold cheese cubes better, but room-temperature ham slices more easily. Place your cutting board on a flat surface and gather your knife.
- Cube the Ham (3 minutes): Stack 2-3 slices of ham on top of each other. Cut them into strips about 1/2 inch wide, then rotate and cut into small cubes. Aim for uniform pieces—about the size of a dice. This ensures each bite has a consistent amount of ham. You should get about 1 cup of cubed ham from 8 ounces.
- Cube the Cheddar (3 minutes): Cut the block of cheddar into 1/2-inch thick slices, then into strips, and finally into cubes. Keep them similar in size to the ham pieces. Sharp cheddar is firm enough to cut cleanly—if your cheese is too soft, pop it in the freezer for 10 minutes first.
- Portion the Crackers (2 minutes): Count out about 8-10 mini crackers per serving. If you’re using regular crackers, break them into smaller pieces. Place them in a separate compartment or small baggie to keep them crunchy.
- Wash and Prep Add-Ins (5 minutes): Rinse your fruit and veggies. If using grapes, pull them off the stems. For apple slices, toss them in a little lemon juice to prevent browning. Cherry tomatoes can go in whole—no need to slice.
- Assemble the Containers (5 minutes): Grab your bento boxes or containers. In the largest compartment, add the ham cubes. In another compartment, place the cheddar cubes. In a third, add the crackers. Use any remaining compartments for fruit, veggies, or dip. If your container has a small round spot, that’s perfect for a dollop of honey mustard or ranch.
- Seal and Store (2 minutes): Snap the lids on tightly. If you’re packing for the next day, refrigerate immediately. For longer storage, place the containers in the fridge—they’ll stay fresh for up to 4 days.
- Add a Personal Touch (optional): Tuck in a small note, a sticker, or a napkin for fun. My kids love finding a little surprise in their lunch—it makes the kit feel extra special.
Sensory Cue: When you cube the cheddar, you should feel a slight resistance as the knife cuts through—it should be firm but not hard. The ham should slice easily without shredding. If your ham is falling apart, it’s too thin—go thicker next time.
Troubleshooting Tip: If your cheese sticks to the knife, wipe the blade with a damp cloth between cuts. This prevents gummy edges and keeps your cubes looking neat.
Cooking Tips & Techniques
Over the years, I’ve learned a few tricks that make these Easy Ham and Cheddar Copycat Lunchable Kits even better. Here’s what experience has taught me:
Keep Crackers Separate: This is the biggest mistake I see people make. If you put crackers directly on top of moist ingredients like fruit or cheese, they’ll get soggy within hours. Always pack them in a separate compartment or a small baggie. I use the little silicone cupcake liners as dividers—they work perfectly.
Cube, Don’t Slice: Cubed ham and cheese hold up better than slices. Slices tend to stick together and tear when you try to separate them. Cubes are easier to grab and eat, especially for little hands. Plus, they look more uniform and appetizing in the container.
Use a Sharp Knife: I learned this the hard way after crushing a block of cheddar with a dull blade. A sharp knife makes clean cuts, which means less crumbling and waste. If you don’t have a sharpener, ask your local butcher to sharpen your knife—it’s usually free or cheap.
Don’t Overfill: It’s tempting to pack as much as possible, but overfilled containers make it hard to close the lid. Leave a little space so the contents don’t get squished. Aim for a single layer of each ingredient—stacking leads to mixing and mess.
Prep in Batches: I cube all the ham and cheese at once, then portion everything into containers. This saves time and keeps the process streamlined. I usually make 4-5 kits at a time, which covers the school week.
Add a Moisture Barrier: If you’re including wet ingredients like sliced apples or cherry tomatoes, place them in a separate compartment or wrap them in a paper towel. This prevents moisture from seeping into the crackers and cheese.
Variations & Adaptations
One of the best things about these Easy Ham and Cheddar Copycat Lunchable Kits is how easy they are to customize. Here are some variations I’ve tried and loved:
Protein Swaps
Instead of ham, try turkey, roast beef, or salami. For a vegetarian option, use hard-boiled egg slices, hummus, or cheese-only kits. My husband loves the turkey and Swiss version—it tastes like a grown-up lunchable.
Cheese Variations
Sharp cheddar is classic, but you can use Colby Jack, Gouda, or even pepper jack for a kick. For a fancy twist, add a few cubes of brie or a slice of havarti. Just make sure the cheese is firm enough to cube—soft cheeses like goat cheese are better as a spread.
Seasonal Add-Ins
In summer, I add fresh berries, peach slices, or watermelon cubes. In fall, apple slices and dried cranberries are perfect. Winter calls for clementine segments and pomegranate arils. Spring? Snap peas and radish slices add crunch.
Dietary Adaptations
For gluten-free, use rice crackers or corn cakes. For low-carb, skip the crackers and add extra veggies like cucumber rounds or bell pepper strips. For dairy-free, use plant-based cheese or skip it altogether—the ham and veggies are still satisfying.
Fun Shapes
Use cookie cutters to cut the ham and cheese into fun shapes—stars, hearts, or animals. My kids go crazy for this. It takes an extra 2 minutes but makes lunch feel like a party.
Serving & Storage Suggestions
These kits are designed to be eaten cold, straight from the fridge. Here’s how to serve and store them for best results:
Serving Temperature: Serve chilled or at room temperature. If you’re packing for a school lunch, add a small ice pack to keep everything fresh. For picnics, pack everything in a cooler bag.
Presentation Tips: Arrange the ingredients neatly in compartments for visual appeal. I like to place the ham and cheese side by side, crackers in the middle, and fruit on the side. A sprig of mint or a colorful napkin adds a nice touch.
Storage Instructions: Store assembled kits in the refrigerator for up to 4 days. Keep the lids tightly sealed to prevent drying out. If you’re prepping for the week, make them on Sunday and enjoy through Thursday.
Freezer Instructions: You can freeze the ham and cheese separately for up to 2 months, but I don’t recommend freezing assembled kits—the crackers get stale and the texture changes. If you want to prep ahead, cube the ham and cheese, freeze them in separate bags, and assemble fresh when needed.
Reheating: These kits are meant to be eaten cold, but if you prefer warm ham, microwave the ham cubes for 10-15 seconds before assembling. Don’t microwave the cheese or crackers—they’ll get weird.
Flavor Development: The flavors actually meld together nicely after a day in the fridge. The ham absorbs a little saltiness from the cheese, and everything tastes more cohesive. That’s why I love making them a day ahead.
Nutritional Information & Benefits
These Easy Ham and Cheddar Copycat Lunchable Kits are a balanced, satisfying snack or meal. Here’s the estimated nutrition for one serving (without optional add-ins):
| Nutrient | Amount Per Serving |
|---|---|
| Calories | 280 |
| Protein | 18g |
| Fat | 16g |
| Carbohydrates | 14g |
| Fiber | 1g |
| Sugar | 2g |
| Sodium | 680mg |
Ham provides high-quality protein for energy and muscle repair. Cheddar cheese offers calcium for strong bones and teeth. Crackers give quick carbs for a boost. When you add fruit and veggies, you get vitamins, fiber, and antioxidants. These kits are naturally gluten-free if you choose gluten-free crackers, and they’re low in added sugar—only what’s in the ham and cheese.
Compared to store-bought Lunchables, these DIY versions have less sodium, no artificial preservatives, and real ingredients. You control the portions, so you can adjust based on your dietary needs. I love knowing exactly what my family is eating—no mystery ingredients.
Conclusion
These Easy Ham and Cheddar Copycat Lunchable Kits have become a staple in my kitchen for good reason. They’re quick, affordable, and endlessly customizable. Whether you’re packing for a picky eater, meal prepping for yourself, or just tired of spending money on overpriced snack boxes, this recipe delivers.
I love that I can make a week’s worth in under 20 minutes and feel good about what I’m serving. The ham is real, the cheese is sharp, and the crackers stay crunchy—everything a lunchable should be. Plus, my kids actually eat the fruit I pack because it’s right there, looking colorful and inviting.
So go ahead—give these a try. Experiment with different proteins, cheeses, and add-ins. Make them your own. And when you do, I’d love to hear about it. Drop a comment below sharing your favorite variation, or tag me in your lunch photos. Let’s make lunchtime something to look forward to!
Frequently Asked Questions
Can I use pre-sliced ham and cheese instead of cubing them?
Yes, but cubes hold up better in the container and are easier to eat. Slices tend to stick together and tear. If you’re short on time, pre-sliced works—just layer them flat instead of stacking.
How long do these kits last in the fridge?
They stay fresh for up to 4 days when stored in an airtight container. The crackers might soften slightly after day 2, so I recommend packing crackers separately if you’re making them more than 2 days ahead.
Can I make these for a road trip or picnic?
Absolutely! Pack them in a cooler with ice packs. Avoid adding anything that spoils quickly, like mayo-based dips. Stick to sturdy fruits like apples and grapes, and keep everything chilled until serving.
What if my child doesn’t like ham?
Swap the ham for turkey, chicken, roast beef, or even salami. For a vegetarian option, use hard-boiled egg slices, cheese cubes with hummus, or nut butter with apple slices.
Can I use a different type of cheese?
Of course! Try Colby Jack, Gouda, Swiss, or pepper jack for a kick. Just make sure the cheese is firm enough to cube—soft cheeses like brie are better as a spread on the side.
Pin This Recipe!
Easy Ham and Cheddar Lunchable Kits: Best DIY Copycat

These DIY Ham and Cheddar Lunchable Kits are a quick, affordable, and healthier alternative to store-bought versions. Made with real ingredients like thick-cut ham and sharp cheddar, they’re perfect for meal prep, school lunches, or on-the-go snacks.
- Prep Time: 15 minutes
- Cook Time: 0 minutes
- Total Time: 15 minutes
- Yield: 4 servings 1x
- Category: Snack
- Cuisine: American
Ingredients
- 8 ounces thick-cut deli ham, cubed into bite-sized pieces
- 8 ounces sharp cheddar cheese, cut into small cubes or slices
- 1 sleeve mini crackers (about 30–40 crackers), such as Ritz, Club, or saltines
- 1/2 cup grapes, apple slices, or berries (optional)
- 1/2 cup cherry tomatoes, cucumber rounds, or baby carrots (optional)
- 2 tablespoons honey mustard, ranch dressing, or cream cheese (optional)
- 1 small cookie, chocolate square, or fruit leather (optional)
Instructions
- Prep Your Ingredients (5 minutes): Take ham and cheddar out of the fridge. Let them sit for 5 minutes. Place cutting board on a flat surface and gather your knife.
- Cube the Ham (3 minutes): Stack 2-3 slices of ham. Cut into strips about 1/2 inch wide, then rotate and cut into small cubes. Aim for uniform pieces about the size of a dice. You should get about 1 cup of cubed ham from 8 ounces.
- Cube the Cheddar (3 minutes): Cut the block of cheddar into 1/2-inch thick slices, then into strips, and finally into cubes. Keep them similar in size to the ham pieces.
- Portion the Crackers (2 minutes): Count out about 8-10 mini crackers per serving. Place them in a separate compartment or small baggie to keep them crunchy.
- Wash and Prep Add-Ins (5 minutes): Rinse fruit and veggies. If using grapes, pull them off the stems. For apple slices, toss them in a little lemon juice to prevent browning. Cherry tomatoes can go in whole.
- Assemble the Containers (5 minutes): In the largest compartment, add the ham cubes. In another compartment, place the cheddar cubes. In a third, add the crackers. Use any remaining compartments for fruit, veggies, or dip.
- Seal and Store (2 minutes): Snap the lids on tightly. If packing for the next day, refrigerate immediately. For longer storage, place containers in the fridge—they’ll stay fresh for up to 4 days.
- Add a Personal Touch (optional): Tuck in a small note, a sticker, or a napkin for fun.
Notes
Keep crackers separate from moist ingredients to prevent sogginess. Use a sharp knife for clean cuts. Cube ham and cheese instead of slicing for better texture. Don’t overfill containers. Prep in batches for the week. Add a moisture barrier for wet ingredients.
Nutrition
- Serving Size: 1 kit
- Calories: 280
- Sugar: 2
- Sodium: 680
- Fat: 16
- Saturated Fat: 9
- Carbohydrates: 14
- Fiber: 1
- Protein: 18
Keywords: ham and cheddar lunchable, DIY lunchable, copycat lunchable, meal prep lunch, school lunch ideas, easy snack, healthy lunchable