Love this? Save it for later!
Share the inspiration with your friends
“Pumpkin desserts are fine,” my brother-in-law Mark said every single Thanksgiving for seven years. He’d pass on the pie, push around the pumpkin roll, and reach for the apple crisp instead. I’d nod, secretly plotting. Then last October, I made these salted caramel pumpkin pie bars “just for a friend’s party” and caught him hovering near the kitchen counter at 10 p.m., fork in hand, staring at the pan. “I’m just… checking the texture,” he mumbled. There were three bars left. I let him take two.
That’s the thing about this recipe. It doesn’t announce itself with a fanfare. It just sits there on the counter, looking humble, while people who swore they were “not pumpkin people” find themselves going back for a second square. Honestly, I get it. I wasn’t sure about pumpkin bars myself until I figured out the secret. The crust has to be buttery enough to shatter when you bite into it. The filling needs to be silky, not rubbery. And the caramel? It has to be salted just enough to make you pause mid-bite and go, oh.
Maybe you’ve been there. You bring a pumpkin dessert to a gathering and watch it get politely ignored while the chocolate cake disappears. I wanted to make something that would win over even the skeptics. Something that tastes like Thanksgiving but feels like a cheat day. These bars took me a few tries to perfect. I overbaked the first batch. The second batch had a soggy crust. But by the third try, my neighbor knocked on my door to ask what smelled so good. That’s when I knew I had something worth keeping.
Why You’ll Love This Recipe
Let me tell you why these bars have become my most-requested fall dessert. I’ve tested this recipe six times across three different ovens, and I’ve never had a batch fail to get devoured. That’s not bragging. That’s me being honest about how much butter and patience went into getting it right.
- Quick & Easy: You don’t need to fuss with rolling pie dough or blind baking. The press-in crust comes together in 10 minutes flat. From start to finish, you’re looking at about an hour of hands-off time.
- Simple Ingredients: No trips to a specialty store. Butter, flour, pumpkin puree, eggs, sugar, and a can of sweetened condensed milk. You probably have most of it already.
- Perfect for Fall Gatherings: These bars travel well, slice cleanly, and look stunning on a dessert table. They’re my go-to for Friendsgiving, potlucks, and the “I-need-to-bring-something-impressive” moment.
- Crowd-Pleaser: I’ve served these to kids who normally hate pumpkin, adults who claim they don’t eat dessert, and my brother-in-law Mark. Everyone reaches for seconds.
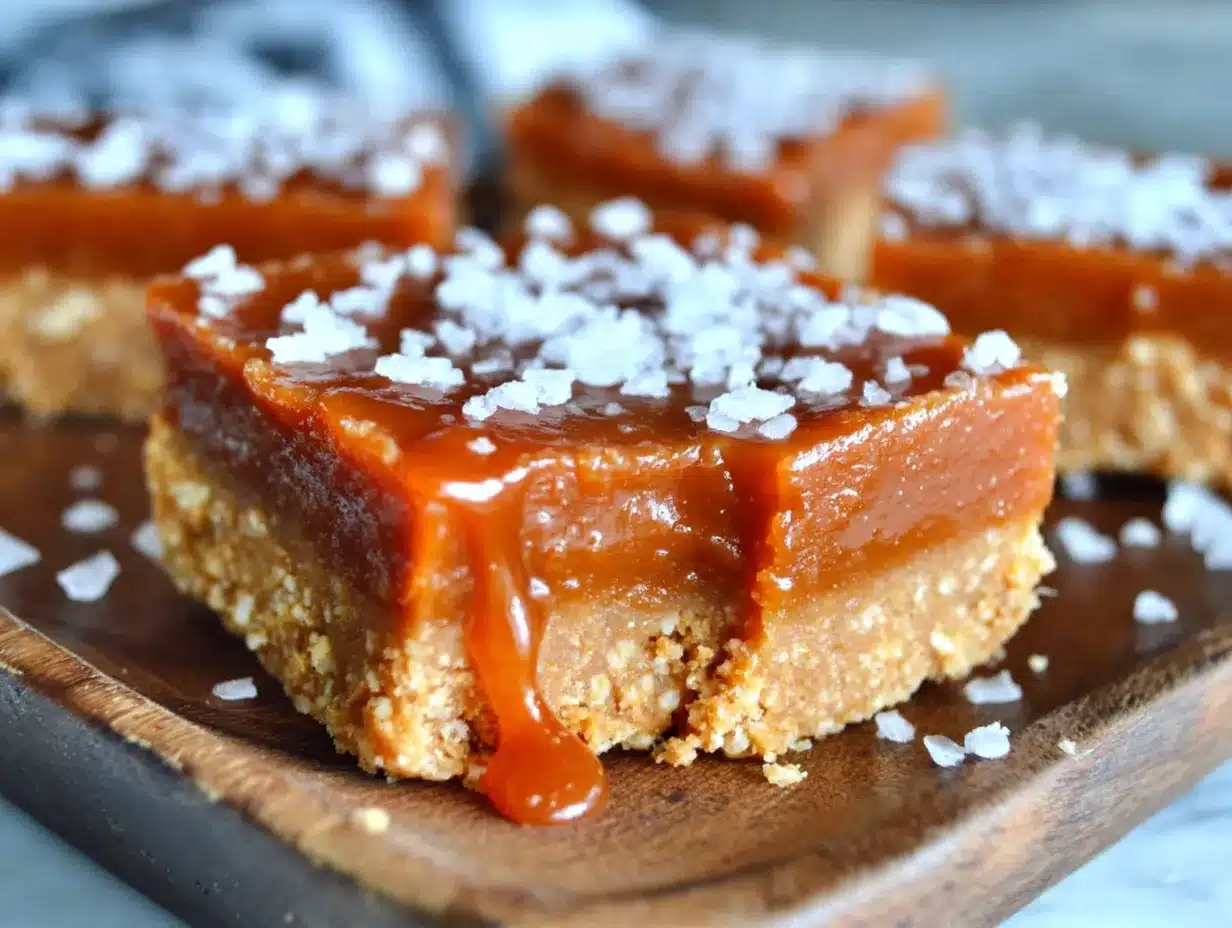
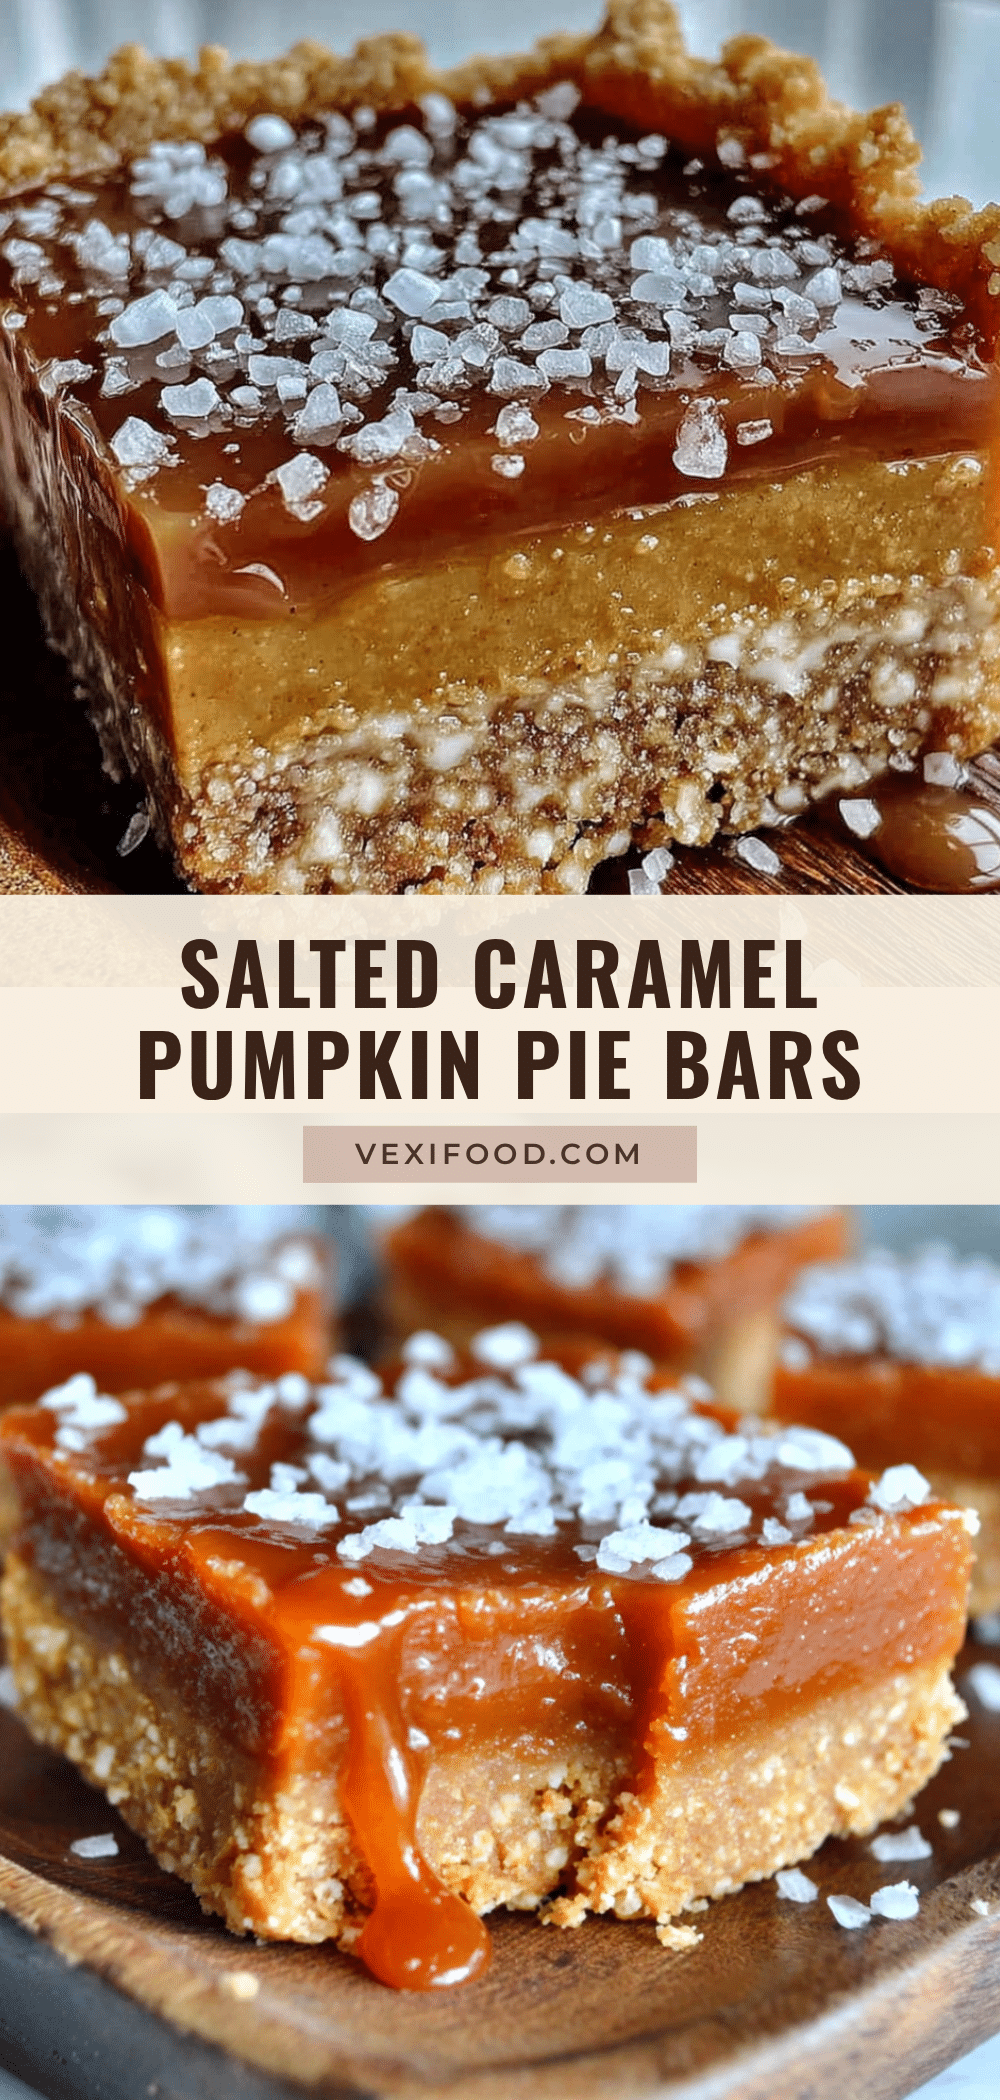
- Unbelievably Delicious: The contrast between the crisp shortbread crust, the velvety pumpkin custard, and that glossy salted caramel topping is pure magic. It’s the kind of dessert where you close your eyes after the first bite and forget anyone else is in the room.
What makes this recipe different from the dozens of pumpkin bar recipes out there? It’s the texture. Most pumpkin bars turn out cakey or dense. This one has a custard-like filling that stays creamy even after refrigeration. The salted caramel isn’t an afterthought either. I cook it until it reaches that perfect amber color, then I add flaky sea salt right at the end. The result is a dessert that hits every note: sweet, salty, creamy, and buttery.
This isn’t just another pumpkin dessert. It’s the one that makes people text you the next day asking for the recipe. It’s the one that disappears before the apple pie. And honestly? It’s the one I make just for myself on a rainy Tuesday in October, because sometimes you need a little salted caramel in your life.
What Ingredients You Will Need
This recipe uses simple, wholesome ingredients to deliver that big, bold flavor. Most of these are pantry staples, especially if you do any baking during the fall season. Let me walk you through each one and share a few things I’ve learned from making these bars more times than I care to admit.
For the Shortbread Crust
- 1 ½ cups (188g) all-purpose flour — Spoon and level it. Scooping directly from the bag packs the flour and makes the crust tough. I learned this the hard way.
- ½ cup (100g) granulated sugar — Regular white sugar keeps the crust crisp. Brown sugar would make it soft and chewy, which isn’t what we want here.
- ½ cup (113g) unsalted butter, cold and cubed — Cold butter is non-negotiable. It creates those little pockets of steam that make the crust flaky. I use Kerrygold when I’m feeling fancy.
- ¼ teaspoon salt — Just enough to balance the sweetness.
For the Pumpkin Filling
- 1 can (15 oz) pumpkin puree — Not pumpkin pie filling. They’re different. Pumpkin puree is just pumpkin. The pie filling has sugar and spices already added. Libby’s is my go-to brand.
- 1 can (14 oz) sweetened condensed milk — This is the secret to that silky, custard-like texture. Don’t substitute evaporated milk. They are not the same thing.
- 2 large eggs, room temperature — Cold eggs can make the filling lumpy. Let them sit on the counter for 20 minutes before you start.
- 1 teaspoon vanilla extract — Pure vanilla, not imitation. It makes a difference in the depth of flavor.
- 1 ½ teaspoons pumpkin pie spice — You can make your own if you prefer. I use 1 teaspoon cinnamon, ½ teaspoon ginger, ¼ teaspoon nutmeg, and a pinch of cloves.
- ¼ teaspoon salt — Salt makes the pumpkin flavor pop.
For the Salted Caramel Topping
- ½ cup (113g) unsalted butter — Cut into cubes so it melts evenly.
- 1 cup (200g) packed brown sugar — Light or dark brown sugar both work. Dark gives a deeper, more molasses-y flavor.
- ½ cup (120ml) heavy cream — Heavy cream is essential here. Half-and-half won’t thicken properly.
- 1 teaspoon vanilla extract — Added at the end for that warm vanilla note.
- Flaky sea salt for sprinkling — Maldon is my favorite. The big, crunchy flakes make a difference.
Equipment Needed
You don’t need a fancy kitchen to make these bars. Here’s what I use every single time:
- 9×13-inch baking pan — Metal or glass both work. If you use glass, reduce the oven temperature by 25°F to prevent overbrowning.
- Parchment paper — This is your best friend. Leave an overhang on two sides so you can lift the bars out cleanly. I’ve tried greasing the pan directly and regretted it every time.
- Food processor or pastry cutter — A food processor makes the crust in 30 seconds. A pastry cutter works too, it just takes a little more elbow grease.
- Medium saucepan — For the caramel. Use a light-colored pan if you have one. It makes it easier to see the color change.
- Whisk and rubber spatula — A whisk for the filling, a spatula for scraping every last bit of caramel out of the pan.
- Cooling rack — Essential for letting the bars cool completely before slicing. Warm bars are a mess.
If you don’t have a food processor, you can make the crust by hand. Cut the cold butter into the flour mixture using a pastry blender or two forks until it looks like coarse sand. It takes a few extra minutes but works perfectly.
Preparation Method
Let me walk you through this step by step. I’ve included all the little details that make the difference between good bars and unforgettable bars.
Step 1: Make the Crust
Preheat your oven to 350°F (175°C). Line your 9×13-inch pan with parchment paper, leaving an overhang on the long sides. In a food processor, pulse the flour, sugar, and salt together. Add the cold butter cubes and pulse until the mixture looks like coarse meal with some pea-sized butter pieces remaining. Don’t over-process. Those little butter bits create flakiness. Press the mixture evenly into the bottom of the prepared pan. Use the bottom of a measuring cup to get it flat and compact. Bake for 18-20 minutes until lightly golden around the edges. Set aside to cool slightly while you make the filling.
Step 2: Prepare the Pumpkin Filling
In a large bowl, whisk the pumpkin puree and sweetened condensed milk together until smooth. Add the eggs one at a time, whisking well after each addition. Stir in the vanilla, pumpkin pie spice, and salt. Whisk until everything is completely combined. The mixture should be smooth and glossy. If you see any streaks, keep whisking. Pour the filling over the warm crust and spread it evenly with a spatula.
Step 3: Bake the Bars
Bake at 350°F (175°C) for 30-35 minutes. The filling should be set around the edges but still slightly jiggly in the center. That jiggle is important. If it’s completely firm, it’s overbaked. Let the bars cool completely on a wire rack. This takes about 1.5 to 2 hours. Don’t rush this step. Warm bars will fall apart when you try to slice them.
Step 4: Make the Salted Caramel
In a medium saucepan over medium heat, melt the butter. Add the brown sugar and heavy cream, whisking constantly until the sugar dissolves. Bring the mixture to a gentle boil, then reduce the heat to low. Let it simmer for 3-4 minutes, whisking occasionally, until it thickens slightly. Remove from heat and stir in the vanilla. Let the caramel cool for 10 minutes. It will continue to thicken as it cools.
Step 5: Assemble and Chill
Pour the warm caramel over the cooled pumpkin layer. Use a spatula to spread it evenly. Sprinkle generously with flaky sea salt. Refrigerate the bars for at least 2 hours, or overnight. Chilling is non-negotiable. It sets the caramel and makes slicing clean and easy.
Step 6: Slice and Serve
Lift the bars out of the pan using the parchment overhang. Place on a cutting board and slice into squares with a sharp knife. Wipe the knife clean between cuts for the neatest edges. Serve cold or at room temperature. I prefer them straight from the fridge, but my sister likes them after sitting out for 15 minutes.
Cooking Tips & Techniques
I’ve made this recipe enough times to know exactly where things can go wrong. Here’s what I’ve learned so you don’t have to make the same mistakes.
Don’t overwork the crust. I know it’s tempting to keep pulsing until it looks like fine sand, but those little butter chunks are what make the crust tender. Stop when you still see some pea-sized pieces. Trust me on this.
Watch the caramel carefully. The first time I made caramel, I walked away to check my phone and came back to a burnt mess. Caramel goes from perfect to ruined in about 30 seconds. Stay at the stove, whisk in hand, and watch for that amber color.
Use room temperature eggs. Cold eggs can seize up the pumpkin mixture and leave you with lumps. I forgot to take my eggs out once and tried to warm them in a bowl of hot water. One cracked open and I ended up with poached egg in my pumpkin. Just set them out ahead of time.
Let the bars cool completely before adding caramel. If the pumpkin layer is still warm, the caramel will soak right in instead of sitting on top. You want that distinct layer of caramel on top. Patience is hard, but it pays off.
Slice with a hot knife. Run your knife under hot water, dry it off, then slice. The heat glides through the caramel without dragging. Wipe and repeat between cuts. It takes an extra minute but gives you those beautiful, clean edges.
Variations & Adaptations
One of the best things about this recipe is how flexible it is. Here are some ways I’ve adapted it over the years.
Gluten-Free Version: Swap the all-purpose flour with a 1:1 gluten-free baking flour. I use Bob’s Red Mill and it works beautifully. Don’t use almond flour. The crust won’t hold together.
Dairy-Free Option: Use vegan butter in the crust and a dairy-free sweetened condensed milk. I’ve tried it with coconut-based condensed milk and it was surprisingly good. The caramel is trickier. You’ll need to use a vegan butter and full-fat coconut cream instead of heavy cream.
Spice It Up: Add ¼ teaspoon of cayenne pepper to the caramel for a spicy-sweet kick. I did this on a whim one year and it was a hit. The heat sneaks up on you after the sweetness fades.
Chocolate Drizzle: Melt some dark chocolate and drizzle it over the caramel before chilling. The chocolate and salted caramel combination is ridiculous in the best way.
Nutty Crunch: Sprinkle toasted pecans or walnuts over the caramel before it sets. The crunch adds another layer of texture that works perfectly with the creamy filling.
Serving & Storage Suggestions
These bars are versatile when it comes to serving. Here’s how I handle them.
Serving Temperature: I like them cold, straight from the fridge. The caramel firms up and the filling stays creamy. If you prefer a softer texture, let them sit at room temperature for 15-20 minutes before serving.
Presentation: Arrange the bars on a platter and add a tiny pinch of extra flaky salt on top right before serving. It looks beautiful and gives that fresh salty pop. A dollop of whipped cream on the side never hurts either.
Storage: Keep the bars in an airtight container in the refrigerator. They’ll stay fresh for up to 5 days. I’ve never had them last that long, but theoretically they will.
Freezing: These freeze beautifully. Wrap individual bars in plastic wrap, then place them in a freezer-safe bag. They’ll keep for up to 3 months. Thaw in the refrigerator overnight before serving.
Flavor Development: Honestly, these bars taste even better the next day. The flavors meld together overnight and the caramel sinks into the pumpkin just a little. If you can wait, make them a day ahead.
Nutritional Information & Benefits
Let’s be real. This is a dessert, not a health food. But here’s what you’re looking at per bar (based on 12 servings):
- Calories: Approximately 380
- Fat: 18g
- Carbohydrates: 52g
- Protein: 5g
- Sugar: 38g
- Sodium: 220mg
On the bright side, pumpkin is packed with vitamin A and fiber. It’s good for your eyes and your digestion. The eggs add protein. The butter and cream… well, they add happiness. I consider these bars a “sometimes food,” but when I make them, I don’t hold back. Life is too short for skimpy caramel.
Conclusion
These salted caramel pumpkin pie bars have become my signature fall dessert for a reason. They’re forgiving enough for a beginner baker but impressive enough to steal the show at any gathering. The crust is buttery, the filling is silky, and that salted caramel on top is the kind of thing you’ll dream about later.
I love this recipe because it feels like fall in every bite. It’s the dessert I make when I want to slow down and enjoy the season. It’s the one I bring to parties when I want to see people’s eyes light up. And it’s the one I keep coming back to, year after year, because it never lets me down.
I’d love to hear how these turn out for you. Did you add a twist? Did someone in your family claim to hate pumpkin and then ask for the recipe? Drop a comment below and let me know. And if you share a photo on social media, tag me. I want to see your beautiful bars.
Now go preheat that oven. You’ve got some caramel to make.
Frequently Asked Questions
Can I use pumpkin pie filling instead of pumpkin puree?
No, I wouldn’t recommend it. Pumpkin pie filling already has sugar and spices added, which will throw off the sweetness and texture of the filling. Stick with plain pumpkin puree for the best results.
Do I have to refrigerate these bars?
Yes, because of the eggs and dairy in the filling and caramel, these bars need to be stored in the refrigerator. They actually taste better cold anyway, so it works out perfectly.
Can I make these bars ahead of time?
Absolutely. In fact, I recommend it. Make them a day ahead and let them chill overnight in the fridge. The flavors meld together and the bars slice more cleanly.
Why did my caramel turn out grainy?
Grainy caramel usually means the sugar crystallized. This happens if you stir too vigorously or if a bit of undissolved sugar splashes onto the sides of the pan. Use a clean whisk and try not to agitate the mixture too much once it starts boiling.
Can I freeze these bars?
Yes, they freeze beautifully. Wrap individual bars in plastic wrap and store them in a freezer bag for up to 3 months. Thaw in the refrigerator overnight before serving.
Pin This Recipe!
Perfect Salted Caramel Pumpkin Pie Bars: Easy Fall Dessert
These salted caramel pumpkin pie bars feature a buttery shortbread crust, silky pumpkin custard filling, and a glossy salted caramel topping. They’re the perfect easy fall dessert that wins over even the biggest pumpkin skeptics.
- Prep Time: 20 minutes
- Cook Time: 50 minutes
- Total Time: 3 hours 10 minutes (includes chilling)
- Yield: 12 servings 1x
- Category: Dessert
- Cuisine: American
Ingredients
- 1 ½ cups (188g) all-purpose flour
- ½ cup (100g) granulated sugar
- ½ cup (113g) unsalted butter, cold and cubed
- ¼ teaspoon salt
- 1 can (15 oz) pumpkin puree
- 1 can (14 oz) sweetened condensed milk
- 2 large eggs, room temperature
- 1 teaspoon vanilla extract
- 1 ½ teaspoons pumpkin pie spice
- ¼ teaspoon salt
- ½ cup (113g) unsalted butter
- 1 cup (200g) packed brown sugar
- ½ cup (120ml) heavy cream
- 1 teaspoon vanilla extract
- Flaky sea salt for sprinkling
Instructions
- Preheat oven to 350°F (175°C). Line a 9×13-inch baking pan with parchment paper, leaving an overhang on the long sides.
- Make the crust: In a food processor, pulse flour, sugar, and salt together. Add cold butter cubes and pulse until mixture looks like coarse meal with some pea-sized butter pieces remaining. Press evenly into prepared pan. Bake for 18-20 minutes until lightly golden. Set aside to cool slightly.
- Prepare the pumpkin filling: In a large bowl, whisk pumpkin puree and sweetened condensed milk until smooth. Add eggs one at a time, whisking well after each. Stir in vanilla, pumpkin pie spice, and salt until completely combined and glossy.
- Pour filling over warm crust and spread evenly. Bake at 350°F (175°C) for 30-35 minutes until set around edges but still slightly jiggly in center. Cool completely on a wire rack (about 1.5-2 hours).
- Make the salted caramel: In a medium saucepan over medium heat, melt butter. Add brown sugar and heavy cream, whisking constantly until sugar dissolves. Bring to a gentle boil, then reduce heat to low. Simmer for 3-4 minutes, whisking occasionally, until slightly thickened. Remove from heat and stir in vanilla. Let cool for 10 minutes.
- Pour warm caramel over cooled pumpkin layer and spread evenly. Sprinkle generously with flaky sea salt. Refrigerate for at least 2 hours or overnight.
- Lift bars out of pan using parchment overhang. Slice into squares with a sharp knife, wiping clean between cuts. Serve cold or at room temperature.
Notes
Don’t overwork the crust; leave some pea-sized butter pieces for flakiness. Watch caramel carefully as it can burn quickly. Use room temperature eggs to avoid lumps. Let bars cool completely before adding caramel to maintain distinct layers. Slice with a hot knife for clean edges. Bars taste even better the next day.
Nutrition
- Serving Size: 1 bar
- Calories: 380
- Sugar: 38
- Sodium: 220
- Fat: 18
- Saturated Fat: 11
- Carbohydrates: 52
- Fiber: 2
- Protein: 5
Keywords: pumpkin bars, salted caramel, pumpkin dessert, fall dessert, Thanksgiving dessert, pumpkin pie bars, easy pumpkin recipe