Love this? Save it for later!
Share the inspiration with your friends
This was supposed to be a peach cobbler. I had the ripe fruit, the butter, the flour—the whole plan mapped out in my head. But the power went out halfway through preheating the oven on a sticky July afternoon. I stood there, staring at the digital clock blinking 00:00, with a bowl of sliced peaches sweating on the counter and cream cheese softening in the heat. Honestly, I almost cried. You know that feeling when you have a specific craving and nothing else will do? That was me, except I was out of options and patience.
I grabbed the graham crackers from the pantry out of pure frustration. My grandmother used to make a chocolate icebox cake every summer, and the memory hit me like a wave. I didn’t have chocolate pudding, but I had vanilla wafers, cream cheese, and heavy cream. I started layering—peaches, cookies, cream, repeat—with no real confidence it would work. The whole thing felt like a desperate gamble, not a recipe. I shoved it in the fridge and forgot about it for a few hours, too annoyed to even check.
When I finally pulled it out, the layers had settled into something beautiful. The cookies had softened into cake-like tenderness, the peaches had released their juices into the cream, and the whole thing tasted like summer in a dish. I mean, it was better than the cobbler would have been. No oven required, no stress, just a happy accident that turned into my most-requested dessert. This creamy no-bake peach icebox cake has been my secret weapon ever since, and I think you’re going to love how simple it really is.
Why You’ll Love This Recipe
Let me tell you why this creamy no-bake peach icebox cake has earned a permanent spot in my recipe rotation. I’ve tested this at least a dozen times—once with store-brand cookies that turned into mush, another time with peaches that were too firm—and I’ve dialed it in so you don’t have to learn the hard way.
- No Oven Required: When it’s 95 degrees outside and turning on the oven feels like a punishment, this recipe saves the day. The fridge does all the work.
- Simple Ingredients: You probably have most of these in your kitchen right now. No fancy extracts, no obscure spices, just real food that comes together beautifully.
- Perfect for Summer Gatherings: This is the dessert you bring to a barbecue or potluck when you want to impress without sweating over a hot stove. It travels well and gets better as it sits.
- Crowd-Pleaser: I’ve served this to kids, grandparents, and picky eaters, and every single person has asked for the recipe. It’s one of those desserts that disappears before you get a second slice.
- Unbelievably Creamy: The texture is what gets people every time. The cookies soften into a cake-like crumb, the cream layer stays light and fluffy, and the peaches add just enough juicy sweetness to tie it all together.
What makes this different from other icebox cakes? It’s the balance. Most versions are either too sweet or too soggy, but this one hits that sweet spot where every bite feels intentional. The cream cheese adds a slight tang that cuts through the sweetness, and the peaches bring a freshness that makes it feel lighter than it actually is. Honestly, it’s comfort food reimagined—faster, cooler, and somehow even more satisfying than the baked version.
What Ingredients You Will Need
This recipe uses simple, wholesome ingredients to deliver bold flavor and satisfying texture without the fuss. Most of these are pantry staples or easy to find at any grocery store, which is exactly what you want when a craving strikes unexpectedly.
- Fresh Peaches (4-5 medium, ripe but firm): Look for peaches that give slightly when pressed but aren’t mushy. If peaches aren’t in season, you can use frozen sliced peaches (thawed and drained) or canned peaches in juice (not syrup). I prefer yellow peaches for their balanced sweetness.
- Vanilla Wafers (about 8 ounces, or one standard box): These are the backbone of the cake. I’ve tested this with Nilla wafers and store brands, and honestly, name-brand works best here. They soften at the perfect rate without turning to paste. You’ll need roughly 40-50 cookies.
- Cream Cheese (8 ounces, softened): Full-fat cream cheese gives the best texture and flavor. Let it sit out for 30 minutes before starting so it blends smoothly. Low-fat works in a pinch, but the filling won’t be as rich.
- Heavy Cream (1 cup, cold): This gets whipped into stiff peaks and folded into the cream cheese mixture. Don’t substitute with milk or half-and-half—the structure won’t hold. Cold cream whips faster and fluffier.
- Powdered Sugar (1/2 cup): This sweetens the cream layer without the grittiness of granulated sugar. Sift it if you have lumps, though I’ve skipped that step in a rush and it still worked fine.
- Vanilla Extract (1 teaspoon): Pure vanilla adds warmth and depth. Imitation works, but pure is noticeably better here since the flavor isn’t masked by chocolate or spices.
- Lemon Juice (1 tablespoon, fresh): A tiny bit of acid brightens the peaches and keeps the cream layer from feeling heavy. Don’t skip it—it makes a difference.
- Optional Garnishes: Fresh mint leaves, extra peach slices, or a light dusting of cinnamon before serving. I sometimes add a drizzle of honey if the peaches aren’t super sweet.
One quick note about the cookies: I’ve tried this with shortbread cookies and graham crackers, and while both work, vanilla wafers give the most authentic icebox cake texture. They soften into something between cake and pudding, which is exactly what you want. If you’re gluten-free, look for gluten-free vanilla wafers—they work perfectly with no adjustments needed.
Equipment Needed
You don’t need a fancy kitchen to pull this off. Here’s what you’ll actually use:
- 8×8-inch Baking Dish (or a 9-inch round cake pan): This size gives you nice, tall layers. A 9×13 works too, but the layers will be thinner and the cake will set faster.
- Electric Mixer (handheld or stand): You can whip the cream by hand with a whisk, but your arm will hate you. A mixer makes it effortless and gives you better volume.
- Large Mixing Bowls: One for the cream cheese mixture, one for whipping cream. Glass or stainless steel works best—plastic can hold onto odors.
- Spatula: A rubber spatula is ideal for folding the whipped cream into the cream cheese without deflating it. A metal spoon works too, but be gentle.
- Sharp Knife and Cutting Board: For slicing the peaches. A dull knife will bruise the fruit and make a mess.
- Plastic Wrap or Lid: You need to cover the cake while it chills. Plastic wrap works fine, just press it directly onto the surface to prevent a skin from forming.
I use a Pyrex baking dish that I’ve had for years, and it’s perfect for this recipe. If you don’t have an 8×8, a loaf pan works for a taller, narrower cake—just adjust the layers accordingly. And if you’re really in a pinch, a deep pie dish will get the job done, though the servings will be more casual.
Preparation Method
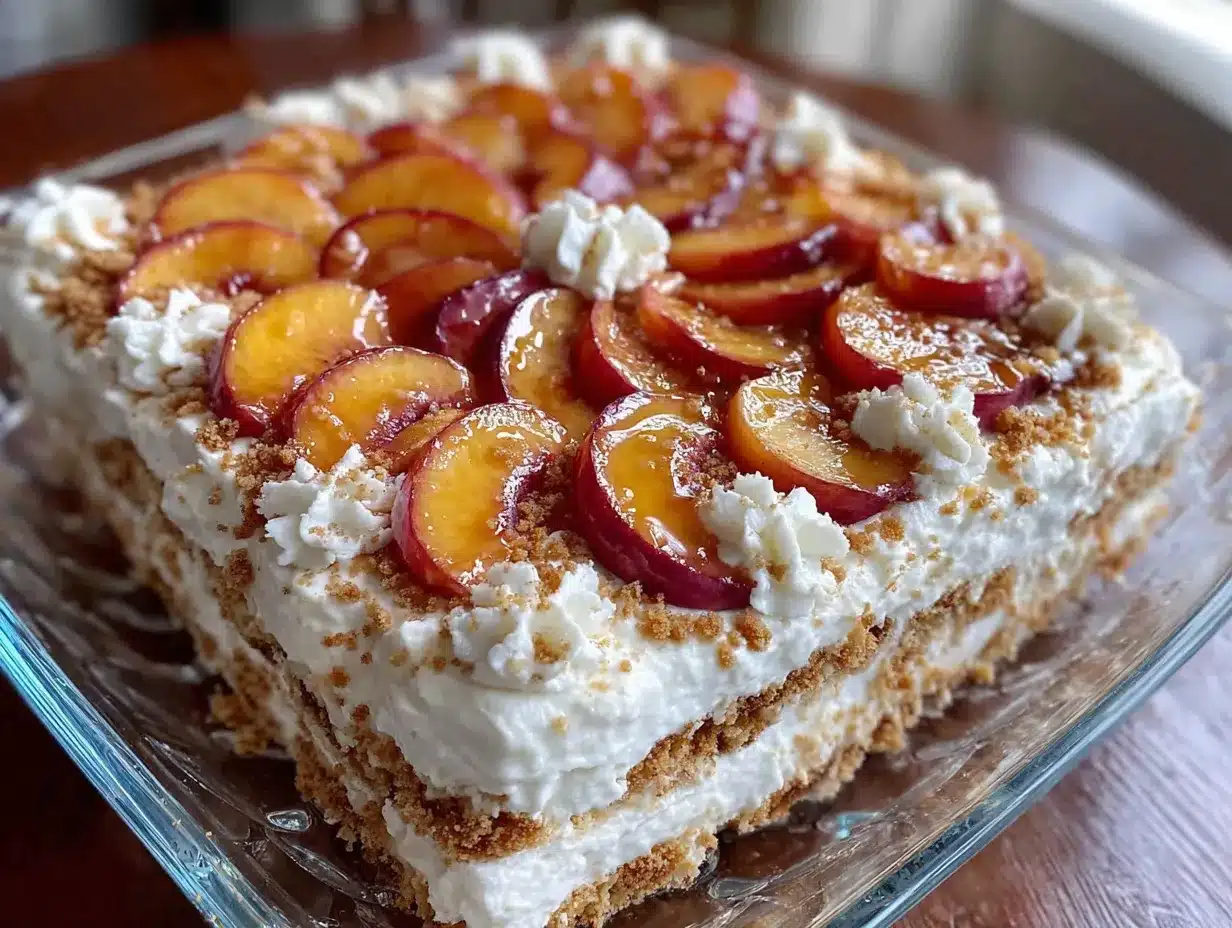
This comes together in about 20 minutes of active work, then the fridge does the rest. Here’s how to do it right.
-
Prep the Peaches: Wash and peel the peaches (optional, but I prefer peeled for a smoother texture). Slice them into 1/4-inch thick wedges. Toss them in a bowl with the lemon juice to prevent browning and add brightness. Set aside while you make the cream layer.
-
Whip the Cream: In a large mixing bowl, pour the cold heavy cream. Beat on medium-high speed until soft peaks form—this takes about 2-3 minutes with an electric mixer. Add the powdered sugar and vanilla extract, then continue beating until stiff peaks form. You want the cream to hold its shape when you lift the beaters. Be careful not to over-whip, or you’ll end up with butter. I’ve done that before, and it’s not pretty.
-
Make the Cream Cheese Base: In another bowl, beat the softened cream cheese until smooth and fluffy, about 2 minutes. Scrape down the sides halfway through. The cream cheese should be completely lump-free before you add anything else.
-
Fold It Together: Gently fold the whipped cream into the cream cheese using a spatula. Start with about a third of the cream, folding until just combined, then add the rest. Work slowly and gently—you want to keep as much air in the mixture as possible. The final texture should be light, fluffy, and spreadable.
-
Layer the Cake: Spread a thin layer of the cream mixture (about 1/4 cup) on the bottom of your baking dish. This prevents the cookies from sliding around. Arrange a single layer of vanilla wafers on top, breaking some to fill gaps if needed. Don’t overlap them too much—a little space is fine.
-
Add Peaches and Cream: Spread half of the remaining cream mixture over the cookies. Arrange half of the peach slices on top, pressing them gently into the cream. Add another layer of cookies, then the remaining cream, then the remaining peaches. End with a final layer of cookies on top, pressing them down slightly.
-
Cover and Chill: Cover the dish tightly with plastic wrap or a lid. Refrigerate for at least 6 hours, but overnight is better. The cookies need time to soften into that cake-like texture, and the flavors need time to meld. I know it’s hard to wait, but trust me—it’s worth it.
-
Serve: When ready to serve, uncover the dish and slice into squares. The cake should be firm enough to hold its shape but soft enough to melt in your mouth. Garnish with fresh mint or extra peach slices if you’re feeling fancy.
Cooking Tips & Techniques
I’ve made this creamy no-bake peach icebox cake more times than I can count, and I’ve picked up a few tricks along the way. Here’s what I wish someone had told me the first time.
Don’t rush the chilling time. I know it’s tempting to pull it out after 4 hours, but the texture won’t be right. The cookies need at least 6 hours to soften fully, and overnight gives you that perfect cake-like consistency. If you’re in a hurry, you can use thin ginger snaps instead of vanilla wafers—they soften faster—but the flavor will be spicier.
Let the cream cheese come to room temperature. Cold cream cheese doesn’t blend smoothly, and you’ll end up with lumps in your cream layer. Set it out 30-45 minutes before you start. If you forget, microwave it in 10-second bursts until soft, but be careful not to melt it.
Pat the peaches dry. After tossing them with lemon juice, give them a quick pat with a paper towel. Too much liquid will make the cake soggy instead of creamy. I learned this the hard way when my first attempt turned into peach soup.
Use a serrated knife to slice. A sharp serrated knife cuts through the layers cleanly without squishing the cake. Wipe the blade between cuts for neat slices. If the cake sticks to the knife, dip it in warm water and dry it off.
Variations & Adaptations
This recipe is forgiving, so feel free to make it your own. Here are some variations I’ve tried and loved.
Berry Peach Combo: Swap half the peaches for fresh blueberries or raspberries. The tartness of the berries balances the sweetness of the cream and adds a pop of color. I did this for a Fourth of July party and it was a hit.
Gluten-Free Version: Use gluten-free vanilla wafers or shortbread cookies. The texture is slightly different, but the flavor is just as good. I’ve also used gluten-free graham crackers in a pinch—just break them into smaller pieces.
Vegan Adaptation: Replace the cream cheese with a vegan cream cheese alternative, the heavy cream with full-fat coconut cream (chilled and whipped), and use vegan vanilla wafers. The coconut cream adds a subtle tropical note that pairs beautifully with the peaches.
Spiced Peach Version: Add 1/2 teaspoon of cinnamon and a pinch of nutmeg to the cream cheese mixture. This gives the cake a warm, almost autumnal flavor that works surprisingly well year-round. I made this for a fall potluck and everyone thought I’d baked it.
Individual Servings: Layer everything in small mason jars or dessert cups instead of a baking dish. This is perfect for parties or meal prep—just grab and go. The layers will set in about 4 hours since there’s less volume.
Serving & Storage Suggestions
This cake is best served cold, straight from the fridge. I like to let it sit at room temperature for about 5 minutes before slicing—it takes the chill off and makes the flavors more pronounced. Serve it on its own, or with a dollop of whipped cream and a sprig of fresh mint for a pretty presentation.
For storage, keep the cake covered in the refrigerator for up to 3 days. The texture actually improves after the first day as the flavors continue to meld. After 3 days, the cookies start to break down too much and the cake becomes mushy, so try to finish it within that window.
You can freeze this cake, but I don’t recommend it. The cream layer separates when thawed, and the texture becomes grainy. If you absolutely must freeze it, wrap the entire dish tightly in plastic wrap and then foil, and freeze for up to 1 month. Thaw in the refrigerator overnight, but know that it won’t be as creamy as fresh.
Leftovers can be stored in an airtight container for 2 days, though I’ve never had leftovers last that long. The flavors deepen overnight, so day-old cake is actually my favorite way to eat it.
Nutritional Information & Benefits
Here’s an approximate nutritional breakdown per serving (based on 9 servings):
| Nutrient | Amount Per Serving |
|---|---|
| Calories | 320 |
| Total Fat | 18g |
| Saturated Fat | 10g |
| Cholesterol | 55mg |
| Sodium | 210mg |
| Total Carbohydrates | 38g |
| Dietary Fiber | 2g |
| Sugars | 24g |
| Protein | 4g |
Peaches are a good source of vitamin C and fiber, and the cream cheese adds a small amount of calcium. While this isn’t a health food, it’s a dessert made with real ingredients that you can feel good about serving. The portion size is satisfying without being overwhelming, which makes it easier to enjoy mindfully.
If you’re watching your sugar intake, you can reduce the powdered sugar to 1/3 cup without sacrificing texture. The peaches provide natural sweetness, so you won’t miss it much.
Conclusion
This creamy no-bake peach icebox cake is proof that the best recipes often come from happy accidents. It’s simple enough for a Wednesday night dessert but impressive enough for a summer party, and it doesn’t require any special skills or equipment. The combination of soft, cake-like cookies, light and tangy cream, and sweet, juicy peaches is just unbeatable.
I hope you give this recipe a try and make it your own. Maybe you’ll add a little cinnamon, swap in berries, or serve it in individual cups. Whatever you do, I’d love to hear about it. Drop a comment below and let me know how it turned out—did you use fresh peaches or frozen? Did anyone ask for the recipe? I read every comment and I love hearing your stories.
Happy no-baking, friends. Summer is too short to spend it in front of a hot oven.
Frequently Asked Questions
Can I use canned peaches instead of fresh?
Yes, absolutely. Use canned peaches packed in juice (not syrup) and drain them well. Pat them dry with a paper towel to remove excess liquid. The texture will be slightly softer, but the flavor will still be great.
How long does this cake need to chill?
At least 6 hours, but overnight is best. The cookies need time to soften into that cake-like texture, and the flavors need time to meld. Don’t rush this step—it’s the most important part of the recipe.
Can I make this dairy-free?
Yes, with a few swaps. Use vegan cream cheese, full-fat coconut cream (chilled and whipped), and dairy-free vanilla wafers. The coconut cream adds a subtle tropical flavor that pairs nicely with the peaches.
Why did my cake turn out soggy?
This usually happens if the peaches were too wet or if the cake wasn’t chilled long enough. Make sure to pat the peaches dry after slicing, and give the cake the full chilling time. If the cookies are still crunchy, it needs more time in the fridge.
Can I double this recipe?
Yes, just use a 9×13 baking dish and double all ingredients. The chilling time stays the same. You may need to add an extra layer of cookies and cream to fill the dish properly.
Pin This Recipe!
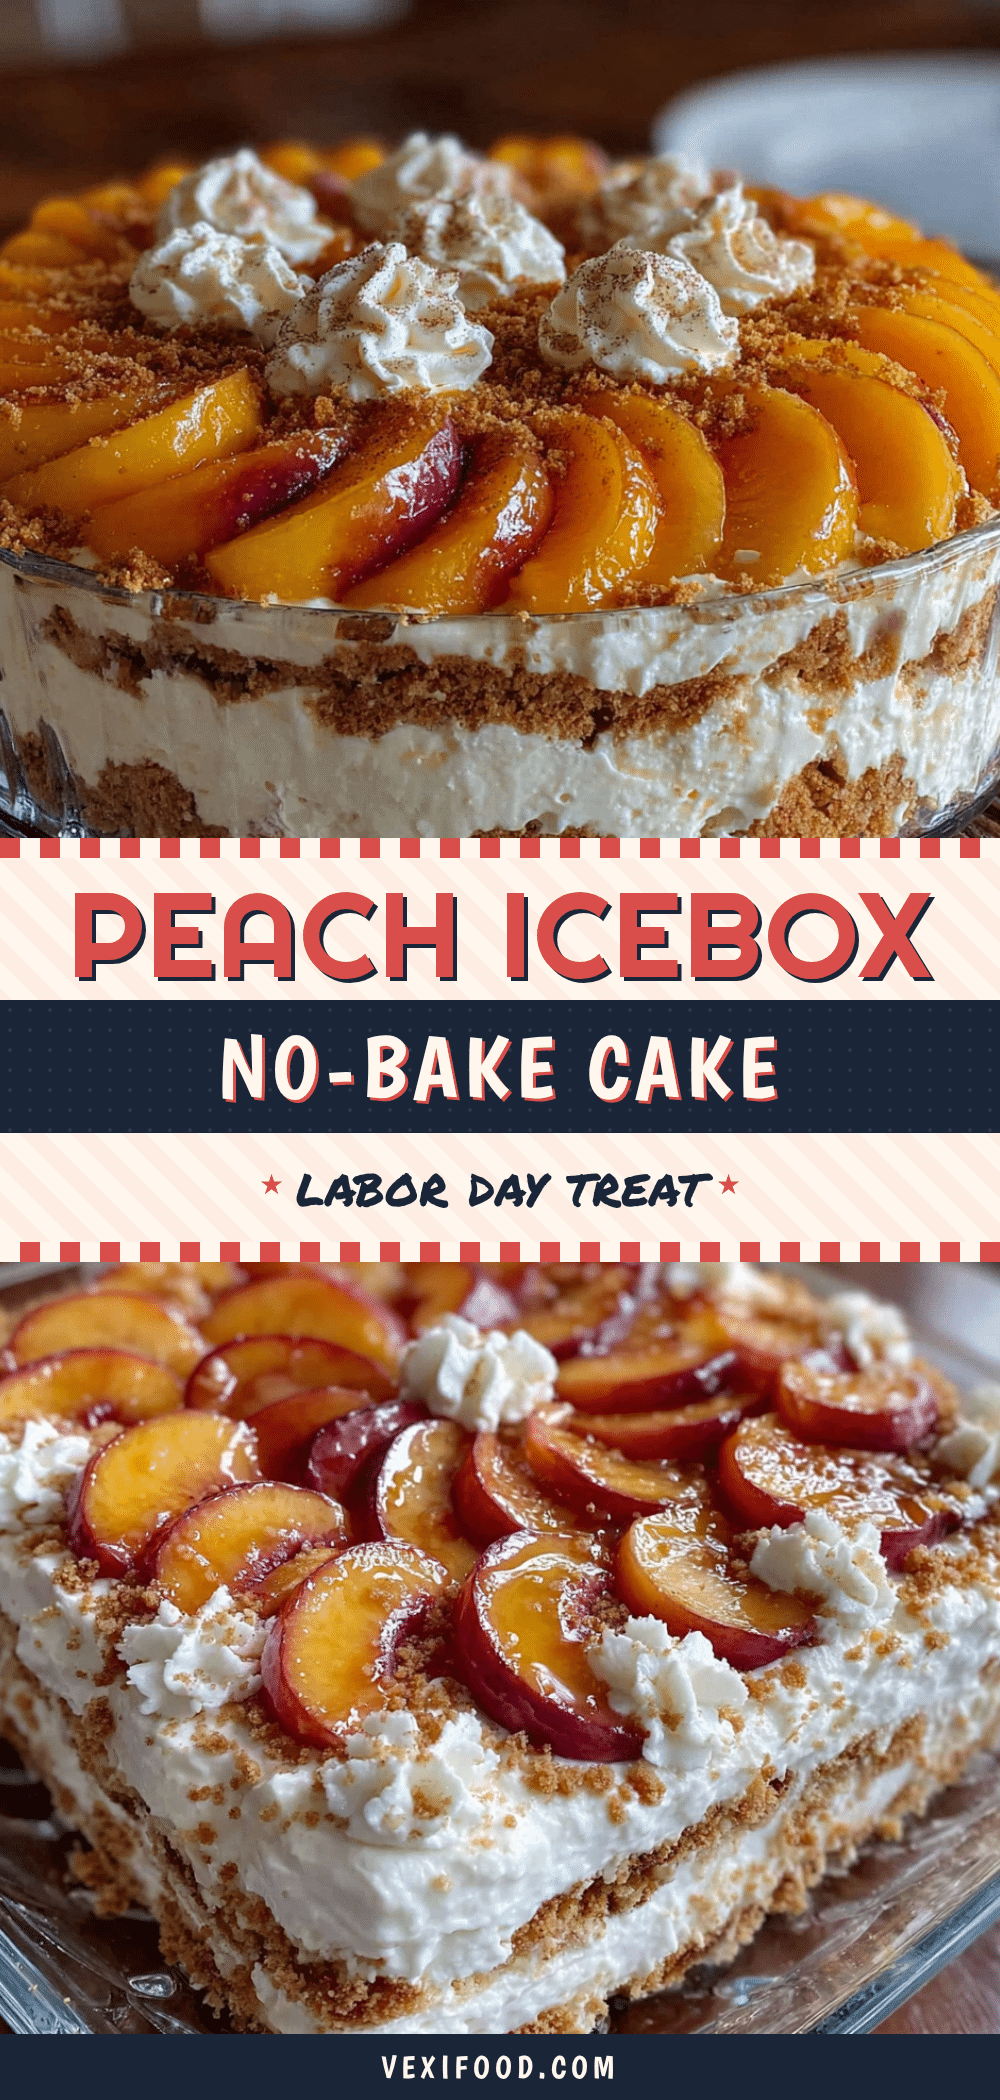
Best Creamy No-Bake Peach Icebox Cake Recipe

A creamy no-bake peach icebox cake made with fresh peaches, vanilla wafers, and a light cream cheese filling. Perfect for summer gatherings, this dessert requires no oven and comes together in just 20 minutes of active prep.
- Prep Time: 20 minutes
- Cook Time: 0 minutes
- Total Time: 6 hours 20 minutes (includes chilling)
- Yield: 9 servings 1x
- Category: Dessert
- Cuisine: American
Ingredients
- 4–5 medium ripe but firm fresh peaches, sliced into 1/4-inch wedges
- 8 ounces vanilla wafers (about 40–50 cookies)
- 8 ounces cream cheese, softened
- 1 cup cold heavy cream
- 1/2 cup powdered sugar
- 1 teaspoon vanilla extract
- 1 tablespoon fresh lemon juice
- Optional: fresh mint leaves, extra peach slices, cinnamon, or honey for garnish
Instructions
- Wash and peel the peaches (optional). Slice into 1/4-inch thick wedges and toss with lemon juice to prevent browning. Set aside.
- In a large mixing bowl, beat cold heavy cream on medium-high speed until soft peaks form, about 2-3 minutes. Add powdered sugar and vanilla extract, then continue beating until stiff peaks form. Be careful not to over-whip.
- In another bowl, beat softened cream cheese until smooth and fluffy, about 2 minutes. Scrape down sides halfway through.
- Gently fold the whipped cream into the cream cheese using a spatula, starting with about a third of the cream and then adding the rest. Fold until just combined and the mixture is light and fluffy.
- Spread a thin layer (about 1/4 cup) of the cream mixture on the bottom of an 8×8-inch baking dish.
- Arrange a single layer of vanilla wafers on top, breaking some to fill gaps. Do not overlap too much.
- Spread half of the remaining cream mixture over the cookies. Arrange half of the peach slices on top, pressing gently into the cream.
- Add another layer of cookies, then the remaining cream, then the remaining peaches. End with a final layer of cookies on top, pressing down slightly.
- Cover tightly with plastic wrap or a lid and refrigerate for at least 6 hours, preferably overnight.
- When ready to serve, uncover and slice into squares. Garnish with fresh mint or extra peach slices if desired.
Notes
Don’t rush the chilling time—at least 6 hours, but overnight is best. Let cream cheese come to room temperature for smooth blending. Pat peaches dry after tossing with lemon juice to avoid sogginess. Use a serrated knife to slice cleanly. The cake can be stored covered in the refrigerator for up to 3 days; texture improves after the first day. Freezing is not recommended as the cream layer may separate.
Nutrition
- Serving Size: 1 square (1/9 of cak
- Calories: 320
- Sugar: 24
- Sodium: 210
- Fat: 18
- Saturated Fat: 10
- Carbohydrates: 38
- Fiber: 2
- Protein: 4
Keywords: no-bake peach icebox cake, peach dessert, summer dessert, no-bake dessert, icebox cake, peach recipe