Love this? Save it for later!
Share the inspiration with your friends
The lady at the yarn shop—I swear I’m not making this up—was the one who changed my cookie life. I was just there to pick up a skein of chunky wool for a scarf I never finished, and somehow, between discussing the merits of merino and the best way to fix a dropped stitch, she started talking about pumpkin cookies. She wasn’t a baker by trade, just a woman who ran a tiny shop that smelled like lavender and old wood. She told me her secret was using a single egg yolk instead of a whole egg, and she scribbled the recipe on the back of a receipt. I almost laughed. I mean, a yarn shop? But I took that crumpled piece of paper home, and honestly, it was the best thing that happened to my fall baking routine.
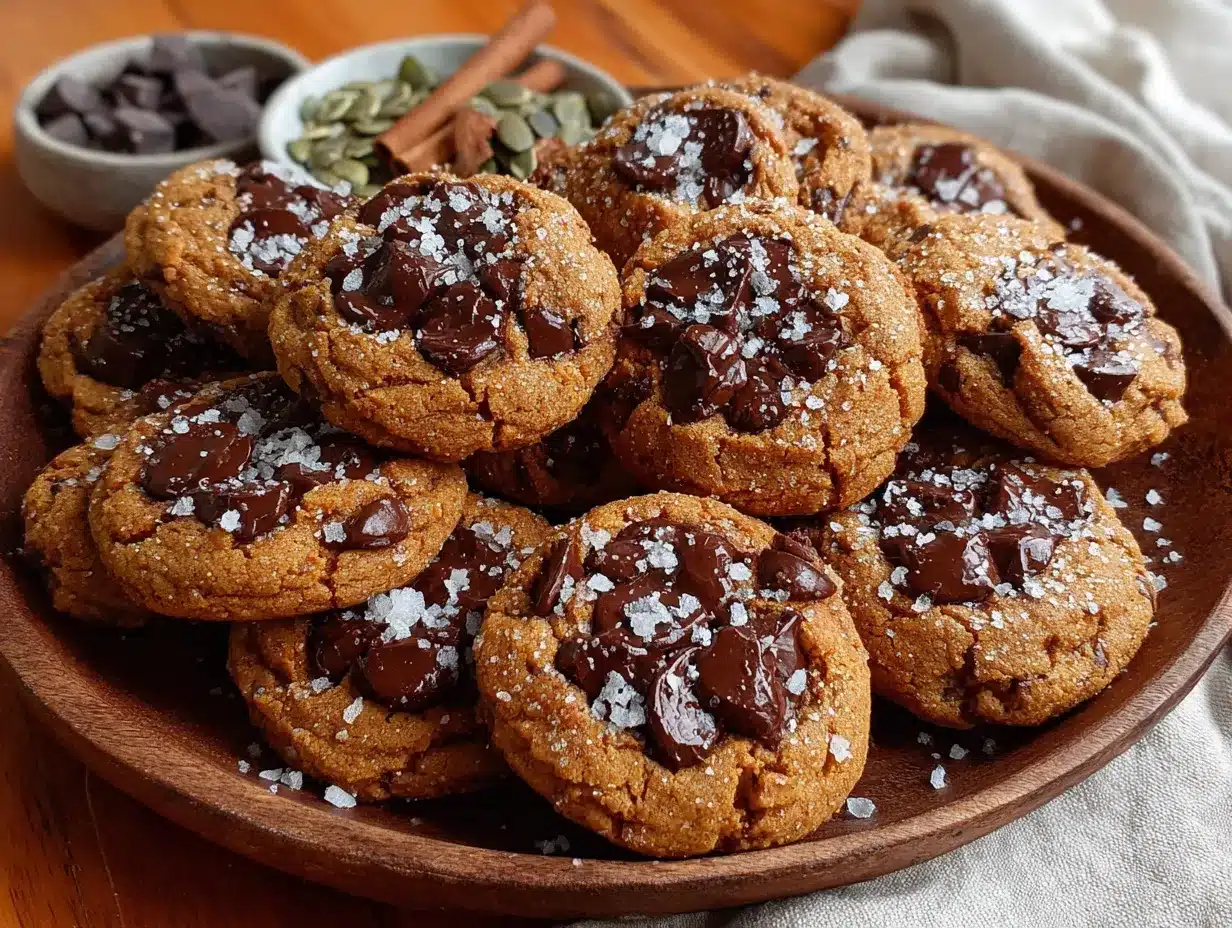
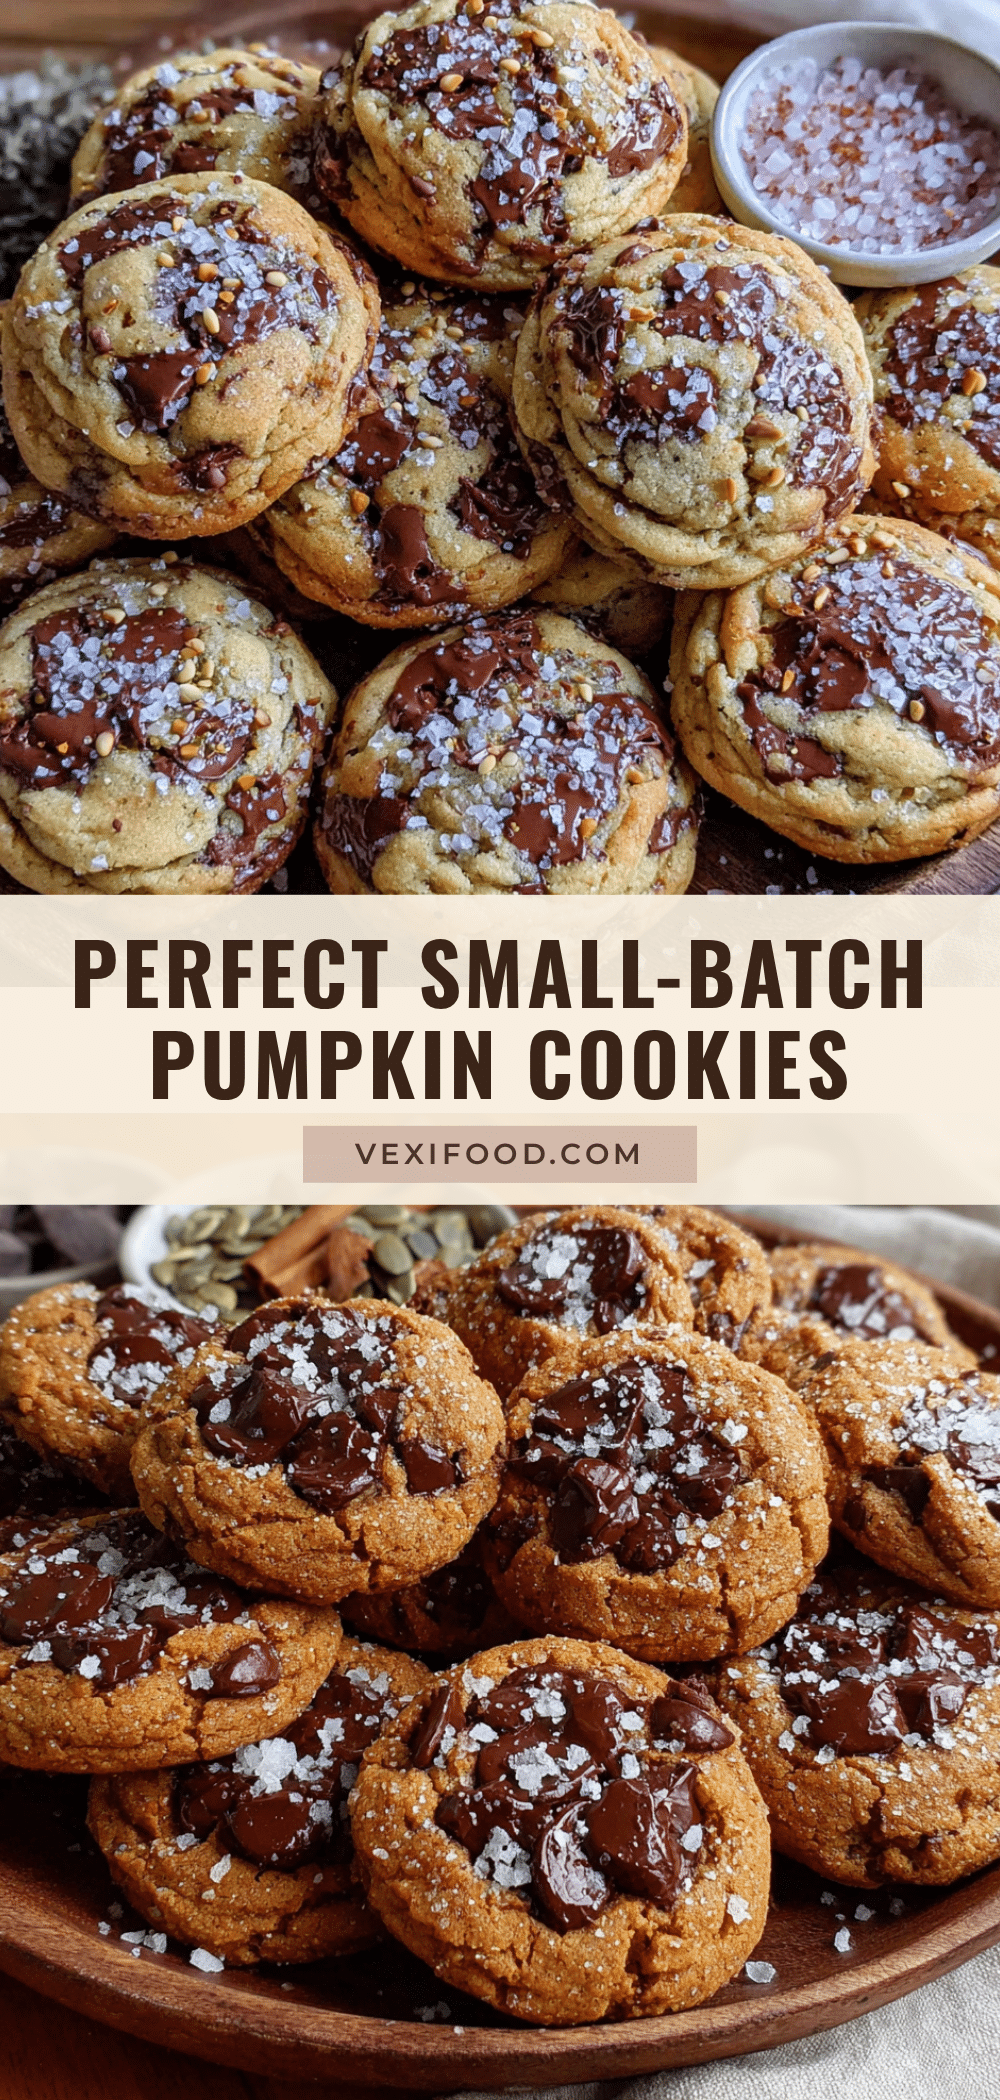
These Perfect Small-Batch Pumpkin Chocolate Chip Cookies are exactly that—a cozy, no-fuss recipe that gives you six perfect cookies without the commitment of a full batch. Maybe you’ve been there, staring at a half-can of pumpkin puree in the fridge, wondering what to do with it. This is the answer. The texture is soft, almost cake-like, but with those slightly crisp edges that make a cookie truly satisfying. And the chocolate chips? They melt into little pools of richness that balance the warm, spiced pumpkin flavor. I’ve tweaked that yarn shop lady’s original idea over the years, adding a touch more cinnamon and a pinch of nutmeg, and now I make them every time the leaves start to turn. Let me tell you, there is nothing quite like the smell of these baking on a chilly October afternoon.
Why You’ll Love This Recipe
I’ve tested this recipe more times than I care to admit, and it always delivers. It’s the kind of cookie that makes you look like a pro even when you’re just craving something sweet and simple. Here is why this one stands out from the crowd of pumpkin recipes out there.
- Quick & Easy: From start to finish, you are looking at about 25 minutes. No chilling the dough, no fancy equipment—just mix, scoop, and bake.
- Simple Ingredients: You probably have most of these in your pantry right now. The only special trip might be for a can of pumpkin puree, but you can use the leftovers for a smoothie or oatmeal.
- Perfect for Small Households: This recipe makes exactly six cookies. No more, no less. It is ideal for couples, singles, or anyone who doesn’t need a dozen cookies staring at them from the counter.
- Crowd-Pleaser: I brought these to a book club meeting last month, and they vanished before anyone even mentioned the first chapter. Kids love them, adults love them, and they have that nostalgic bakery-style vibe.
- Unbelievably Delicious: The secret is using that single egg yolk. It gives the cookies a tender, almost creamy texture without making them greasy. The pumpkin keeps them moist for days, if they last that long.
What makes this different from every other pumpkin cookie recipe is the balance. So many pumpkin cookies turn out either too dry or too gummy. This one hits that sweet spot—soft in the middle, lightly browned on the bottom, and packed with just enough chocolate to make every bite interesting. It is comfort food that feels intentional, not like a desperate attempt to use up leftover pumpkin.
What Ingredients You Will Need
This recipe relies on a handful of basic ingredients, but each one plays a specific role. I have tested swaps and substitutions, so I will share what works and what doesn’t. Let’s break it down.
- Unsalted butter, softened (3 tablespoons / 42g): I always use unsalted so I can control the salt level. Let it sit out for about 30 minutes before starting. If you are in a rush, cut it into small cubes and let it soften for 10 minutes—it works fine.
- Granulated sugar (¼ cup / 50g): This gives the cookies structure and a bit of crunch on the edges. You can reduce it to 3 tablespoons if you prefer less sweet cookies, but I would not go lower than that.
- Light brown sugar, packed (2 tablespoons / 25g): This adds moisture and a hint of molasses flavor that pairs beautifully with pumpkin. Dark brown sugar works too, but it will make the cookies slightly darker and more caramel-like.
- Pumpkin puree (¼ cup / 60g): Make sure you are using 100% pure pumpkin puree, not pumpkin pie filling. The pie filling has added sugar and spices that will throw off the balance. I like Libby’s brand for consistent texture.
- Egg yolk (1 large): This is the trick that makes these cookies so tender. Save the egg white for an omelet or add it to scrambled eggs the next morning.
- Vanilla extract (½ teaspoon): Pure vanilla extract is best, but imitation will work in a pinch. It enhances the warm spices without overpowering them.
- All-purpose flour (¾ cup / 90g): Spoon and level your flour for accurate measurement. Scooping directly from the bag can pack in too much flour, making the cookies dry.
- Baking soda (¼ teaspoon): This helps the cookies spread just a bit and gives them a soft, puffy texture.
- Pumpkin pie spice (½ teaspoon): I use store-bought for convenience, but you can make your own by mixing ¼ teaspoon cinnamon, ⅛ teaspoon nutmeg, ⅛ teaspoon ginger, and a pinch of cloves.
- Cinnamon (¼ teaspoon): Extra cinnamon because pumpkin and cinnamon are best friends. Trust me on this one.
- Salt (¼ teaspoon): Salt balances the sweetness and brings out the pumpkin flavor. Do not skip it.
- Semi-sweet chocolate chips (⅓ cup / 60g): I prefer Ghirardelli or Guittard for their rich flavor and good melt. Dark chocolate chips work beautifully too, or you can chop up a chocolate bar for uneven, melty puddles.
One quick note on substitutions: if you want to make these dairy-free, use vegan butter sticks (not the spreadable kind in a tub) and dairy-free chocolate chips. I have tried it with coconut oil instead of butter, and the cookies spread too much, so I do not recommend that swap. For a gluten-free version, use a 1:1 gluten-free flour blend that contains xanthan gum.
Equipment Needed
You do not need a lot of fancy tools for this recipe, which is part of why I love it. Here is what you will need:
- Mixing bowls: One medium bowl for dry ingredients and one small bowl for wet ingredients. I use glass or ceramic bowls because they don’t retain odors.
- Hand mixer or stand mixer: You can cream the butter and sugar by hand with a wooden spoon, but a hand mixer makes it easier and faster. I have done it both ways, and the cookies turn out the same.
- Rubber spatula: For scraping down the sides of the bowl and folding in the chocolate chips. A silicone spatula is my favorite because it doesn’t scratch my bowls.
- Baking sheet: A standard half-sheet pan works perfectly. If you only have a dark nonstick pan, keep an eye on the cookies because they can brown faster.
- Parchment paper or silicone baking mat: This prevents sticking and makes cleanup a breeze. I prefer parchment paper because it gives the cookies slightly crisper bottoms.
- Cookie scoop (1.5 tablespoon size): This ensures even-sized cookies that bake uniformly. If you don’t have one, use two spoons to portion the dough.
- Cooling rack: Letting the cookies cool on a rack prevents soggy bottoms. If you don’t have one, transfer them to a plate after 5 minutes on the baking sheet.
I bought a set of three cookie scoops years ago, and the medium one gets the most use. They are cheap and worth every penny for consistent results. If you bake often, invest in one—it makes portioning dough almost meditative.
Preparation Method
Making these cookies is straightforward, but a few small details make a big difference. Follow these steps, and you will have perfect cookies every time.
- Preheat your oven to 350°F (175°C). Line a baking sheet with parchment paper or a silicone mat. This is non-negotiable—do not grease the pan directly, or the cookies will spread too much.
- In a medium bowl, whisk together the flour, baking soda, pumpkin pie spice, cinnamon, and salt. Set this aside. Whisking aerates the flour and ensures the spices are evenly distributed. I once skipped this step and ended up with a cookie that had a concentrated clump of baking soda—not pleasant.
- In a separate bowl, beat the softened butter, granulated sugar, and brown sugar together until light and fluffy. This takes about 2 minutes with a hand mixer on medium speed. Scrape down the sides of the bowl halfway through. The mixture should look pale and slightly increased in volume.
- Add the pumpkin puree, egg yolk, and vanilla extract. Beat on low speed until just combined. The mixture might look slightly curdled at this point—that is normal because the pumpkin adds moisture. Do not overmix, or the cookies will be tough.
- Gradually add the dry ingredients to the wet ingredients. Mix on low speed until just a few streaks of flour remain. Stop the mixer and scrape down the bowl. Overmixing at this stage develops gluten, which makes cookies dense and less tender.
- Fold in the chocolate chips with a rubber spatula. Gently stir until they are evenly distributed. If you want a few chips on top for visual appeal, reserve a tablespoon and press them onto the dough balls after scooping.
- Scoop the dough into 6 equal portions. Use a 1.5-tablespoon cookie scoop or two spoons. Place them on the prepared baking sheet, spacing them about 2 inches apart. The dough will be slightly sticky and soft—that is perfect.
- Bake for 10 to 12 minutes. The cookies are done when the edges are set and lightly golden, but the centers still look slightly soft and underdone. My oven runs hot, so I check at 10 minutes. You want them just barely baked—they will continue to set on the hot baking sheet.
- Let the cookies cool on the baking sheet for 5 minutes. This step is crucial. If you try to move them immediately, they will fall apart. After 5 minutes, transfer them to a wire rack to cool completely. Or, you know, eat one warm because that is the best part of baking.
A note on timing: if you are making these for a specific occasion, the dough can be scooped and frozen on a baking sheet, then transferred to a freezer bag. Bake from frozen, adding 2 to 3 minutes to the baking time. I do this all the time for unexpected guests.
Cooking Tips & Techniques
I have made this recipe at least two dozen times, and I have learned a few things the hard way. Here are the tips that make a real difference.
Do not overmix the dough. This is the number one mistake I see. Once you add the flour, mix only until it disappears. Overmixing develops gluten and makes the cookies tough instead of tender. I speak from experience—I ruined a batch by walking away while the mixer was running. They came out like little hockey pucks.
Use room temperature ingredients. Cold butter won’t cream properly with the sugar, and cold egg yolk can seize the mixture. Let your butter sit out for 30 minutes, and if your egg is cold, place it in a bowl of warm water for 5 minutes. This small step makes a noticeable difference in texture.
Measure your flour correctly. Spoon the flour into your measuring cup and level it off with a knife. Scooping directly from the bag can add up to 25% more flour, which results in dry, crumbly cookies. I learned this from a baking class years ago, and it changed everything.
Watch the bake time closely. Ovens vary wildly. My friend’s oven bakes these in exactly 9 minutes, while mine takes 11. Start checking at the 9-minute mark. The cookies should look puffy and slightly cracked on top, with golden edges. The centers will look soft, but they will firm up as they cool.
Let them cool properly. Those 5 minutes on the baking sheet are not optional. The cookies are fragile when hot, and moving them too soon can cause them to break. I once tried to rush this step and ended up with a plate of cookie rubble. Still delicious, but not pretty.
For extra sparkle, sprinkle a tiny pinch of flaky sea salt on top of each cookie right after baking. It sounds fancy, but it takes seconds and really enhances the pumpkin and chocolate flavors. I use Maldon salt, but any flaky salt works.
Variations & Adaptations
One of the best things about this recipe is how easy it is to customize. Here are some variations I have tried and loved.
Spiced White Chocolate Version: Swap the semi-sweet chocolate chips for white chocolate chips and add an extra ¼ teaspoon of pumpkin pie spice. The sweetness of the white chocolate pairs beautifully with the warm spices. I made these for a fall brunch, and they were gone in minutes.
Vegan Adaptation: Use vegan butter sticks (I like Earth Balance) and a flax egg (1 tablespoon ground flaxseed mixed with 2.5 tablespoons water, let sit for 5 minutes). Use dairy-free chocolate chips. The texture is slightly less tender but still very good. I have made this version for a friend with dairy allergies, and she asked for the recipe.
Gluten-Free Option: Substitute the all-purpose flour with a 1:1 gluten-free flour blend that contains xanthan gum. I have used Bob’s Red Mill and King Arthur Measure for Measure with great results. Do not overmix, and add 1 to 2 minutes to the bake time if needed.
Add Mix-Ins: Fold in ¼ cup of chopped pecans or walnuts along with the chocolate chips for extra crunch. Toasted pecans are especially good—toast them in a dry pan over medium heat for 3 minutes, stirring frequently. Let them cool before adding to the dough.
Cookie Sandwiches: Bake the cookies as directed, let them cool completely, then sandwich a scoop of vanilla ice cream or pumpkin spice ice cream between two cookies. Roll the edges in mini chocolate chips or crushed graham crackers. This is my favorite summer-fall transition treat.
Pumpkin Chocolate Chip Cookie Bars: Press the dough into a greased 8×4-inch loaf pan and bake for 18 to 22 minutes. Let cool completely before cutting into squares. This is perfect if you want a thicker, bar-style dessert with less fuss.
Serving & Storage Suggestions
These cookies are best served slightly warm, when the chocolate chips are still melty and the pumpkin flavor is most pronounced. Let them cool on the baking sheet for 5 minutes, then transfer to a plate and serve immediately. If you want to get fancy, dust them with a little powdered sugar or serve them alongside a glass of cold milk or a warm chai latte.
For storage, place the cooled cookies in an airtight container at room temperature. They will stay soft and fresh for up to 3 days. I like to layer them between sheets of parchment paper to prevent sticking. Honestly, they rarely last that long in my house—my husband tends to find them within hours.
You can also freeze the baked cookies. Let them cool completely, then place them in a single layer in a freezer-safe bag or container. Freeze for up to 3 months. To thaw, let them sit at room temperature for about 30 minutes, or pop them in a 300°F oven for 5 minutes to warm through. The texture remains remarkably good after freezing.
If you want to freeze the dough instead, scoop the dough balls onto a parchment-lined baking sheet and freeze until solid, about 1 hour. Transfer the frozen dough balls to a freezer bag. Bake from frozen, adding 2 to 3 minutes to the bake time. This is my go-to method for having fresh cookies on demand without any effort.
The flavor actually improves after a day or two—the pumpkin and spices meld together, and the texture becomes even more tender. So if you can resist eating them all on day one, you will be rewarded on day two.
Nutritional Information & Benefits
Here is the approximate nutritional breakdown for one cookie (based on 6 cookies per batch):
- Calories: 195
- Fat: 10g
- Saturated Fat: 6g
- Carbohydrates: 26g
- Fiber: 1g
- Sugar: 16g
- Protein: 3g
These numbers are estimates and will vary based on the specific brands and substitutions you use. If you use dark chocolate chips, the sugar content will be slightly lower, and the antioxidant benefits will be higher.
Pumpkin puree is a nutritional powerhouse. It is packed with vitamin A (in the form of beta-carotene), which supports eye health and immune function. It also provides fiber, which helps with digestion and keeps you feeling full. One serving of these cookies gives you a small dose of that goodness—enough to feel a little virtuous while enjoying a treat.
The chocolate chips (especially dark chocolate) contain flavonoids, which are antioxidants that support heart health. So you are basically eating a health food. I mean, sort of. Let’s not get carried away, but it is nice to know there is some nutritional value in every bite.
These cookies are not gluten-free or dairy-free as written, but the variations section above provides easy adaptations for those dietary needs. They are also nut-free if you skip the optional pecans or walnuts.
Conclusion
These Perfect Small-Batch Pumpkin Chocolate Chip Cookies have become my go-to fall recipe for a reason. They are simple, reliable, and absolutely delicious. That yarn shop lady had no idea she was handing me a recipe that would bring so many cozy moments to my kitchen. Every time I bake them, I think of that tiny shop and the unexpected places where good recipes hide.
I hope you give these a try and make them your own. Maybe you will add a pinch more cinnamon, or swap in white chocolate chips, or eat them all straight off the baking sheet—no judgment here. That is the beauty of a small-batch recipe. It gives you room to experiment without wasting ingredients.
If you do make these, I would love to hear how they turned out. Drop a comment below and let me know if you tried any variations or if they became a new favorite in your kitchen. And if you have a story about where you found an unexpected recipe, please share it—I am always looking for the next great baking idea from an unlikely source.
Happy baking, and may your cookies always be perfectly soft in the middle!
Frequently Asked Questions
Can I use pumpkin pie filling instead of pumpkin puree?
No, I would not recommend it. Pumpkin pie filling contains added sugar and spices, which will make the cookies too sweet and throw off the texture. Stick with 100% pure pumpkin puree for the best results.
Why did my cookies turn out flat?
Flat cookies usually happen for one of three reasons: the butter was too soft or melted, the flour was undermeasured, or the baking sheet was too warm. Make sure your butter is softened but not melted, spoon and level your flour, and let the baking sheet cool completely between batches.
Can I double this recipe?
Absolutely. Simply double all the ingredients. The bake time might increase by 1 to 2 minutes because the oven will have more cookies to heat. Just keep an eye on them and use the same visual cues—golden edges and soft centers.
How do I know when the cookies are done baking?
The edges should be set and lightly golden, but the centers will still look slightly soft and puffy. They will continue to bake on the hot baking sheet as they cool. If you insert a toothpick into the center, it should come out with a few moist crumbs, not wet batter.
Can I use fresh pumpkin instead of canned?
Yes, but you need to roast and puree the pumpkin first, then drain off any excess liquid. Fresh pumpkin puree has more water than canned, so the cookies might spread more. To fix this, let the puree sit in a fine-mesh strainer for 30 minutes to drain before using.
Pin This Recipe!
Perfect Small-Batch Pumpkin Chocolate Chip Cookies
These soft, cake-like pumpkin chocolate chip cookies are made with a single egg yolk for a tender texture. Perfect for small households, this recipe yields six cookies in about 25 minutes.
- Prep Time: 15 minutes
- Cook Time: 12 minutes
- Total Time: 27 minutes
- Yield: 6 cookies 1x
- Category: Dessert
- Cuisine: American
Ingredients
- 3 tablespoons (42g) unsalted butter, softened
- ¼ cup (50g) granulated sugar
- 2 tablespoons (25g) light brown sugar, packed
- ¼ cup (60g) pumpkin puree (100% pure, not pie filling)
- 1 large egg yolk
- ½ teaspoon vanilla extract
- ¾ cup (90g) all-purpose flour
- ¼ teaspoon baking soda
- ½ teaspoon pumpkin pie spice
- ¼ teaspoon cinnamon
- ¼ teaspoon salt
- ⅓ cup (60g) semi-sweet chocolate chips
Instructions
- Preheat oven to 350°F (175°C). Line a baking sheet with parchment paper or a silicone mat.
- In a medium bowl, whisk together flour, baking soda, pumpkin pie spice, cinnamon, and salt. Set aside.
- In a separate bowl, beat softened butter, granulated sugar, and brown sugar together until light and fluffy, about 2 minutes with a hand mixer on medium speed. Scrape down the sides halfway through.
- Add pumpkin puree, egg yolk, and vanilla extract. Beat on low speed until just combined. The mixture may look slightly curdled—this is normal.
- Gradually add dry ingredients to wet ingredients. Mix on low speed until just a few streaks of flour remain. Do not overmix.
- Fold in chocolate chips with a rubber spatula until evenly distributed. Optionally, reserve a tablespoon of chips to press onto dough balls after scooping.
- Scoop dough into 6 equal portions using a 1.5-tablespoon cookie scoop or two spoons. Place on prepared baking sheet, spacing 2 inches apart.
- Bake for 10 to 12 minutes, until edges are set and lightly golden but centers still look slightly soft and underdone.
- Let cookies cool on baking sheet for 5 minutes, then transfer to a wire rack to cool completely. Serve warm for best flavor.
Notes
Do not overmix the dough to avoid tough cookies. Use room temperature ingredients for best texture. Measure flour by spooning and leveling. Bake time may vary; check at 9 minutes. Let cookies cool on baking sheet for 5 minutes before moving. For extra sparkle, sprinkle flaky sea salt on top after baking. Dough can be frozen for up to 3 months; bake from frozen adding 2-3 minutes.
Nutrition
- Serving Size: 1 cookie
- Calories: 195
- Sugar: 16
- Sodium: 120
- Fat: 10
- Saturated Fat: 6
- Carbohydrates: 26
- Fiber: 1
- Protein: 3
Keywords: pumpkin chocolate chip cookies, small batch cookies, fall baking, pumpkin cookies, easy cookie recipe