Love this? Save it for later!
Share the inspiration with your friends
The neighborhood block party was in six hours and I’d completely forgotten I signed up to bring the waffles. Not just any waffles, mind you—I’d bragged about my “famous” Belgian waffles at the last meeting, letting my mouth write checks my kitchen couldn’t cash. Everyone else was bringing those elaborate dishes that take two days to prep—marinated meats, layered dips, artisanal breads. I had a stick of butter, some flour, and a waffle iron I hadn’t used since last Christmas. Honestly, I almost just grabbed a box of mix from the store. But then I saw the butter sitting on the counter, and that little voice in my head said, brown it. You know that feeling when desperation turns into determination? I mean, I was panicking, but I figured if I was going to fail, I might as well fail spectacularly. The result? A plate of waffles so ridiculously crispy and nutty that people were actually asking for the recipe before I could even apologize for being late. Let me tell you, winning a block party with a recipe you threw together in a panic is a weird kind of flex, but I’ll take it. That’s how this crispy brown butter Belgian waffles recipe became my go-to—born from chaos, perfected by accident, and way too good to keep to myself. Maybe you’ve been there, staring at a half-empty pantry with a hungry crowd coming over. If so, this one’s for you.
Why You’ll Love This Recipe
Let’s be real—there are a million waffle recipes out there. But this one? It’s different. I’ve tested this recipe about a dozen times (my family has been very patient), and every single batch came out with that perfect crispy exterior and soft, airy center. The secret isn’t some fancy technique—it’s browning the butter. That one step changes everything.
- Quick & Easy: From start to finish, you’re looking at about 30 minutes. Perfect for a lazy Sunday morning or when you need to impress people fast.
- Simple Ingredients: You probably have everything in your kitchen right now. No weird extracts or hard-to-find flours.
- Perfect for Weekends or Brunch: Whether it’s a holiday morning or a random Saturday, these waffles make any day feel special.
- Crowd-Pleaser: Kids love the crispy edges, adults love the nutty brown butter flavor. Everyone wins.
- Unbelievably Delicious: The texture is next-level—crunchy on the outside, fluffy on the inside. It’s comfort food at its finest.
What makes this recipe stand out from the rest is the brown butter. Most waffle recipes just melt the butter and call it a day. Taking those extra few minutes to brown it adds a deep, toasty flavor that makes these waffles taste like they came from a fancy brunch spot. I’ve tried it with regular melted butter, and honestly, it’s just not the same. This is the kind of recipe that makes you close your eyes after the first bite—it’s that good.
What Ingredients You Will Need
This recipe uses simple, everyday ingredients to create something truly special. The star of the show is the brown butter, which adds a rich, nutty flavor you just can’t get any other way.
- All-purpose flour – 2 cups (240g). Gives the waffles structure without making them heavy.
- Granulated sugar – 2 tablespoons (25g). Just enough for a hint of sweetness.
- Baking powder – 1 tablespoon (14g). The key to that fluffy interior.
- Salt – 1/2 teaspoon (3g). Balances the sweetness and enhances the brown butter flavor.
- Large eggs – 2, separated. The yolks go into the batter, and you’ll whip the whites separately for extra lightness.
- Whole milk – 1 3/4 cups (415ml). Adds richness. You can use 2% in a pinch, but whole milk gives the best texture.
- Unsalted butter – 1/2 cup (1 stick or 113g). You’ll brown this until it’s golden and smells like toasted nuts. I prefer Kerrygold for its higher butterfat content—it browns beautifully.
- Vanilla extract – 1 teaspoon (5ml). Pure vanilla makes a difference here; skip the imitation stuff if you can.
- Non-stick cooking spray or melted butter – for the waffle iron. Don’t skip this, even if your iron claims to be non-stick.
Ingredient tips from my kitchen: For the brown butter, use a light-colored pan so you can see the color change. And please, please use room temperature eggs and milk—cold ingredients will seize the brown butter and you’ll end up with clumps. I learned that the hard way. If you’re dairy-free, you can substitute the butter with a high-quality vegan butter (I like Miyoko’s) and use oat milk instead of whole milk. The texture will be slightly different, but still delicious.
Equipment Needed
You don’t need a professional kitchen to make these waffles, but a few key tools make the process much smoother.
- Belgian waffle iron – This is non-negotiable. A standard waffle iron won’t give you the same deep pockets or crispy exterior. I use a Cuisinart round Belgian waffle maker, and it’s been reliable for years.
- Small saucepan – For browning the butter. Use a light-colored pan so you can monitor the color.
- Mixing bowls – You’ll need at least two: one for dry ingredients, one for wet ingredients.
- Whisk – For combining ingredients without overmixing.
- Electric hand mixer or stand mixer – For whipping the egg whites to stiff peaks. You can do it by hand with a whisk, but your arm will hate you.
- Rubber spatula – For folding in the egg whites gently.
- Measuring cups and spoons – Accurate measurements matter in baking.
- Ladle or measuring cup – For pouring batter onto the waffle iron evenly.
If you don’t have a Belgian waffle iron, you can use a regular one—just adjust the cooking time and expect thinner waffles. A good budget-friendly option is the Dash mini waffle maker, though you’ll have to make them in batches.
Preparation Method
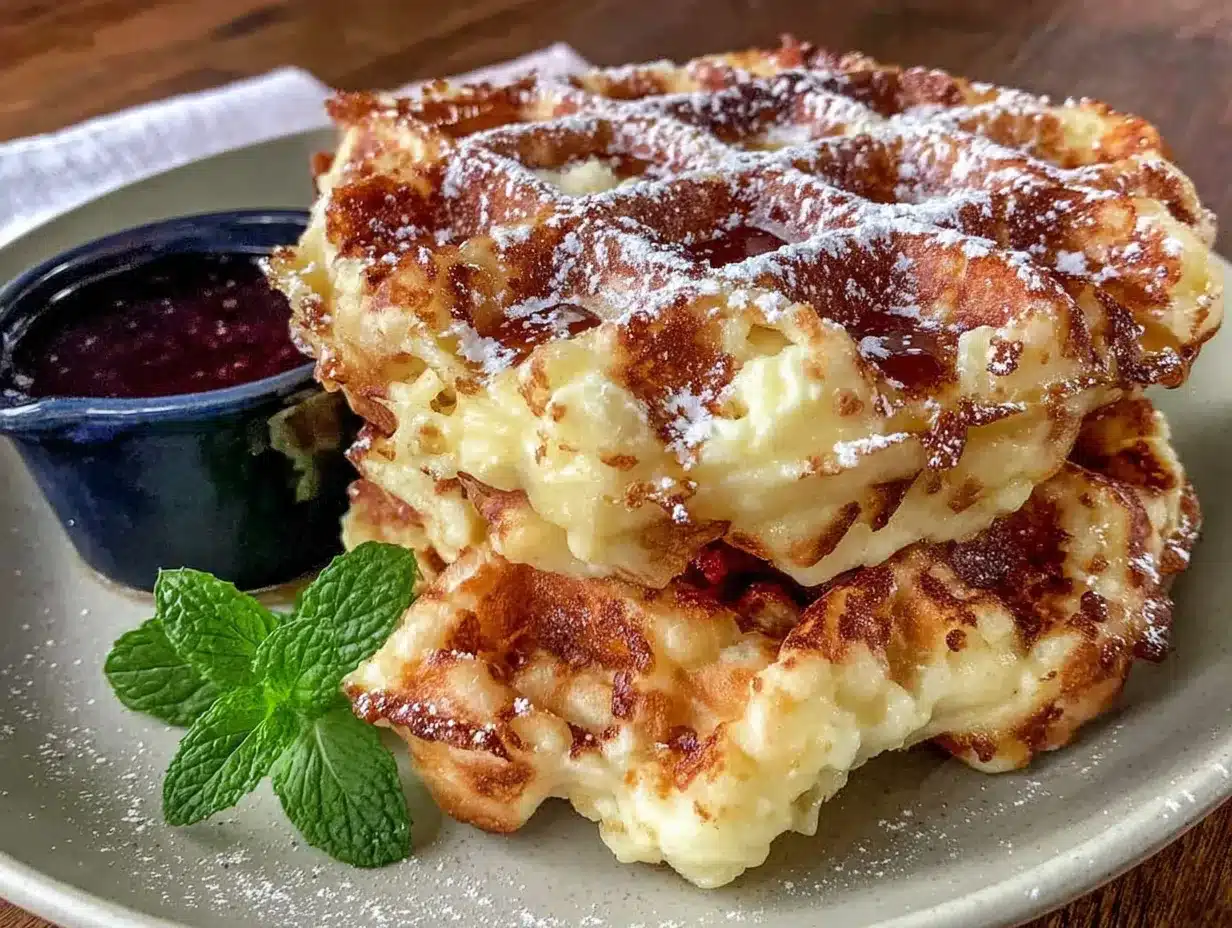
Follow these steps carefully, and you’ll have the crispiest, most flavorful waffles of your life. Trust the process.
- Brown the butter. Place the butter in a small saucepan over medium heat. Stir frequently as it melts. It will foam up, then the foam will subside, and you’ll see brown specks forming at the bottom. This takes about 5-7 minutes. Once it smells nutty and is a deep amber color, remove it from the heat immediately and pour it into a heat-safe bowl to stop the cooking. Let it cool for 5 minutes.
- Separate the eggs. While the butter cools, separate the egg whites from the yolks. Place the whites in a medium bowl and the yolks in a large bowl. Let both come to room temperature if they aren’t already.
- Mix the dry ingredients. In a separate bowl, whisk together the flour, sugar, baking powder, and salt. Set aside.
- Whisk the wet ingredients. To the bowl with the egg yolks, add the milk, vanilla extract, and the cooled brown butter. Whisk until smooth and well combined. The mixture should look pale and slightly thickened.
- Combine wet and dry. Pour the wet ingredients into the dry ingredients. Stir with a spatula until just combined. A few lumps are okay—overmixing will make the waffles tough. The batter should be thick but pourable.
- Whip the egg whites. Using an electric hand mixer or stand mixer with the whisk attachment, beat the egg whites on medium-high speed until stiff peaks form. This means when you lift the whisk, the peaks stand up straight without falling over. Don’t overbeat, or they’ll become dry and grainy.
- Fold in the egg whites. Gently fold about one-third of the whipped egg whites into the batter to lighten it. Then add the remaining whites and fold carefully until no white streaks remain. Be gentle—you want to keep as much air in the batter as possible.
- Preheat the waffle iron. While you’re folding, plug in your waffle iron and let it heat up fully. Most Belgian waffle irons have an indicator light. Spray generously with non-stick cooking spray or brush with melted butter.
- Cook the waffles. Pour about 3/4 cup of batter onto the center of the hot waffle iron (adjust based on your iron’s size). Close the lid and cook until golden brown and crispy, about 4-5 minutes. Don’t open the lid too early—let it steam and set. The waffle should release easily when it’s done.
- Keep warm. Place cooked waffles on a wire rack in a single layer (not stacked, or they’ll get soggy) in a 200°F oven while you cook the remaining batter.
Sensory cues to watch for: The batter should be thick and bubbly after folding in the egg whites. When you pour it onto the iron, it should sizzle slightly. The waffle is done when it’s deep golden brown and feels firm to the touch. If steam stops coming out of the sides, it’s probably done.
My personal tip: Let the batter rest for 5 minutes after folding in the egg whites. This allows the flour to hydrate fully and gives you a more tender waffle. I stumbled on this by accident when I got distracted by my phone, and honestly, it made a noticeable difference.
Cooking Tips & Techniques
I’ve made more waffles than I care to count, and I’ve messed up plenty along the way. Here’s what I’ve learned so you don’t have to repeat my mistakes.
Don’t rush the brown butter. I know it’s tempting to crank up the heat, but medium heat is your friend. High heat will burn the butter before it browns, and burnt butter tastes bitter, not nutty. Watch it carefully—once it turns amber, it goes from perfect to burnt in about 30 seconds. I’ve definitely had to start over more than once.
Room temperature ingredients matter. Cold milk and eggs will cause the brown butter to solidify into little flecks when you mix them together. You’ll end up with a lumpy batter that doesn’t cook evenly. Take the eggs and milk out of the fridge 30 minutes before you start. If you forget, place the eggs in a bowl of warm water for 5 minutes and microwave the milk for 15 seconds.
Don’t overmix the batter. This is probably the most common mistake. Mix until the flour disappears, then stop. A few lumps are fine. Overmixing develops gluten, which makes waffles tough and chewy instead of light and crispy. You want tender, not tough.
Let the waffle iron do its job. Resist the urge to peek. Opening the lid too early can cause the waffle to split or stick. Wait until the steam noticeably decreases and the indicator light says it’s done. If you’re unsure, give it an extra 30 seconds—crispy is better than undercooked.
Keep waffles crispy. Never stack hot waffles on a plate. The steam will soften the crispy exterior. Place them on a wire rack in a single layer. If you’re making a big batch, put the rack in a warm oven (200°F) to keep them hot without losing crunch.
Variations & Adaptations
One of the best things about this recipe is how easily it adapts. Here are a few ways I’ve changed it up depending on what I’m craving or who I’m feeding.
Gluten-Free Version: Substitute the all-purpose flour with a 1:1 gluten-free baking flour blend (I like King Arthur’s). Add 1 teaspoon of xanthan gum if your blend doesn’t already include it. The texture will be slightly more delicate, but still crispy and delicious. My gluten-sensitive friend couldn’t tell the difference.
Vegan Adaptation: Use a plant-based butter (like Miyoko’s) for browning, and substitute the eggs with flax eggs (1 tablespoon ground flaxseed + 3 tablespoons water per egg, let sit for 5 minutes). Use oat milk or almond milk instead of whole milk. The waffles won’t be as airy without the whipped egg whites, but they’ll still have great flavor and a decent crunch.
Flavor Twists: Add 1 teaspoon of cinnamon and a pinch of nutmeg to the dry ingredients for a warm, spiced version. Or fold in 1/2 cup of mini chocolate chips after the egg whites for a dessert-style waffle. I once made a batch with orange zest and a splash of cardamom—it was incredible with a drizzle of honey.
Savory Option: Reduce the sugar to 1 tablespoon and add 1/2 teaspoon of black pepper and 1/4 cup of finely grated Parmesan cheese to the batter. Serve with fried chicken or a poached egg for a savory brunch that’ll knock your socks off.
Serving & Storage Suggestions
These waffles are best served immediately, straight from the iron, while they’re still crispy and warm. But let’s be realistic—sometimes you make a big batch or have leftovers.
Serving temperature: Serve hot, within 5 minutes of cooking. If you’re serving a crowd, keep them in a single layer on a wire rack in a 200°F oven for up to 30 minutes. Any longer and they’ll start to dry out.
Toppings that work: Classic maple syrup is always a winner, but try a dollop of whipped cream and fresh berries for something lighter. A drizzle of honey and a sprinkle of sea salt is my personal favorite—the salt really brings out the nutty brown butter flavor. For a decadent treat, add a scoop of vanilla ice cream and some warm chocolate sauce.
Storage: Let leftover waffles cool completely on a wire rack. Place them in a single layer in a zip-top freezer bag, pressing out as much air as possible. They’ll keep in the freezer for up to 3 months. To reheat, pop them directly into a toaster or a 350°F oven for 5-7 minutes until crispy again. Do not microwave them—they’ll turn into sad, soggy pancakes.
Flavor development: Honestly, these waffles are best fresh. The crispy exterior doesn’t hold up well overnight in the fridge. If you must refrigerate them, they’ll last about 2 days, but reheating in a toaster is your only hope for restoring some crunch.
Nutritional Information & Benefits
Let’s be honest—waffles aren’t health food, but they don’t have to be a guilty pleasure either. Here’s the breakdown for one waffle (based on a recipe that makes 6 waffles).
| Nutrient | Amount per Waffle |
|---|---|
| Calories | 320 |
| Total Fat | 18g |
| Saturated Fat | 10g |
| Cholesterol | 95mg |
| Sodium | 380mg |
| Total Carbohydrates | 34g |
| Dietary Fiber | 1g |
| Sugars | 6g |
| Protein | 8g |
Health highlights: The brown butter adds a small amount of vitamin A and healthy fats. Eggs provide high-quality protein and choline, which is great for brain health. Using whole milk gives you calcium and vitamin D. If you’re watching your sugar intake, you can reduce the sugar to 1 tablespoon without affecting the texture too much.
Dietary considerations: This recipe contains gluten, dairy, and eggs. For gluten-free or vegan options, check the variations section above. These waffles are not low-carb, but they can be part of a balanced breakfast when paired with protein and fruit.
My personal take: I don’t believe in demonizing food. These waffles are a treat, and that’s okay. The key is moderation—enjoy one or two with some fresh fruit and maybe a side of eggs, and you’ve got a satisfying meal that feels indulgent without going overboard.
Conclusion
If you take one thing away from this post, let it be this: brown butter changes everything. It turns a simple waffle into something that tastes like you spent hours in the kitchen, when really, you just spent a few extra minutes browning the butter. That nutty, toasty flavor paired with the crispy edges and fluffy center is honestly hard to beat.
I love this recipe because it’s forgiving. I’ve made it when I was rushing, when I was distracted, when I was out of practice—and it always delivers. It’s the kind of recipe that makes you look like a hero at brunch without all the stress. So go ahead, give it a try. Play around with the toppings, make it your own, and don’t forget to brown that butter. I’d love to hear how yours turn out—drop a comment below and let me know what toppings you used. Happy cooking!
Frequently Asked Questions
Can I make the batter ahead of time?
I don’t recommend it. The whipped egg whites will deflate, and the baking powder will lose its fizz, resulting in flat, dense waffles. If you need to prep ahead, brown the butter and measure out the dry ingredients the night before. Then just whip the egg whites and mix everything together when you’re ready to cook.
Why are my waffles not crispy?
Most likely, your waffle iron isn’t hot enough, or you’re opening it too early. Make sure the iron is fully preheated (wait for the indicator light). Also, don’t stack the cooked waffles—place them on a wire rack so steam can escape. If they’re still not crispy, try cooking them 30-60 seconds longer.
Can I use salted butter instead of unsalted?
Yes, but reduce the added salt in the recipe to 1/4 teaspoon. Salted butter has about 1/4 teaspoon of salt per stick, so you’ll need to adjust to avoid overly salty waffles. I prefer unsalted for better control over the seasoning.
How do I clean brown butter residue from the pan?
Brown butter leaves behind those delicious browned milk solids, which can stick to your pan. Fill the pan with water and bring it to a boil, then scrape up the bits with a wooden spoon. For stubborn residue, add a splash of white vinegar to the water. It comes right off.
Can I double this recipe?
Absolutely. Just double all the ingredients. The only tricky part is browning the butter—you can brown two sticks at once in a larger pan, just keep a close eye on it. You’ll also need a bigger bowl for the batter. The cooking time per waffle stays the same.
Pin This Recipe!
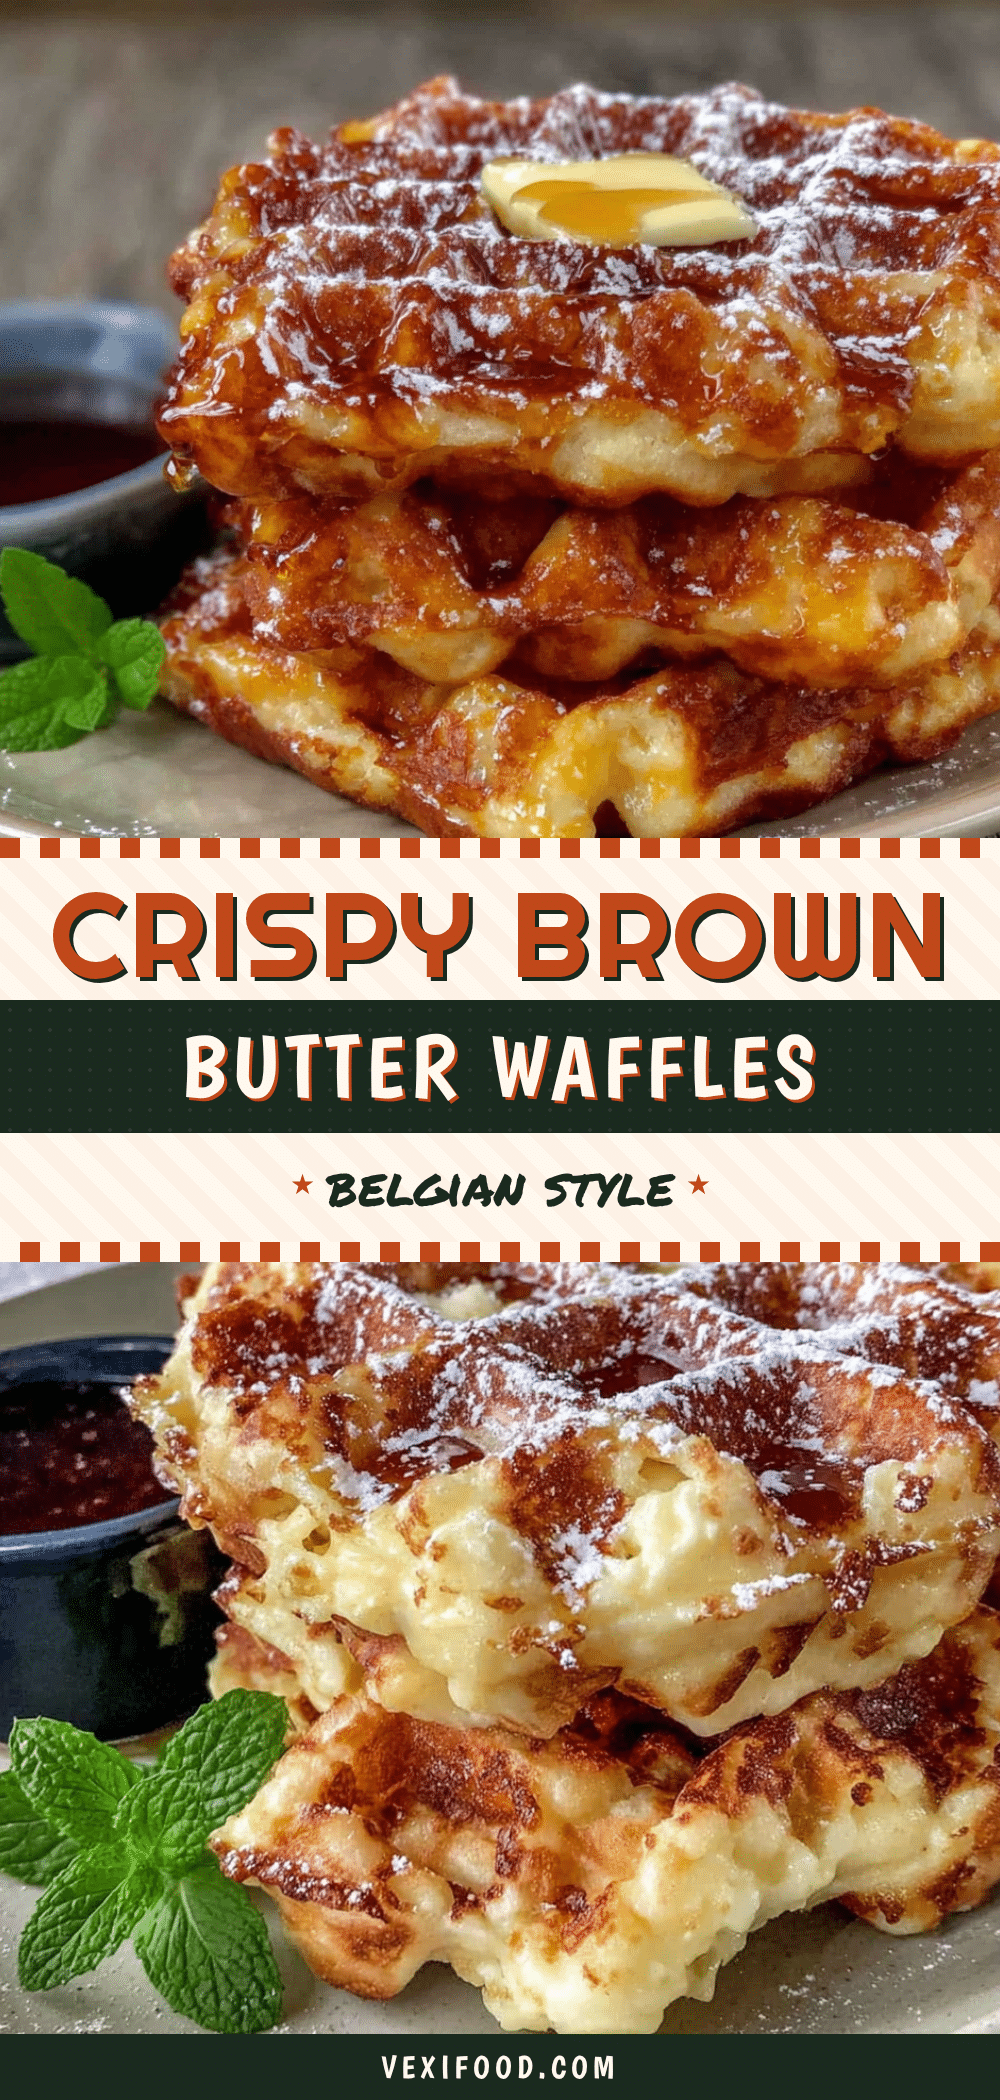
Best Crispy Brown Butter Belgian Waffles Recipe

These crispy brown butter Belgian waffles are quick and easy to make, with a nutty flavor from browned butter and a perfect crispy exterior with a soft, airy center. Perfect for weekends or brunch, they’re a crowd-pleaser that tastes like it came from a fancy brunch spot.
- Prep Time: 15 minutes
- Cook Time: 15 minutes
- Total Time: 30 minutes
- Yield: 6 servings 1x
- Category: Breakfast
- Cuisine: American
Ingredients
- 2 cups (240g) all-purpose flour
- 2 tablespoons (25g) granulated sugar
- 1 tablespoon (14g) baking powder
- 1/2 teaspoon (3g) salt
- 2 large eggs, separated
- 1 3/4 cups (415ml) whole milk
- 1/2 cup (1 stick or 113g) unsalted butter
- 1 teaspoon (5ml) vanilla extract
- Non-stick cooking spray or melted butter for the waffle iron
Instructions
- Brown the butter: Place the butter in a small saucepan over medium heat. Stir frequently as it melts. It will foam up, then the foam will subside, and you’ll see brown specks forming at the bottom. This takes about 5-7 minutes. Once it smells nutty and is a deep amber color, remove it from the heat immediately and pour it into a heat-safe bowl to stop the cooking. Let it cool for 5 minutes.
- Separate the eggs: While the butter cools, separate the egg whites from the yolks. Place the whites in a medium bowl and the yolks in a large bowl. Let both come to room temperature if they aren’t already.
- Mix the dry ingredients: In a separate bowl, whisk together the flour, sugar, baking powder, and salt. Set aside.
- Whisk the wet ingredients: To the bowl with the egg yolks, add the milk, vanilla extract, and the cooled brown butter. Whisk until smooth and well combined. The mixture should look pale and slightly thickened.
- Combine wet and dry: Pour the wet ingredients into the dry ingredients. Stir with a spatula until just combined. A few lumps are okay—overmixing will make the waffles tough. The batter should be thick but pourable.
- Whip the egg whites: Using an electric hand mixer or stand mixer with the whisk attachment, beat the egg whites on medium-high speed until stiff peaks form. This means when you lift the whisk, the peaks stand up straight without falling over. Don’t overbeat, or they’ll become dry and grainy.
- Fold in the egg whites: Gently fold about one-third of the whipped egg whites into the batter to lighten it. Then add the remaining whites and fold carefully until no white streaks remain. Be gentle—you want to keep as much air in the batter as possible.
- Preheat the waffle iron: While you’re folding, plug in your waffle iron and let it heat up fully. Most Belgian waffle irons have an indicator light. Spray generously with non-stick cooking spray or brush with melted butter.
- Cook the waffles: Pour about 3/4 cup of batter onto the center of the hot waffle iron (adjust based on your iron’s size). Close the lid and cook until golden brown and crispy, about 4-5 minutes. Don’t open the lid too early—let it steam and set. The waffle should release easily when it’s done.
- Keep warm: Place cooked waffles on a wire rack in a single layer (not stacked, or they’ll get soggy) in a 200°F oven while you cook the remaining batter.
Notes
Let the batter rest for 5 minutes after folding in the egg whites for a more tender waffle. Use room temperature eggs and milk to prevent the brown butter from solidifying. Don’t overmix the batter. Keep waffles crispy by placing them on a wire rack in a single layer, not stacked.
Nutrition
- Serving Size: 1 waffle
- Calories: 320
- Sugar: 6
- Sodium: 380
- Fat: 18
- Saturated Fat: 10
- Carbohydrates: 34
- Fiber: 1
- Protein: 8
Keywords: Belgian waffles, crispy waffles, brown butter waffles, easy waffle recipe, brunch recipe