Love this? Save it for later!
Share the inspiration with your friends
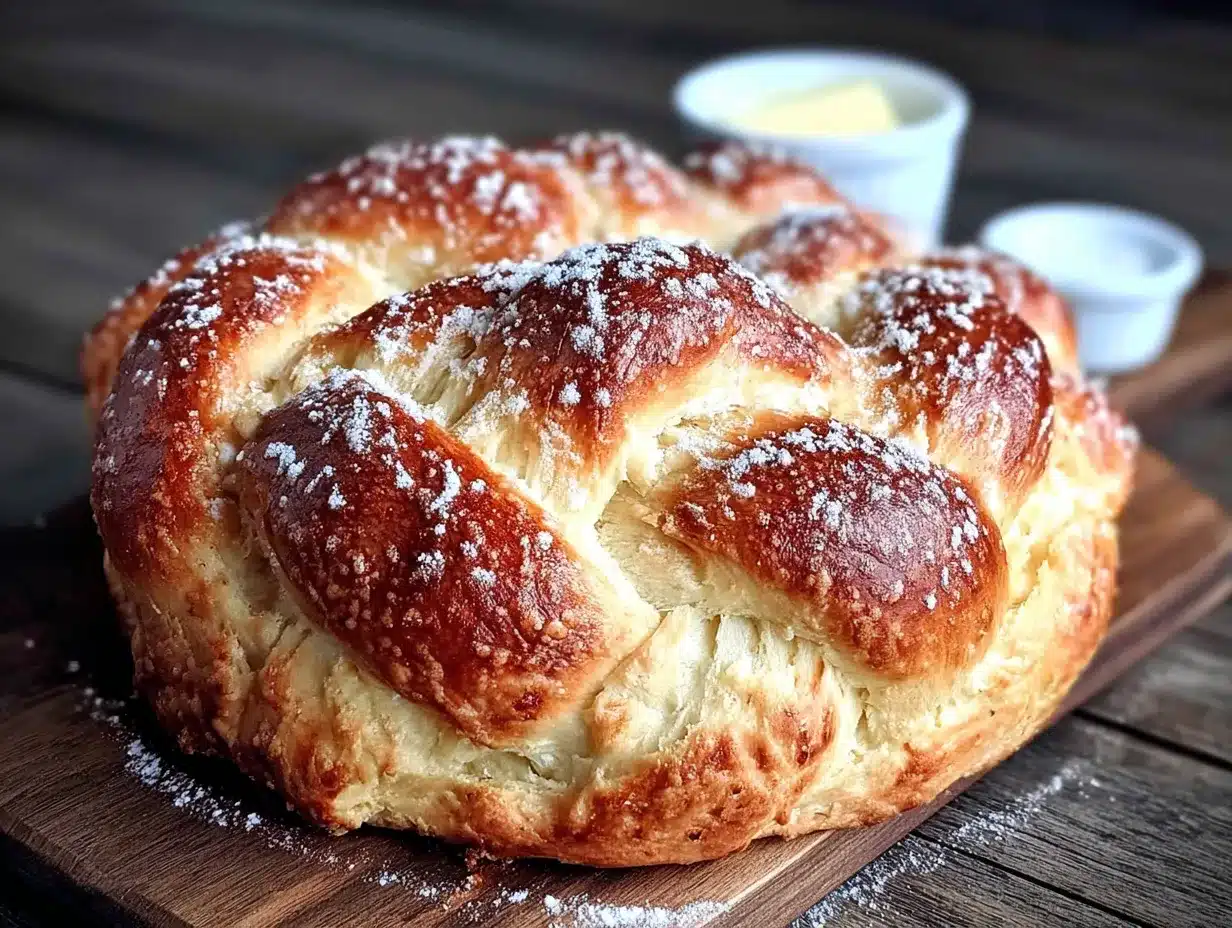
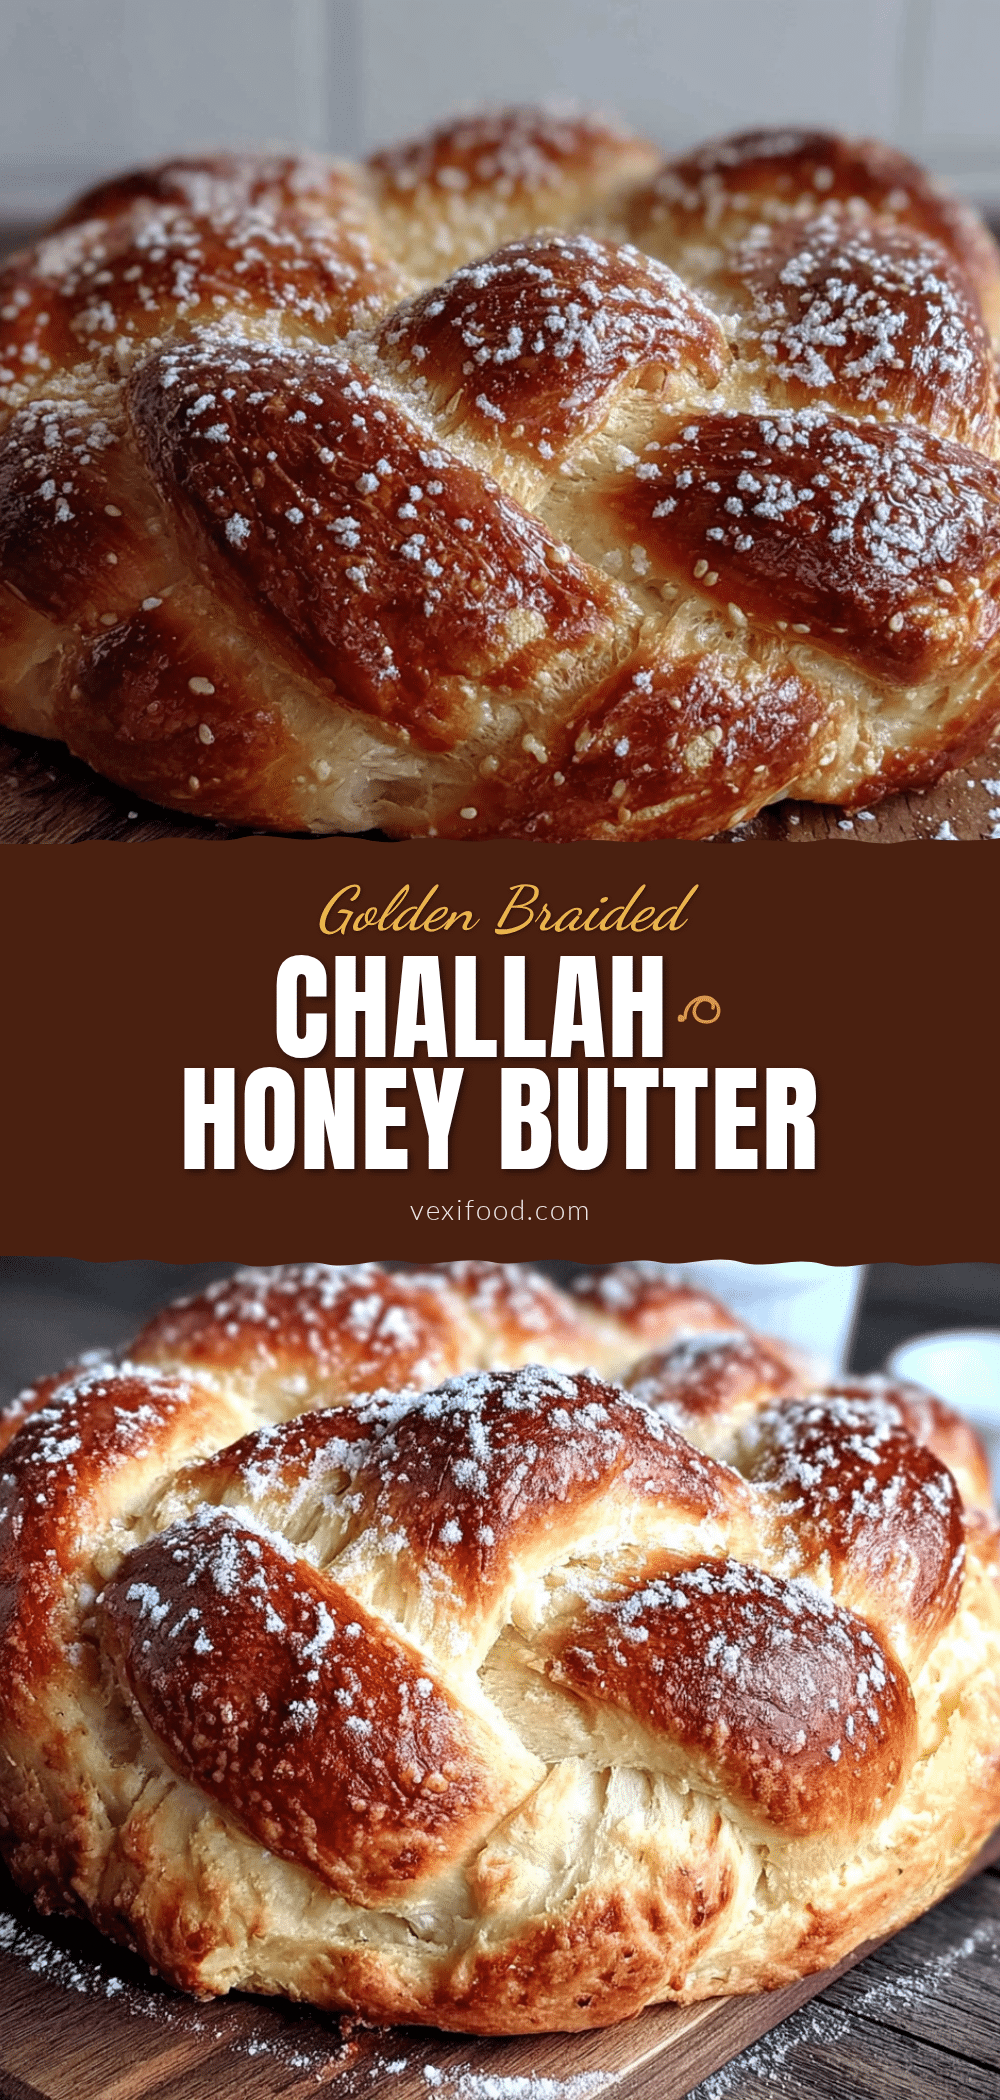
My neighbor Rebecca asked me last week why I couldn’t just braid the challah dough in a circle instead of wrestling it into a loaf pan. I started to explain the whole tradition thing—round challah is for Rosh Hashanah, not random Tuesdays—then stopped. Honestly? I had no good reason. I just assumed it would be more complicated, that the braid wouldn’t hold its shape, that it would bake up lopsided and weird. So I told her I’d try it her way, mostly to prove a point. The round challah came out of the oven looking like something from a bakery window. Golden, plump, perfectly swirled. Rebecca texted me a photo of her kids tearing into it with honey butter dripping down their chins. I sat there eating my words, literally, because I had to make another one just to taste it myself. That was three months ago, and I haven’t baked a loaf-pan challah since. This Perfect Round Challah with Honey Butter has become my go-to, and let me tell you—once you go round, you don’t go back. There is something about the way the braid spirals that makes each slice feel special, like you are unwrapping a present. And that honey butter? It is the kind of simple addition that makes you wonder why you didn’t think of it sooner. Maybe you have been stuck in your own challah rut, wrestling with the same old loaf pan. I get it. But trust me on this one.
Why You’ll Love This Recipe
I have tested this recipe about seven times to get the texture just right. The first batch was too dense. The second was too sweet. The third—well, the third caught fire in the oven because I forgot to cover it halfway through. But the version I am sharing today? It is the one that made my neighbor’s kids ask for seconds. Here is why this one works:
- Perfectly Soft and Fluffy: The dough bakes up pillowy on the inside with a golden, slightly crisp crust. No dry, crumbly mess here.
- Simple Ingredients: You probably have flour, eggs, honey, and butter in your kitchen right now. No weird specialty items required.
- Great for Any Occasion: Round challah is traditional for Rosh Hashanah, but honestly? It works for Friday night dinners, Sunday brunch, or just because it is Tuesday.
- Crowd-Pleaser: I brought this to a potluck last month, and three people asked for the recipe before I even sat down.
- Next-Level Honey Butter: This is not just butter with honey stirred in. It is whipped, fluffy, and lightly salted—the perfect companion to that warm, braided bread.
What makes this recipe different from the dozens of challah recipes out there is the technique. I use a slightly wetter dough than most recipes call for, which gives you that bakery-style softness. And instead of the usual three-strand braid, I show you a simple four-strand round braid that looks impressive but is actually easier than it sounds. This is comfort food reimagined—the same soul-soothing satisfaction of traditional challah, but shaped in a way that makes every slice feel like the best piece.
What Ingredients You Will Need
This recipe uses simple, pantry-friendly ingredients that come together to create something truly special. Here is what you will need and why each one matters.
For the Challah Dough
- 4 cups all-purpose flour (520 grams) – I prefer King Arthur Flour for consistent results, but any brand works. Bread flour will give you chewier texture if you prefer that.
- 2 ¼ teaspoons active dry yeast (one packet) – Make sure it is fresh. Old yeast is the number one reason challah fails.
- ½ cup warm water (120 ml, about 110°F) – Not too hot! If it burns your wrist, it will kill the yeast.
- ⅓ cup honey (80 ml) – This adds sweetness and helps with browning. Local honey gives a lovely floral note.
- 3 large eggs, room temperature – Cold eggs will shock the dough. Leave them on the counter for an hour before starting.
- ¼ cup vegetable oil (60 ml) – Canola or avocado oil work great. Olive oil will change the flavor, so stick with neutral here.
- 1 teaspoon salt – Don’t skip this. Salt controls yeast activity and adds depth.
- 1 egg yolk for the wash – This gives that gorgeous golden crust.
- 1 tablespoon water for the wash – Mix with the yolk for easy brushing.
- Sesame seeds or poppy seeds for topping (optional) – I love black and white sesame seeds together.
For the Honey Butter
- ½ cup unsalted butter (1 stick, 113 grams), softened – Let it sit out for at least 30 minutes. Cold butter won’t whip properly.
- 3 tablespoons honey (45 ml) – Use a runny honey for best texture. Crystallized honey will make the butter grainy.
- ¼ teaspoon flaky sea salt – Maldon is my favorite. It makes the honey butter taste like something from a fancy brunch spot.
Equipment Needed
You do not need a professional bakery setup for this recipe. Here is what I use and what you can substitute if needed.
- Large mixing bowl – Glass or ceramic works best. Metal can react with the yeast if left too long.
- Stand mixer with dough hook – This makes kneading effortless, but you can absolutely knead by hand. It takes about 10 minutes of arm work.
- Baking sheet – Line it with parchment paper. The round challah spreads slightly as it bakes.
- Pastry brush – For the egg wash. A silicone brush is easier to clean than a natural one.
- Kitchen scale – Not required, but highly recommended for consistent results. Flour measurement by volume can vary wildly.
- Clean kitchen towel – For covering the dough while it rises. A damp towel works better than plastic wrap in dry climates.
- Small bowl – For mixing the egg wash.
- Hand mixer or stand mixer – For the honey butter. A whisk and some elbow grease work too if you are feeling strong.
I bought my baking sheet from a restaurant supply store for twelve dollars, and it has outlasted every fancy brand I have tried. Sometimes simple is better.
Preparation Method
Let me walk you through this step by step. I have included timing cues and sensory markers so you know exactly what to look for at each stage.
- Activate the yeast. In your mixing bowl, combine the warm water, 1 tablespoon of honey, and the yeast. Stir gently and let it sit for 5 to 10 minutes. It should look foamy and smell slightly bready. If nothing happens, your yeast is dead—start over with fresh yeast.
- Mix the wet ingredients. Add the remaining honey, eggs, vegetable oil, and salt to the yeast mixture. Whisk until everything is combined. The mixture will look pale yellow and slightly frothy.
- Add the flour. Gradually add the flour, one cup at a time, mixing with the dough hook on low speed. After about 3 minutes, the dough should pull away from the sides of the bowl. If it is still sticky, add flour one tablespoon at a time until it forms a soft, slightly tacky ball. Do not add too much flour—a slightly sticky dough gives you a softer challah.
- Knead the dough. Knead on medium speed for 6 to 8 minutes (or by hand for 10 minutes). The dough should feel smooth and elastic. Press your finger into it—it should spring back slowly. If the indentation stays, keep kneading.
- First rise. Place the dough in a lightly oiled bowl, cover with a clean towel, and let it rise in a warm, draft-free spot for 1 to 1.5 hours. It should double in size. I put mine in the microwave (turned off) with a cup of hot water next to it—works every time.
- Punch down and divide. Gently punch the dough down to release the air. Turn it onto a lightly floured surface. Divide the dough into 4 equal pieces. If you have a scale, each piece should weigh about 200 grams.
- Roll into ropes. Roll each piece into a rope about 14 inches long. The ropes should be slightly thicker in the middle and tapered at the ends. If they shrink back as you roll, let the dough rest for 5 minutes and try again.
- Braid the round challah. Lay the four ropes in a star pattern (like a plus sign with two lines crossing). Pinch the center together. Take the rope on the right and cross it over the one next to it. Then take the rope on the far left and cross it over the one next to it. Continue alternating—right over, left over—until you reach the ends. Pinch the ends together and tuck them under the loaf. Don’t worry if it looks messy. My first round challah looked like a pretzel that had been in a fight. It still tasted amazing.
- Second rise. Carefully transfer the braided challah to your parchment-lined baking sheet. Cover with a towel and let it rise for 30 to 45 minutes. It should puff up noticeably but not double in size.
- Preheat and prepare egg wash. About 15 minutes before baking, preheat your oven to 350°F (175°C). Whisk the egg yolk with 1 tablespoon of water until smooth.
- Brush and bake. Gently brush the egg wash over the entire surface of the challah. Be careful not to deflate it. Sprinkle with sesame seeds if using. Bake for 28 to 35 minutes, rotating the pan halfway through. The challah is done when it is deep golden brown and sounds hollow when tapped on the bottom. If the top is browning too fast, tent loosely with foil for the last 10 minutes.
- Cool completely. Let the challah cool on a wire rack for at least 30 minutes before slicing. I know it is tempting to tear into it warm, but cutting too early will make it gummy.
Cooking Tips & Techniques
After seven batches and one small kitchen fire, I have learned a few things that will save you from my mistakes.
- Temperature matters more than you think. Cold ingredients will make your dough stubborn and slow to rise. I set my eggs and butter on the counter the night before. If you forget, place the eggs in a bowl of warm water for 5 minutes.
- Don’t over-flour your surface. Too much flour makes the dough dry and tough. Use just enough to prevent sticking. A bench scraper is your best friend for lifting sticky dough.
- Watch the rise, not the clock. Humidity, temperature, and altitude all affect rising time. Your dough is ready when it has doubled in size and holds a fingerprint when poked gently. If it springs back immediately, it needs more time.
- My biggest failure: The time I forgot to cover the challah during the second rise. The surface dried out and formed a skin, which cracked during baking. Always keep that towel on top. If you notice a dry patch, brush it lightly with water before baking.
- Multitask smartly. While the dough is rising, make your honey butter. While the challah bakes, clean your kitchen. This recipe flows beautifully if you plan ahead.
- For consistent results: Use a kitchen scale. Flour volume can vary by up to 25% depending on how you scoop it. Weight measurements are bulletproof.
Variations & Adaptations
One of the best things about this recipe is how flexible it is. Here are some ways I have adapted it over the months.
- Whole Wheat Version: Substitute 1 cup of all-purpose flour with whole wheat flour. Add an extra tablespoon of honey and let the dough rest for 10 minutes after mixing to allow the whole wheat to absorb moisture.
- Vegan Challah: Replace the eggs with flax eggs (1 tablespoon ground flaxseed + 3 tablespoons water per egg). Use coconut oil instead of butter, and maple syrup instead of honey. The texture will be slightly denser but still delicious.
- Savory Challah: Reduce the honey to 2 tablespoons and add 1 tablespoon of za’atar, 1 teaspoon of garlic powder, and ½ cup of grated Parmesan to the dough. Skip the sesame seeds and top with flaky salt instead.
- Gluten-Free Option: I tested this with a 1:1 gluten-free flour blend and it worked surprisingly well. Add an extra egg and let the dough rest for 20 minutes before braiding to allow the flour to hydrate fully.
- Stuffed Challah: Before braiding, flatten each rope slightly, place a line of chocolate chips or cinnamon sugar down the center, and pinch the edges to seal. The filling stays hidden inside the braid—a fun surprise when you slice it.
Serving & Storage Suggestions
This round challah is at its absolute best served warm, but it is still wonderful at room temperature.
- Serving temperature: Warm is ideal. Pop slices in a 300°F oven for 5 minutes if it has been sitting out. The honey butter should be soft but not melted—let it sit at room temperature for 15 minutes before serving.
- Presentation: Place the whole round challah on a wooden board with the honey butter in a small bowl next to it. Sprinkle a few extra sesame seeds and a pinch of flaky salt on the butter for visual appeal.
- What to serve with it: This challah pairs beautifully with a simple vegetable soup, a fresh green salad, or roasted chicken. For brunch, serve it alongside scrambled eggs and fresh fruit. The honey butter also works wonders on pancakes or waffles.
- Storage: Store leftover challah in an airtight container at room temperature for up to 3 days. Do not refrigerate—it will dry out the bread. For longer storage, wrap tightly in plastic wrap and freeze for up to 2 months.
- Reheating: Thaw frozen challah at room temperature. Reheat slices in a toaster or in a 350°F oven for 5 minutes. The honey butter can be refrigerated for up to a week—just let it soften before using.
- Flavor development: Interestingly, the challah tastes even better on day two. The flavors meld and the texture becomes slightly more tender. If you can resist eating it all fresh, save some for tomorrow’s French toast.
Nutritional Information & Benefits
Let me be clear—this is a treat, not a health food. But there are some redeeming qualities worth noting.
- Per serving (1 slice, about 1/12 of the loaf, with 1 tablespoon honey butter): Approximately 280 calories, 12g fat, 38g carbohydrates, 6g protein, 2g fiber.
- Honey benefits: Raw honey contains antioxidants and has antibacterial properties. Local honey may also help with seasonal allergies.
- Eggs: Provide high-quality protein and choline, which supports brain health.
- Dietary considerations: This recipe is nut-free and can be made dairy-free by using plant-based butter. It is not gluten-free unless you use the substitution above.
- Potential allergens: Contains wheat, eggs, and dairy. The honey butter adds additional dairy.
- My perspective: I believe in balance. This challah is not something I eat every day, but when I do, I savor every bite without guilt. Food is about joy, connection, and tradition—not just numbers on a label.
FAQs
Can I make this challah ahead of time?
Absolutely. You can prepare the dough through the first rise, punch it down, cover it tightly, and refrigerate for up to 24 hours. The next day, let it come to room temperature for about 30 minutes before shaping and continuing with the recipe.
Why is my challah dough so sticky?
Sticky dough is normal, especially with this recipe. Resist the urge to add too much flour. A slightly tacky dough creates a softer, fluffier challah. If it is truly unworkable, add flour one tablespoon at a time until it becomes manageable.
Can I use instant yeast instead of active dry yeast?
Yes. Use the same amount (2 ¼ teaspoons) but skip the activation step. Mix the instant yeast directly with the flour. You will need to let the dough rise for slightly less time—about 45 minutes to 1 hour for the first rise.
How do I know when the challah is fully baked?
The internal temperature should reach 190°F to 200°F on an instant-read thermometer. The crust should be deep golden brown, and the loaf should sound hollow when you tap the bottom. If you are unsure, bake for an extra 3 to 5 minutes.
Can I freeze the unbaked challah?
Yes. Shape the challah and place it on the baking sheet. Freeze until solid, then wrap tightly in plastic wrap and foil. When ready to bake, thaw in the refrigerator overnight, let it come to room temperature for 30 minutes, then proceed with the egg wash and baking.
Conclusion
This Perfect Round Challah with Honey Butter has become more than just a recipe in my kitchen. It is the thing I bring to dinner parties, the project I make on slow Sunday afternoons, the bread that makes my house smell like home. The round shape feels celebratory, even on an ordinary day, and that honey butter—fluffy, sweet, and salty—is the kind of simple luxury that makes you slow down and actually taste what you are eating. I hope you give this recipe a try, and I hope you make it your own. Maybe you will add cinnamon to the dough, or swap the sesame seeds for everything bagel seasoning, or serve it with jam instead of honey butter. That is the beauty of a good recipe—it is a starting point, not a rulebook. When you make this challah, I would love to hear about it. Drop a comment below and tell me how it turned out, what you changed, or just share a photo of your beautiful braided loaf. Happy baking, friend.
Pin This Recipe!
Perfect Round Challah Recipe with Honey Butter
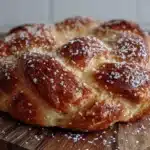
This Perfect Round Challah with Honey Butter is a soft, fluffy, and beautifully braided bread that’s perfect for any occasion. The accompanying honey butter is whipped, fluffy, and lightly salted, making it the ideal companion to the warm bread.
- Prep Time: 30 minutes
- Cook Time: 30 minutes
- Total Time: 2 hours 30 minutes
- Yield: 12 servings 1x
- Category: Bread
- Cuisine: Jewish
Ingredients
- 4 cups all-purpose flour (520 grams)
- 2 ¼ teaspoons active dry yeast (one packet)
- ½ cup warm water (120 ml, about 110°F)
- ⅓ cup honey (80 ml)
- 3 large eggs, room temperature
- ¼ cup vegetable oil (60 ml)
- 1 teaspoon salt
- 1 egg yolk (for the wash)
- 1 tablespoon water (for the wash)
- Sesame seeds or poppy seeds for topping (optional)
- ½ cup unsalted butter (1 stick, 113 grams), softened
- 3 tablespoons honey (45 ml)
- ¼ teaspoon flaky sea salt
Instructions
- Activate the yeast: In your mixing bowl, combine the warm water, 1 tablespoon of honey, and the yeast. Stir gently and let it sit for 5 to 10 minutes until foamy.
- Mix the wet ingredients: Add the remaining honey, eggs, vegetable oil, and salt to the yeast mixture. Whisk until combined and pale yellow.
- Add the flour: Gradually add the flour, one cup at a time, mixing with the dough hook on low speed until the dough pulls away from the sides of the bowl. Add flour one tablespoon at a time if too sticky.
- Knead the dough: Knead on medium speed for 6 to 8 minutes (or by hand for 10 minutes) until smooth and elastic. The dough should spring back slowly when pressed.
- First rise: Place the dough in a lightly oiled bowl, cover with a clean towel, and let it rise in a warm, draft-free spot for 1 to 1.5 hours until doubled in size.
- Punch down and divide: Gently punch the dough down, turn onto a lightly floured surface, and divide into 4 equal pieces (about 200 grams each).
- Roll into ropes: Roll each piece into a rope about 14 inches long, slightly thicker in the middle and tapered at the ends.
- Braid the round challah: Lay the four ropes in a star pattern, pinch the center together, and braid by alternating right over and left over until the ends. Pinch ends together and tuck under.
- Second rise: Transfer the braided challah to a parchment-lined baking sheet, cover with a towel, and let rise for 30 to 45 minutes until puffed.
- Preheat and prepare egg wash: Preheat oven to 350°F (175°C). Whisk the egg yolk with 1 tablespoon of water until smooth.
- Brush and bake: Gently brush the egg wash over the challah, sprinkle with sesame seeds if using, and bake for 28 to 35 minutes, rotating halfway. The challah is done when deep golden brown and sounds hollow when tapped.
- Cool completely: Let the challah cool on a wire rack for at least 30 minutes before slicing.
Notes
For best results, use a kitchen scale for consistent flour measurement. The dough should be slightly sticky for a softer challah. If the top browns too fast, tent loosely with foil for the last 10 minutes. The challah tastes even better on day two.
Nutrition
- Serving Size: 1 slice (1/12 of loa
- Calories: 280
- Sugar: 12
- Sodium: 180
- Fat: 12
- Saturated Fat: 6
- Carbohydrates: 38
- Fiber: 2
- Protein: 6
Keywords: round challah, honey butter, braided bread, Rosh Hashanah, challah recipe, homemade bread