Love this? Save it for later!
Share the inspiration with your friends
There used to be a tiny bakery tucked between a laundromat and a dusty antiques shop on Main Street in my old neighborhood. They made the most perfect pumpkin snickerdoodle cookies you could imagine—soft, pillowy, with just the right amount of cinnamon-sugar crunch on the outside. When they closed suddenly two autumns ago, I actually stood outside their darkened window for a solid minute feeling genuinely lost. After twelve tries—some that came out flat as pancakes, others that were more cake than cookie—I finally got it.
Let me tell you, this wasn’t some casual weekend baking project. I became a little obsessed, honestly. I’d take notes on texture, adjust the pumpkin-to-flour ratio, experiment with chilling times, and text my sister photos of every single batch. She started calling it my “pumpkin project.” But here’s the thing about pumpkin snickerdoodle cookies—they’re tricky. Too much pumpkin and they turn gummy. Too little and you lose that unmistakable fall flavor. These small batch pumpkin snickerdoodle cookies hit that sweet spot where the pumpkin is present but not overwhelming, and the cookie stays chewy for days.
Maybe you’ve been there—chasing a recipe that feels just out of reach, making batch after batch because you know what it should taste like but can’t quite get there. That was me with these cookies. I finally cracked the code when I realized the trick wasn’t in the ingredients themselves but in how you handle them. The pumpkin needs to be blotted dry. The butter needs to be truly softened, not melted. And the chilling? Non-negotiable. I keep making these because they remind me of crisp October mornings and that little bakery that’s gone now, but also because they’re genuinely the best version of a pumpkin snickerdoodle I’ve ever eaten. And I’ve eaten a lot of them.
Why You’ll Love This Recipe
These aren’t just another pumpkin cookie recipe floating around the internet. After developing this recipe through multiple rounds of testing—and yes, some spectacular failures—I can say with confidence that these small batch pumpkin snickerdoodle cookies deliver everything you want from a fall treat without any of the hassle.
- Small Batch Perfection: This recipe makes exactly 8 cookies. No more staring at a plate of 24 cookies wondering what to do with the extras. Perfect for when you want a treat without committing to a month’s worth of baked goods.
- Simple Pantry Ingredients: You probably have most of these already. Pumpkin puree, butter, sugar, flour, eggs, and cinnamon. No weird specialty ingredients that require a trip to three different stores.
- Ready in Under 30 Minutes: From start to finish, you’re looking at about 25 minutes of active time. The chill time is only 20 minutes, which is totally manageable even on a busy weeknight.
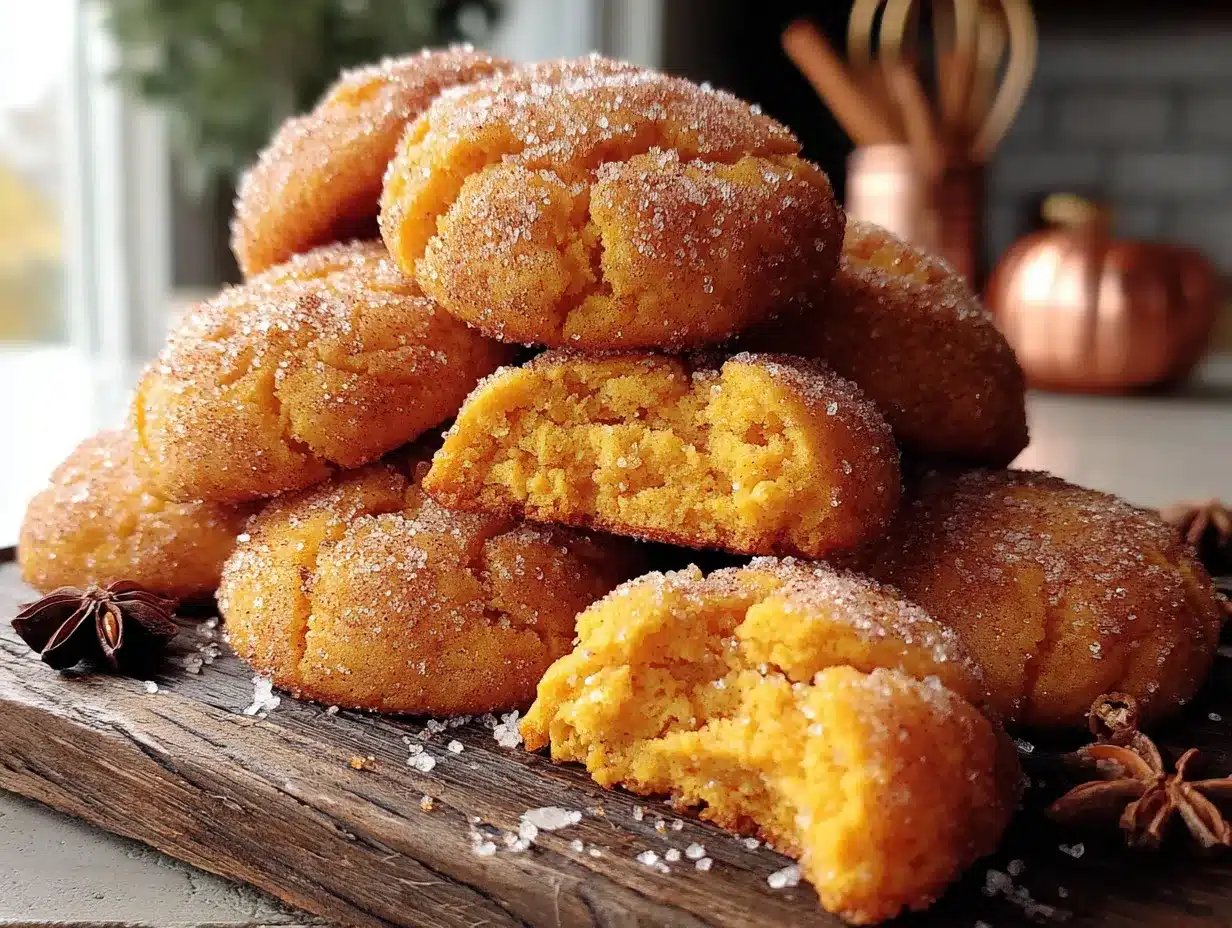
- That Perfect Texture: These cookies are soft in the middle with a slight chewiness around the edges. The cinnamon-sugar coating gives them that signature snickerdoodle crackle, while the pumpkin keeps them tender.
- Foolproof for Beginners: I’ve had friends who swear they can’t bake successfully make these without any issues. The instructions are straightforward, and I’ve included all the little tricks I learned the hard way.
What makes these different from every other pumpkin snickerdoodle recipe out there? It’s the technique of blotting the pumpkin puree to remove excess moisture. That one step transforms the texture from dense and wet to light and perfectly chewy. I learned this after my third failed batch where the cookies spread into sad, flat discs. Trust me on this one.
These cookies are the kind that make you close your eyes after the first bite. They’re fall in cookie form—warm, spiced, and comforting. Perfect for sharing with a friend over coffee, packing in a lunchbox, or keeping all to yourself on a cozy afternoon. No judgment here.
What Ingredients You Will Need
This recipe uses simple, wholesome ingredients to create those perfect pumpkin snickerdoodle cookies with minimal fuss. Most of these are pantry staples, which makes this an ideal last-minute baking project.
For the Cookie Dough
- Unsalted butter, 4 tablespoons (56g), softened to room temperature (I prefer Kerrygold for its richness, but any good quality butter works)
- Granulated sugar, ½ cup (100g) (adds sweetness and helps create that slightly crispy exterior)
- Light brown sugar, ¼ cup (50g), packed (adds moisture and a hint of molasses flavor that complements the pumpkin)
- Pumpkin puree, ¼ cup (60g) (use 100% pure pumpkin, not pumpkin pie filling—Libby’s is my go-to brand for consistent results)
- Large egg yolk, 1 (room temperature for better incorporation)
- Vanilla extract, 1 teaspoon (pure vanilla extract makes a noticeable difference here)
- All-purpose flour, 1 cup (125g) (spooned and leveled—don’t scoop directly from the bag)
- Cream of tartar, ½ teaspoon (this is what gives snickerdoodles their signature tangy flavor and chewy texture)
- Baking soda, ½ teaspoon
- Ground cinnamon, ½ teaspoon
- Ground ginger, ¼ teaspoon (adds warmth without being overpowering)
- Ground nutmeg, ⅛ teaspoon (freshly grated if you have it)
- Salt, ¼ teaspoon (balances the sweetness and enhances all the flavors)
For the Cinnamon-Sugar Coating
- Granulated sugar, 3 tablespoons (36g)
- Ground cinnamon, 1 tablespoon (yes, a full tablespoon—we want that generous coating)
A quick note on the pumpkin puree: after you measure out the ¼ cup, place it on a plate lined with paper towels and blot gently to remove excess moisture. This step is absolutely crucial. I learned this the hard way when my first batches came out gummy and flat. The blotting removes about a tablespoon of liquid, which means your cookies will hold their shape and have that perfect soft-but-not-soggy texture.
If you’re dairy-free, you can substitute the butter with a good quality vegan butter stick (not margarine). For a gluten-free version, use a 1:1 gluten-free flour blend that contains xanthan gum. I’ve tested this with Bob’s Red Mill 1:1 Baking Flour and the results were excellent—slightly more delicate, but still delicious.
Equipment Needed
You don’t need a fancy bakery setup for these small batch pumpkin snickerdoodle cookies. Here’s what you’ll need:
- Mixing bowls: One medium bowl for dry ingredients and one large bowl for wet ingredients. I use glass bowls because they’re easy to clean and don’t retain odors.
- Electric hand mixer: While you can cream the butter and sugar by hand with a wooden spoon, a hand mixer makes the process much easier and gives you a fluffier result. A stand mixer works too, but honestly, it’s overkill for this small batch.
- Measuring cups and spoons: For accuracy, especially with the cream of tartar and spices. I recommend metal measuring spoons for dry ingredients.
- Kitchen scale: Optional but highly recommended for the flour measurement. Weighing ensures consistent results every time.
- Baking sheet: A standard half-sheet pan works perfectly. Line it with parchment paper for easy cleanup.
- Parchment paper: Non-negotiable for preventing sticking and ensuring even browning.
- Cooling rack: Allows air to circulate around the cookies so they cool evenly without getting soggy bottoms.
- Small bowl: For mixing the cinnamon-sugar coating.
- Cookie scoop: A 1.5-tablespoon scoop makes uniform cookies that bake evenly. If you don’t have one, use two spoons to portion the dough.
- Plastic wrap: For chilling the dough balls before baking.
I picked up my favorite cookie scoop at a kitchen supply store for about eight dollars, and it’s one of those tools that makes baking feel effortless. If you bake cookies regularly, it’s worth the small investment.
Preparation Method
Let me walk you through this step by step. I’ve included all the little details that make the difference between good cookies and absolutely perfect pumpkin snickerdoodle cookies.
- Preheat and prepare: Preheat your oven to 350°F (175°C). Line a baking sheet with parchment paper. This gives you time to prepare the dough while the oven comes to temperature.
- Blot the pumpkin: Measure out ¼ cup (60g) of pumpkin puree and spread it on a plate lined with paper towels. Place another paper towel on top and press gently to absorb excess moisture. Let it sit while you prepare the other ingredients. This step removes about a tablespoon of liquid and is the secret to perfectly textured cookies that don’t spread into flat discs.
- Cream the butter and sugars: In a large mixing bowl, combine 4 tablespoons (56g) of softened butter with ½ cup (100g) granulated sugar and ¼ cup (50g) packed light brown sugar. Beat with an electric hand mixer on medium speed for 2-3 minutes until the mixture is light, fluffy, and pale in color. Scrape down the sides of the bowl halfway through. You’ll know it’s ready when it looks like soft, sandy clouds.
- Add the wet ingredients: Add the blotted pumpkin puree, 1 large egg yolk, and 1 teaspoon of vanilla extract to the butter mixture. Beat on low speed until just combined, about 30 seconds. Don’t overmix here—we just want everything incorporated. The mixture might look slightly curdled at this point, but that’s completely normal. Trust the process.
- Combine the dry ingredients: In a separate medium bowl, whisk together 1 cup (125g) all-purpose flour, ½ teaspoon cream of tartar, ½ teaspoon baking soda, ½ teaspoon ground cinnamon, ¼ teaspoon ground ginger, ⅛ teaspoon ground nutmeg, and ¼ teaspoon salt. Whisking ensures the leavening agents and spices are evenly distributed throughout the flour.
- Mix the dough: Gradually add the dry ingredients to the wet ingredients, mixing on low speed or folding with a spatula until just combined. Stop as soon as you no longer see streaks of flour. Overmixing at this stage develops gluten and will make your cookies tough. The dough will be soft and slightly sticky—that’s exactly what we want.
- Make the cinnamon-sugar coating: In a small bowl, stir together 3 tablespoons (36g) granulated sugar and 1 tablespoon ground cinnamon. Set aside.
- Portion and coat the dough: Using a 1.5-tablespoon cookie scoop or two spoons, portion the dough into 8 equal balls (about 1.5 inches in diameter). Roll each ball between your palms to make them smooth, then roll each one generously in the cinnamon-sugar mixture until fully coated. Don’t be shy with the coating—this is what gives snickerdoodles their signature look and flavor.
- Chill the dough balls: Place the coated dough balls on the prepared baking sheet, spacing them about 2 inches apart. Cover loosely with plastic wrap and refrigerate for 20 minutes. This chill time is crucial—it solidifies the butter, prevents excessive spreading, and allows the flavors to meld. I learned this after my fifth batch spread into sad, flat puddles.
- Bake: Bake the chilled dough balls at 350°F (175°C) for 10-12 minutes. The cookies should look puffed and set around the edges but still soft in the center. They will continue to bake on the hot baking sheet after you remove them from the oven. For softer cookies, bake for 10 minutes. For slightly crisper edges, go for 12 minutes.
- Cool: Let the cookies cool on the baking sheet for 5 minutes. This allows them to set properly without breaking apart. Then transfer them to a wire cooling rack to cool completely. The tops will develop those beautiful crackles as they cool—that’s the sign of a perfect snickerdoodle.
A few sensory cues to watch for: the dough should feel soft but not sticky after chilling. When you press it gently, it should hold its shape. The cookies are done when the edges look set and the tops have a matte appearance rather than a glossy sheen. The kitchen will smell like a fall festival—cinnamon, pumpkin, and warm butter.
Cooking Tips & Techniques
After twelve batches of these small batch pumpkin snickerdoodle cookies, I’ve collected some hard-won wisdom that will save you from the same mistakes I made.
Don’t skip the blotting step. I cannot emphasize this enough. Pumpkin puree contains a surprising amount of water, and that extra moisture will cause your cookies to spread into thin, crispy discs instead of staying thick and soft. One batch I made without blotting came out so flat I could have used them as coasters. Blotting removes about a tablespoon of liquid and transforms the texture completely.
Room temperature ingredients matter. Cold butter won’t cream properly with the sugar, and cold egg yolk can cause the batter to seize up. Take the butter out of the fridge about 30 minutes before you start baking. If you’re in a hurry, cut the butter into small cubes and let them sit for 10 minutes—they’ll soften faster. For the egg yolk, place it in a bowl of warm water for 5 minutes.
Measure flour correctly. Scooping flour directly from the bag compacts it and can add up to 25% more flour than the recipe calls for. Instead, spoon the flour into your measuring cup and level it off with a knife. Better yet, use a kitchen scale for accuracy. I ruined two batches before I realized I was overmeasuring the flour, and the cookies came out dry and crumbly.
Chill the dough. I know it’s tempting to skip this step when you’re craving cookies, but that 20-minute chill makes a huge difference. It solidifies the butter, which means the cookies spread less in the oven. It also allows the flour to fully hydrate and the spices to meld together. One time I was impatient and baked them straight from mixing—they spread so much that they merged into one giant cookie on the pan.
Space them properly. These cookies will spread, even with the chill time. Leave at least 2 inches between each dough ball. If you’re baking on a smaller pan, bake in two batches rather than crowding them. Crowded cookies steam instead of bake, and you’ll lose that lovely texture.
Rotate the pan halfway through. Ovens have hot spots, and rotating the pan ensures even baking. I set a timer for 5 minutes, rotate the pan, and let them finish baking. This small step prevents burnt edges and underdone centers.
Let them cool on the pan. Those 5 minutes of cooling on the hot baking sheet are essential. The cookies are fragile when they first come out of the oven, and moving them too soon can cause them to break apart. The residual heat finishes the baking process and sets the structure.
Variations & Adaptations
One of the best things about these small batch pumpkin snickerdoodle cookies is how easily they adapt to different tastes and dietary needs. Here are some variations I’ve tested and loved:
Vegan Pumpkin Snickerdoodles: Substitute the butter with 4 tablespoons (56g) of vegan butter stick (I like Miyoko’s for its buttery flavor). Replace the egg yolk with 1 tablespoon of aquafaba (the liquid from a can of chickpeas) mixed with 1 teaspoon of cornstarch. The texture will be slightly more delicate, but the flavor is spot on.
Gluten-Free Version: Swap the all-purpose flour with a 1:1 gluten-free baking flour blend that contains xanthan gum. I’ve had excellent results with Bob’s Red Mill 1:1 Baking Flour. The cookies will be a bit more tender and may spread slightly more, so add an extra 5 minutes to the chill time.
Pumpkin Chocolate Chip Snickerdoodles: Add ⅓ cup (60g) of mini chocolate chips to the dough after mixing in the dry ingredients. The chocolate pairs beautifully with the pumpkin and cinnamon. I made this version for a Halloween party and they disappeared in minutes.
Spiced-Up Version: Increase the ginger to ½ teaspoon and add ¼ teaspoon of ground cloves and a pinch of cardamom. This creates a more complex spice profile that’s reminiscent of pumpkin pie. My neighbor tried this version and now requests it every fall.
Pumpkin Cream Cheese Frosting: For an indulgent treat, whip up a simple cream cheese frosting and spread it on the cooled cookies. Mix 2 ounces of softened cream cheese with 1 tablespoon of softened butter, ½ cup of powdered sugar, and ¼ teaspoon of vanilla extract. It turns these cookies into mini pumpkin whoopie pies.
Small Batch to Full Batch: If you want more cookies, simply double all the ingredients. The baking time remains the same, but you may need to bake in batches depending on your oven size. I’ve done this for holiday cookie exchanges and it works perfectly.
Serving & Storage Suggestions
These small batch pumpkin snickerdoodle cookies are best served slightly warm, when the edges are still a bit soft and the cinnamon-sugar coating is at its most fragrant. I like to enjoy them with a mug of hot apple cider or a chai latte—the warm spices complement each other beautifully.
For a cozy dessert spread, arrange the cookies on a wooden board with sliced apples, a bowl of caramel sauce for dipping, and maybe some dark chocolate pieces. They’re also wonderful crumbled over vanilla ice cream for an impromptu fall sundae.
Storage Instructions: Store the cooled cookies in an airtight container at room temperature for up to 5 days. Place a piece of bread in the container to help maintain moisture—the bread will absorb excess humidity while keeping the cookies soft. Replace the bread slice every other day if you’re keeping them longer.
Freezer Instructions: These cookies freeze beautifully. You have two options. First, you can freeze the baked cookies in a single layer on a baking sheet, then transfer them to a freezer-safe bag for up to 3 months. Thaw at room temperature for about 30 minutes before serving. Second, you can freeze the unbaked dough balls after coating them in cinnamon-sugar. Place them on a baking sheet and freeze until solid, then transfer to a freezer bag. Bake from frozen, adding 2-3 minutes to the baking time.
Reheating Tips: To refresh day-old cookies, pop them in a 300°F (150°C) oven for 3-5 minutes. This revives the soft texture and makes the cinnamon-sugar coating fragrant again. Avoid microwaving, which can make them tough and rubbery.
Flavor Development: Interestingly, these cookies taste even better the day after baking. The spices meld together and the pumpkin flavor becomes more pronounced. So don’t worry if you’re making them a day ahead for a gathering—they’ll be perfect.
Nutritional Information & Benefits
While these small batch pumpkin snickerdoodle cookies are definitely a treat, they do offer some nutritional benefits thanks to the pumpkin puree. Here’s the estimated nutritional breakdown per cookie (based on 8 cookies):
| Nutrient | Amount Per Cookie |
|---|---|
| Calories | 175 |
| Total Fat | 7g |
| Saturated Fat | 4g |
| Carbohydrates | 27g |
| Sugar | 16g |
| Protein | 2g |
| Fiber | 1g |
| Sodium | 115mg |
Pumpkin is rich in vitamin A (from beta-carotene), which supports eye health and immune function. It also provides fiber and potassium. The cinnamon in the coating has anti-inflammatory properties and may help regulate blood sugar levels. Of course, these cookies still contain butter and sugar, so enjoy them as an occasional treat rather than a daily staple.
For those with dietary concerns, this recipe contains gluten and dairy. It can be adapted to be vegan and gluten-free using the substitutions mentioned in the variations section. The small batch size makes portion control easier—you get exactly 8 cookies, no more, no less.
Conclusion
These small batch pumpkin snickerdoodle cookies are everything I hoped they would be when I started my quest to recreate that bakery version. They’re soft, chewy, warmly spiced, and coated in that signature cinnamon-sugar crackle that makes snickerdoodles so beloved. The pumpkin adds moisture and a subtle earthiness without overwhelming the classic snickerdoodle flavor.
What I love most about this recipe is how approachable it is. You don’t need any special skills or equipment, and the small batch size means you can satisfy a craving without committing to dozens of cookies. Whether you’re baking for yourself, sharing with a friend, or introducing someone to the joy of homemade cookies, this recipe delivers every time.
I’d love to hear how these turn out for you! Did you try any of the variations? Did you discover a new favorite fall cookie? Drop a comment below and share your experience. And if you know someone who needs a little pumpkin spice in their life, send them this recipe. Happy baking, friends!
Frequently Asked Questions
Can I use pumpkin pie filling instead of pumpkin puree?
No, you should use 100% pure pumpkin puree for this recipe. Pumpkin pie filling contains added sugar and spices that will throw off the balance of the cookies and make them too sweet and wet. Stick with plain pumpkin puree for the best results.
Why did my cookies spread too much?
This usually happens for one of three reasons: the butter was too soft or melted, the dough wasn’t chilled long enough, or the pumpkin puree wasn’t blotted dry. Make sure your butter is softened but not melted, chill the dough balls for at least 20 minutes, and always blot the pumpkin puree with paper towels before adding it to the batter.
Can I make these cookies without cream of tartar?
Cream of tartar gives snickerdoodles their distinctive tangy flavor and chewy texture. If you don’t have it, you can substitute with 1 teaspoon of lemon juice or white vinegar mixed into the wet ingredients, but the flavor will be slightly different. Alternatively, you can omit it entirely, but the cookies will be more like regular sugar cookies with pumpkin.
How do I know when the cookies are done baking?
The cookies are done when the edges look set and slightly golden, but the centers still appear soft and puffy. They will continue to bake on the hot baking sheet after you remove them from the oven. If you’re unsure, err on the side of underbaking rather than overbaking—slightly underdone cookies are soft and delicious, while overdone ones become dry and crumbly.
Can I double this recipe?
Absolutely! This recipe doubles beautifully. Simply multiply all the ingredients by two. The baking time and temperature remain the same, but you’ll need to bake in batches unless you have a very large oven. The dough can also be refrigerated for up to 3 days before baking, making it perfect for planning ahead.
Pin This Recipe!
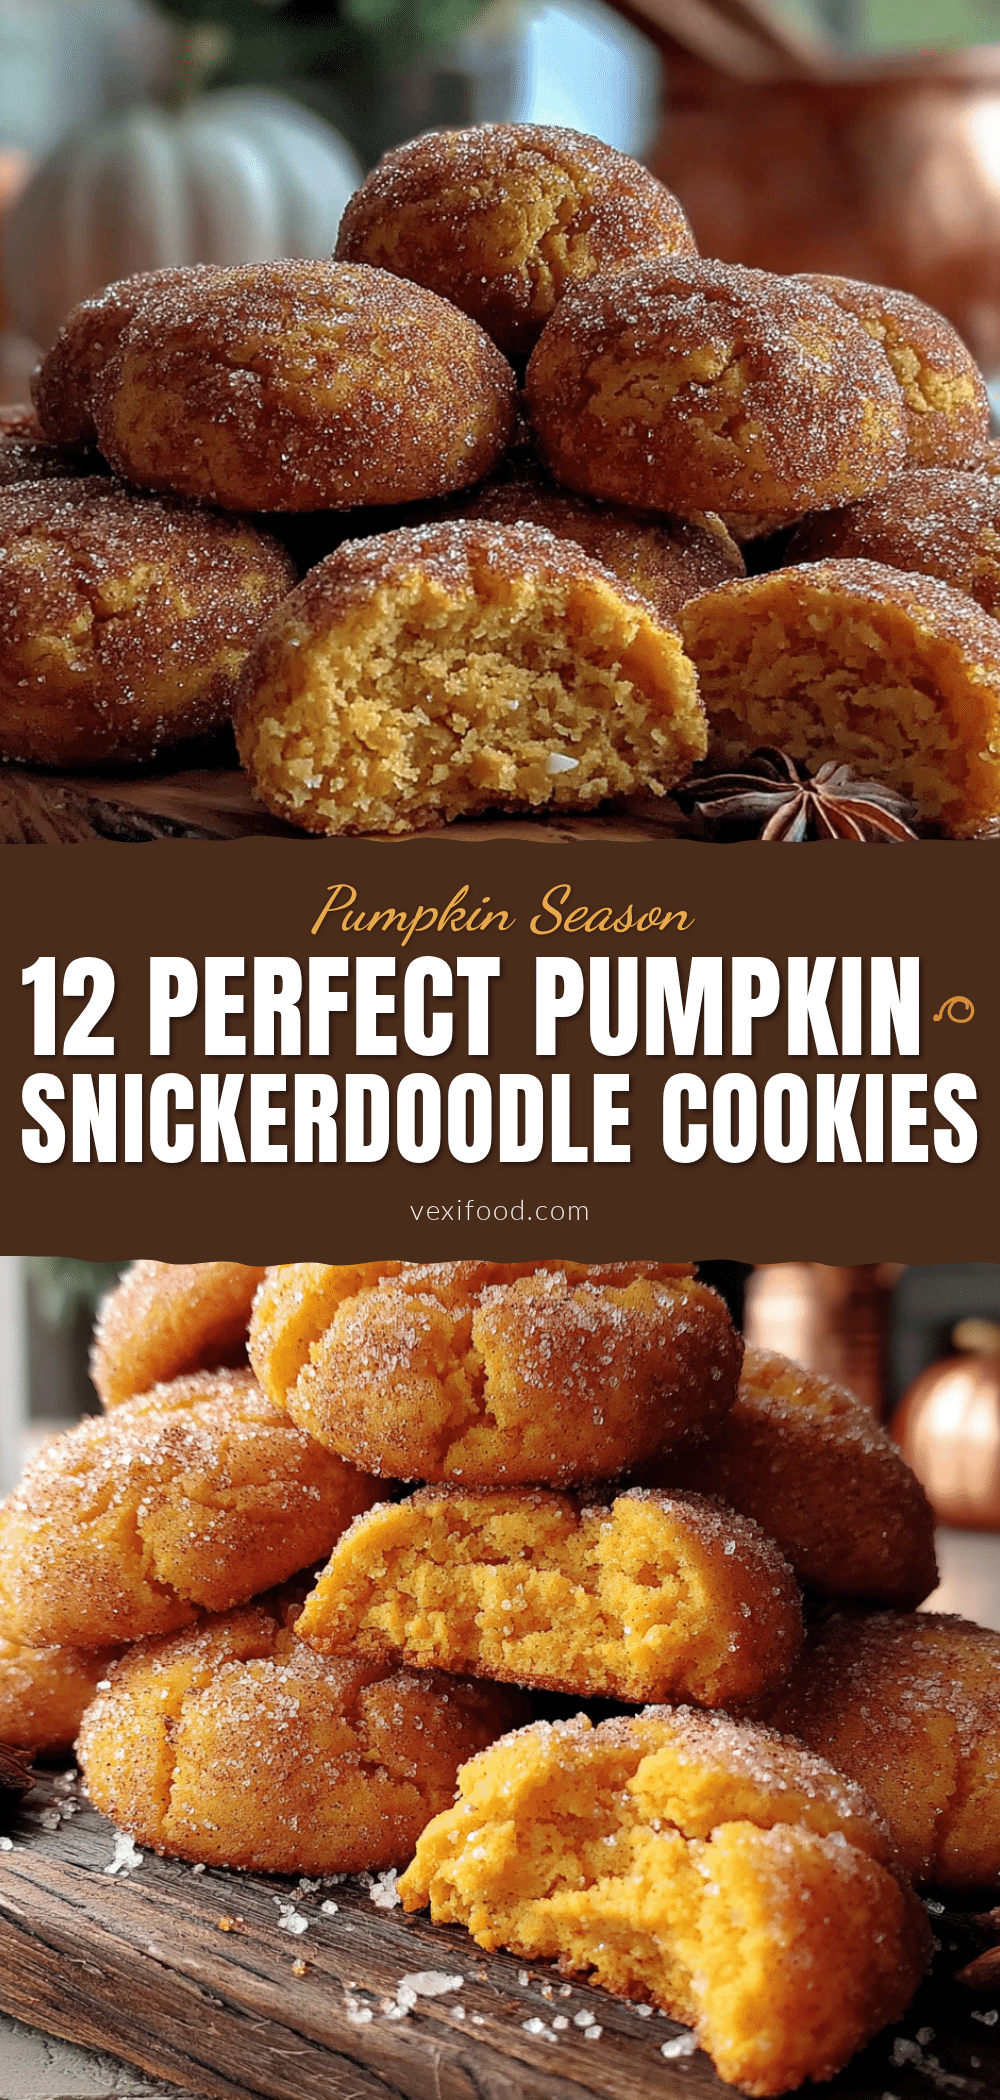
Perfect Pumpkin Snickerdoodle Cookies Small Batch

Soft, pillowy pumpkin snickerdoodle cookies with a cinnamon-sugar crunch, made in a small batch of 8. The secret is blotting the pumpkin puree to remove excess moisture for a perfectly chewy texture.
- Prep Time: 15 minutes
- Cook Time: 10-12 minutes
- Total Time: 45 minutes (including 20 minutes chilling)
- Yield: 8 cookies 1x
- Category: Dessert
- Cuisine: American
Ingredients
- 4 tablespoons (56g) unsalted butter, softened
- ½ cup (100g) granulated sugar
- ¼ cup (50g) light brown sugar, packed
- ¼ cup (60g) pumpkin puree (blotted dry)
- 1 large egg yolk, room temperature
- 1 teaspoon vanilla extract
- 1 cup (125g) all-purpose flour (spooned and leveled)
- ½ teaspoon cream of tartar
- ½ teaspoon baking soda
- ½ teaspoon ground cinnamon
- ¼ teaspoon ground ginger
- ⅛ teaspoon ground nutmeg
- ¼ teaspoon salt
- 3 tablespoons (36g) granulated sugar (for coating)
- 1 tablespoon ground cinnamon (for coating)
Instructions
- Preheat oven to 350°F (175°C). Line a baking sheet with parchment paper.
- Blot the pumpkin puree: Spread ¼ cup (60g) pumpkin puree on a plate lined with paper towels. Place another paper towel on top and press gently to absorb excess moisture. Let sit while preparing other ingredients.
- Cream the butter and sugars: In a large bowl, beat 4 tablespoons softened butter, ½ cup granulated sugar, and ¼ cup packed light brown sugar with an electric hand mixer on medium speed for 2-3 minutes until light, fluffy, and pale. Scrape down sides halfway through.
- Add wet ingredients: Add blotted pumpkin puree, 1 large egg yolk, and 1 teaspoon vanilla extract. Beat on low speed until just combined, about 30 seconds. Mixture may look slightly curdled.
- Combine dry ingredients: In a separate medium bowl, whisk together 1 cup all-purpose flour, ½ teaspoon cream of tartar, ½ teaspoon baking soda, ½ teaspoon ground cinnamon, ¼ teaspoon ground ginger, ⅛ teaspoon ground nutmeg, and ¼ teaspoon salt.
- Mix the dough: Gradually add dry ingredients to wet ingredients, mixing on low speed or folding with a spatula until just combined. Dough will be soft and slightly sticky.
- Make cinnamon-sugar coating: In a small bowl, stir together 3 tablespoons granulated sugar and 1 tablespoon ground cinnamon.
- Portion and coat dough: Using a 1.5-tablespoon cookie scoop or two spoons, portion dough into 8 equal balls (about 1.5 inches in diameter). Roll each ball between palms to smooth, then roll generously in cinnamon-sugar mixture until fully coated.
- Chill dough balls: Place coated dough balls on prepared baking sheet, spacing 2 inches apart. Cover loosely with plastic wrap and refrigerate for 20 minutes.
- Bake: Bake chilled dough balls at 350°F (175°C) for 10-12 minutes. Cookies should look puffed and set around edges but still soft in center.
- Cool: Let cookies cool on baking sheet for 5 minutes, then transfer to a wire cooling rack to cool completely.
Notes
Blotting the pumpkin puree is crucial to prevent spreading. Chill the dough for at least 20 minutes. For softer cookies, bake for 10 minutes; for crisper edges, bake for 12 minutes. Cookies taste even better the day after baking.
Nutrition
- Serving Size: 1 cookie
- Calories: 175
- Sugar: 16
- Sodium: 115
- Fat: 7
- Saturated Fat: 4
- Carbohydrates: 27
- Fiber: 1
- Protein: 2
Keywords: pumpkin snickerdoodle, small batch cookies, fall cookies, pumpkin cookies, snickerdoodle recipe