Love this? Save it for later!
Share the inspiration with your friends
The woman at the next table watched me wrestling with a piping bag at the community bake sale last October. I was losing badly—the frosting was too warm, the tip kept clogging, and my cupcakes looked like sad little blobs. She didn’t say anything at first. Then she slid a napkin across the table with a phone number scrawled on it. “Call me,” she said. “I have a recipe that changed my Halloween game.”
Honestly, I almost didn’t call. I figured she was just being polite. But a week later, I dialed the number, and that’s how I ended up standing in a stranger’s kitchen on a Tuesday afternoon, learning how to make these Perfect Black Velvet Halloween Cupcakes with Cream Cheese Frosting. She had learned it from her grandmother, who ran a small bakery in Ohio for forty years. The recipe had been tweaked and perfected over decades, and let me tell you—it shows.
I’ve made these cupcakes every Halloween since that day. The first batch I baked on my own was a mess—I forgot the vinegar and ended up with gray-ish muffins that tasted fine but looked tragic. But I kept at it, and now I can make them in my sleep. There’s something about that first bite of dark, velvety cake paired with tangy cream cheese frosting that just feels like fall. Maybe you’ve been there too—hunting for that one dessert that actually delivers on both flavor and Halloween vibes without tasting like food coloring and regret.
These cupcakes are it. They’re the ones people grab first at parties, the ones that disappear before the caramel apples. And the best part? They’re not complicated. You don’t need any special skills or a pastry degree. You just need a little patience and a good cream cheese frosting recipe. Trust me on this.
Why You’ll Love This Recipe
Let me tell you why these Perfect Black Velvet Halloween Cupcakes with Cream Cheese Frosting have become my go-to for every spooky season celebration. I’ve tested this recipe more times than I care to admit, and every single batch has confirmed what I already suspected—this is the one.
- Quick & Easy : From start to finish, you’re looking at about 45 minutes. The batter comes together in one bowl, no stand mixer required. Perfect for busy weeknights when you suddenly remember the school Halloween party is tomorrow morning.
- Simple Ingredients : No weird specialty items. You probably have most of this in your pantry right now. The black color comes from a smart combination of ingredients, not a whole bottle of black food coloring that stains everything it touches.
- Perfect for Halloween Parties : These cupcakes scream Halloween without being tacky. They’re elegant enough for adult gatherings but fun enough for kids’ parties. I’ve brought them to office potlucks and PTA meetings alike.
- Crowd-Pleaser : Kids love the dramatic color, and adults go crazy for the cream cheese frosting. I’ve never brought home leftovers. Not once.
- Unbelievably Delicious : The texture is what gets everyone. It’s not a dry, crumbly black cake—it’s velvety, moist, and rich. The cream cheese frosting cuts through the sweetness perfectly. It’s the kind of cupcake that makes you close your eyes after the first bite.
What makes this recipe different from the dozens of other black velvet recipes out there? It’s the balance. Most black velvet cupcakes taste like chocolate with a side of dye. These have a subtle cocoa flavor that doesn’t overpower, and the color comes from black cocoa powder plus just enough black gel food coloring to get that deep, dramatic shade. No metallic aftertaste, no chalky residue.
This recipe isn’t just good—it is the kind that makes you close your eyes after the first bite. It’s comfort food reimagined for the spookiest time of year, with the same soul-soothing satisfaction as the red velvet cake your grandma used to make. Perfect for impressing guests without stress, or turning a simple Tuesday into something memorable.
What Ingredients You Will Need
This recipe uses simple, wholesome ingredients to deliver that signature black velvet flavor and perfectly tender crumb. Most of these are pantry staples, which makes these cupcakes dangerously easy to whip up on a whim.
For the Cupcakes
- All-purpose flour, 1 ½ cups (180g) – Spoon and level it, don’t scoop directly from the bag or you’ll end up with dense cupcakes
- Black cocoa powder, ¼ cup (20g) – This is the secret to the deep color without loads of dye. I prefer the King Arthur brand for its intensity
- Granulated sugar, 1 cup (200g) – Regular white sugar works best here
- Baking soda, 1 teaspoon – Make sure it’s fresh, or your cupcakes won’t rise properly
- Salt, ½ teaspoon – Balances the sweetness and enhances the cocoa flavor
- Vegetable oil, ½ cup (120ml) – Keeps the cupcakes incredibly moist. Canola or avocado oil also work
- Buttermilk, ½ cup (120ml), room temperature – This reacts with the baking soda for that tender crumb. No buttermilk? Add 1 tablespoon lemon juice to regular milk and let it sit 5 minutes
- Large egg, 1, room temperature – Let it sit out for 30 minutes for better incorporation
- White vinegar, 1 teaspoon – Don’t skip this! It reacts with the baking soda for lift
- Vanilla extract, 1 teaspoon – Pure vanilla, not imitation, for the best flavor
- Black gel food coloring, 1-2 teaspoons – I use Americolor Super Black for the most intense shade without altering the taste
For the Cream Cheese Frosting
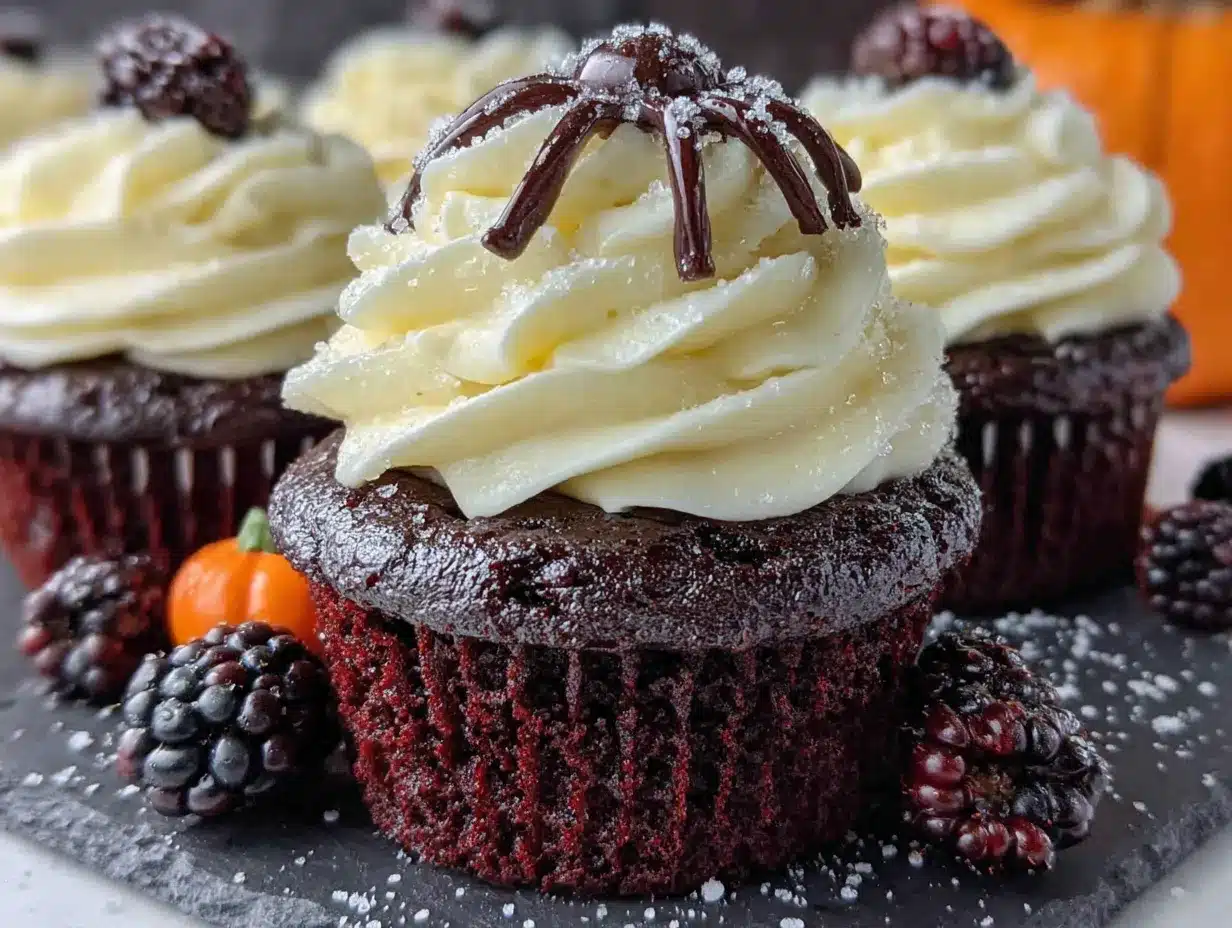
- Cream cheese, 8 oz (226g), softened – Full-fat brick style, not the spreadable kind in a tub. It makes a difference
- Unsalted butter, ½ cup (113g), softened – Let it sit out for at least an hour
- Powdered sugar, 3 cups (360g), sifted – Sifting prevents lumps in your frosting
- Vanilla extract, 1 teaspoon – Again, pure vanilla please
- Pinch of salt – Just a tiny one, to balance the sweetness
For Decoration (Optional but Fun)
- Halloween sprinkles – Ghosts, bats, pumpkins, whatever you find
- Orange sanding sugar – For a sparkly contrast against the black frosting
- Mini candy eyeballs – Because everything is better with eyes
Equipment Needed
You don’t need a fancy kitchen to pull these off. Here’s what you’ll need:
- Standard 12-cup muffin tin – Non-stick is great, but I line mine with paper liners anyway
- Paper cupcake liners – I like black or orange ones for Halloween, but white shows off the black cake nicely too
- Mixing bowls – One large, one medium. Glass or metal works best
- Whisk – For combining dry ingredients
- Hand mixer or stand mixer – For the frosting. You can do it by hand with a wooden spoon, but your arm will thank you for using a mixer
- Spatula – A rubber spatula for scraping the bowl clean
- Piping bag with star tip – I use a Wilton 1M tip for that classic swirl. A zip-top bag with the corner snipped off works in a pinch
- Cooling rack – Essential for even cooling. Don’t skip this or your bottoms will get soggy
- Small cookie scoop – For evenly portioning the batter. Not necessary, but helpful
If you don’t have a piping bag, honestly, just use a spoon. The frosting will still taste amazing. I’ve definitely used the back of a butter knife in a pinch, and nobody complained.
Preparation Method
Alright, let’s get baking. I’ll walk you through every step so you don’t make the same mistakes I did that first time.
- Preheat your oven to 350°F (175°C). Line your muffin tin with 12 paper liners. I like to put the liners in first so I’m not scrambling later.
- Whisk the dry ingredients together. In your large bowl, combine the flour, black cocoa powder, sugar, baking soda, and salt. Whisk until everything is evenly distributed. You’ll see some black specks from the cocoa—that’s normal.
- Make a well in the center and add the oil, buttermilk, egg, vinegar, and vanilla. Stir gently with a spatula until just combined. Do not overmix! A few lumps are totally fine. Overmixing will make your cupcakes tough, and nobody wants that.
- Add the black food coloring. Start with 1 teaspoon and stir. If the batter looks more dark gray than black, add another teaspoon. The color will deepen slightly during baking, but you want it to look quite dark at this stage. I usually end up using about 1 ½ teaspoons.
- Fill the liners about ⅔ full. A cookie scoop makes this super easy and ensures even baking. You should get exactly 12 cupcakes. Resist the urge to fill them higher—they’ll overflow and you’ll get flat, sad tops.
- Bake for 15-18 minutes. Start checking at 15 minutes. Insert a toothpick into the center of a cupcake—if it comes out clean or with just a few moist crumbs, they’re done. The tops should spring back when lightly touched. Don’t overbake! Dry black velvet cupcakes are a tragedy.
- Cool in the pan for 5 minutes. This lets them set so they don’t fall apart when you move them. Then transfer to a wire rack to cool completely. This is crucial—if you frost them while they’re still warm, your frosting will melt into a puddle. I learned this the hard way.
- While the cupcakes cool, make the frosting. In a medium bowl, beat the softened cream cheese and butter together with a hand mixer until smooth and creamy, about 2 minutes. Scrape the bowl well.
- Add the powdered sugar gradually, about ½ cup at a time, mixing on low speed after each addition. This prevents a powdered sugar explosion. Trust me, I’ve worn it. Add the vanilla and salt, then beat on medium-high for 2-3 minutes until light and fluffy.
- Frost the cooled cupcakes. Fill your piping bag with the cream cheese frosting and pipe a generous swirl onto each cupcake. If you don’t have a piping bag, just spread it on with a knife. It’ll taste the same, I promise.
- Decorate immediately while the frosting is still soft. Add sprinkles, candy eyes, or orange sanding sugar. The frosting will set slightly as it sits, so decorations stick better when applied right away.
Cooking Tips & Techniques
After making these Perfect Black Velvet Halloween Cupcakes with Cream Cheese Frosting more times than I can count, I’ve picked up a few tricks that make a real difference.
Room temperature ingredients matter. I know, I know, it’s annoying to wait. But cold buttermilk and cold egg will make your batter seize up, and you’ll end up with denser cupcakes. Take them out of the fridge 30 minutes before you start. If you’re in a rush, place the egg in a bowl of warm water for 5 minutes.
Don’t skip the vinegar. I had a friend once who thought she could leave it out because she didn’t have any. Her cupcakes came out flat and pale. The vinegar reacts with the baking soda to create lift, and it also helps activate the black cocoa powder for a deeper color. It’s non-negotiable.
Black cocoa powder is different from regular cocoa. It’s darker, less acidic, and has a milder chocolate flavor—almost like Oreo cookies. If you use regular cocoa powder, your cupcakes will be brown, not black, and you’ll need way more food coloring. I learned this when I grabbed the wrong jar one time. The results were… disappointing.
Let the frosting chill slightly before piping. Cream cheese frosting can be soft, especially on warm days. If it feels too loose, pop it in the fridge for 15 minutes before piping. This gives you cleaner swirls that hold their shape. On the flip side, if your frosting is too cold and stiff, let it sit out for 10 minutes and re-beat it briefly.
Use a damp paper towel under your mixing bowl. This keeps the bowl from sliding around while you’re beating the frosting. It’s such a simple trick, but it saves me from chasing my bowl across the counter every time.
One mistake I still make sometimes—overfilling the liners. I get excited and think “just a little more batter.” Then I end up with mushroom tops that overflow the liner and bake into weird shapes. Stick to ⅔ full. Your future self will thank you.
Variations & Adaptations
One of the best things about this recipe is how flexible it is. Here are some ways I’ve adapted it over the years:
Gluten-Free Version
Swap the all-purpose flour with a 1:1 gluten-free baking flour blend. I’ve used King Arthur Measure for Measure with great results. Add an extra tablespoon of buttermilk since gluten-free flours tend to absorb more liquid. The texture is slightly more delicate, but still delicious.
Dairy-Free Adaptation
Use dairy-free buttermilk (mix 1 tablespoon lemon juice with ½ cup unsweetened almond milk) and a plant-based cream cheese for the frosting. Miyoko’s and Tofutti both work well. The frosting will be a bit softer, so chill it longer before piping.
Chocolate Lover’s Twist
Add ½ cup mini chocolate chips to the batter before baking. They sink slightly and create little pockets of melted chocolate throughout the cupcake. It’s over-the-top in the best way possible.
Spooky Spiderweb Design
Instead of sprinkles, pipe a spiderweb on each cupcake. Frost with white cream cheese frosting, then pipe concentric circles of black frosting on top. Drag a toothpick from the center outward to create the web effect. It looks way more impressive than it is.
Mini Cupcake Version
Use a mini muffin tin and bake for 8-10 minutes instead of 15-18. You’ll get about 36 mini cupcakes. Perfect for parties where people want to try multiple desserts without committing to a full-sized cupcake.
Serving & Storage Suggestions
These Perfect Black Velvet Halloween Cupcakes with Cream Cheese Frosting are best served at room temperature. The cake is most tender and the frosting is perfectly creamy when it’s not straight from the fridge. If you’ve refrigerated them, let them sit out for about 20 minutes before serving.
For presentation, I like to arrange them on a black cake stand or a wooden board. The contrast between the dark cake, white frosting, and colorful sprinkles looks stunning. Add some fake spiderwebs or mini pumpkins around the base for that extra Halloween touch.
These pair beautifully with a hot cup of coffee or a tall glass of cold milk. For adult gatherings, they’re amazing alongside a spiced apple cider or a dark stout beer. The cream cheese frosting cuts through the richness of the beer beautifully.
Storage instructions: Keep any leftovers in an airtight container in the refrigerator for up to 5 days. The cream cheese frosting needs to be chilled. I place them in a single layer in a container, or if I have to stack them, I put a sheet of parchment paper between layers so the frosting doesn’t stick.
You can also freeze the unfrosted cupcakes for up to 3 months. Wrap each one tightly in plastic wrap, then place them in a freezer bag. When you’re ready to serve, thaw them at room temperature, then make the frosting fresh. The frosting doesn’t freeze well—it gets grainy and separates.
One thing I love about these cupcakes is that the flavor actually improves after a day in the fridge. The black cocoa powder deepens, and the cake becomes even more moist. So feel free to make them a day ahead—they’ll be even better.
Nutritional Information & Benefits
Let’s be real—these are cupcakes, not health food. But I still think it’s helpful to know what you’re working with. Here’s the estimated nutritional value per cupcake (with frosting):
- Calories: Approximately 380
- Fat: 20g
- Carbohydrates: 48g
- Protein: 4g
- Sugar: 36g
Now, the good news. Black cocoa powder is actually rich in antioxidants—more so than regular cocoa powder. It contains flavonoids that can help reduce inflammation. The cream cheese adds a small amount of protein and calcium. And honestly, there’s something to be said for the mental health benefits of treating yourself to something special every once in a while.
If you’re watching your sugar intake, you can reduce the sugar in the cupcakes to ¾ cup without affecting the texture too much. For the frosting, you can use a low-sugar powdered sugar alternative like Swerve, though the texture will be slightly different.
These cupcakes contain dairy (butter, buttermilk, cream cheese), eggs, and gluten. Not suitable for vegans or those with celiac disease unless you use the substitutions listed above.
Conclusion
These Perfect Black Velvet Halloween Cupcakes with Cream Cheese Frosting have become a staple in my fall baking rotation for good reason. They’re dramatic without being difficult, delicious without being complicated, and they always, always get compliments. The deep black color, the velvety texture, that tangy cream cheese frosting—it’s a combination that just works.
I love that this recipe came from a stranger who became a friend. It reminds me that the best recipes often come from the most unexpected places. And every time I make them, I think about that Tuesday afternoon in her kitchen, learning the little tricks that make all the difference.
Now I want to hear from you. Have you tried making black velvet cupcakes before? What’s your favorite Halloween dessert? Drop a comment below and let me know—I read every single one. And if you make these, tag me in your photos. I love seeing your creations almost as much as I love eating these cupcakes.
Go ahead, give them a try. Your Halloween party guests will thank you. And honestly? You’ll thank yourself.
Frequently Asked Questions
Can I make these cupcakes without black cocoa powder?
You can, but they won’t be as dark. Use regular unsweetened cocoa powder and increase the black food coloring to 2-3 teaspoons. The flavor will be more chocolate-forward and less Oreo-like.
Why did my cream cheese frosting turn out runny?
This usually happens when the cream cheese or butter is too soft, or if you overbeat the frosting. Make sure your cream cheese is softened but still cool to the touch. If your kitchen is warm, chill the frosting for 15 minutes before piping.
Can I use liquid food coloring instead of gel?
You can, but you’ll need a lot more, which can alter the taste and texture of the batter. Gel food coloring is more concentrated and won’t thin out your batter. I strongly recommend sticking with gel.
How far in advance can I make these cupcakes?
You can bake the cupcakes up to 2 days ahead and store them in an airtight container at room temperature. Make the frosting and frost them the day you plan to serve them for the best texture and appearance.
My cupcakes didn’t rise properly. What went wrong?
Most likely, your baking soda is old. Baking soda loses its potency over time. Check the expiration date. Also, make sure your buttermilk is fresh—the acid in it is what activates the baking soda for that beautiful rise.
Pin This Recipe!
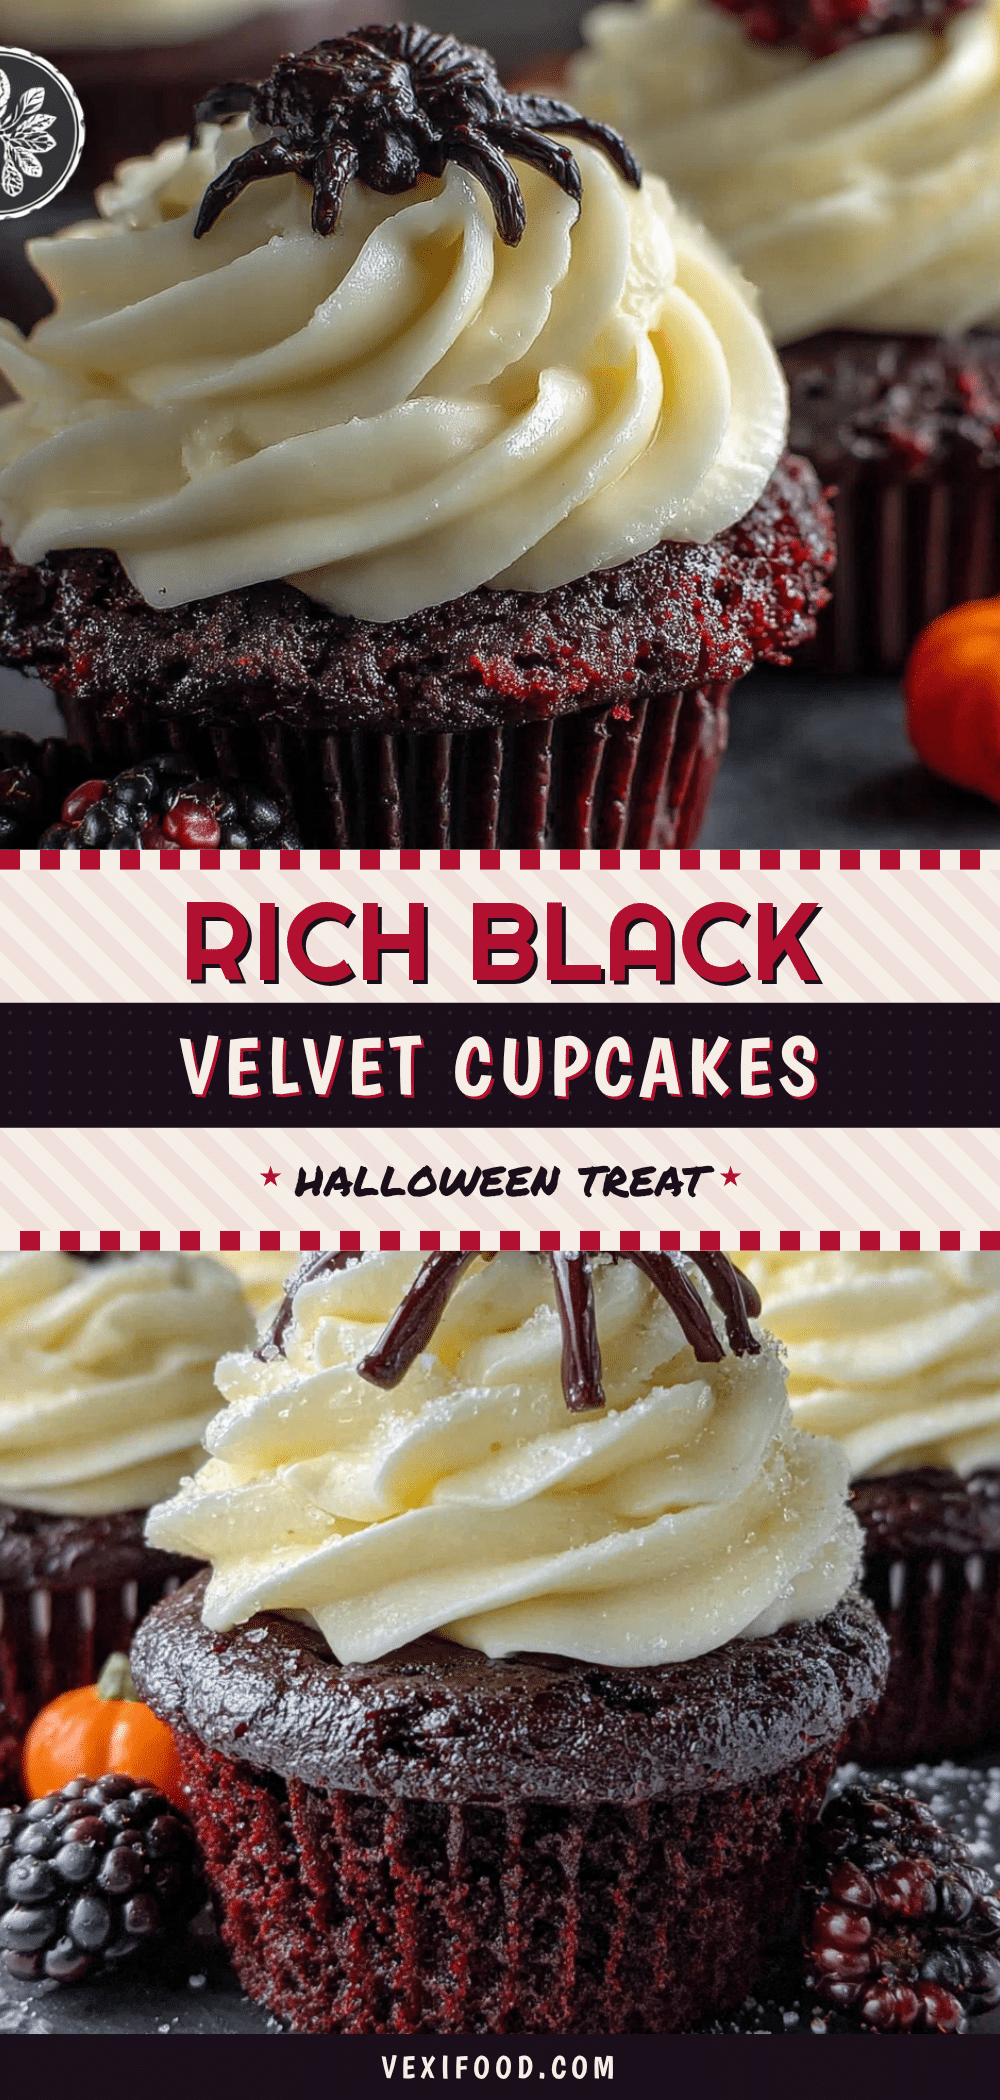
Perfect Black Velvet Halloween Cupcakes (Easy Recipe)
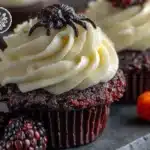
These Perfect Black Velvet Halloween Cupcakes with Cream Cheese Frosting are dramatic without being difficult, delicious without being complicated. The deep black color, velvety texture, and tangy cream cheese frosting make them a crowd-pleaser for any Halloween party.
- Prep Time: 15 minutes
- Cook Time: 18 minutes
- Total Time: 45 minutes
- Yield: 12 cupcakes 1x
- Category: Dessert
- Cuisine: American
Ingredients
- 1 ½ cups (180g) all-purpose flour
- ¼ cup (20g) black cocoa powder
- 1 cup (200g) granulated sugar
- 1 teaspoon baking soda
- ½ teaspoon salt
- ½ cup (120ml) vegetable oil
- ½ cup (120ml) buttermilk, room temperature
- 1 large egg, room temperature
- 1 teaspoon white vinegar
- 1 teaspoon vanilla extract
- 1–2 teaspoons black gel food coloring
- 8 oz (226g) cream cheese, softened
- ½ cup (113g) unsalted butter, softened
- 3 cups (360g) powdered sugar, sifted
- 1 teaspoon vanilla extract
- Pinch of salt
- Halloween sprinkles (optional)
- Orange sanding sugar (optional)
- Mini candy eyeballs (optional)
Instructions
- Preheat your oven to 350°F (175°C). Line your muffin tin with 12 paper liners.
- In a large bowl, whisk together the flour, black cocoa powder, sugar, baking soda, and salt until evenly distributed.
- Make a well in the center and add the oil, buttermilk, egg, vinegar, and vanilla. Stir gently with a spatula until just combined. Do not overmix.
- Add the black food coloring, starting with 1 teaspoon, and stir. Add more if needed until the batter is quite dark.
- Fill the liners about ⅔ full. A cookie scoop helps ensure even baking.
- Bake for 15-18 minutes, or until a toothpick inserted into the center comes out clean or with a few moist crumbs. The tops should spring back when lightly touched.
- Cool in the pan for 5 minutes, then transfer to a wire rack to cool completely.
- While the cupcakes cool, make the frosting: In a medium bowl, beat the softened cream cheese and butter together with a hand mixer until smooth and creamy, about 2 minutes. Scrape the bowl well.
- Gradually add the powdered sugar, about ½ cup at a time, mixing on low speed after each addition. Add the vanilla and salt, then beat on medium-high for 2-3 minutes until light and fluffy.
- Frost the cooled cupcakes using a piping bag with a star tip or simply spread with a knife.
- Decorate immediately with sprinkles, candy eyes, or orange sanding sugar while the frosting is still soft.
Notes
Room temperature ingredients matter for best texture. Don’t skip the vinegar—it reacts with baking soda for lift and deepens the color. Black cocoa powder is different from regular cocoa; it gives an Oreo-like flavor. If frosting is too soft, chill for 15 minutes before piping. Cupcakes can be baked up to 2 days ahead; frost the day of serving. Unfrosted cupcakes can be frozen for up to 3 months.
Nutrition
- Serving Size: 1 cupcake
- Calories: 380
- Sugar: 36
- Fat: 20
- Carbohydrates: 48
- Protein: 4
Keywords: black velvet cupcakes, Halloween cupcakes, cream cheese frosting, easy Halloween dessert, black cocoa cupcakes