Love this? Save it for later!
Share the inspiration with your friends
My roommate Jenna asked me last October why I couldn’t just shape the cookies right on the baking sheet instead of chilling them first. I started to explain why that wouldn’t work—something about spreading and losing definition. Then I stopped. Honestly, I had no good reason except that’s how I’d always done it. So we tried it her way. The almond fingernails stayed perfectly put, the knuckle wrinkles didn’t melt away, and I ate a solid portion of my pride along with the test batch. This is the story of how I stopped being a cookie dictator and ended up with my best Halloween recipe yet.
These spooky witch finger sugar cookies have become our annual tradition. We make them every October 28th, rain or shine, and I’ve learned more from Jenna’s casual kitchen chaos than from any cooking class I’ve taken. The trick is simple—don’t overthink the dough, and let the almonds do the creepy work for you. I mean, there’s something deeply satisfying about watching someone’s face go from “oh cute cookies” to “wait, those are fingers” in two seconds flat.
The first batch we made together was a disaster in the best way. We forgot to chill the dough at all, some fingers looked more like slugs, and I dropped an entire tray of almond fingernails on the floor. But you know what? The ones that survived tasted incredible, and we laughed so hard my stomach hurt. That’s the energy these cookies need. They’re not about perfection—they’re about the joy of making something weird and wonderful with your hands. Maybe you’ve been there, standing over a baking sheet covered in flour, wondering if you’ve lost your mind. Trust me, these cookies are worth the mess.
Why You’ll Love This Recipe
I’ve tested this recipe six times over two Halloweens, and I can tell you with confidence—these are the cookies that steal the show at every party. They’re not just another sugar cookie; they’re a conversation starter, a photo op, and a genuinely delicious treat all rolled into one slightly disturbing package.
- Quick & Easy: From start to finish, these come together in about 45 minutes. The dough needs a quick chill, but you can shape them right on the sheet and skip the extra cleanup.
- Simple Ingredients: Butter, sugar, flour, eggs, and almonds. That’s it. No weird extracts or specialty decorations required.
- Perfect for Halloween: Whether it’s a classroom party, a spooky movie night, or just a Tuesday that needs some creepy energy, these cookies deliver.
- Crowd-Pleaser: Kids go wild for them. Adults pretend to be grossed out while reaching for a third one. I’ve seen it happen every single time.
- Unbelievably Delicious: The almond extract gives these a subtle marzipan flavor that pairs perfectly with the buttery sugar cookie base. They taste way better than they look—and they look pretty disturbing.
What makes these different from every other witch finger recipe out there? It’s the texture. I spent weeks tweaking the butter-to-flour ratio until I got that perfect balance—crispy on the outside, soft in the middle, with just enough structure to hold the almond nail without cracking. Plus, I figured out the knuckle trick that keeps the wrinkles from disappearing in the oven. Trust me, that detail makes all the difference.
These cookies make me feel like a kid again. There’s something pure about making food that’s meant to be funny and gross and delicious all at once. It’s comfort food with a wicked sense of humor—and honestly, isn’t that exactly what Halloween should taste like?
What Ingredients You Will Need
This recipe uses simple pantry staples to create something genuinely spooky. The magic is in the technique, not the ingredient list. Here’s what you’ll need to gather before you start terrifying your friends and family.
For the Cookie Dough
- 1 cup (2 sticks) unsalted butter, softened to room temperature (I use Land O Lakes for consistent results)
- 1 cup granulated sugar (regular white sugar works perfectly)
- 1 large egg, room temperature
- 1 teaspoon vanilla extract
- 1/2 teaspoon almond extract (this is the secret to that creepy-sweet flavor)
- 2 1/2 cups all-purpose flour (spoon and level—don’t scoop directly from the bag)
- 1/2 teaspoon baking powder
- 1/4 teaspoon salt
For the Decoration
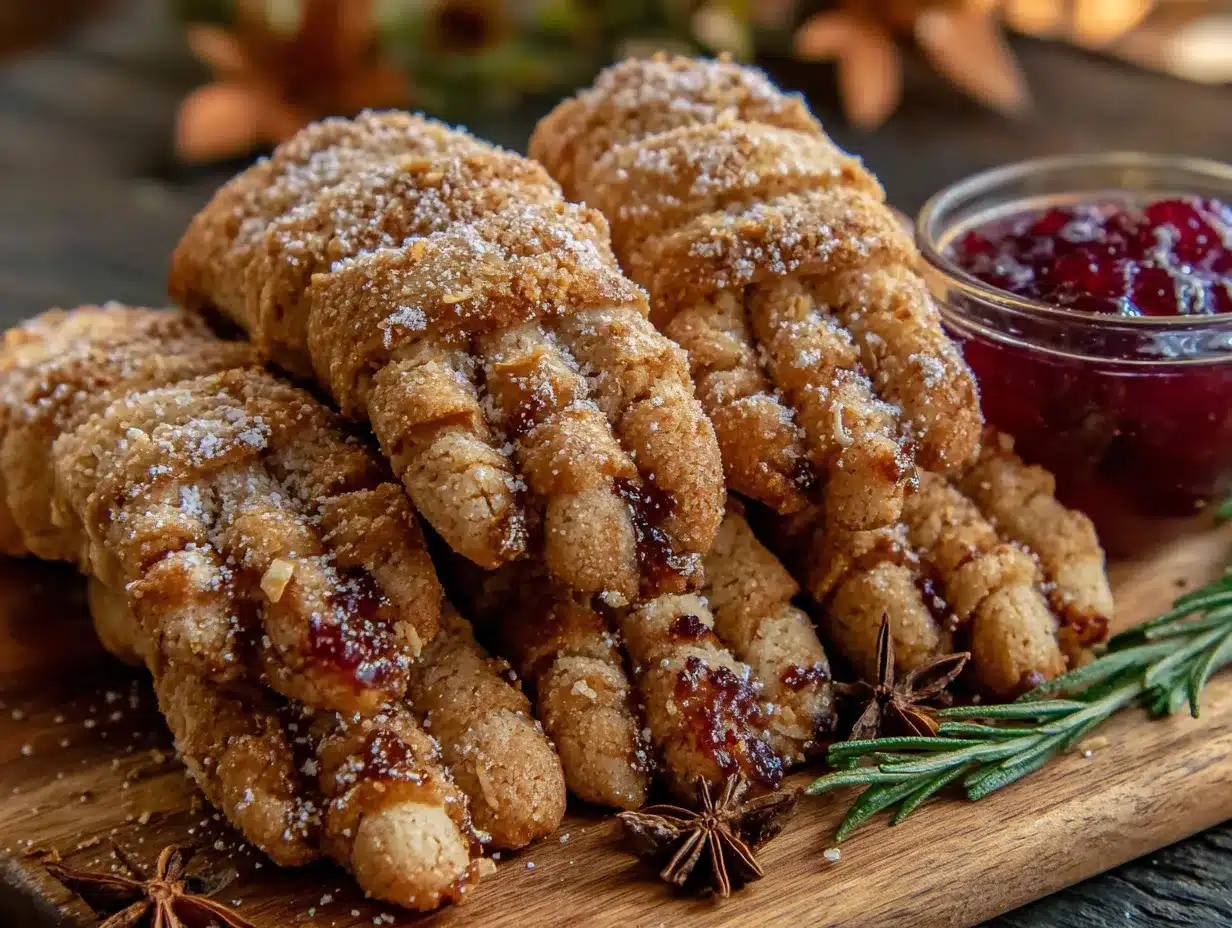
- Whole blanched almonds (one per cookie—about 24-30 depending on how many fingers you make)
- Red gel food coloring (I prefer Wilton brand for the blood effect)
- Seedless raspberry jam (optional, for extra gore—mix with a drop of red coloring)
The almond extract is non-negotiable here. It gives the cookies that distinctive marzipan undertone that makes them taste like something from a witch’s kitchen. If you’re out, you can use more vanilla, but it won’t have the same haunting flavor profile. I learned that the hard way when I made a batch for a party and everyone said they just tasted like regular sugar cookies. Regular is fine, but spooky is better.
For the almonds, look for whole blanched almonds without the skin. The smooth surface makes them look more like real fingernails. If you only have skin-on almonds, you can blanch them yourself—just boil water, drop them in for 60 seconds, and slip the skins off. It’s a little extra work, but the effect is worth it.
The red gel coloring gives you that perfect blood-at-the-cuticle look. Liquid food coloring works in a pinch, but it’s thinner and tends to bleed into the cookie. Gel gives you more control and a more realistic, viscous appearance. Trust me on this one—I’ve made the mistake of using liquid coloring and ended up with pink-fingered cookies that looked more like they had a bad manicure than a fresh amputation.
Equipment Needed
You don’t need a professional pastry kitchen for these cookies. Here’s what I use every time I make them:
- Stand mixer or hand mixer (I prefer my KitchenAid for creaming butter and sugar, but a hand mixer works just fine)
- Large mixing bowl
- Measuring cups and spoons
- Baking sheets (I use two to rotate batches)
- Parchment paper or silicone baking mats (parchment is cheaper and works great)
- Small offset spatula or butter knife (for making knuckle marks)
- Pastry brush or small paintbrush (for applying the “blood”)
- Wire cooling rack
- Plastic wrap (for chilling the dough)
If you don’t have an offset spatula, a regular butter knife works perfectly for creating the knuckle indentations. I actually prefer the knife because it gives a more natural, slightly jagged wrinkle line. My first batch I used a chopstick, and the knuckles looked like perfectly round craters—not exactly realistic.
For the baking sheets, avoid dark non-stick pans if you can. They absorb more heat and can brown the bottoms of your cookies too quickly. Light-colored aluminum sheets give you more control and more even baking. I learned this after my third batch came out with burnt bottoms and pale tops—not a good look for fingers that are supposed to look freshly severed.
Preparation Method
Alright, let’s make some fingers. Take your time with the shaping—it’s the most important part. Remember, these are supposed to look imperfect. Real fingers aren’t perfectly straight, and neither should your cookies be.
- Cream the butter and sugar. In a large bowl, beat the softened butter and granulated sugar together until light and fluffy, about 3-4 minutes. Scrape down the sides of the bowl halfway through. You want the mixture to look pale and airy—this is what gives the cookies their tender texture.
- Add the wet ingredients. Beat in the egg, vanilla extract, and almond extract until fully combined. The mixture might look slightly curdled at this point—that’s totally normal. Don’t panic.
- Mix the dry ingredients. In a separate bowl, whisk together the flour, baking powder, and salt. Add this to the wet mixture in two additions, mixing on low speed until just combined. Overmixing will make the cookies tough, and nobody wants tough witch fingers.
- Chill the dough. Wrap the dough in plastic wrap and refrigerate for at least 30 minutes. This step is crucial—warm dough is impossible to shape into realistic fingers. I once skipped this step because I was in a hurry, and my “fingers” looked more like sad, squished potatoes.
- Preheat the oven. Set your oven to 325°F (163°C). Line your baking sheets with parchment paper.
- Shape the fingers. Take a small piece of dough, about 1 tablespoon, and roll it into a log shape. Place it on the baking sheet and use your fingers to taper one end slightly thinner (that’s the fingertip) and leave the other end thicker (the wrist end). Don’t make them perfectly straight—real fingers have natural curves and bumps.
- Create the knuckles. Use the back of a butter knife or your offset spatula to press gentle lines into the dough where knuckles would be. Press firmly enough to create a deep indent, but not so hard that you cut through the dough. I usually make two or three knuckle lines per finger.
- Add the fingernail. Press a whole blanched almond into the tapered end of each finger. Push it in about halfway so it looks like a real nail growing out of the fingertip. The almond should be slightly angled, not perfectly flat against the cookie.
- Bake. Bake for 12-14 minutes, or until the edges are just barely golden. The centers will still look slightly soft—that’s perfect. Let them cool on the baking sheet for 5 minutes before transferring to a wire rack.
- Add the blood. Once the cookies are completely cool, use a small paintbrush to dab red gel food coloring around the cuticle area where the almond meets the dough. If you’re using raspberry jam, mix a small amount with a drop of red coloring and apply it the same way. The jam gives a more realistic, slightly glossy blood effect.
A few notes from my many, many trials: If your dough is sticking to your hands while shaping, dust your palms with a tiny bit of flour. If the almonds keep falling off during baking, you didn’t press them in far enough—push them until the dough slightly covers the base of the almond. And if your fingers look more like thumbs than witch fingers, just roll them a bit thinner next time. Every batch teaches you something new.
Cooking Tips & Techniques
After making these cookies more times than I care to admit, I’ve collected a few tricks that make the process smoother and the results more terrifying.
The knuckle trick. Here’s the thing about knuckle wrinkles—they tend to puff up and disappear during baking. To prevent this, I press the lines in twice. First before baking, then again about 30 seconds after they come out of the oven while the cookies are still warm. The second press sets the wrinkles permanently. I figured this out after my first batch came out looking like smooth baby fingers, which is cute but not exactly Halloween-appropriate.
Temperature matters. Room temperature butter is non-negotiable. Cold butter won’t cream properly, and melted butter will make your cookies spread into flat pancakes. Leave your butter out for about an hour before starting. If you forgot, cut it into small cubes and microwave in 5-second bursts, checking frequently. I’ve definitely nuked butter into a puddle before—don’t be like me.
Chill between batches. If you’re making multiple trays, keep the remaining dough in the fridge while the first batch bakes. Warm dough spreads more and loses its finger shape. I learned this the hard way when my second batch came out looking like alien blobs. Keep it cold, keep it creepy.
The blood application. Less is more with the red gel. A tiny dab at the cuticle line looks disturbingly realistic. If you slather it on, it looks like a ketchup accident. I use a fine-tipped paintbrush from an old watercolor set—it gives me perfect control. Apply it right before serving if you want the freshest, most gory appearance.
My biggest failure. One year I tried to make these with a gluten-free flour blend. The texture was off, the fingers crumbled, and the almonds fell off like loose teeth. It was a disaster. If you need gluten-free, I recommend a 1:1 baking flour blend with xanthan gum, and add an extra egg yolk for structure. I haven’t perfected this yet, so proceed with caution.
Variations & Adaptations
These cookies are surprisingly versatile. Here are some ways I’ve adapted them over the years:
Vegan Witch Fingers: Substitute the butter with vegan butter sticks (I like Earth Balance), use a flax egg (1 tablespoon ground flaxseed mixed with 3 tablespoons water), and skip the egg wash. The texture is slightly more crumbly, but the flavor is still fantastic. I made these for a vegan friend’s Halloween party, and nobody could tell the difference.
Chocolate Witch Fingers: Replace 1/4 cup of the flour with unsweetened cocoa powder. These look like chocolate-dipped fingers, which is somehow even more disturbing. I use dark cocoa powder for a richer flavor and a more realistic “dirt” color. The chocolate version pairs beautifully with the almond nails—it’s like a chocolate-covered almond in cookie form.
Spice Witch Fingers: Add 1 teaspoon of pumpkin pie spice or cinnamon to the dough for a fall-flavored version. These are perfect for Thanksgiving-adjacent Halloween parties. I made these for a “Thanksgiving meets Halloween” party, and they were a hit—spooky but cozy.
Different Nails: If you don’t have blanched almonds, try using sliced almonds (press two side by side for a wider nail), or even candy corn for a sweet, colorful alternative. I’ve also used white chocolate chips for “zombie” nails—they look appropriately decayed and pale.
Extra Gore: Mix a few drops of red food coloring into a small amount of corn syrup and drizzle it over the cookies for a blood-dripping effect. This is messy but incredibly effective for adult parties. I did this for a Halloween potluck and had people genuinely hesitating before taking a bite—which is exactly the reaction you want.
Serving & Storage Suggestions
These cookies are best served at room temperature, arranged on a platter in a way that maximizes the creepy factor. I like to scatter them on a black platter with a few fake spider webs and plastic spiders. The contrast between the pale cookies and the dark background makes the fingernails and “blood” really pop.
For presentation, arrange the fingers in a slightly chaotic pattern—like a hand that’s been scattered. Don’t line them up neatly like a bakery display. The messier they look, the more unsettling they are. I once arranged them in a fan pattern like a hand, and my guests actually screamed when they saw it. That’s the level of reaction you want.
Storage: Store the cookies in an airtight container at room temperature for up to 5 days. If you’ve added the red gel or jam “blood,” place a piece of wax paper between layers to prevent smudging. The cookies actually get slightly softer and more tender after a day or two, which I personally prefer.
Freezing: You can freeze the shaped, unbaked cookies on a baking sheet until solid, then transfer them to a freezer bag. Bake directly from frozen, adding 2-3 minutes to the baking time. I do this every year so I can pull out a batch whenever Halloween spirit strikes. The almonds stay perfectly in place through freezing and baking.
Reheating: If you want that fresh-from-the-oven warmth, pop them in a 300°F oven for 3-4 minutes. The edges will crisp up again, and the centers will soften. Just be careful with the “blood” decoration—it might melt slightly. I usually add the blood after reheating if I’m serving them warm.
The flavors actually develop over time. The almond extract mellows and blends with the vanilla, creating a more complex, marzipan-like flavor after a day or two. I honestly prefer these cookies on day two—they taste more like a bakery cookie than a homemade one.
Nutritional Information & Benefits
Let’s be real—these are Halloween cookies, not health food. But here’s the breakdown if you’re curious:
Per cookie (approximate, based on 24 cookies):
- Calories: 175
- Fat: 9g
- Carbohydrates: 22g
- Protein: 2g
- Sugar: 11g
- Fiber: 0.5g
On the bright side, almonds are a great source of vitamin E and healthy fats. So technically, you’re getting some nutrition from the fingernails. That counts for something, right?
These cookies are vegetarian but not vegan in their standard form. They contain dairy (butter), eggs, and gluten. For allergen considerations, I’ve included vegan and gluten-free variations above, though I can’t guarantee identical results.
From a wellness perspective, I believe in balance. Halloween comes once a year, and these cookies are part of the fun. I pair them with a big glass of milk or a hot apple cider, and I don’t stress about the sugar content. Life is too short to count calories in a witch finger cookie. Enjoy the season, enjoy the weirdness, and enjoy every single bite.
Conclusion
These spooky witch finger sugar cookies have become more than just a Halloween treat in my kitchen—they’re a tradition, a memory, and a reminder that the best recipes come from being willing to be wrong. That first batch I made with Jenna taught me that cooking rules are meant to be tested, and sometimes the person who doesn’t know the “right way” ends up showing you a better one.
I hope you make these cookies and get a little messy. I hope you laugh when the almonds fall off or when your fingers look more like sausages. And I hope you share them with people who appreciate the effort it takes to make something this delightfully disturbing. Whether you’re a seasoned baker or someone who’s never made cookies from scratch, this recipe is for you.
If you try these, I’d love to hear about it. Drop a comment below with your best finger shapes, your goriest decorations, or your favorite Halloween memory. Tag me in your photos—I want to see your witch fingers in all their creepy glory. And if you have a recipe that taught you something unexpected, share that too. We’re all learning together, one slightly misshapen cookie at a time.
Happy Halloween, friends. Go make something wonderfully weird.
Frequently Asked Questions
Can I make the dough ahead of time?
Absolutely. You can prepare the dough up to 3 days in advance and keep it wrapped tightly in the refrigerator. When you’re ready to bake, let it sit at room temperature for about 10 minutes so it’s soft enough to shape. You can also freeze the dough for up to 3 months—just thaw it overnight in the fridge before using.
Why did my cookies spread too much?
This usually happens when the dough isn’t chilled enough or the butter was too soft. Make sure your butter is at room temperature but not greasy or melted. If your kitchen is warm, pop the shaped cookies in the fridge for 10 minutes before baking. That extra chill keeps the fingers from turning into blobs.
Can I use a different nut for the fingernails?
Sure! Sliced almonds work well for a thinner nail, and pecan halves give a wider, more dramatic look. I’ve even used candy corn for a sweeter, more colorful option. Just make sure whatever you use is pressed firmly into the dough so it stays put during baking.
How do I get the blood to look realistic?
Use gel food coloring rather than liquid—it’s thicker and more opaque. Apply it with a fine paintbrush around the cuticle area where the almond meets the dough. For extra gore, mix a drop of red coloring with a tiny bit of corn syrup and let it drip down the side of the finger. Less is more—you want it to look like a fresh cut, not a crime scene.
Can I make these nut-free?
Yes, but the fingernails won’t look as realistic. Try using a small piece of white chocolate or a sliced almond sliver made from a nut-free alternative. The texture and appearance won’t be identical, but the cookies will still be delicious and spooky. Just be sure to label them clearly if you’re serving them at a party where allergies might be a concern.
Pin This Recipe!
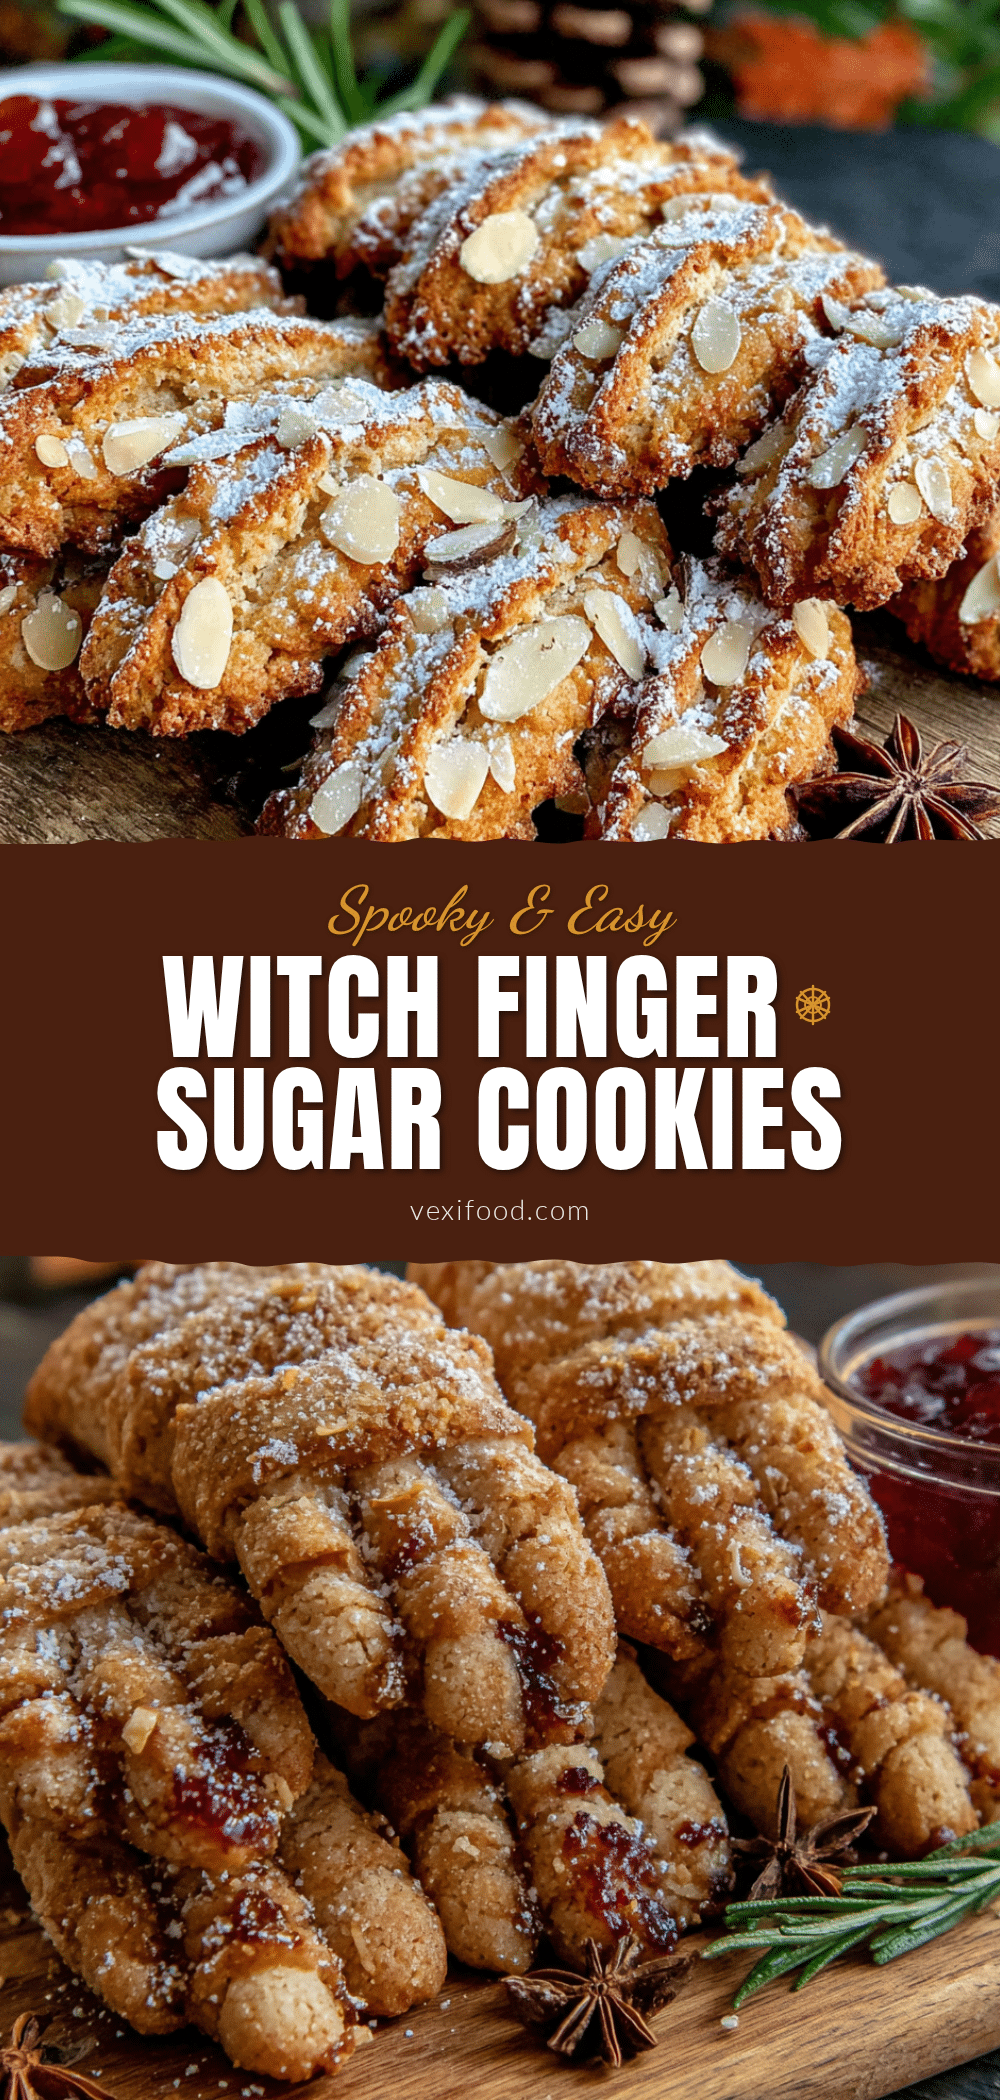
Spooky Witch Finger Sugar Cookies Easy Halloween Recipe
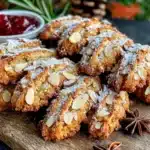
These spooky witch finger sugar cookies are a Halloween tradition—creepy, delicious, and surprisingly easy to make. With almond fingernails and a buttery sugar cookie base, they’re a conversation starter and a crowd-pleaser.
- Prep Time: 15 minutes
- Cook Time: 12-14 minutes
- Total Time: 45 minutes
- Yield: 24-30 cookies 1x
- Category: Dessert
- Cuisine: American
Ingredients
- 1 cup (2 sticks) unsalted butter, softened to room temperature
- 1 cup granulated sugar
- 1 large egg, room temperature
- 1 teaspoon vanilla extract
- 1/2 teaspoon almond extract
- 2 1/2 cups all-purpose flour (spoon and level)
- 1/2 teaspoon baking powder
- 1/4 teaspoon salt
- Whole blanched almonds (one per cookie, about 24-30)
- Red gel food coloring
- Seedless raspberry jam (optional, for extra gore)
Instructions
- Cream the butter and sugar together until light and fluffy, about 3-4 minutes.
- Beat in the egg, vanilla extract, and almond extract until fully combined.
- In a separate bowl, whisk together the flour, baking powder, and salt. Add to the wet mixture in two additions, mixing on low until just combined.
- Wrap the dough in plastic wrap and refrigerate for at least 30 minutes.
- Preheat the oven to 325°F (163°C). Line baking sheets with parchment paper.
- Take about 1 tablespoon of dough, roll into a log shape, and place on the baking sheet. Taper one end slightly thinner for the fingertip and leave the other end thicker for the wrist.
- Use the back of a butter knife to press gentle lines into the dough for knuckles (2-3 per finger).
- Press a whole blanched almond into the tapered end of each finger, pushing it in about halfway.
- Bake for 12-14 minutes, until edges are just barely golden. Let cool on the baking sheet for 5 minutes, then transfer to a wire rack.
- Once completely cool, use a small paintbrush to dab red gel food coloring around the cuticle area where the almond meets the dough. Optionally, mix raspberry jam with a drop of red coloring for a glossy blood effect.
Notes
For best results, press knuckle lines twice—once before baking and again 30 seconds after removing from the oven. Keep dough chilled between batches to prevent spreading. Use gel food coloring for more realistic blood effect. Store in an airtight container at room temperature for up to 5 days.
Nutrition
- Serving Size: 1 cookie
- Calories: 175
- Sugar: 11
- Sodium: 60
- Fat: 9
- Saturated Fat: 5
- Carbohydrates: 22
- Fiber: 0.5
- Protein: 2
Keywords: witch finger cookies, Halloween cookies, sugar cookies, spooky cookies, almond cookies, easy Halloween recipe