Love this? Save it for later!
Share the inspiration with your friends
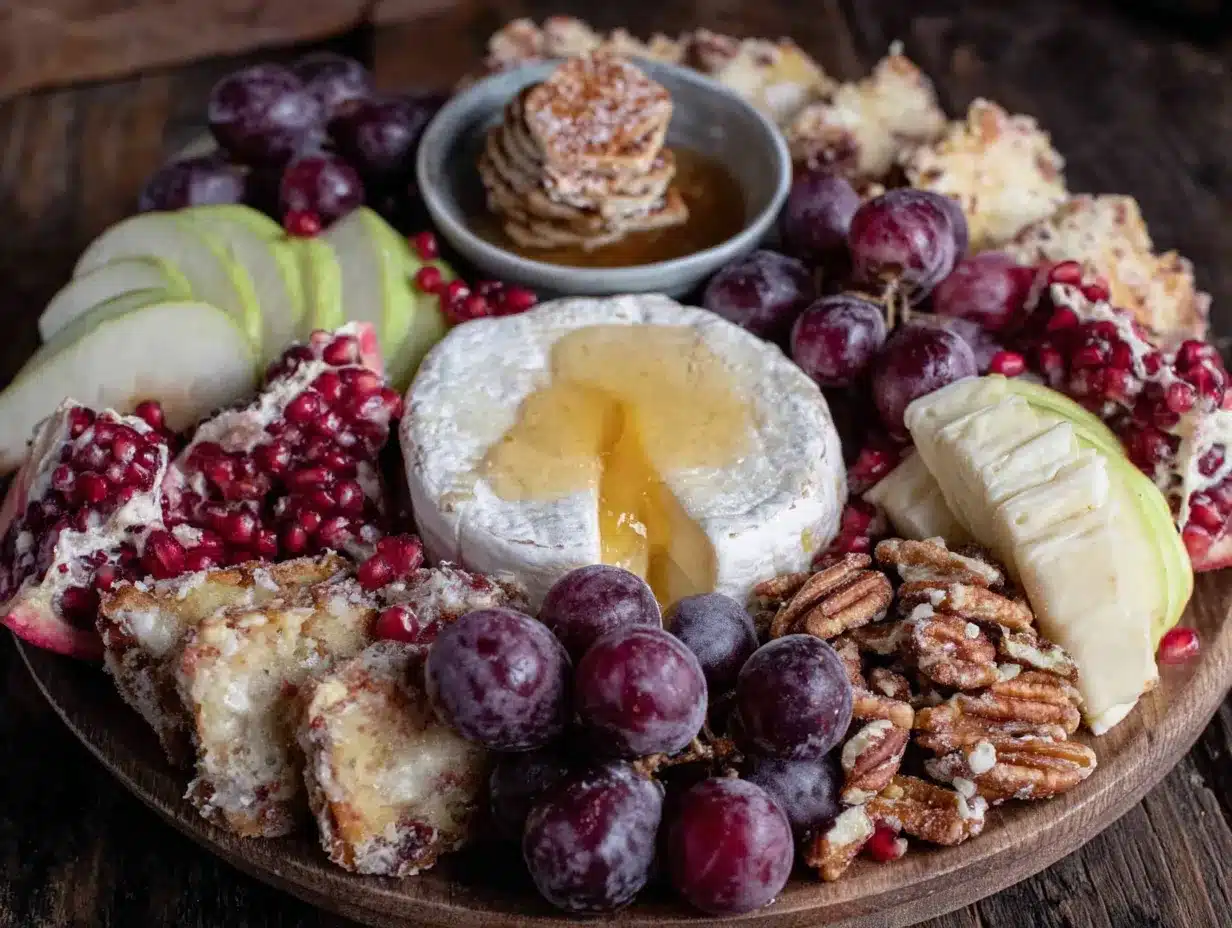
It was 11:47 PM on a random Wednesday in October, and I had a very specific vision of a charcuterie board that absolutely refused to let me sleep. The kind of board that would make people stop mid-conversation and just stare. I didn’t have the fancy slate platter I’d been eyeing online, but I had a massive wooden cutting board my mom gave me years ago that I’d never actually used for company. And the idea that arrived? What if I took all the cozy, nostalgic flavors of fall—the apples, the sharp cheddar, the warmth of cinnamon—and turned them into something that felt both effortless and completely show-stopping for a Friendsgiving gathering?
I mean, let me tell you, I’ve made a lot of charcuterie boards in my time. Some were gorgeous, some were… well, they were edible. But this one felt different from the start. Maybe it was the late hour or the fact that I was eating a slice of apple butter-toasted sourdough while I arranged things, but something clicked. I forgot to add the honeycomb until the very end (classic me), and I definitely dropped a handful of figs on the floor, but honestly? The final board was pure magic.
Maybe you’ve been there—wanting to host something special for your friends, but feeling the pressure to make it look like it came from a magazine. This Ultimate Friendsgiving Charcuterie Board with Fall Fruits is the answer. It’s the kind of spread that makes people feel welcomed and cared for, without you spending all day in the kitchen. And that’s why I keep coming back to it, year after year.
Why You’ll Love This Recipe
This isn’t just another cheese board. This is the board that disappears first at every gathering, the one people ask you to bring to every Friendsgiving from now on. Here’s why it works:
- Effortlessly Impressive: It looks like you spent hours styling it, but the actual prep time is under 30 minutes. The secret is all in the arrangement, not the complexity.
- Perfect for a Crowd: This board serves 8-10 people easily, making it the ideal centerpiece for your Friendsgiving table. No one leaves hungry, and there’s something for every palate.
- Seasonally Brilliant: By using fall fruits like crisp apples, juicy pears, and sweet figs, you get maximum flavor with minimal effort. These ingredients are at their peak, so they do all the heavy lifting.
- Endlessly Customizable: Have a friend who’s dairy-free? A cousin who’s gluten-sensitive? This board is incredibly adaptable. Swap cheeses, meats, and crackers to suit everyone’s needs without losing its wow factor.
- No Cooking Required: Seriously. The most “cooking” you’ll do is maybe toasting some nuts or slicing a baguette. This is the ultimate stress-free appetizer for a host who wants to actually enjoy their own party.
I’ve tested this board at three different Friendsgivings now, and each time, I’ve tweaked it based on what my friends actually ate. The first year, I went overboard on the fancy crackers. Last year, I learned that people will fight over the last piece of aged gouda. This version? It’s the one that got the most “Oh my god, this is incredible” comments, and the one I’ll be making for years to come.
What Ingredients You Will Need
This recipe relies on simple, high-quality ingredients that come together to create a stunning visual and flavor experience. You don’t need anything obscure—just good stuff that tastes like fall.
For the Cheeses (The Stars of the Board)
- Aged Gouda (8 oz): This is my non-negotiable. The nutty, caramel-like flavor is perfect with apples and pears. I recommend a 2-year aged gouda for the best texture.
- Sharp White Cheddar (8 oz): A classic for a reason. Its tangy bite cuts through the sweetness of the fruit and honey. Look for a block you can cut into rustic slices.
- Soft-Ripened Brie (8 oz wheel): For that creamy, decadent element. A double or triple-cream brie is ideal. Serve it at room temperature for the best spreadable texture.
- Blue Cheese (4 oz): A little goes a long way. I love a creamy gorgonzola or a classic roquefort for its bold, salty punch that contrasts beautifully with the sweet figs.
For the Meats (The Savory Backbone)
- Prosciutto (4-6 oz): Thinly sliced and draped in ribbons. It’s salty, delicate, and adds a touch of elegance.
- Genoa Salami (4-6 oz): Cut into thin rounds or small cubes. Its firm texture and robust flavor are a great counterpoint to the soft cheese.
- Soppressata (4 oz): This spicy, dry-cured salami adds a little heat. I love it with the honey and fruit.
For the Fall Fruits (The Sweet Stars)
- Honeycrisp Apples (2): Crisp, sweet-tart, and they don’t brown too quickly. Slice them just before serving.
- Bosc Pears (2): Their firm flesh and sweet, slightly spicy flavor hold up perfectly on a board.
- Fresh Figs (6-8): Halved or quartered. They’re like little jewels of sweetness. When they’re in season, they’re non-negotiable.
- Seedless Red Grapes (1 cup): Small clusters add color and a pop of juicy sweetness.
For the Crunch & Spread
- Artisan Crackers (1 box): I love a mix of water crackers and rosemary-infused flatbreads.
- Baguette (1): Sliced and lightly toasted or left fresh. It’s the perfect vehicle for all that cheese and fruit.
- Honey (for drizzling): A local honey or a spicy fall varietal like chestnut honey adds a final touch of sweetness.
- Fig Jam or Apple Butter (1/2 cup): A small bowl of this adds another layer of fall flavor.
For the Garnishes (The Finishing Touches)
- Toasted Walnuts or Pecans (1/2 cup): For crunch and a toasty flavor.
- Fresh Rosemary Sprigs: For that rustic, woodland look.
- Dried Apricots or Cherries (1/4 cup): A chewy, sweet-tart addition.
- Flaky Sea Salt (like Maldon): A pinch on the cheeses or fruit makes all the difference.
Equipment Needed
You don’t need a ton of fancy gear for this. The most important thing is a large surface to arrange everything on.
- Large Wooden Cutting Board or Serving Platter: The bigger, the better. A 16×20-inch board is ideal. If you don’t have one, a large baking sheet lined with parchment paper works in a pinch.
- Small Bowls (2-3): For the honey, jam, and any olives or pickles you might add. I use little ceramic ramekins.
- Cheese Knives (3-4): One for each cheese type to avoid cross-contamination. A set of small spreaders and a hard cheese knife are perfect.
- Paring Knife & Cutting Board: For slicing the fruit and bread just before serving.
- Cheesecloth or Parchment Paper: Optional, but I like to place a piece under the brie for a cleaner look and easier cleanup.
Preparation Method
This is where the magic happens. The key to a stunning board is layering and creating visual interest. Don’t overthink it—just follow these steps, and you’ll have a masterpiece.
- Prep Your Ingredients (15 minutes): Take all your cheeses out of the fridge 30 minutes before you start building the board. Room temperature cheese has way more flavor. Slice the baguette, wash and slice the apples and pears (toss them in a little lemon juice to prevent browning), halve the figs, and toast the nuts if you’re using them.
- Place Your Bowls First (2 minutes): This is a pro tip. Put your small bowls of honey, fig jam, and any olives on the board first. This anchors your layout and prevents you from having to squeeze them in later. I usually place them in a triangle pattern across the board.
- Add the Cheeses (5 minutes): Place your cheese wedges and wheels around the board, spacing them out. Don’t cluster them all in one spot. Cut the brie wheel into a few wedges but keep it in the shape of the wheel. Slice the cheddar and gouda into rustic chunks and fan them out. Place the blue cheese in a crumbled pile or in a small wedge. This creates natural “zones” for people to grab from.
- Layer the Meats (3 minutes): Fold the prosciutto slices into loose ribbons or waves and place them near the brie. Fan out the salami and soppressata slices in a different area. The goal is to create texture—some folded, some flat, some piled.
- Add the Fruit (5 minutes): This is where the board starts to look incredible. Arrange the apple and pear slices in overlapping fans. Place the fig halves in small clusters. Tuck small bunches of red grapes into any empty spaces. The fruit provides color and freshness, so don’t be shy with it.
- Fill the Gaps with Crackers & Bread (3 minutes): Now, fill in all the remaining empty spaces with your crackers and baguette slices. Don’t just pile them in one spot—scatter them around the board so people can reach them easily from any angle. Some can be standing up, some lying flat.
- Add the Crunch & Garnishes (2 minutes): Sprinkle the toasted walnuts or pecans over the board, focusing on areas near the cheese. Scatter the dried apricots or cherries. Tuck small sprigs of fresh rosemary around the board for a pop of green and a wonderful aroma.
- Final Touches (1 minute): Drizzle a little honey over the brie and the blue cheese. Sprinkle a tiny pinch of flaky sea salt over the apples and pears. Step back, admire your work, and take a picture. You’ve just created a Friendsgiving centerpiece.
Cooking Tips & Techniques
I’ve made this board enough times to learn a few things the hard way. Here are my best tips for success.
- The Temperature Trap: I cannot stress this enough—serve your cheese at room temperature. Cold cheese is flavorless cheese. Take it out of the fridge at least 30-45 minutes before your guests arrive. I’ve learned this the hard way, serving a board where the brie was still firm and the cheddar had no taste.
- The Soggy Cracker Problem: Don’t put crackers or bread directly next to wet ingredients like grapes or jam. They’ll get soft and sad. Create a little barrier with a piece of cheese or a nut. Or, use small bowls for anything wet.
- The Overcrowding Mistake: A crowded board is an ugly board. Leave a little bit of space between the elements. It looks more intentional and makes it easier for people to grab things without knocking everything over. I once crammed everything on a small board, and it looked like a delicious mess, but not in a good way.
- Multitasking is Your Friend: While your cheese is coming to room temperature, prep all your fruit and arrange your bowls. This way, when you’re ready to build, everything is ready to go. It takes the pressure off and makes the whole process feel like a fun, creative project.
- The “One of Everything” Rule: When you’re arranging, try to make sure that from any angle, a guest can grab a piece of cheese, a slice of meat, a piece of fruit, and a cracker without having to reach across the whole board. This creates a better flow.
Variations & Adaptations
This board is a template, not a rulebook. Feel free to make it your own. Here are a few of my favorite variations.
- Vegetarian & Vegan Friendsgiving: Skip the meat entirely and double up on the cheese. Add marinated artichoke hearts, roasted red peppers, and a bowl of hummus. For a vegan version, use your favorite plant-based cheeses (a cashew-based brie is incredible) and load up on roasted vegetables and fruit.
- The “Savory Lover’s” Board: Add some spicy pickled peppers, cornichons, and whole grain mustard. Swap the honey for a hot honey. Include a hard, salty cheese like manchego and a smoky gouda. This version is perfect for those who prefer bold, tangy flavors over sweet.
- The “Breakfast for Dinner” Friendsgiving: This is a fun twist. Use mini pancakes or waffles instead of crackers. Add a bowl of maple syrup, some crispy bacon, and a pile of scrambled eggs. It’s a charcuterie board that doubles as brinner!
- Gluten-Free Adaptation: This is incredibly easy. Simply swap out the crackers and baguette for gluten-free crackers, rice cakes, or even endive leaves for a crunchy, low-carb vessel. Most cheeses and meats are naturally gluten-free.
Serving & Storage Suggestions
This board is best enjoyed immediately, but with a little planning, you can make it ahead and still have it look amazing.
- Serving Temperature: As mentioned, serve everything at room temperature. The cheese will be soft and flavorful, the fruit will be juicy, and the meats will be at their best. Don’t put it in the fridge once it’s assembled.
- Presentation: Place the board in the center of your table so everyone can reach it. I like to put it on a bed of fresh fall leaves (like maple or oak) for a truly seasonal look. It’s a simple touch that makes a huge impact.
- What to Serve With It: This board is a meal in itself, but it pairs beautifully with a crisp white wine like Sauvignon Blanc or a light red like Pinot Noir. A sparkling apple cider is also a fantastic non-alcoholic option. For a heartier spread, serve it alongside a simple fall salad with a maple vinaigrette.
- Storage: If you have leftovers (which is rare, but possible), separate the components. Store cheeses in wax paper or cheese paper in the fridge. Meats can be stored in an airtight container. Fruit is best eaten fresh, but leftover sliced apples and pears can be stored in a bag with a squeeze of lemon juice.
- Reheating: You don’t really “reheat” a charcuterie board. Just take the leftover cheese and meat out of the fridge 20 minutes before you want to snack on them again. The crackers and bread will likely need to be refreshed, so just toast the bread again if needed.
Nutritional Information & Benefits
This board is indulgent, but it also has some surprising nutritional benefits, thanks to the high-quality ingredients.
- Estimated Values (per serving, based on 1/8 of board): Calories: 450-550, Fat: 30-35g, Protein: 20-25g, Carbs: 30-40g. These are estimates and will vary based on the specific cheeses and meats you choose.
- Health Benefits of Key Ingredients: The fall fruits (apples, pears, figs) are packed with fiber and antioxidants. Cheese is a great source of calcium and protein. Nuts provide healthy fats and vitamin E. Even the cured meats offer protein and iron in moderation.
- Dietary Considerations: This board is naturally low-carb and gluten-free if you skip the crackers and bread. It’s also easy to make vegetarian. If you’re watching your sodium, opt for low-sodium cheeses and meats and go easy on the prosciutto.
- Potential Allergens: This recipe contains dairy (cheese), gluten (crackers, bread), and tree nuts (walnuts/pecans). Always check labels if you’re serving guests with allergies, and clearly label any bowls with potential allergens.
Conclusion
This Ultimate Friendsgiving Charcuterie Board with Fall Fruits is more than just an appetizer—it’s a statement. It says, “I’m so glad you’re here, and I want you to feel welcomed and fed.” It’s the board that starts the conversation, that makes people linger around the table, that creates those warm, fuzzy memories that Friendsgiving is all about.
I love this recipe because it’s forgiving. You can’t really mess it up. You can swap out the brie for camembert, the walnuts for almonds, the apples for pears. It’s a template for joy, and I hope you make it your own. The best part? You get to eat the evidence of your beautiful work.
So go ahead, build your masterpiece. And when you do, I want to hear about it! Drop a comment below and tell me what your favorite fall fruit is, or tag me in your photos on social media. I can’t wait to see your Friendsgiving spreads. Happy hosting, friends!
Frequently Asked Questions
Can I make this charcuterie board a day ahead?
You can prep the ingredients a day ahead, but it’s best to assemble the board the day of your Friendsgiving. Slice your fruit, toast your nuts, and take your cheese out of the fridge about an hour before you plan to serve. Then just arrange everything on the board right before your guests arrive. This ensures everything looks fresh and the crackers stay crisp.
What if I can’t find fresh figs?
No problem at all! Fresh figs are a seasonal treat, and they’re not always available. You can easily substitute them with dried figs (which are delicious and chewy), sliced fresh peaches or nectarines in the summer, or even a handful of dried apricots. The board will still be beautiful and delicious.
How do I keep the apple and pear slices from browning?
This is a common concern, and the answer is simple. After you slice your apples and pears, toss them in a bowl with a tablespoon of lemon juice or a little bit of pineapple juice. The citric acid acts as a natural preservative and will keep them looking fresh for hours. Just make sure to pat them dry before adding them to the board so they don’t make the crackers soggy.
Can I add hot elements to the board?
Absolutely! A warm element can be a lovely surprise. You could add a small bowl of warm, spiced nuts, some honey-drizzled goat cheese that’s been baked, or even a few slices of a warm, crusty baguette. Just be careful not to put anything too hot directly on the board, as it could damage the wood or warp a platter. Use a small heat-safe dish instead.
What’s the best way to arrange the board for a crowd?
For a large group, think about creating multiple “stations” on the board. Place a few different cheeses in different spots, and scatter the meats and fruits around them. This prevents a bottleneck at one end of the table and makes it easy for guests to grab a bit of everything from wherever they’re standing. A large board is your best friend here!
Pin This Recipe!
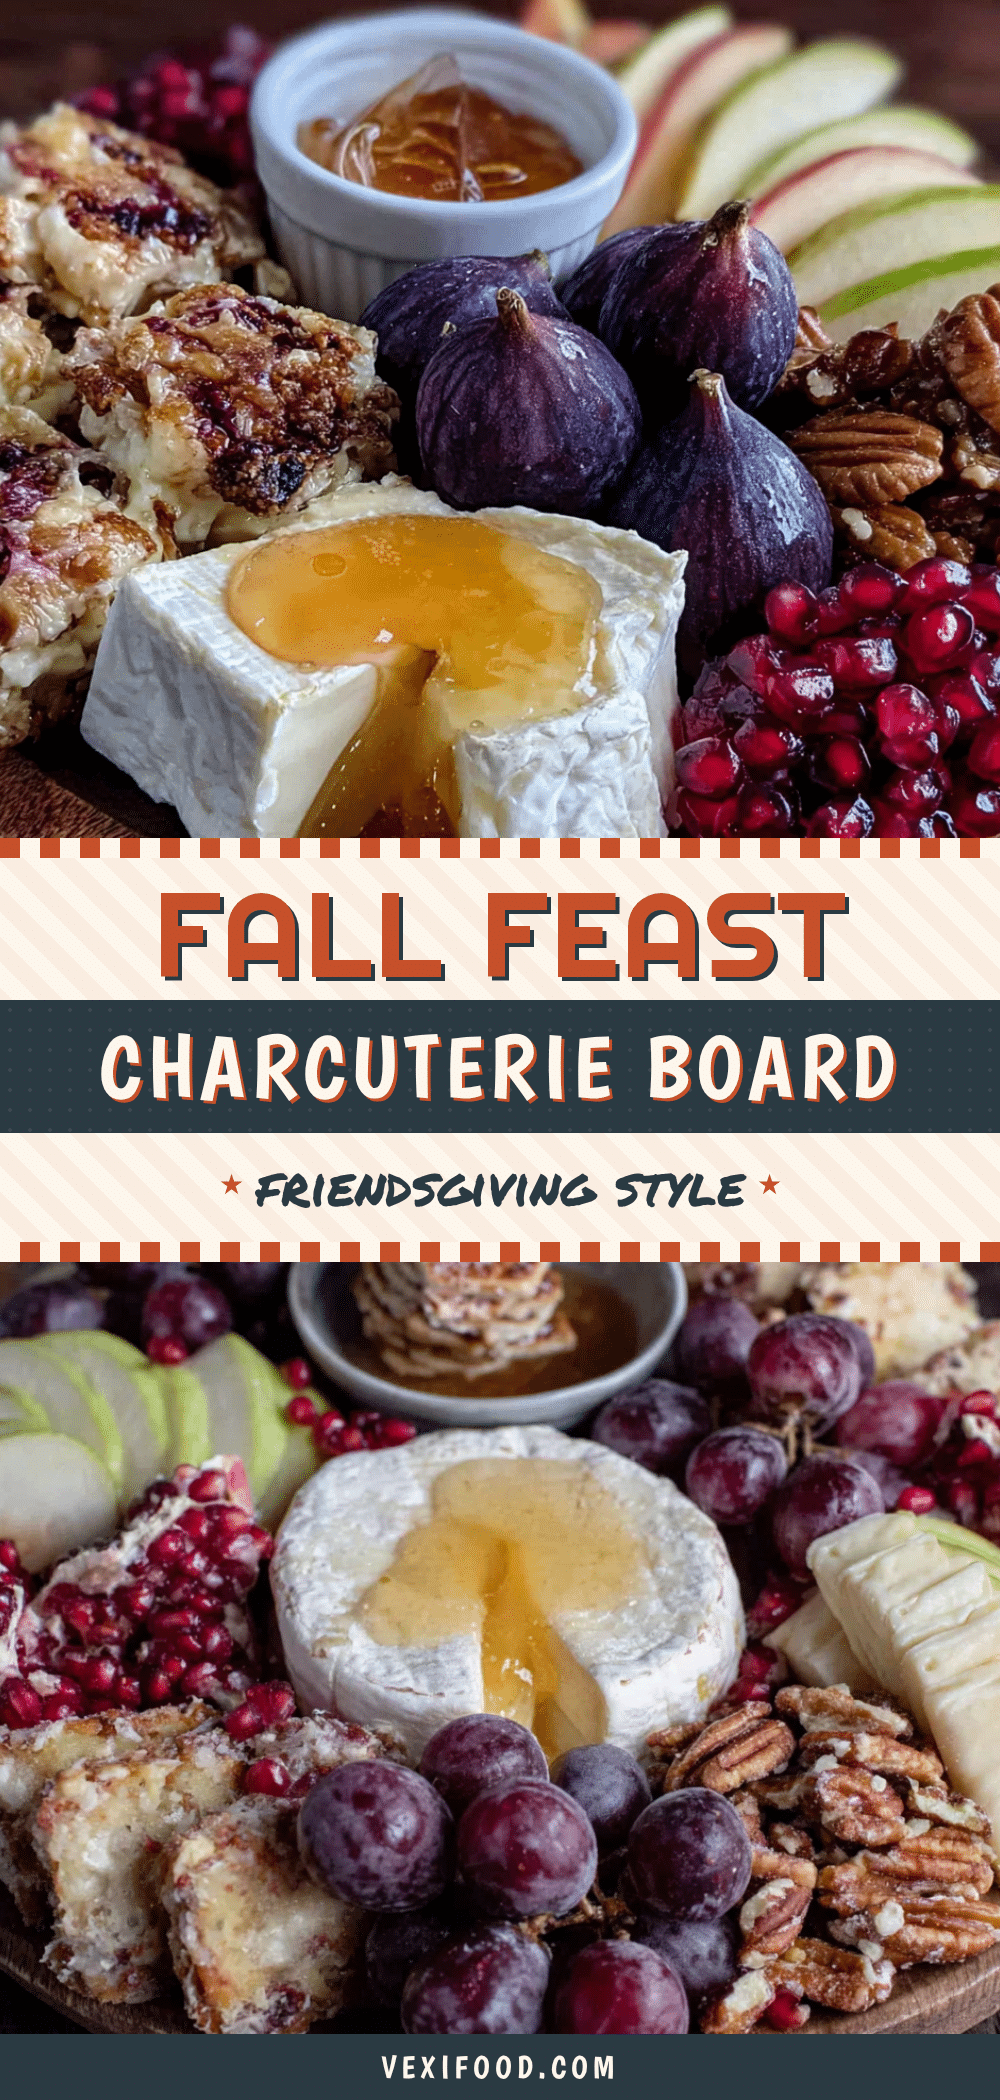
Ultimate Friendsgiving Charcuterie Board with Fall Fruits
This stunning charcuterie board combines all the cozy flavors of fall—crisp apples, juicy pears, sweet figs, and a selection of artisan cheeses and cured meats—into an effortlessly impressive centerpiece for your Friendsgiving gathering. With under 30 minutes of prep, it’s the perfect stress-free appetizer that will have everyone coming back for more.
- Prep Time: 15 minutes
- Cook Time: 0 minutes
- Total Time: 15 minutes
- Yield: 8-10 servings
- Category: Appetizer
- Cuisine: American
Ingredients
- Aged Gouda (8 oz)
- Sharp White Cheddar (8 oz)
- Soft-Ripened Brie (8 oz wheel)
- Blue Cheese (4 oz)
- Prosciutto (4-6 oz)
- Genoa Salami (4-6 oz)
- Soppressata (4 oz)
- Honeycrisp Apples (2)
- Bosc Pears (2)
- Fresh Figs (6-8)
- Seedless Red Grapes (1 cup)
- Artisan Crackers (1 box)
- Baguette (1)
- Honey (for drizzling)
- Fig Jam or Apple Butter (1/2 cup)
- Toasted Walnuts or Pecans (1/2 cup)
- Fresh Rosemary Sprigs
- Dried Apricots or Cherries (1/4 cup)
- Flaky Sea Salt (like Maldon)
Instructions
- Prep Your Ingredients (15 minutes): Take all your cheeses out of the fridge 30 minutes before you start building the board. Slice the baguette, wash and slice the apples and pears (toss them in a little lemon juice to prevent browning), halve the figs, and toast the nuts if you’re using them.
- Place Your Bowls First (2 minutes): Put your small bowls of honey, fig jam, and any olives on the board first. This anchors your layout and prevents you from having to squeeze them in later. I usually place them in a triangle pattern across the board.
- Add the Cheeses (5 minutes): Place your cheese wedges and wheels around the board, spacing them out. Cut the brie wheel into a few wedges but keep it in the shape of the wheel. Slice the cheddar and gouda into rustic chunks and fan them out. Place the blue cheese in a crumbled pile or in a small wedge.
- Layer the Meats (3 minutes): Fold the prosciutto slices into loose ribbons or waves and place them near the brie. Fan out the salami and soppressata slices in a different area. The goal is to create texture—some folded, some flat, some piled.
- Add the Fruit (5 minutes): Arrange the apple and pear slices in overlapping fans. Place the fig halves in small clusters. Tuck small bunches of red grapes into any empty spaces.
- Fill the Gaps with Crackers & Bread (3 minutes): Fill in all the remaining empty spaces with your crackers and baguette slices. Scatter them around the board so people can reach them easily from any angle. Some can be standing up, some lying flat.
- Add the Crunch & Garnishes (2 minutes): Sprinkle the toasted walnuts or pecans over the board, focusing on areas near the cheese. Scatter the dried apricots or cherries. Tuck small sprigs of fresh rosemary around the board for a pop of green and a wonderful aroma.
- Final Touches (1 minute): Drizzle a little honey over the brie and the blue cheese. Sprinkle a tiny pinch of flaky sea salt over the apples and pears. Step back, admire your work, and take a picture.
Notes
Serve cheese at room temperature for best flavor. To prevent apple and pear slices from browning, toss them in a little lemon juice. Avoid placing crackers directly next to wet ingredients to keep them crisp. The board can be prepped a day ahead but assemble just before serving.
Nutrition
- Serving Size: 1/8 of board
- Calories: 450550
- Sugar: 1520
- Sodium: 8001000
- Fat: 3035
- Saturated Fat: 1520
- Carbohydrates: 3040
- Fiber: 46
- Protein: 2025
Keywords: Friendsgiving, charcuterie board, fall fruits, appetizer, cheese board, holiday entertaining