Love this? Save it for later!
Share the inspiration with your friends
There used to be a tiny bakery tucked between a laundromat and a used bookstore in my old neighborhood that made sourdough bread that changed how I thought about bread. When they suddenly closed—just a handwritten sign on the door one Tuesday morning—I felt genuinely lost. That crusty, tangy loaf with the impossibly open crumb had become my weekly ritual. After maybe twelve tries—some hockey pucks, a few frisbees, one that I’m pretty sure could have been used as a doorstop—I finally cracked the code. This easy no-knead Dutch oven sourdough bread for beginners is the result of that obsession, and honestly, it’s better than the original.
The first time I attempted sourdough, I nearly quit before I started. I’d read about autolyse and stretch-and-folds and hydration percentages, and my head was spinning. I mean, who has time for all that? But here’s the thing I learned through trial and error—you don’t need any of that complicated stuff to make a genuinely good loaf of sourdough bread. This recipe strips away the intimidation and leaves you with the good stuff: that crackling crust, that chewy interior, that unmistakable tangy flavor that fills your whole kitchen.
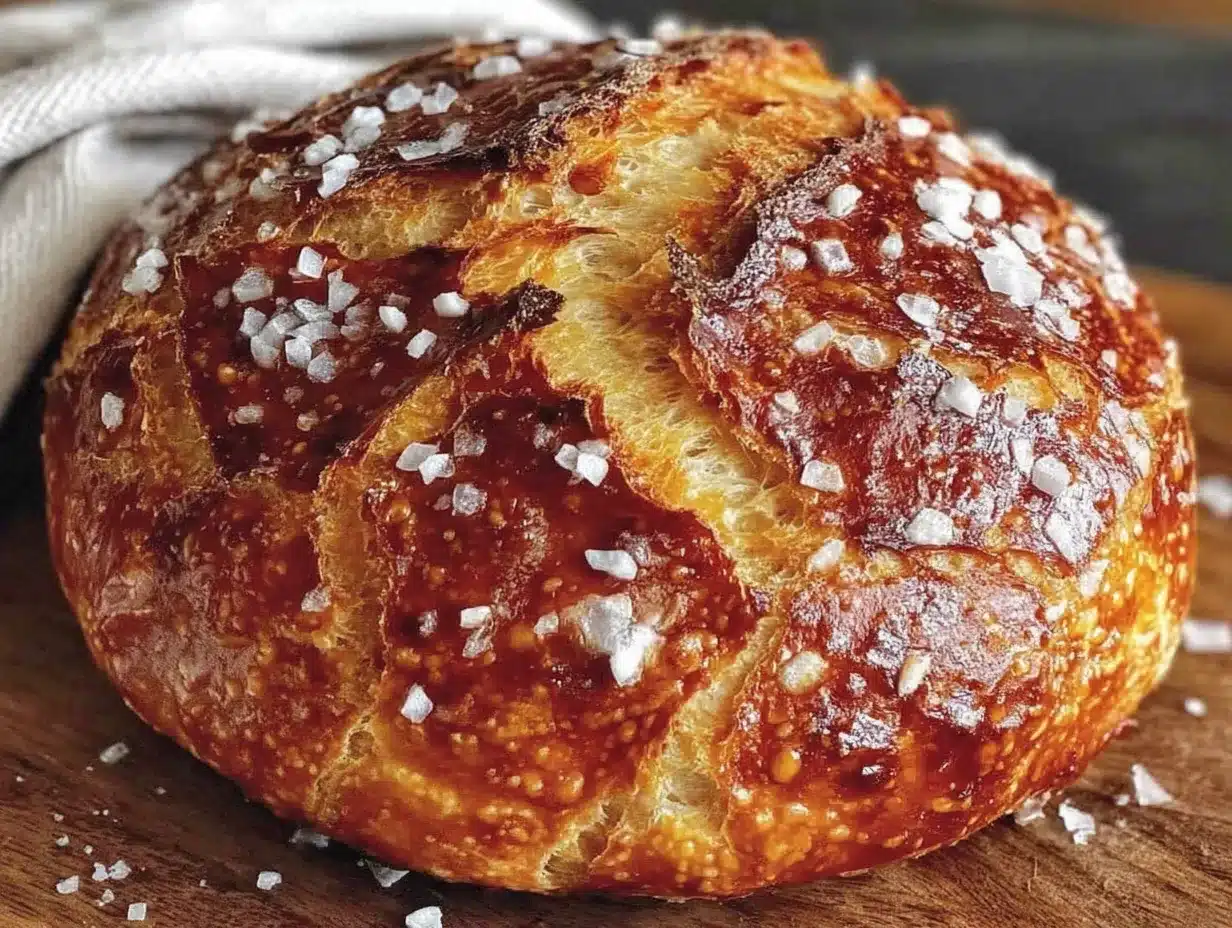
Let me tell you, the day I pulled my first successful loaf out of the Dutch oven, I actually teared up a little. Maybe you’ve been there—that moment when something you’ve been working on finally clicks. The crust was golden and blistered, the crumb was airy with those beautiful irregular holes, and the sound it made when I tapped the bottom? Pure music. I immediately texted a photo to my sister, who responded with “that looks like bakery bread.” That’s the moment I knew I had to share this recipe with anyone who thought sourdough was out of reach. Because it’s not. It really, really isn’t.
Why You’ll Love This Recipe
This easy no-knead Dutch oven sourdough bread for beginners is the recipe I wish I’d had when I started my sourdough journey. It cuts through all the noise and gets straight to the point—delicious bread with minimal fuss. Here’s why this one’s different:
- No complicated techniques: Forget about stretch-and-folds, coil folds, or any of that fancy stuff. This recipe uses a simple mix-and-wait method that anyone can handle.
- Minimal hands-on time: You’ll spend about 10 minutes actively working on this bread. The rest is just waiting for the dough to do its thing.
- Uses your starter directly: No need to calculate feeding schedules or worry about peak activity windows. If your starter is bubbly and active, you’re good to go.
- Perfect for busy schedules: The long fermentation gives you flexibility. Need to bake a day later? No problem. The dough waits for you, not the other way around.
- That signature crust: The Dutch oven creates the perfect steamy environment for developing that crackling, golden crust that makes sourdough so satisfying.
- Beginner-proof results: I’ve tested this recipe with absolute beginners—friends who’d never baked bread in their lives—and every single one got a beautiful loaf on their first try.
What makes this recipe truly special is the simplicity. Most sourdough recipes make you feel like you need a culinary degree to pull them off. This one just asks you to mix flour, water, salt, and starter, then wait. The long, slow fermentation develops flavor and structure without any kneading or complicated folding. It’s the kind of recipe that makes you wonder why you ever thought sourdough was hard. Trust me, that first time you slice into a warm loaf you made with your own hands, you’ll understand why this is the recipe that converts skeptics into bread bakers.
What Ingredients You Will Need
This easy no-knead Dutch oven sourdough bread for beginners uses just four simple ingredients. That’s it. No special additives, no obscure flours, nothing you can’t find at any grocery store. Here’s what you’ll need:
For the Dough
- 500 grams bread flour (about 4 cups) — I prefer King Arthur Flour for its consistent protein content, but any good bread flour works. The higher protein content (around 12-13%) gives you better structure and a chewier crumb.
- 350 grams water (about 1.5 cups) at room temperature — Use filtered water if your tap water is heavily chlorinated. Chlorine can slow down fermentation and affect your final flavor.
- 100 grams active sourdough starter (about 1/2 cup) — Your starter should be bubbly and doubled in size. Feed it 4-8 hours before mixing your dough for best results.
- 10 grams fine sea salt (about 1.5 teaspoons) — Don’t skip the salt! It’s crucial for flavor development and helps control fermentation. I use fine sea salt because it dissolves more evenly than kosher salt.
For Dusting
- Rice flour or all-purpose flour for dusting your proofing basket — Rice flour is ideal because it doesn’t absorb moisture and prevents sticking. All-purpose works in a pinch but can make the dough stickier.
Ingredient Tips from My Kitchen
The quality of your starter matters more than you might think. A mature, well-fed starter that’s at least two weeks old will give you better flavor and more reliable results. If your starter is new, don’t worry—just make sure it’s active and bubbly before you start. I keep my starter on the counter and feed it once a day, but if you keep yours in the fridge, just pull it out and give it a feeding the day before you plan to bake.
For the flour, bread flour really does make a difference here. All-purpose flour has lower protein content, which means less structure and a denser crumb. If all you have is all-purpose, you can still make this work—just expect a slightly different texture. I’ve done it before when I ran out of bread flour, and while it wasn’t as airy, it was still delicious.
The water temperature matters more than you’d think. Room temperature water (around 70-75°F) is perfect for a slow, steady fermentation. If your kitchen is cold, use slightly warmer water. If it’s hot, use cooler water. You’re aiming for a final dough temperature around 75-78°F for optimal fermentation.
Equipment Needed
One of the best things about this easy no-knead Dutch oven sourdough bread for beginners is that you don’t need a ton of fancy equipment. Here’s what you’ll need:
- Dutch oven (5-6 quart) with a lid — This is the star of the show. The heavy pot traps steam, creating that perfect crust. I use a Lodge enameled Dutch oven, but any heavy pot with a tight-fitting lid works. No Dutch oven? Use a heavy metal pot with an oven-safe lid, or even a deep cast iron skillet covered with a metal bowl.
- Large mixing bowl — Any big bowl works. I use a glass one so I can see the dough’s texture, but ceramic or stainless steel is fine too.
- Digital kitchen scale — This is non-negotiable for consistent results. Measuring by volume (cups) is too inconsistent for bread baking. A $15 scale from Amazon will change your bread game forever.
- Bench scraper — Helps with handling the sticky dough. A flexible plastic one is my favorite, but a metal one works too. In a pinch, use a spatula.
- Proofing basket or banneton — Gives the dough structure during its final rise. If you don’t have one, line a bowl with a clean kitchen towel and dust it generously with rice flour.
- Parchment paper — Makes transferring the dough into the hot Dutch oven so much easier. Trust me on this one.
- Razor blade or lame — For scoring the dough before baking. A sharp knife works in a pinch, but a razor blade gives you cleaner cuts.
- Cooling rack — Crucial for letting the bread cool properly. Putting hot bread on a solid surface traps steam and ruins that crispy crust.
I’ve made this recipe with just the bare minimum—a bowl, a pot, and a scale—and it still worked. The Dutch oven is the only truly essential piece of equipment, and even that has workarounds. Don’t let a missing tool stop you from trying.
Preparation Method
This easy no-knead Dutch oven sourdough bread for beginners follows a simple timeline. The active work takes about 10 minutes total spread over two days. Here’s how it breaks down:
Day 1: Mix and Bulk Ferment (Evening, about 10 minutes active)
- Mix the dough: In your large bowl, combine 500 grams bread flour and 350 grams water. Mix with your hand or a spatula until no dry flour remains. Let this rest for 30 minutes. This is called autolyse, and it helps the flour absorb water and develop gluten naturally.
- Add starter and salt: After the rest, add 100 grams active sourdough starter and 10 grams salt on top of the dough. Wet your hands slightly (sticky dough is easier to handle with wet hands) and mix everything together until well combined. The dough will be shaggy and sticky—that’s normal.
- Cover and wait: Cover the bowl with a damp towel or plastic wrap and let it sit at room temperature (70-75°F) for 8-12 hours. This is the bulk fermentation. The dough should double in size and look bubbly and domed on top. If your kitchen is cold, it might take closer to 12 hours. If it’s warm, check it at 8 hours.
Day 2: Shape and Final Proof (Morning, about 10 minutes active)
- Turn out the dough: Lightly flour your work surface. Gently scrape the dough out of the bowl. It will be very bubbly and sticky. Try to handle it as little as possible—you want to preserve those air bubbles.
- Shape the dough: Using your bench scraper, gently fold the dough into a round shape. Here’s a simple technique: fold the top edge toward the center, then the bottom, then the left and right. Flip it over so the seams are on the bottom. Use your hands to gently cup the dough and pull it toward you in a circular motion to create tension on the surface. Don’t overwork it—just a few passes is enough.
- Prepare your proofing basket: Generously dust your banneton or lined bowl with rice flour. Place the shaped dough seam-side up into the basket. Cover with a towel or plastic wrap.
- Cold proof: Put the basket in the refrigerator for 8-12 hours (or up to 24 hours for more tangy flavor). This cold proof makes the dough easier to handle and develops deeper flavor. If you’re in a hurry, you can let it proof at room temperature for 2-3 hours instead.
Baking Day (Morning, about 45 minutes active)
- Preheat your oven: Place your Dutch oven with the lid on in the cold oven. Turn the oven to 450°F (230°C) and let it preheat for 30-45 minutes. The pot needs to be screaming hot for that perfect crust.
- Prepare the dough: While the oven preheats, take your dough out of the fridge. Place a piece of parchment paper on top of the dough in the basket, then place a plate or cutting board on top. Flip everything over so the dough lands on the parchment paper. Score the top of the dough with a razor blade—a simple cross or a single slash about 1/2 inch deep. This allows the bread to expand properly in the oven.
- Bake with steam: Carefully remove the hot Dutch oven from the oven. Lift the parchment paper with the dough and lower it into the pot. Put the lid on and bake for 30 minutes. The lid traps steam, which creates that beautiful crust.
- Finish without lid: After 30 minutes, remove the lid and continue baking for 15-20 minutes until the crust is deep golden brown. The internal temperature should reach 200-210°F (93-99°C) when done.
- Cool completely: Use the parchment paper to lift the bread out of the pot and transfer it to a cooling rack. Here’s the hardest part—let it cool for at least 2 hours before slicing. Cutting into warm bread releases steam and makes the crumb gummy. I know it’s tempting, but trust me on this one.
A note about timing: I like to mix my dough around 8 PM, shape it the next morning around 8 AM, and bake it that evening. But you can adjust this to fit your schedule. The beauty of this recipe is its flexibility. If you mix in the morning, you can bake that evening. If life gets busy, the cold proof can stretch to 48 hours without issue.
Cooking Tips & Techniques
After many loaves of this easy no-knead Dutch oven sourdough bread for beginners, I’ve learned a few things the hard way. Here are my best tips for success:
Watch your fermentation time, not the clock. The 8-12 hour bulk fermentation is a guideline, not a rule. What matters is how the dough looks and feels. It should be doubled in size, jiggly, and covered in bubbles on top. If it’s not there at 8 hours, let it go longer. If it’s there at 6 hours (in a warm kitchen), don’t wait.
Don’t skip the cold proof. I know it adds time, but the cold proof does three things: it makes the dough easier to handle, it deepens the sour flavor, and it creates a better crust. Even 4 hours in the fridge makes a noticeable difference.
Use wet hands for sticky dough. This was a game-changer for me. When you mix the starter and salt into the dough, wet your hands first. The dough won’t stick to wet hands, and you can mix more thoroughly without making a mess.
Score with confidence. A shallow score won’t let the bread expand properly, and a hesitant score will stick. Use a sharp blade and make one clean, decisive cut about 1/2 inch deep. Don’t saw back and forth—just one smooth motion.
Preheat longer than you think. A properly preheated Dutch oven is crucial. I give mine a full 45 minutes in the oven after it reaches temperature. The pot needs to be evenly hot all the way through.
One mistake I made early on was checking the dough too often during bulk fermentation. Every time you open the lid or peek under the towel, you let heat escape and disturb the fermentation. Just let it be. Trust the process and check it at the minimum time.
Variations & Adaptations
Once you’ve mastered this easy no-knead Dutch oven sourdough bread for beginners, the possibilities are endless. Here are some variations I’ve tried and loved:
Whole Wheat Version: Replace 100 grams of the bread flour with whole wheat flour. You’ll need to add about 25 grams more water since whole wheat absorbs more liquid. The flavor is nuttier and more complex. I make this version when I want a heartier loaf for sandwiches.
Seeded Sourdough: Add 50 grams of mixed seeds (sunflower, pumpkin, sesame, flax) during the mixing stage. Toast them lightly first for more flavor. This makes an incredible toast bread that’s perfect with avocado or butter.
Cheese and Herb Loaf: Fold in 100 grams of shredded sharp cheddar and 2 tablespoons of fresh rosemary (or 1 tablespoon dried) during the shaping stage. The cheese melts into the dough, creating pockets of savory goodness. This is my go-to for soup season.
Gluten-Free Adaptation: While this exact recipe won’t work with gluten-free flour, you can try a gluten-free sourdough starter and a blend of gluten-free flours. I’ve had success with a mix of brown rice flour, sorghum flour, and tapioca starch. The texture is different—denser and more cake-like—but still delicious.
Olive Oil and Herb Loaf: Add 2 tablespoons of olive oil and 1 tablespoon of dried herbs (oregano, thyme, rosemary) during the mixing stage. The oil makes the crumb slightly softer and the herbs infuse the whole loaf with Mediterranean flavor. Perfect for dipping in soup or making crostini.
I once made a version with roasted garlic folded into the dough before shaping, and it was so good I ate half the loaf standing at the counter. Don’t be afraid to experiment—sourdough is forgiving, and even “failures” are usually still delicious.
Serving & Storage Suggestions
This easy no-knead Dutch oven sourdough bread for beginners is best served warm, but let me clarify what I mean by that. Let it cool completely first (that 2-hour wait is real), then if you want to serve it warm, pop slices in a 350°F oven for 5 minutes. This gives you that fresh-baked experience without ruining the texture.
Serving Ideas:
- Slice thick and toast until golden, then slather with salted butter and a sprinkle of flaky sea salt
- Serve alongside a bowl of tomato soup or hearty stew for dipping
- Make crostini by brushing slices with olive oil and toasting until crispy
- Use for the best grilled cheese sandwich of your life
- Slice thin and serve with cheese, cured meats, and olives for a simple appetizer
Storage:
- Store cut-side down on a wooden cutting board at room temperature for up to 3 days. The cut side will stay fresher this way.
- For longer storage, wrap the whole loaf in a clean kitchen towel and place in a paper bag. Avoid plastic bags—they trap moisture and make the crust soft.
- To freeze, slice the bread first, then wrap tightly in plastic wrap and place in a freezer bag. Toast slices directly from frozen for fresh-tasting bread anytime.
Reheating:
- For a whole loaf: warm in a 350°F oven for 10 minutes
- For slices: toast in a toaster or under the broiler for 2-3 minutes
- For frozen slices: toast straight from the freezer, adding an extra minute to the toasting time
The flavor actually develops over the first 24 hours after baking. Day-old sourdough is perfect for toast, and it makes incredible croutons or breadcrumbs. If your loaf starts to go stale after a few days, don’t throw it out—make panzanella, bread pudding, or homemade stuffing.
Nutritional Information & Benefits
This easy no-knead Dutch oven sourdough bread for beginners isn’t just delicious—it’s also surprisingly nutritious. Here’s what you’re getting in a typical slice (about 1/12 of the loaf):
- Calories: 150-170
- Carbohydrates: 30-32 grams
- Protein: 5-6 grams
- Fiber: 1-2 grams
- Fat: 0.5-1 gram
- Sodium: 190-210 mg
The fermentation process in sourdough offers some real benefits. The natural fermentation breaks down phytic acid, which can inhibit mineral absorption. This means your body can actually absorb more of the nutrients in the flour—things like iron, zinc, and magnesium. The lactic acid bacteria in sourdough also create a more digestible bread that’s often easier on sensitive stomachs.
Compared to commercial bread, homemade sourdough has a lower glycemic index, meaning it doesn’t spike your blood sugar as dramatically. The long fermentation also develops complex flavors naturally, so you don’t need added sugars or preservatives. Plus, you know exactly what’s in it—just four simple ingredients.
One thing I love about this bread is that it’s naturally low in fat and contains no added sugars. It’s a whole-food option that fits into most dietary patterns, including vegetarian and vegan diets. If you’re watching your sodium, you can reduce the salt to 8 grams, though the flavor won’t be as pronounced.
Conclusion
This easy no-knead Dutch oven sourdough bread for beginners is proof that you don’t need a bakery degree or fancy equipment to make incredible bread at home. With just four ingredients, a little patience, and a Dutch oven, you can create loaves that rival anything from a professional bakery. The crust crackles when you cut into it, the crumb is airy and chewy, and the flavor is that unmistakable tangy sourdough that makes everything taste better.
What I love most about this recipe is how it builds confidence. Once you pull that first beautiful loaf out of the oven, you’ll start thinking about what else you can make. Maybe you’ll try adding seeds or herbs. Maybe you’ll experiment with different flour blends. Maybe you’ll start giving loaves as gifts. That’s the magic of sourdough—it starts with a simple recipe and grows into something that becomes part of your life.
I’d love to hear how your first loaf turns out. Drop a comment below and tell me about your baking experience—did it crackle when you cut into it? Did you add any fun mix-ins? Share a photo if you can! And if you have questions, don’t hesitate to ask. We were all beginners once, and the sourdough community is the most supportive bunch I’ve ever met. Happy baking, friend—you’ve got this.
Frequently Asked Questions
Can I use all-purpose flour instead of bread flour?
Yes, you can, but the texture will be different. All-purpose flour has less protein, which means less gluten development and a denser crumb. The bread will still taste great—it just won’t have that airy, open crumb that bread flour creates. If you’re in a pinch, go ahead and use all-purpose. I’ve done it plenty of times when I ran out of bread flour.
My dough is really sticky. Is that normal?
Absolutely normal. Sourdough dough is wetter than regular bread dough—that’s what gives it that open crumb. The key is to use wet hands when handling it and to work on a well-floured surface. Don’t be tempted to add more flour to the dough itself; that will make your bread dense. Just trust the process and use the techniques I described in the recipe.
How do I know when my starter is ready to use?
Your starter is ready when it’s at least doubled in size, bubbly on top and throughout, and has a pleasant sour smell. It should pass the “float test”—drop a small spoonful in a glass of water, and if it floats, it’s ready. Feed it 4-8 hours before you plan to mix your dough for best results. A mature starter that’s at least two weeks old will give you the most reliable results.
Can I bake this without a Dutch oven?
Yes, but you’ll need to create steam another way. Place a shallow metal pan on the bottom rack of your oven while preheating. When you put the bread in, pour a cup of hot water into the pan and quickly close the door. You can also spritz the oven walls with water from a spray bottle every few minutes for the first 10 minutes of baking. The crust won’t be as dramatic, but the bread will still be delicious.
Why did my bread turn out flat and dense?
This usually means one of three things: your starter wasn’t active enough, your bulk fermentation was too short, or you handled the dough too aggressively. Make sure your starter is bubbly and doubled before using it. Give the dough enough time to double during bulk fermentation—this can take 8-12 hours depending on your kitchen temperature. And when shaping, handle the dough gently to preserve those air bubbles. If you’re still having trouble, try extending your bulk fermentation by an hour or two.
Pin This Recipe!
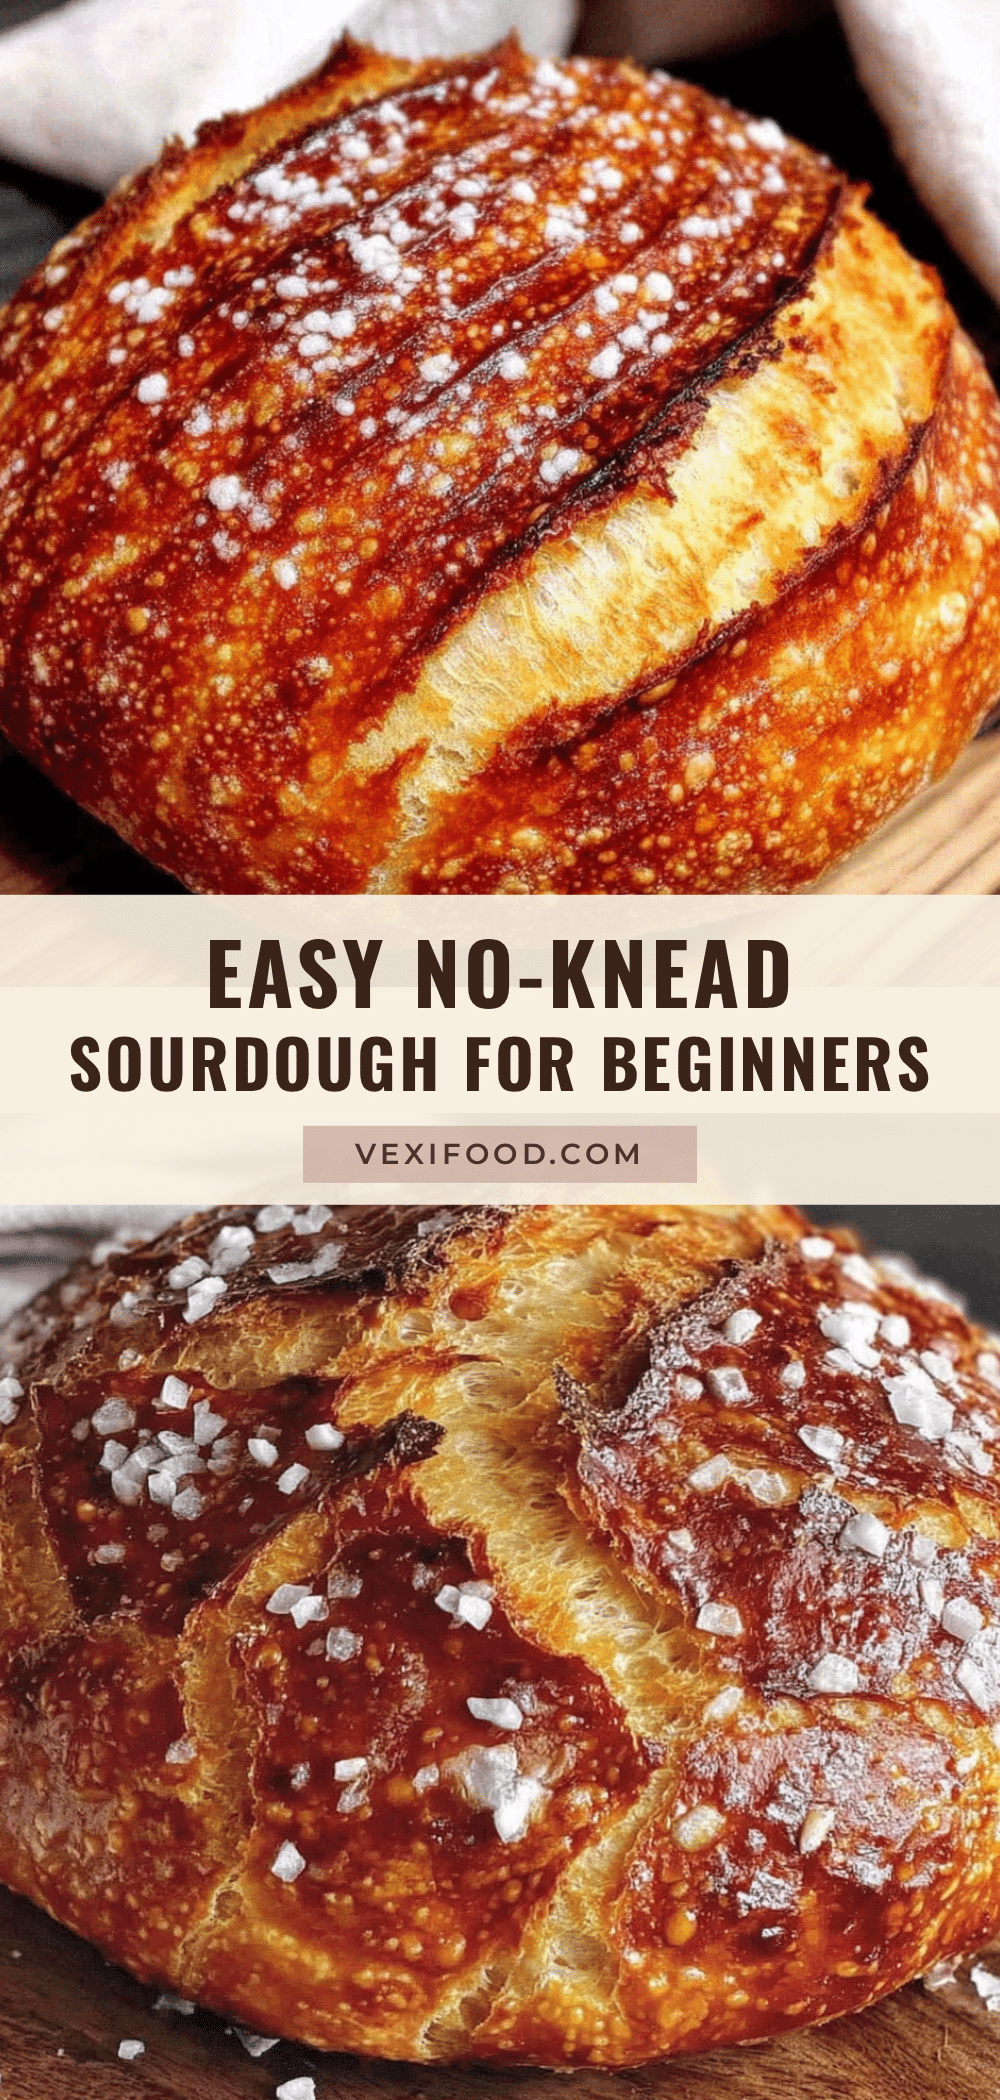
Easy No-Knead Dutch Oven Sourdough Bread – Best Beginner Recipe
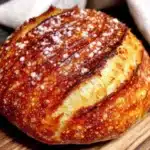
This easy no-knead Dutch oven sourdough bread for beginners strips away the intimidation and leaves you with the good stuff: that crackling crust, that chewy interior, that unmistakable tangy flavor that fills your whole kitchen. With just four ingredients, a little patience, and a Dutch oven, you can create loaves that rival anything from a professional bakery.
- Prep Time: 10 minutes
- Cook Time: 45 minutes
- Total Time: 12 hours 55 minutes (including fermentation and proofing)
- Yield: 12 servings 1x
- Category: Bread
- Cuisine: American
Ingredients
- 500 grams bread flour (about 4 cups)
- 350 grams water (about 1.5 cups) at room temperature
- 100 grams active sourdough starter (about 1/2 cup)
- 10 grams fine sea salt (about 1.5 teaspoons)
- Rice flour or all-purpose flour for dusting
Instructions
- Mix the dough: In your large bowl, combine 500 grams bread flour and 350 grams water. Mix with your hand or a spatula until no dry flour remains. Let this rest for 30 minutes.
- Add starter and salt: After the rest, add 100 grams active sourdough starter and 10 grams salt on top of the dough. Wet your hands slightly and mix everything together until well combined. The dough will be shaggy and sticky.
- Cover and wait: Cover the bowl with a damp towel or plastic wrap and let it sit at room temperature (70-75°F) for 8-12 hours. The dough should double in size and look bubbly and domed on top.
- Turn out the dough: Lightly flour your work surface. Gently scrape the dough out of the bowl. It will be very bubbly and sticky. Handle it as little as possible.
- Shape the dough: Using your bench scraper, gently fold the dough into a round shape. Fold the top edge toward the center, then the bottom, then the left and right. Flip it over so the seams are on the bottom. Use your hands to gently cup the dough and pull it toward you in a circular motion to create tension on the surface.
- Prepare your proofing basket: Generously dust your banneton or lined bowl with rice flour. Place the shaped dough seam-side up into the basket. Cover with a towel or plastic wrap.
- Cold proof: Put the basket in the refrigerator for 8-12 hours (or up to 24 hours for more tangy flavor).
- Preheat your oven: Place your Dutch oven with the lid on in the cold oven. Turn the oven to 450°F (230°C) and let it preheat for 30-45 minutes.
- Prepare the dough: While the oven preheats, take your dough out of the fridge. Place a piece of parchment paper on top of the dough in the basket, then place a plate or cutting board on top. Flip everything over so the dough lands on the parchment paper. Score the top of the dough with a razor blade—a simple cross or a single slash about 1/2 inch deep.
- Bake with steam: Carefully remove the hot Dutch oven from the oven. Lift the parchment paper with the dough and lower it into the pot. Put the lid on and bake for 30 minutes.
- Finish without lid: After 30 minutes, remove the lid and continue baking for 15-20 minutes until the crust is deep golden brown. The internal temperature should reach 200-210°F (93-99°C) when done.
- Cool completely: Use the parchment paper to lift the bread out of the pot and transfer it to a cooling rack. Let it cool for at least 2 hours before slicing.
Notes
The long, slow fermentation develops flavor and structure without any kneading or complicated folding. The cold proof can stretch to 48 hours without issue. Use wet hands for sticky dough. Score with confidence—a shallow score won’t let the bread expand properly. Preheat the Dutch oven longer than you think for best results.
Nutrition
- Serving Size: 1 slice (1/12 of loa
- Calories: 160
- Sodium: 200
- Fat: 0.75
- Saturated Fat: 0.1
- Carbohydrates: 31
- Fiber: 1.5
- Protein: 5.5
Keywords: sourdough bread, no-knead bread, Dutch oven bread, beginner sourdough, easy sourdough, homemade bread, artisan bread