Love this? Save it for later!
Share the inspiration with your friends
A friend asked me why I couldn’t just throw a can of white beans into a pot with some broth and call it chili. I started to explain why that wouldn’t work—the layers, the simmering, the whole process. Then I stopped. Honestly, I had never actually tried it that way. So I did. And let me tell you, I ate my words right along with that bowl of soup. It was a Tuesday night in late October, and the wind was rattling my old windows. I had a sick kid on the couch, a half-empty fridge, and absolutely no energy for a complicated dinner. My friend’s suggestion felt almost offensive to my sensibilities as a recipe developer. But I was tired. So I gave in.
The result was so good, I actually texted her a photo with a string of embarrassed praise. The chili was creamy without any cream, rich without hours of simmering, and deeply comforting in a way that felt like a hug from the inside. The green chiles did most of the heavy lifting—they brought this bright, mild heat that cut through the richness of the beans and chicken. I mean, I had been overcomplicating white chicken chili for years. All those extra steps? Unnecessary. The texture was perfect—brothy but thick enough to coat a spoon, with tender shreds of chicken and soft beans swimming in a savory, slightly tangy broth.
Maybe you’ve been there, clinging to a recipe method because it’s “the right way” to do things. I get it. But this easy white chicken chili taught me that sometimes the simplest path is the best one. It’s become my go-to for those rough days when you need dinner to feel like a victory, not a chore. Now I make it every time the weather turns cold, and it never fails to deliver that cozy, soul-warming feeling we all crave.
Why You’ll Love This Recipe
This isn’t just another white chicken chili recipe floating around the internet. After testing this method more times than I can count (including that first humbling attempt), I can confidently say this version hits different. It’s been tested by my family, my neighbor Karen who stops by unannounced, and even my picky nephew who usually survives on plain pasta.
- Quick & Easy: From start to finish, this comes together in about 30 minutes. Perfect for those weeknights when you walk in the door hungry and need dinner on the table before everyone gets hangry.
- Simple Ingredients: You probably have most of these in your pantry already. No fancy grocery store runs required—just good, honest ingredients that work together beautifully.
- Perfect for Cold Weather: This is the ultimate cozy dinner for chilly evenings, snowy days, or any time you need a little warmth from the inside out.
- Crowd-Pleaser: I’ve served this at casual get-togethers and watched grown adults go back for thirds. Kids love it too—the green chiles are mild enough that even little ones enjoy it.
- Unbelievably Delicious: The secret is in how the ingredients meld together. The beans break down just enough to create a naturally creamy texture without adding any dairy. It’s comfort food at its finest.
What makes this recipe different from all the rest? It’s the technique of mashing some of the beans before adding them to the pot. That one simple step creates a velvety, luscious broth that tastes like you simmered it for hours. No heavy cream, no flour, no complicated roux. Just pure, honest flavor that feels like a warm blanket on a cold day.
What Ingredients You Will Need
This recipe relies on pantry staples and a few fresh ingredients to create something truly special. The beauty is in the simplicity—each component plays a specific role in building flavor and texture without overwhelming the dish.
- Chicken: 1 pound boneless, skinless chicken breasts or thighs. I prefer thighs for more flavor and moisture, but breasts work great too. You can also use rotisserie chicken to save time.
- White Beans: 2 cans (15 ounces each) cannellini beans or great northern beans, drained and rinsed. These are the backbone of the chili—they add body and creaminess when mashed.
- Green Chiles: 2 cans (4 ounces each) diced green chiles. Look for mild ones unless you want extra heat. I like the Ortega brand for consistent flavor.
- Chicken Broth: 4 cups low-sodium chicken broth. Using low-sodium lets you control the salt level. Homemade broth takes this to another level if you have it on hand.
- Onion: 1 medium yellow onion, diced. This provides the savory base that everything builds upon.
- Garlic: 4 cloves garlic, minced. Fresh garlic is non-negotiable here—it adds that pungent, aromatic depth that jarred garlic just can’t match.
- Spices: 1 teaspoon ground cumin, 1 teaspoon dried oregano, ½ teaspoon smoked paprika, salt and black pepper to taste. Cumin is the star here—it gives the chili that warm, earthy flavor we all love.
- Lime: 1 fresh lime, juiced. Added at the very end, the lime juice brightens everything up and balances the richness.
- Optional Toppings: Fresh cilantro, diced avocado, shredded Monterey Jack cheese, sour cream, tortilla chips, sliced jalapeños. These are where you can really make it your own.
For the best texture, I recommend using cannellini beans—they’re creamier than great northern beans and break down more easily when mashed. If you’re watching your sodium, look for no-salt-added canned beans. And please, don’t skip the lime juice at the end. It might seem like a small detail, but it makes a world of difference in brightening up all those cozy, savory flavors.
Equipment Needed
You don’t need any fancy equipment for this recipe—just a few basic kitchen tools that you probably already own. Here’s what you’ll need:
- Large Pot or Dutch Oven: A 5- to 6-quart pot works perfectly. I use my trusty enameled cast iron Dutch oven because it holds heat evenly, but any heavy-bottomed pot will do the job.
- Wooden Spoon: For stirring and scraping up any bits that stick to the bottom. A silicone spatula works too.
- Potato Masher or Fork: You’ll need this to mash some of the beans. A fork works in a pinch, but a potato masher makes quick work of it.
- Chef’s Knife and Cutting Board: For dicing the onion and mincing the garlic. A sharp knife makes all the difference.
- Measuring Cups and Spoons: For accurate measurements. I know some people eyeball it, but for consistent results, measuring is worth the extra few seconds.
- Citrus Juicer (Optional): If you have one, it makes juicing that lime much easier. If not, just roll the lime on the counter before cutting it open.
If you don’t have a Dutch oven, don’t worry. A regular stockpot or even a large saucepan will work. The key is having enough surface area to sauté the aromatics without overcrowding them. And if you don’t have a potato masher, just use a fork or even the bottom of a sturdy glass to mash the beans. We’re keeping it simple here.
Preparation Method
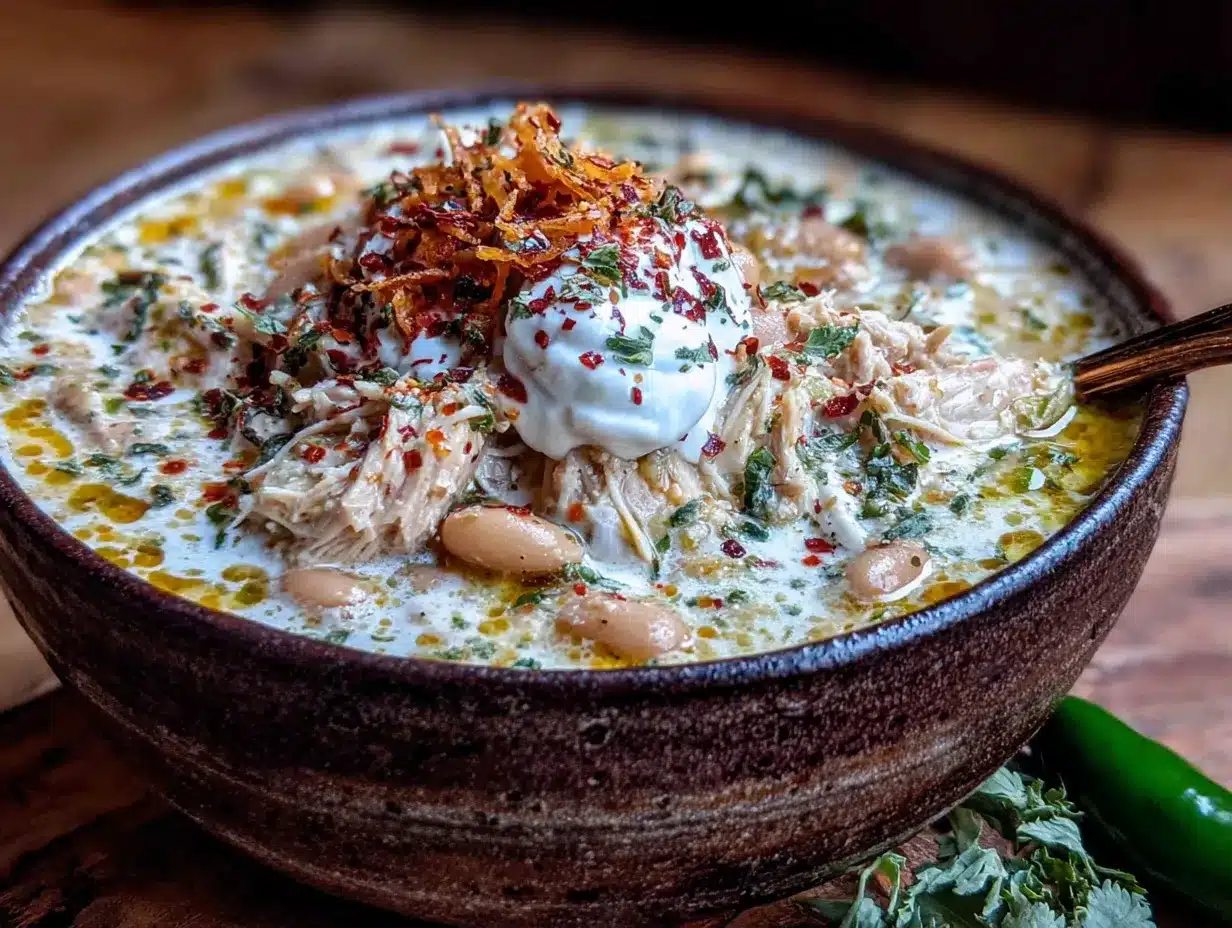
Let me walk you through this step by step. Trust me, if I can make this work on a tired Tuesday night with a sick kid on the couch, you can absolutely nail it.
- Prep your ingredients first. Dice the onion, mince the garlic, drain and rinse the beans, and juice the lime. Having everything ready makes the cooking process smooth and stress-free. This should take about 5 minutes.
- Mash half the beans. Take one can of drained beans and mash them with a potato masher or fork until they form a chunky paste. Leave the other can whole. This is the secret to that creamy texture without adding any dairy. The mashed beans will thicken the broth naturally as they cook.
- Heat your pot over medium heat. Add 1 tablespoon of olive oil and let it shimmer for about 30 seconds. You want it hot but not smoking.
- Sauté the aromatics. Add the diced onion and cook for 4-5 minutes until it’s soft and translucent, stirring occasionally. Then add the minced garlic and cook for another 30 seconds until fragrant. Your kitchen should smell amazing right about now.
- Add the spices. Sprinkle in the cumin, oregano, and smoked paprika. Stir constantly for about 30 seconds to toast the spices. This wakes up their flavors and makes them more aromatic. Don’t skip this step—it makes a real difference.
- Add the chicken. Place the chicken breasts or thighs directly into the pot. Pour in the chicken broth, then add the whole beans, mashed beans, and both cans of green chiles. Stir everything together gently.
- Bring to a simmer. Increase the heat to high and bring the chili to a gentle boil. Then reduce the heat to medium-low and let it simmer uncovered for 15-20 minutes. The chicken should be cooked through and tender. You’ll see the broth start to thicken as the mashed beans work their magic.
- Shred the chicken. Remove the chicken from the pot using tongs and place it on a cutting board. Use two forks to shred it into bite-sized pieces. It should shred easily—if it doesn’t, let it cook for a few more minutes.
- Return the chicken to the pot. Stir the shredded chicken back into the chili. Add the lime juice and stir to combine. Taste and adjust seasoning with salt and pepper. This is your moment to dial in the flavor.
- Let it rest. Remove the pot from heat and let the chili sit for 5 minutes before serving. This allows the flavors to meld together and the texture to settle. I know it’s hard to wait, but trust me on this one.
The chili should be thick enough to coat the back of a spoon but still loose enough to be spoonable. If it’s too thick, add a splash more broth. If it’s too thin, let it simmer for another 5-10 minutes uncovered. You’re looking for that perfect cozy consistency.
Cooking Tips & Techniques
I’ve learned a few things the hard way so you don’t have to. Here are my best tips for making this white chicken chili absolutely perfect every time.
Don’t skip the bean-mashing step. I know it seems like an extra task, but this is what gives the chili its creamy texture without any dairy. I once tried to skip it to save time, and the result was a thin, watery broth that just didn’t hit the same. The mashed beans thicken the chili naturally and add a velvety richness that’s hard to replicate any other way.
Toast your spices. This is something I learned from a chef friend years ago, and it’s made a huge difference in my cooking. Heating the cumin and oregano in the oil before adding liquid releases their essential oils and deepens their flavor. Just 30 seconds is all it takes, but watch carefully so they don’t burn—burnt spices taste bitter and can ruin the whole pot.
Use low-sodium broth. This gives you control over the salt level. Canned beans already contain sodium, and you can always add more salt at the end if needed. I learned this lesson after making a batch that was so salty I had to double the recipe to fix it. Now I always start with low-sodium broth and adjust from there.
Let it rest before serving. I know you’re hungry, but those 5 minutes of resting time make a real difference. The flavors meld together, the texture settles, and the chili becomes more cohesive. It’s the same principle as letting a steak rest—it just tastes better when you give it a moment.
Don’t overcook the chicken. Chicken breasts can dry out quickly if simmered too long. Check for doneness after 15 minutes by cutting into the thickest part—it should be opaque and no longer pink. If you’re using thighs, they’re more forgiving and can simmer a bit longer without drying out.
Variations & Adaptations
One of the best things about this recipe is how adaptable it is. Here are some variations I’ve tried and loved:
Make it vegetarian: Skip the chicken and use vegetable broth instead. Add an extra can of beans and a cup of frozen corn for texture and sweetness. The chili will still be creamy and satisfying—I’ve served this version to meat-eaters who didn’t even miss the chicken.
Spice it up: If you want more heat, add a diced jalapeño along with the onion, or use hot green chiles instead of mild. You can also stir in a teaspoon of chili powder or a pinch of cayenne pepper. My brother-in-law adds a whole chopped serrano pepper, and honestly, it’s delicious if you can handle the heat.
Creamy version: For an extra-indulgent bowl, stir in ½ cup of heavy cream or full-fat coconut milk at the end. This makes it even richer and more luxurious—perfect for when you need maximum comfort. I do this sometimes on really cold days when I want something extra special.
Slow cooker adaptation: Sauté the onion and garlic on the stovetop first, then transfer everything except the lime juice to a slow cooker. Cook on low for 4-6 hours or high for 2-3 hours. Shred the chicken and stir in the lime juice before serving. This is great for busy days when you want dinner ready when you walk in the door.
Add more veggies: Throw in a diced zucchini, a handful of spinach, or some chopped bell peppers along with the onion. It’s an easy way to boost the nutritional content and add more color to the bowl. I often add a can of drained hominy for extra texture and a slightly sweet flavor.
Serving & Storage Suggestions
This white chicken chili is incredibly versatile when it comes to serving. Here’s how I like to enjoy it:
Serving temperature: Serve it piping hot, straight from the pot. The warmth is part of the comfort factor—it’s the kind of meal that warms you from the inside out. Ladle it into deep bowls so nothing spills over the sides.
Toppings bar: Set out small bowls of fresh cilantro, diced avocado, shredded Monterey Jack cheese, sour cream, and tortilla chips. Let everyone customize their own bowl. I’ve found that this makes even picky eaters happy because they can control what goes in.
Perfect pairings: Serve with warm cornbread, crusty bread for dipping, or a simple side salad dressed with lime vinaigrette. A cold beer or a glass of crisp white wine pairs beautifully with the mild heat of the green chiles. For non-alcoholic options, try a sparkling water with lime or a warm cup of tea.
Storage: Leftovers keep well in an airtight container in the refrigerator for up to 4 days. The flavors actually get better as they meld together overnight. I often make a double batch on purpose just for the leftovers.
Reheating: Reheat gently on the stovetop over medium-low heat, stirring occasionally. Add a splash of broth or water if it’s too thick. You can also microwave individual portions in 30-second intervals, stirring between each. The chili may thicken as it sits, so don’t be surprised if you need to thin it out a bit.
Freezing: This chili freezes beautifully. Let it cool completely, then transfer to freezer-safe containers or bags. It will keep for up to 3 months. Thaw overnight in the refrigerator before reheating. I like to freeze it in individual portions for easy lunches.
Nutritional Information & Benefits
This white chicken chili isn’t just delicious—it’s also packed with nutrients that make you feel good about eating it. Here’s what you’re getting in each serving:
| Nutrient | Amount Per Serving (approx.) |
|---|---|
| Calories | 320 |
| Protein | 32g |
| Carbohydrates | 28g |
| Fiber | 8g |
| Fat | 8g |
| Sodium | 680mg (varies with broth) |
The white beans are a fantastic source of fiber and plant-based protein, which helps keep you full and satisfied. Chicken provides lean protein that supports muscle health and keeps your energy steady. Green chiles are rich in vitamin C and capsaicin, which can boost metabolism and support immune health. And the lime juice adds a dose of vitamin C while helping your body absorb iron from the beans.
This recipe is naturally gluten-free and can be made dairy-free by skipping the cheese and sour cream toppings. It’s also relatively low in fat compared to traditional chili recipes that use heavy cream or lots of cheese. For me, knowing that this comfort food also nourishes my body makes it even better.
Conclusion
This easy white chicken chili has become a staple in my kitchen for good reason. It’s the kind of recipe that delivers on every level—comforting, flavorful, and surprisingly simple to make. Whether you’re feeding a family on a busy weeknight or just craving something warm and cozy on a cold day, this chili never disappoints.
I love how forgiving this recipe is. You can tweak it based on what you have on hand, adjust the spice level to your liking, and it still turns out amazing every time. The fact that it comes together in about 30 minutes with basic pantry ingredients makes it a winner in my book.
I’d love to hear how this recipe turns out for you! Leave a comment below and let me know what toppings you used, or share a photo of your bowl on Pinterest. Did you try any variations? Did you add something unexpected that worked? Drop your questions and stories in the comments—I read every single one and I’m always excited to hear about your kitchen adventures. Happy cooking, friends!
Frequently Asked Questions
Can I use rotisserie chicken instead of cooking raw chicken?
Absolutely! Using rotisserie chicken is a great time-saver. Simply shred about 2-3 cups of cooked chicken and add it to the pot after simmering the broth and beans for 15 minutes. Let it heat through for about 5 minutes before adding the lime juice. This is my go-to method when I’m really short on time.
Can I make this in an Instant Pot?
Yes, you can! Use the sauté function to cook the onion and garlic, then add the remaining ingredients except the lime juice. Pressure cook on high for 10 minutes with natural release. Shred the chicken and stir in the lime juice. The texture will be slightly different—a bit more brothy—but still delicious.
Is this chili spicy?
Not really. The mild green chiles add a gentle warmth without any significant heat. Kids and spice-sensitive adults usually enjoy it without any issues. If you want more heat, add a diced jalapeño or use hot green chiles. The beauty of this recipe is that you can adjust it to your tolerance level.
Can I use dried beans instead of canned?
You can, but it will take much longer. You’ll need to soak 1 cup of dried beans overnight, then cook them separately until tender before adding them to the chili. This adds about 1-2 hours to the total cooking time. Canned beans are more convenient and work perfectly for this quick recipe.
How can I make this chili thicker?
If you prefer a thicker chili, mash more of the beans before adding them to the pot. You can also let it simmer uncovered for an additional 10-15 minutes to reduce the liquid. Another trick is to stir in a tablespoon of cornstarch mixed with an equal amount of cold water, then simmer for a few more minutes until thickened.
Pin This Recipe!

Easy White Chicken Chili with Green Chiles (Best Recipe!)

This creamy, comforting white chicken chili comes together in about 30 minutes with simple pantry ingredients. The secret is mashing some of the beans to create a velvety broth without any dairy.
- Prep Time: 10 minutes
- Cook Time: 20 minutes
- Total Time: 30 minutes
- Yield: 4 servings 1x
- Category: Main Course
- Cuisine: American
Ingredients
- 1 pound boneless, skinless chicken breasts or thighs
- 2 cans (15 ounces each) cannellini beans or great northern beans, drained and rinsed
- 2 cans (4 ounces each) diced green chiles
- 4 cups low-sodium chicken broth
- 1 medium yellow onion, diced
- 4 cloves garlic, minced
- 1 teaspoon ground cumin
- 1 teaspoon dried oregano
- ½ teaspoon smoked paprika
- Salt and black pepper to taste
- 1 fresh lime, juiced
- 1 tablespoon olive oil
- Optional toppings: fresh cilantro, diced avocado, shredded Monterey Jack cheese, sour cream, tortilla chips, sliced jalapeños
Instructions
- Prep your ingredients first. Dice the onion, mince the garlic, drain and rinse the beans, and juice the lime.
- Mash half the beans. Take one can of drained beans and mash them with a potato masher or fork until they form a chunky paste. Leave the other can whole.
- Heat your pot over medium heat. Add 1 tablespoon of olive oil and let it shimmer for about 30 seconds.
- Sauté the aromatics. Add the diced onion and cook for 4-5 minutes until soft and translucent. Add the minced garlic and cook for another 30 seconds until fragrant.
- Add the spices. Sprinkle in the cumin, oregano, and smoked paprika. Stir constantly for about 30 seconds to toast the spices.
- Add the chicken. Place the chicken directly into the pot. Pour in the chicken broth, then add the whole beans, mashed beans, and both cans of green chiles. Stir together gently.
- Bring to a simmer. Increase heat to high and bring to a gentle boil. Reduce heat to medium-low and let simmer uncovered for 15-20 minutes until chicken is cooked through.
- Shred the chicken. Remove chicken from pot and shred with two forks. Return shredded chicken to the pot.
- Add the lime juice and stir to combine. Taste and adjust seasoning with salt and pepper.
- Remove from heat and let rest for 5 minutes before serving.
Notes
For best texture, use cannellini beans. Don’t skip mashing half the beans—it creates creaminess without dairy. Toast spices to deepen flavor. Use low-sodium broth to control salt. Let chili rest 5 minutes before serving. Leftovers keep up to 4 days in the fridge or freeze for up to 3 months.
Nutrition
- Serving Size: 1 bowl (about 1.5 cu
- Calories: 320
- Sugar: 4
- Sodium: 680
- Fat: 8
- Saturated Fat: 2
- Carbohydrates: 28
- Fiber: 8
- Protein: 32
Keywords: white chicken chili, easy chili, green chiles, quick dinner, comfort food, gluten-free, dairy-free option