Love this? Save it for later!
Share the inspiration with your friends
My youngest swore they hated Halloween cupcakes. For three years straight. Not the candy, not the costumes—just the cupcakes. “Too much frosting,” they’d say, pushing the plate away. “It’s just sugar on sugar.” I’d nod and eat theirs, because honestly, what else could I do? Then last October, I was testing a new vanilla recipe for a bake sale, and I found them standing on a stool, finger deep in the bowl, licking off the buttercream. “This one’s different,” they mumbled, caught red-handed. That’s when I knew we had something. These ghost cupcakes aren’t just another Halloween novelty—they’re the ones that turned a skeptic into a believer. Maybe you’ve got a little Halloween grinch at your table too. Let me tell you how I made peace with the holiday, one fluffy cupcake at a time.
Why You’ll Love This Recipe
I’ve tested this recipe seven times to get it just right. Seven batches of cupcakes, seven rounds of feedback from actual kids. Here’s why this version wins every time:
- Budget-Friendly Ingredients: Everything comes from a standard grocery run. No specialty baking shops required—I promise.
- Quick & Easy: From start to finish, you’re looking at about 45 minutes. That includes cooling time. Perfect for after-school baking sessions.
- Simple Decorating: No piping bags? No problem. A plastic sandwich bag with the corner snipped off works beautifully.
- Kid-Approved Flavor: The cake is moist without being greasy, and the frosting is sweet but not cloying. I’ve seen three-year-olds and teenagers go back for seconds.
- Leftovers Reheat Well: Pop one in the microwave for 10 seconds the next day, and it tastes fresh-baked. That’s a game-changer for busy Halloween week.
What makes these ghost cupcakes different? It’s the buttermilk in the batter. That tiny trick gives you a tender crumb that stays soft for days. Plus, the cream cheese in the frosting cuts the sweetness just enough so kids aren’t bouncing off the walls after one cupcake. Well, maybe a little bounce. But worth it.
This is the recipe that made my Halloween-hating kid ask, “Can we make these again next weekend?” That’s the kind of magic I want for your kitchen too.
What Ingredients You Will Need
This recipe uses simple, affordable ingredients that most home bakers already have in their pantry. Nothing fancy here—just smart choices that deliver big flavor without breaking your Halloween budget.
For the Cupcakes
- 1 ½ cups all-purpose flour (spooned and leveled—don’t scoop straight from the bag)
- 1 ¼ teaspoons baking powder
- ½ teaspoon baking soda
- ½ teaspoon salt
- ¾ cup granulated sugar
- ½ cup unsalted butter, softened (I use Land O’Lakes—consistent results every time)
- 2 large eggs, room temperature
- 1 ½ teaspoons vanilla extract
- ½ cup buttermilk, room temperature (adds incredible tenderness)
For the Ghost Frosting
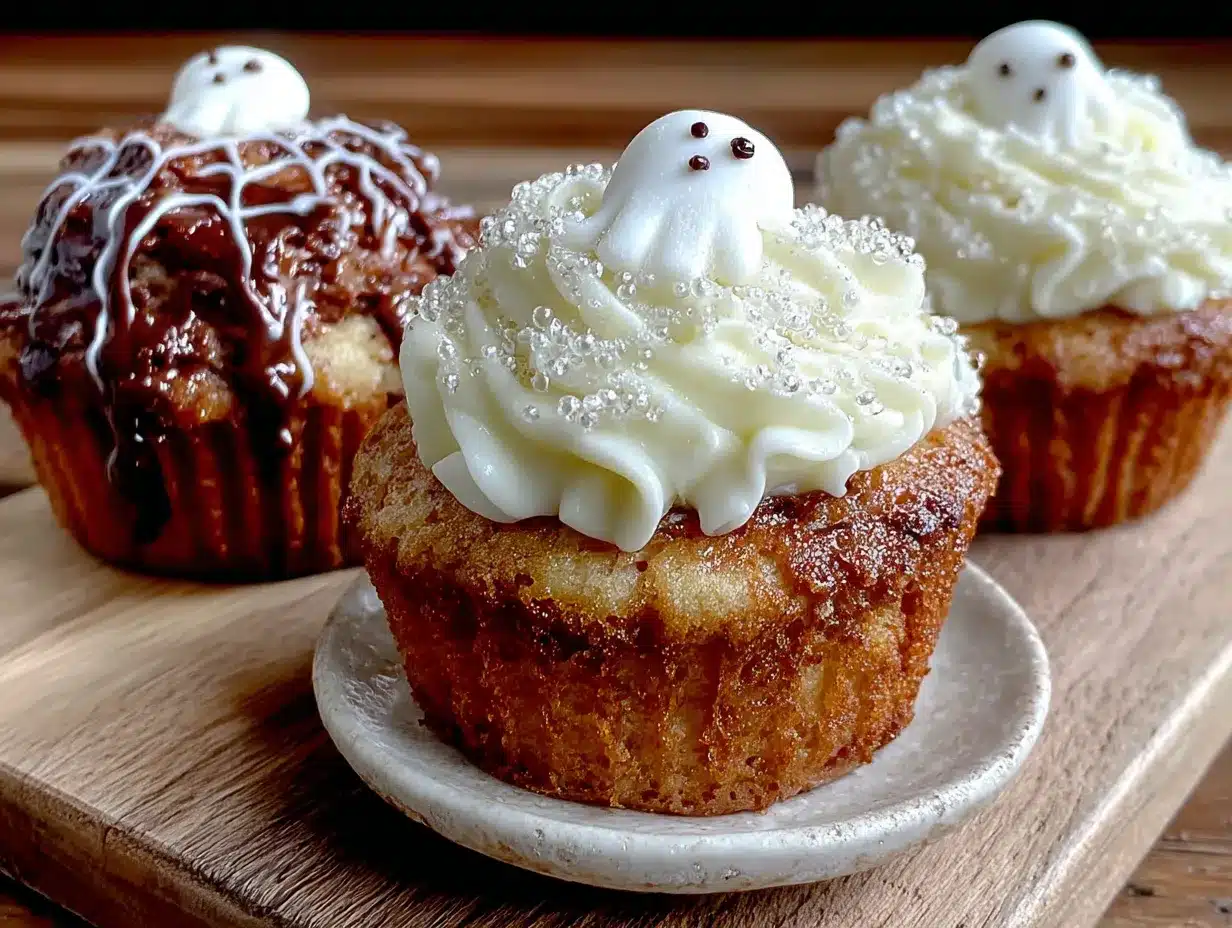
- ½ cup unsalted butter, softened
- 4 ounces cream cheese, softened (full-fat works best for stability)
- 3 cups powdered sugar
- 1 teaspoon vanilla extract
- 1-2 tablespoons milk (as needed for consistency)
For the Ghost Faces
- Mini chocolate chips (about 24-30, for eyes and mouths)
Ingredient Tips: If you don’t have buttermilk on hand, you can make a quick substitute by adding 1 ½ teaspoons of lemon juice or white vinegar to ½ cup of regular milk. Let it sit for 5 minutes until it curdles slightly. It works like a charm. For the cream cheese, I recommend Philadelphia brand—it gives the smoothest frosting without lumps. And please, use real vanilla extract. The imitation stuff has a chemical aftertaste that kids notice more than adults do.
Equipment Needed
You don’t need a professional bakery setup for these ghost cupcakes. Here’s what I use:
- Muffin tin (standard 12-cup)
- Paper cupcake liners (white ones work best for the ghost look)
- Mixing bowls (one large, one medium)
- Electric hand mixer (or a stand mixer if you have one)
- Measuring cups and spoons
- Rubber spatula
- Wire cooling rack
- Piping bag or zip-top bag
- Toothpick or small skewer (for placing chocolate chips)
I’ve made these with just a whisk and a wooden spoon when my mixer was on the fritz. The texture was slightly denser but still delicious. If you’re on a tight budget, skip the piping bag and use a sturdy zip-top bag instead. Snip a tiny corner off and you’re in business. My only splurge recommendation is a good cooling rack—it prevents soggy bottoms, and nobody wants a sad ghost cupcake.
Preparation Method
Let’s make some ghost cupcakes. I’ve broken this down so even first-time bakers can follow along without stress.
- Preheat and Prep: Preheat your oven to 350°F (175°C). Line your muffin tin with 12 paper liners. I like to set everything out before I start—it makes the whole process smoother.
- Whisk Dry Ingredients: In a medium bowl, whisk together the flour, baking powder, baking soda, and salt. Set this aside. Whisking aerates the flour and ensures even distribution of the leavening agents.
- Cream Butter and Sugar: In a large bowl, beat the softened butter and granulated sugar together until light and fluffy. This takes about 3-4 minutes with an electric mixer on medium speed. Scrape down the sides halfway through. You’re looking for a pale, creamy texture that holds its shape slightly.
- Add Eggs and Vanilla: Beat in the eggs one at a time, mixing well after each addition. Add the vanilla extract. The mixture might look slightly curdled at this point—that’s normal. Don’t panic.
- Alternate Dry and Wet: With the mixer on low speed, add about one-third of the flour mixture. Mix until just combined. Add half the buttermilk. Mix. Repeat with another third of flour, then the remaining buttermilk, then the last of the flour. Stop mixing as soon as the flour disappears. Overmixing creates tough cupcakes.
- Fill the Liners: Divide the batter evenly among the 12 liners. I use a cookie scoop for this—it keeps portions consistent. Each liner should be about two-thirds full. Don’t overfill, or you’ll get mushroom tops that make ghost decorating tricky.
- Bake: Bake for 18-22 minutes, or until a toothpick inserted in the center comes out clean or with a few moist crumbs. The tops should be lightly golden and spring back when touched. My oven runs hot, so I check at 18 minutes.
- Cool Completely: Let the cupcakes cool in the pan for 5 minutes, then transfer them to a wire rack. Wait until they’re completely cool before frosting. Warm cupcakes turn frosting into a melty mess. I’ve learned this the hard way—twice.
- Make the Frosting: While the cupcakes cool, beat the softened butter and cream cheese together until smooth. Gradually add the powdered sugar, one cup at a time, beating on low speed. Add the vanilla and milk, then beat on medium-high for 2 minutes until light and fluffy. If the frosting seems too stiff, add another tablespoon of milk. Too loose? Add a little more powdered sugar.
- Pipe the Ghosts: Transfer the frosting to a piping bag fitted with a large round tip (or snip the corner of a zip-top bag). Pipe a tall swirl on each cupcake, starting from the outside and working inward. The goal is a rounded, ghost-like dome. Don’t worry about perfection—ghosts are supposed to look a little wonky.
- Add Faces: Immediately press two mini chocolate chips into each ghost for eyes and one or two for a mouth. Use a toothpick to adjust their positions if needed. Work quickly before the frosting sets.
- Chill and Serve: Refrigerate the decorated cupcakes for 15-20 minutes to set the frosting. This makes them easier to transport and gives the chocolate chips a chance to stick firmly.
Cooking Tips & Techniques
I’ve made plenty of mistakes with ghost cupcakes over the years. Here’s what I’ve learned so you don’t have to repeat my errors.
Room Temperature Ingredients Matter: Cold butter doesn’t cream properly, and cold buttermilk can curdle the batter. Take everything out of the fridge 30 minutes before you start. Set a timer if you’re forgetful like me.
Don’t Overmix the Batter: Once flour hits liquid, gluten starts developing. Mix until you don’t see white streaks anymore, then stop. Lumpy batter is okay. Overmixed batter gives you hockey pucks instead of cupcakes.
The Toothpick Test Isn’t Foolproof: If you insert a toothpick and it comes out wet with batter, bake longer. If it comes out dry, you’re done. But if it comes out with a few moist crumbs attached? That’s perfect. Take them out immediately.
Frosting Consistency is Key: Your ghost frosting should be thick enough to hold its shape but soft enough to pipe smoothly. If it’s too stiff, your ghosts will look like pointy mountains. Add milk one teaspoon at a time until it flows like soft-serve ice cream.
Work in Batches: If you’re making a double batch for a party, cool and frost one batch while the other bakes. Multitasking keeps the process moving and prevents a mountain of unfrosted cupcakes from staring at you accusingly.
One time I forgot the baking powder entirely. The cupcakes came out flat as pancakes. We called them ghost pucks and ate them with extra frosting. Sometimes mistakes turn into happy accidents.
Variations & Adaptations
These ghost cupcakes are endlessly adaptable. Here are a few ways I’ve customized them over the years.
Chocolate Ghost Cupcakes: Substitute ¼ cup of the flour with ¼ cup of unsweetened cocoa powder. Reduce the baking powder to 1 teaspoon. The chocolate version is my personal favorite—it looks like little chocolate ghosts rising from a cocoa graveyard.
Gluten-Free Option: Use a 1:1 gluten-free baking flour blend. I’ve had good results with Bob’s Red Mill. Add an extra tablespoon of buttermilk since gluten-free flours tend to absorb more moisture. The texture is slightly more crumbly but still delicious.
Dairy-Free Adaptation: Swap the butter for vegan butter sticks, use dairy-free cream cheese, and replace the buttermilk with almond milk mixed with 1 ½ teaspoons of lemon juice. The frosting won’t be quite as stable, so refrigerate the decorated cupcakes for 30 minutes before serving.
Spooky Sprinkle Ghosts: Before adding the chocolate chip faces, roll the frosted tops in black or orange sprinkles. Then add the eyes and mouth. My kids love this version because every ghost looks completely different.
Mini Ghosts: Use a mini muffin tin and bake for 10-12 minutes instead of 18-22. These are perfect for classroom parties where kids want to grab and go. You’ll get about 24 mini ghosts from one batch of batter.
Serving & Storage Suggestions
These ghost cupcakes are best served at room temperature. The frosting softens slightly, and the cake feels extra tender. If you’ve refrigerated them, let them sit out for 20 minutes before serving.
Presentation Ideas: Arrange the cupcakes on a black platter or a white cake stand for maximum ghost effect. Add some fake spiderwebs around the base for a spooky touch. I’ve also placed them on a bed of shredded coconut dyed green with food coloring—it looks like ghost grass.
Storage: Store undecorated cupcakes in an airtight container at room temperature for up to 3 days. Frosted cupcakes should be refrigerated in a single layer (or with parchment between layers) for up to 4 days. The frosting gets firmer when cold, which actually makes the ghosts look more defined.
Freezing: Unfrosted cupcakes freeze beautifully for up to 3 months. Wrap each one individually in plastic wrap, then place them in a freezer bag. Thaw at room temperature for about an hour before frosting. I’ve also frozen frosted ghosts (without the chocolate chips) for up to 2 months. Add the faces after thawing.
Reheating: Pop a single cupcake in the microwave for 10-12 seconds. It tastes like it just came out of the oven. Don’t overheat, or the frosting will melt into a ghost puddle.
The flavors actually deepen overnight. If you can resist eating them all on day one, day two ghosts are even better. The buttermilk really works its magic overnight.
Nutritional Information & Benefits
Let’s be honest—these are cupcakes, not health food. But I’ve made some smart choices to keep them reasonable.
Per Cupcake (approximate): 320 calories, 16g fat (10g saturated), 42g carbohydrates, 3g protein, 28g sugar, 1g fiber. These numbers are estimates and will vary based on your specific ingredients and portion sizes.
Health Highlights: The buttermilk adds calcium and probiotics (in small amounts). Cream cheese provides a bit of protein and calcium. And honestly? The joy of making something special with your kids has its own mental health benefits. I stand by that.
Dietary Notes: This recipe contains wheat, dairy, and eggs. It’s not suitable for vegan or dairy-free diets without the substitutions listed above. For nut-free households, double-check your chocolate chip labels—some brands process nuts in the same facility.
I’m not a nutritionist, just a mom who believes in balance. We eat these on Halloween and maybe once or twice during the month. Everything in moderation, including moderation.
Conclusion
These ghost cupcakes turned my Halloween skeptic into a believer. That’s not an exaggeration—my youngest now asks for them every October, and last year they helped decorate the entire batch without complaint. There’s something magical about finding a recipe that pleases everyone at the table, from picky kids to budget-conscious parents.
The best part? You can make them your own. Add sprinkles, change the frosting color, make them chocolate—the base recipe is forgiving and adaptable. That’s the kind of recipe worth keeping in your back pocket.
I’d love to hear how your ghost cupcakes turn out. Did your kids help decorate? Did you try any fun variations? Drop a comment below and share your spooky creations. And if you’re looking for more Halloween baking ideas, check out our spider web brownies or pumpkin patch cookies for a full spooky spread. Happy Halloween, friends! May your ghosts be fluffy and your frosting be plentiful.
Frequently Asked Questions
Can I make these ghost cupcakes ahead of time?
Absolutely. Bake the cupcakes up to 2 days in advance and store them unfrosted in an airtight container. Frost and decorate on the day you plan to serve them for the best presentation. The frosting stays fresh for up to 4 days in the fridge, so you can also make it ahead.
Why did my ghost cupcakes sink in the middle?
Sinking usually happens when the oven door is opened too early or the cupcakes are underbaked. Wait until the 18-minute mark to check on them, and use the toothpick test to confirm doneness. Also, make sure your baking powder and baking soda are fresh—old leavening agents lose their power.
Can I use a boxed cake mix instead?
You can, but the texture won’t be the same. Boxed mixes contain preservatives and stabilizers that make cakes denser. If you’re short on time, use a white cake mix and add ½ cup of buttermilk in place of the water called for on the box. That trick improves the flavor significantly.
How do I get smooth ghost shapes?
The key is frosting consistency. If your frosting is too stiff, it will hold ridges and peaks. Add milk one teaspoon at a time until it pipes smoothly. Also, use a large round piping tip (or a zip-top bag with a generous corner snipped off) for the smoothest results. Practice on a plate first if you’re nervous.
Can I freeze these ghost cupcakes with the frosting on?
Yes, but leave the chocolate chip faces off until after thawing. Freeze the frosted ghosts in a single layer on a baking sheet for 1 hour, then transfer them to a freezer-safe container. Thaw in the refrigerator overnight, then add the chocolate chip faces just before serving. The chocolate chips can sweat and smear if frozen on the frosting.
Pin This Recipe!
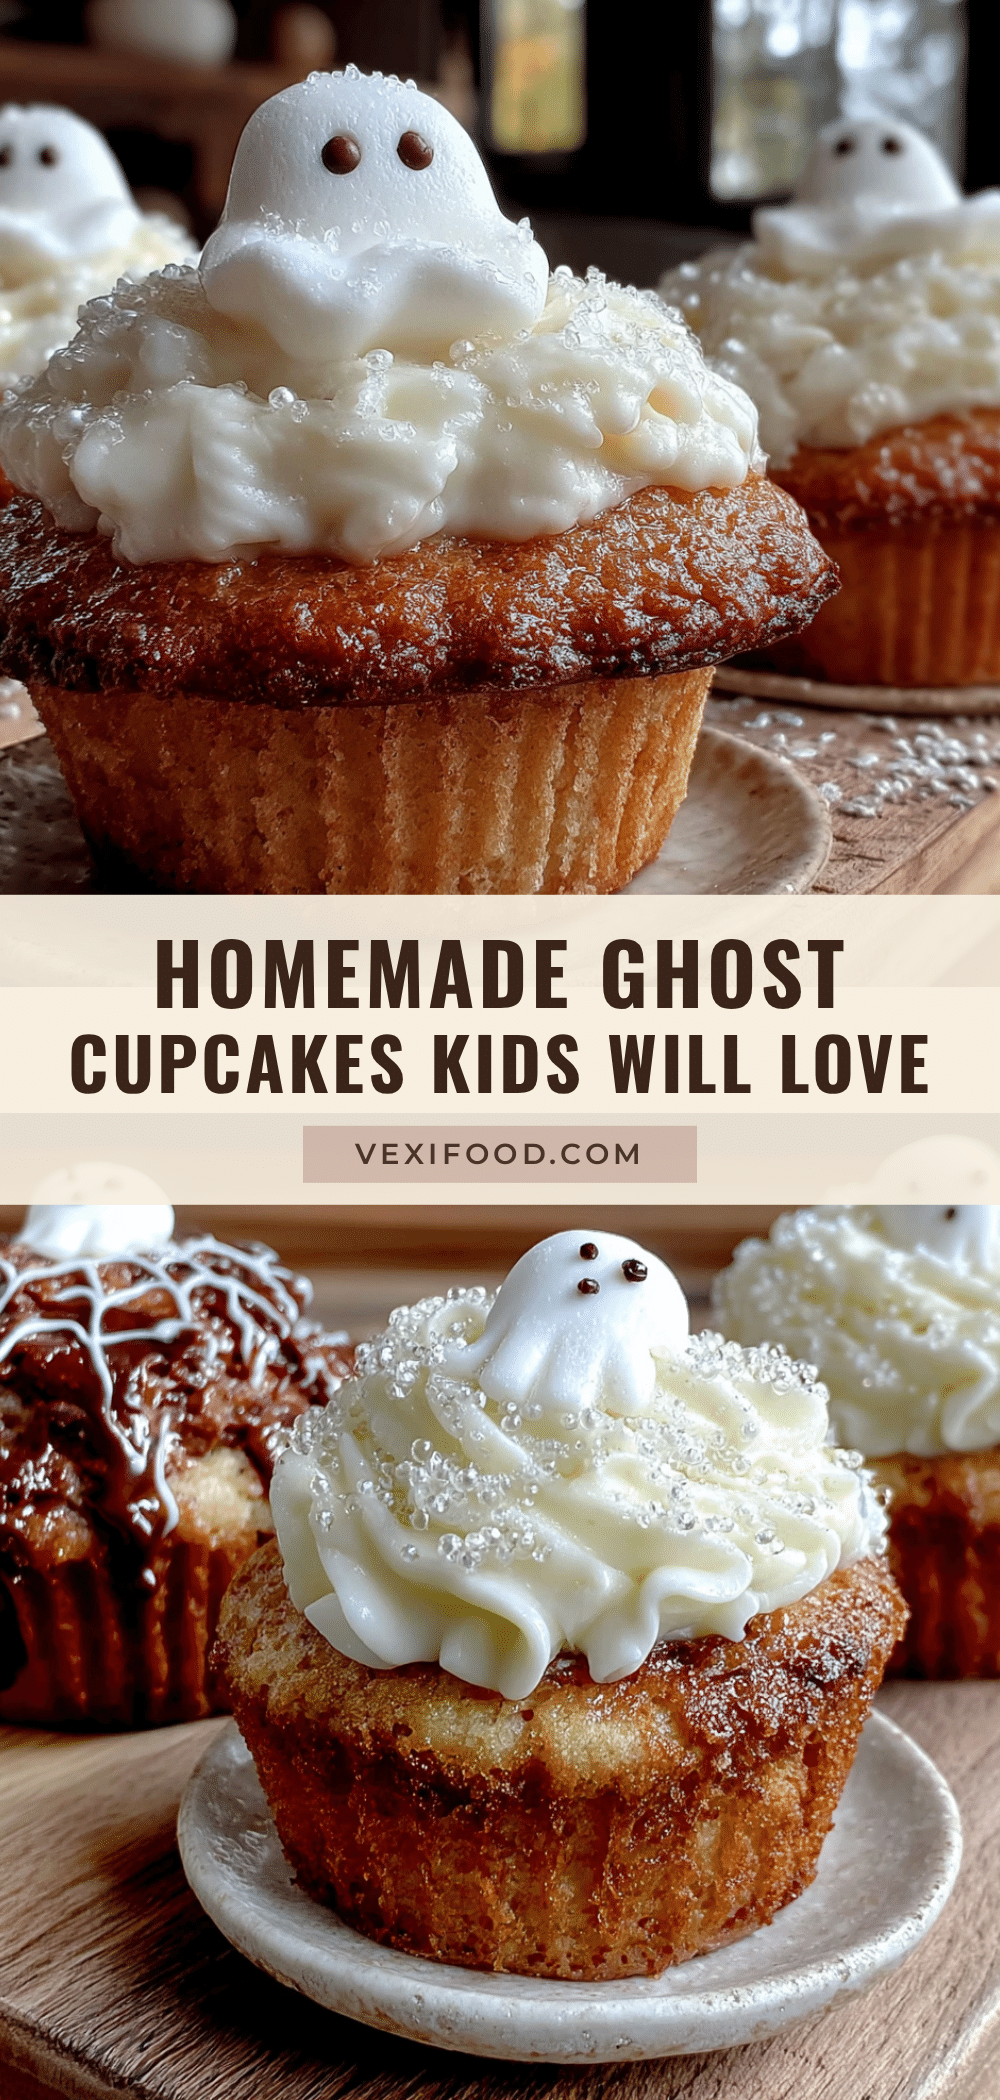
Homemade Ghost Cupcakes: Easy Halloween Treat for Kids
These ghost cupcakes are moist, tender, and topped with a creamy cream cheese frosting. They turned a Halloween skeptic into a believer and are perfect for after-school baking sessions with kids.
- Prep Time: 15 minutes
- Cook Time: 20 minutes
- Total Time: 45 minutes
- Yield: 12 cupcakes 1x
- Category: Dessert
- Cuisine: American
Ingredients
- 1 ½ cups all-purpose flour (spooned and leveled)
- 1 ¼ teaspoons baking powder
- ½ teaspoon baking soda
- ½ teaspoon salt
- ¾ cup granulated sugar
- ½ cup unsalted butter, softened
- 2 large eggs, room temperature
- 1 ½ teaspoons vanilla extract
- ½ cup buttermilk, room temperature
- ½ cup unsalted butter, softened (for frosting)
- 4 ounces cream cheese, softened (full-fat)
- 3 cups powdered sugar
- 1 teaspoon vanilla extract (for frosting)
- 1–2 tablespoons milk (as needed for consistency)
- Mini chocolate chips (about 24-30, for eyes and mouths)
Instructions
- Preheat oven to 350°F (175°C). Line a muffin tin with 12 paper liners.
- In a medium bowl, whisk together flour, baking powder, baking soda, and salt. Set aside.
- In a large bowl, beat softened butter and granulated sugar together until light and fluffy, about 3-4 minutes with an electric mixer on medium speed. Scrape down sides halfway through.
- Beat in eggs one at a time, mixing well after each addition. Add vanilla extract. Mixture may look slightly curdled.
- With mixer on low speed, add about one-third of the flour mixture, mixing until just combined. Add half the buttermilk and mix. Repeat with another third of flour, remaining buttermilk, then last of flour. Stop mixing as soon as flour disappears.
- Divide batter evenly among 12 liners, filling each about two-thirds full.
- Bake for 18-22 minutes, or until a toothpick inserted in center comes out clean or with a few moist crumbs. Tops should be lightly golden and spring back when touched.
- Let cupcakes cool in pan for 5 minutes, then transfer to a wire rack to cool completely.
- While cupcakes cool, make frosting: Beat softened butter and cream cheese together until smooth. Gradually add powdered sugar, one cup at a time, beating on low speed. Add vanilla and milk, then beat on medium-high for 2 minutes until light and fluffy. Adjust consistency with additional milk or powdered sugar if needed.
- Transfer frosting to a piping bag fitted with a large round tip (or snip corner of a zip-top bag). Pipe a tall swirl on each cupcake, starting from outside and working inward, to form a ghost-like dome.
- Immediately press two mini chocolate chips into each ghost for eyes and one or two for a mouth. Use a toothpick to adjust positions if needed.
- Refrigerate decorated cupcakes for 15-20 minutes to set frosting before serving.
Notes
Room temperature ingredients matter: take everything out of the fridge 30 minutes before starting. Don’t overmix the batter; mix until just combined. For the toothpick test, a few moist crumbs attached means perfect doneness. Frosting consistency should be like soft-serve ice cream. Work in batches if making a double batch. If you don’t have buttermilk, add 1 ½ teaspoons lemon juice or white vinegar to ½ cup regular milk and let sit for 5 minutes. Use real vanilla extract for best flavor.
Nutrition
- Serving Size: 1 cupcake
- Calories: 320
- Sugar: 28
- Sodium: 200
- Fat: 16
- Saturated Fat: 10
- Carbohydrates: 42
- Fiber: 1
- Protein: 3
Keywords: ghost cupcakes, Halloween cupcakes, easy Halloween treat, kid-friendly cupcakes, cream cheese frosting, buttermilk cupcakes