Love this? Save it for later!
Share the inspiration with your friends
The first time I made these Halloween sugar cookies, it was 10 PM on a Tuesday in late September. I was standing in my kitchen, covered in a fine dusting of powdered sugar, trying to wrangle a piping bag that had other plans. Honestly, I wasn’t expecting baking advice from my plumber, but there I was, on the phone with him about a clogged kitchen sink, listening to him describe exactly how to get royal icing to flood without spilling over the edges. His name is Dave, and apparently, he decorates cookies for his grandkids every single Halloween. Who knew?
That night, between running the snake through the drain and scraping butter off my counter, I realized something. Cookie decorating had always felt like this big, stressful production to me. The kind of thing you see on TV where everything is perfectly smooth and the colors match and there’s not a single shaky line in sight. But Dave didn’t talk about it like that. He talked about it like it was just… fun. A little messy, a little imperfect, but totally worth it when you see someone’s face light up over a crooked ghost with googly eyes. That conversation changed how I thought about these Halloween sugar cookies.
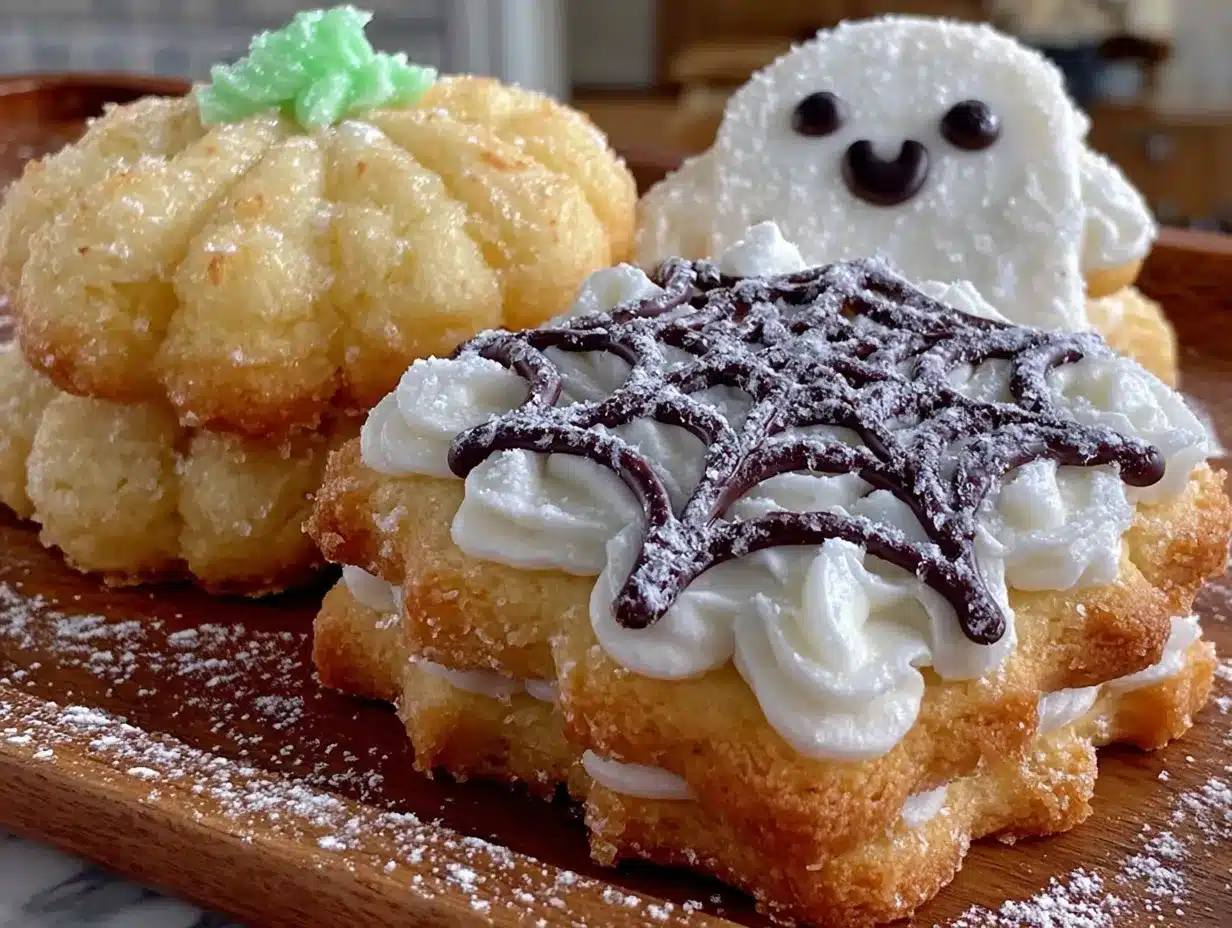
I mean, let’s be real. Halloween is supposed to be a little bit spooky and a little bit silly. Your cookies should match that energy. So I scrapped the idea of perfect, magazine-worthy decorations and started thinking about what actually makes people smile. A spider with too many legs. A pumpkin that’s slightly lopsided. A ghost that looks more like a grumpy cloud. That’s the stuff. And the easy royal icing I’m about to share with you? It sets up firm enough to stack, but it’s forgiving enough that you can fix your mistakes. Maybe you’ve been there—staring at a batch of cookies wondering if you’re about to ruin them with frosting. I promise you, this recipe is built for real people with real kitchens and real time constraints.
These cookies have become my go-to for Halloween parties, classroom treats, and those nights when you just want to make something fun. The dough comes together fast, the icing dries in a couple of hours, and the decorating possibilities are honestly endless. It’s the kind of recipe that stays with you because it actually works. No fuss, no stress, just good cookies and a little bit of laughter along the way.
Why You’ll Love These Halloween Sugar Cookies
I’ve tested this recipe more times than I care to count, and I can tell you with confidence—this is the one. These cookies hold their shape perfectly, taste absolutely delicious, and the royal icing is genuinely easy to work with. Let me break down why you’re going to love them.
- Perfectly Soft with Crisp Edges: The texture is spot on. Soft in the middle, with just enough bite on the edges to hold up to the icing. No spreading, no puffing up into weird blobs.
- Simple Pantry Ingredients: You probably already have everything you need. Butter, sugar, flour, eggs, vanilla, and a few pantry staples. No weird specialty ingredients required.
- Easy Royal Icing That Actually Works: This icing is beginner-friendly. It floods smoothly, dries with a beautiful matte finish, and stays put once it sets. No separation, no cracking, no stress.
- Perfect for Halloween Parties: Whether you’re hosting a spooky gathering, sending treats to school, or just want a fun weekend activity, these cookies fit the bill. They travel well and look impressive with minimal effort.
- Kid-Approved and Adult-Friendly: The flavor is buttery and sweet without being overwhelming. Kids love decorating them, and adults love eating them. It’s a win-win.
What makes this recipe different from the rest? It’s the balance. So many sugar cookie recipes are either too fragile to decorate or too tough to enjoy eating. This one hits the sweet spot. The dough chills quickly, rolls out without sticking, and cuts cleanly. And the icing? It’s a game-changer. I use a simple meringue powder base that gives you that professional bakery finish without the fuss of raw egg whites. It’s tested, trusted, and totally foolproof.
Honestly, this is the kind of recipe that makes you close your eyes after the first bite. It’s comfort food with a spooky twist—familiar, satisfying, and just a little bit magical. Perfect for impressing guests without the stress, or turning a simple October afternoon into something memorable.
What Ingredients You Will Need
This recipe uses simple, wholesome ingredients to deliver that perfect sugar cookie flavor and texture. Most of these are pantry staples, which makes this a great last-minute baking project when Halloween sneaks up on you.
For the Sugar Cookies
- Unsalted butter, softened (1 cup / 2 sticks / 226g) – Make sure it’s truly softened to room temperature. Cold butter won’t cream properly, and melted butter changes the texture. I like using Kerrygold for its rich flavor.
- Granulated sugar (1 cup / 200g) – Regular white sugar gives these cookies their classic sweetness and helps them hold their shape.
- Large egg (1, at room temperature) – Room temperature eggs incorporate more evenly into the batter. If you’re in a hurry, place the egg in a bowl of warm water for 5 minutes.
- Vanilla extract (1 teaspoon) – Pure vanilla extract makes a noticeable difference in flavor. I prefer Nielsen-Massey, but any good quality brand works.
- All-purpose flour (2 ½ cups / 312g) – Spoon and level your flour for accuracy. Scooping directly from the bag can pack in too much flour and make your cookies dry.
- Baking powder (½ teaspoon) – This gives the cookies a slight lift without making them puffy.
- Salt (¼ teaspoon) – Balances the sweetness and enhances the buttery flavor. Use fine sea salt for even distribution.
For the Easy Royal Icing
- Meringue powder (3 tablespoons) – This is the secret to easy royal icing. It stabilizes the icing and gives it that smooth, professional finish. Wilton brand is widely available and reliable.
- Powdered sugar (4 cups / 480g) – Sift it before measuring to avoid lumps. Trust me on this one—lumpy icing is a pain to pipe.
- Warm water (5-6 tablespoons, plus more for thinning) – The amount varies slightly depending on humidity. Start with less and add more as needed.
- Vanilla extract (½ teaspoon, clear if possible) – Clear vanilla extract keeps the icing bright white, which is great for Halloween colors. Regular vanilla works too, but it will tint the icing slightly.
- Gel food coloring (orange, black, purple, green) – Gel colors are concentrated and won’t thin out your icing like liquid drops. Americolor and Wilton both make excellent options.
Ingredient Selection Tips
For the best results, use block-style butter rather than spreadable butter in a tub. Spreadable butter has added water and air, which can throw off the cookie texture. When it comes to meringue powder, check the expiration date—old meringue powder won’t whip up properly. And for the gel food coloring, a little goes a long way. Start with a toothpick’s worth and add more until you reach your desired shade.
Substitution Guidance
If you need a dairy-free option, use a high-quality vegan butter stick (like Miyoko’s) in place of regular butter. The texture will be slightly different, but still delicious. For a gluten-free version, substitute a 1:1 gluten-free baking flour blend. I’ve had good results with King Arthur Measure for Measure. And if you don’t have meringue powder, you can use 2 large egg whites in place of the meringue powder and water, but the icing will be slightly less stable and needs to be used within a day.
Equipment Needed
You don’t need a professional bakery setup for these Halloween sugar cookies. Here’s what you’ll actually use:
- Stand mixer or hand mixer – A stand mixer makes creaming butter and sugar effortless, but a hand mixer works just fine. I’ve made these cookies with both, and the results are identical.
- Rolling pin – A standard rolling pin works. If you have adjustable rolling rings, they’re great for getting even thickness, but not required.
- Halloween cookie cutters – Ghosts, pumpkins, bats, cats, and skulls are classic. I found a set of 12 on Amazon for under $15 that covers all the basics.
- Baking sheets – Two large baking sheets lined with parchment paper or silicone baking mats. Silpat mats are my favorite for even baking.
- Piping bags or squeeze bottles – Disposable piping bags are cheap and easy. For flooding, squeeze bottles with fine tips are a game-changer. I got a set of 4 for about $8.
- Small round piping tip (#2 or #3) – For outlining and detail work. Wilton tips are widely available and affordable.
- Toothpicks – Essential for popping air bubbles and spreading icing into tight corners.
- Cooling rack – Cookies need to cool completely before icing. A wire rack speeds up the process.
If you don’t have piping bags, you can use a zip-top bag with the corner snipped off. It’s not as precise, but it works in a pinch. And for the squeeze bottles, any condiment squeeze bottle with a narrow tip will do—just make sure it’s clean and dry before using.
Preparation Method
Let’s get these Halloween sugar cookies made. I’ll walk you through every step so you know exactly what to expect.
- Cream the butter and sugar (5 minutes) – In a large mixing bowl, beat the softened butter and granulated sugar together on medium speed until light and fluffy. This takes about 3-4 minutes. Scrape down the sides of the bowl halfway through. You’re looking for a pale, airy mixture that looks like thick frosting.
- Add the egg and vanilla (2 minutes) – Add the egg and vanilla extract, then beat on medium speed until fully incorporated. The mixture might look slightly curdled at this point—that’s normal. Don’t panic.
- Mix the dry ingredients (2 minutes) – In a separate bowl, whisk together the flour, baking powder, and salt. Gradually add the dry mixture to the wet mixture, mixing on low speed until just combined. Stop as soon as you don’t see any more streaks of flour. Overmixing will make your cookies tough.
- Chill the dough (30 minutes minimum) – Divide the dough in half, flatten each half into a disc about 1 inch thick, wrap in plastic wrap, and refrigerate for at least 30 minutes. Chilling is non-negotiable here. It prevents spreading and makes the dough easier to roll. You can chill it for up to 3 days.
- Preheat and prep (10 minutes) – When you’re ready to bake, preheat your oven to 350°F (175°C). Line your baking sheets with parchment paper or silicone mats.
- Roll and cut (15 minutes) – Lightly flour your work surface and rolling pin. Roll one disc of dough to about ¼-inch thickness. Cut out your Halloween shapes and transfer them to the prepared baking sheets, spacing them about 1 inch apart. Gather the scraps, re-roll, and cut again. You can re-roll the scraps once for best results.
- Bake (8-10 minutes) – Bake for 8-10 minutes, or until the edges are just barely golden. The centers should look set but not browned. For smaller cookies, check at 7 minutes. Let the cookies cool on the baking sheet for 5 minutes, then transfer to a cooling rack to cool completely. Do not ice warm cookies—the icing will slide right off.
- Make the royal icing (10 minutes) – In a clean mixing bowl, combine the meringue powder and powdered sugar. Add 5 tablespoons of warm water and the vanilla extract. Beat on low speed until combined, then increase to medium-high and beat for 4-5 minutes. The icing should be thick, glossy, and hold a stiff peak. Add more water, ½ tablespoon at a time, if it’s too thick.
- Divide and color (5 minutes) – Divide the icing into separate bowls for each color you’re using. Add gel food coloring a little at a time until you reach your desired shade. For each color, you’ll want two consistencies: a thicker one for outlining (stiff peak) and a thinner one for flooding (flows like honey, spreads smoothly). To thin icing for flooding, add water a few drops at a time and stir gently. You want it to flow off a spoon in a ribbon that disappears back into the surface within 10 seconds.
- Decorate (30-60 minutes) – Fit your piping bags with #2 or #3 tips. Outline each cookie with the thicker icing, then fill in with the thinner flooding icing. Use a toothpick to spread the icing into corners and pop any air bubbles. Let the decorated cookies dry at room temperature for 2-4 hours, or overnight for best results. The icing should be completely hard to the touch before stacking or storing.
Cooking Tips & Techniques
I’ve made plenty of mistakes with sugar cookies over the years, so you don’t have to. Here are the things I wish someone had told me sooner.
Don’t skip the chill time. I know it’s tempting to rush, but warm dough spreads like crazy in the oven. If your first batch comes out looking more like blobs than bats, pop the remaining dough back in the fridge for 15 minutes. I learned this the hard way when my “spider” cookies came out looking like amoebas.
Use a light hand with flour when rolling. Too much flour on your work surface will dry out the dough. Use just enough to prevent sticking, and brush off any excess flour from the cut cookies before baking. A dry pastry brush works perfectly for this.
Rotate your baking sheets halfway through. Most ovens have hot spots. Rotating the sheets front to back and top to bottom at the 4-minute mark ensures even baking. Your cookies will thank you.
Keep the royal icing covered. Royal icing dries out fast. When you’re not actively using a bowl of icing, cover it with a damp paper towel or plastic wrap. Otherwise, you’ll end up with crusty, unusable icing halfway through decorating. I’ve lost count of how many times I’ve had to re-make icing because I forgot this step.
Pipe in batches. Outline and flood 5-6 cookies at a time, rather than outlining all of them first. This keeps the flooding icing from drying out before you can fill it in. The wet-on-wet technique (adding details while the base is still wet) also works much better this way.
Fix mistakes immediately. If you mess up a line or get icing where you don’t want it, use a toothpick to gently scrape it away before it dries. Dried icing is much harder to fix. Keep a bowl of water nearby to rinse your toothpick between fixes.
Variations & Adaptations
One of the best things about this recipe is how flexible it is. Here are some ways to make it your own.
Gluten-Free Version: Swap the all-purpose flour for a 1:1 gluten-free baking blend. I’ve tested this with King Arthur Measure for Measure, and the texture is remarkably close to the original. Add an extra tablespoon of butter to compensate for the drier gluten-free flour.
Vegan Halloween Cookies: Use vegan butter sticks and a flax egg (1 tablespoon ground flaxseed mixed with 3 tablespoons water, let sit for 5 minutes). The cookies will be slightly less tender, but still delicious. For the royal icing, use aquafaba (the liquid from a can of chickpeas) in place of meringue powder—3 tablespoons of aquafaba whipped with powdered sugar until stiff peaks form.
Spiced Pumpkin Variation: Add 1 teaspoon pumpkin pie spice and ¼ cup pumpkin puree to the dough. Reduce the butter by 2 tablespoons to account for the extra moisture. These cookies have a softer texture and taste incredible with a cinnamon-vanilla royal icing.
Chocolate Sugar Cookies: Replace ¼ cup of the flour with ¼ cup of unsweetened cocoa powder. These are perfect for making black cat or bat cookies without using food coloring. The chocolate flavor pairs beautifully with the vanilla royal icing.
No-Icing Option: If you’re short on time, skip the royal icing entirely. Sprinkle the cut cookies with colored sanding sugar or Halloween sprinkles before baking. They come out looking festive with zero decorating time.
Serving & Storage Suggestions
These Halloween sugar cookies are best served at room temperature. The royal icing should be completely set and hard to the touch before you serve them, which usually takes about 2-4 hours at room temperature. If you’re in a humid environment, give them a full 6-8 hours.
For presentation, arrange the cookies on a platter by shape or color. I like to group all the ghosts together, all the pumpkins together, and so on. It looks more intentional and makes the spread feel festive. You can also stack them in clear treat bags tied with orange and black ribbon for party favors.
Storage: Store undecorated cookies in an airtight container at room temperature for up to 1 week. Decorated cookies can be stored in a single layer in an airtight container for up to 2 weeks. If you need to stack them, place a sheet of parchment paper between layers. Do not refrigerate—the moisture in the fridge can make the icing tacky.
Freezing: You can freeze the unbaked cookie dough discs for up to 3 months. Wrap tightly in plastic wrap and then foil. Thaw in the refrigerator overnight before rolling and cutting. Baked, undecorated cookies also freeze well for up to 3 months. Thaw at room temperature before icing.
I actually think these cookies taste even better the next day. The flavors meld together, and the texture softens just slightly. If you can resist eating them all on day one, you’re in for a treat on day two.
Nutritional Information & Benefits
Let’s be honest—these are cookies, not health food. But here’s what you should know. Each cookie (using a medium-sized ghost cutter) contains approximately 120-150 calories, depending on the amount of icing used. They have about 6g of fat, 18g of carbohydrates, and 1g of protein per cookie.
The butter provides a small amount of vitamin A, and the eggs add a bit of protein and choline. The real benefit here is the joy factor. Baking and decorating cookies is a wonderful way to spend time with family, practice creativity, and create traditions. That has its own kind of nutritional value, if you ask me.
If you’re watching your sugar intake, you can reduce the sugar in the cookie dough by ¼ cup without affecting the texture too much. For the icing, use a thinner layer—you’ll still get the decorative effect with less sugar. And if you’re making these for a classroom party, consider using natural food colorings made from vegetables and spices. India Tree makes a great set of natural decorating colors.
As always, these cookies contain dairy, eggs, and gluten. If you have allergies, please use the substitution suggestions above. I’ve made the vegan and gluten-free versions myself, and while they’re not identical to the original, they’re still absolutely worth making.
Conclusion
These Halloween sugar cookies with easy royal icing are the kind of recipe that makes you feel like a baking pro, even if you’re just starting out. The dough is forgiving, the icing is manageable, and the decorating possibilities are endless. Whether you’re making them for a party, a classroom, or just a quiet night in with a cup of tea and a piping bag, they deliver every single time.
I love this recipe because it’s not about perfection. It’s about having fun, getting a little messy, and creating something that makes people smile. The first batch I ever made—the one I decorated while on the phone with Dave the plumber—was full of lopsided ghosts and pumpkins with too many eyes. And you know what? Everyone loved them. Because that’s the thing about Halloween. It’s supposed to be a little bit imperfect. A little bit spooky. A whole lot of fun.
I’d love to see what you create. Leave a comment below and tell me about your favorite Halloween cookie shapes, or share a photo of your decorated cookies. And if you try any of the variations, let me know how they turn out. Happy Halloween, and happy baking!
Frequently Asked Questions
Can I make the dough ahead of time?
Absolutely. The dough can be refrigerated for up to 3 days or frozen for up to 3 months. Just wrap it tightly in plastic wrap and then foil. When you’re ready to bake, let it sit at room temperature for about 10 minutes before rolling—it’ll be easier to work with.
Why did my cookies spread in the oven?
This usually happens for one of three reasons: the dough wasn’t chilled long enough, the butter was too soft, or the baking sheet was too warm. Make sure your dough chills for at least 30 minutes, and always use cool baking sheets. If you’re reusing a sheet, let it cool completely between batches.
How do I get the royal icing to the right consistency?
The key is to start thick and thin it gradually. For outlining, you want icing that holds a stiff peak. For flooding, add water a few drops at a time until the icing flows like honey and a ribbon of icing disappears back into the surface within 10 seconds. If it disappears faster, it’s too thin. If it doesn’t disappear, it’s too thick.
Can I use liquid food coloring instead of gel?
You can, but I don’t recommend it. Liquid food coloring adds extra liquid to the icing, which can throw off the consistency. You’ll need to add more powdered sugar to compensate, which changes the yield. Gel colors are more concentrated and don’t affect the texture. They’re worth the small investment.
How long do decorated cookies last?
Decorated cookies will stay fresh in an airtight container at room temperature for up to 2 weeks. The royal icing acts as a sealant, which actually helps keep the cookies from going stale. Just make sure the icing is completely dry before you store them, and don’t refrigerate them—moisture is the enemy of royal icing.
Pin This Recipe!

Halloween Sugar Cookies with Easy Royal Icing

These Halloween sugar cookies are perfectly soft with crisp edges, topped with an easy royal icing that sets firm. A forgiving recipe built for real people, perfect for spooky parties and classroom treats.
- Prep Time: 30 minutes
- Cook Time: 10 minutes
- Total Time: 1 hour 40 minutes (includes chilling and decorating time)
- Yield: 24 cookies (depending on cutter size) 1x
- Category: Dessert
- Cuisine: American
Ingredients
- 1 cup (2 sticks / 226g) unsalted butter, softened
- 1 cup (200g) granulated sugar
- 1 large egg, at room temperature
- 1 teaspoon vanilla extract
- 2 ½ cups (312g) all-purpose flour
- ½ teaspoon baking powder
- ¼ teaspoon salt
- 3 tablespoons meringue powder
- 4 cups (480g) powdered sugar, sifted
- 5–6 tablespoons warm water, plus more for thinning
- ½ teaspoon vanilla extract (clear if possible)
- Gel food coloring (orange, black, purple, green)
Instructions
- Cream the butter and sugar: In a large mixing bowl, beat the softened butter and granulated sugar together on medium speed until light and fluffy, about 3-4 minutes. Scrape down the sides of the bowl halfway through.
- Add the egg and vanilla: Add the egg and vanilla extract, then beat on medium speed until fully incorporated. The mixture might look slightly curdled—that’s normal.
- Mix the dry ingredients: In a separate bowl, whisk together the flour, baking powder, and salt. Gradually add the dry mixture to the wet mixture, mixing on low speed until just combined. Stop as soon as you don’t see any more streaks of flour.
- Chill the dough: Divide the dough in half, flatten each half into a disc about 1 inch thick, wrap in plastic wrap, and refrigerate for at least 30 minutes (up to 3 days).
- Preheat and prep: When ready to bake, preheat oven to 350°F (175°C). Line baking sheets with parchment paper or silicone mats.
- Roll and cut: Lightly flour your work surface and rolling pin. Roll one disc of dough to about ¼-inch thickness. Cut out Halloween shapes and transfer to prepared baking sheets, spacing about 1 inch apart. Gather scraps, re-roll, and cut again (re-roll scraps once for best results).
- Bake: Bake for 8-10 minutes, or until edges are just barely golden. For smaller cookies, check at 7 minutes. Let cool on baking sheet for 5 minutes, then transfer to a cooling rack to cool completely.
- Make the royal icing: In a clean mixing bowl, combine meringue powder and powdered sugar. Add 5 tablespoons of warm water and vanilla extract. Beat on low speed until combined, then increase to medium-high and beat for 4-5 minutes until thick, glossy, and holds a stiff peak. Add more water, ½ tablespoon at a time, if too thick.
- Divide and color: Divide icing into separate bowls for each color. Add gel food coloring a little at a time. For each color, prepare two consistencies: thicker for outlining (stiff peak) and thinner for flooding (flows like honey, spreads smoothly). To thin, add water a few drops at a time.
- Decorate: Fit piping bags with #2 or #3 tips. Outline each cookie with thicker icing, then fill in with thinner flooding icing. Use a toothpick to spread icing into corners and pop air bubbles. Let dry at room temperature for 2-4 hours, or overnight for best results.
Notes
Don’t skip the chill time—warm dough spreads. Keep royal icing covered with a damp paper towel to prevent drying. Pipe in batches (outline and flood 5-6 cookies at a time) for best results. Fix mistakes immediately with a toothpick before icing dries.
Nutrition
- Serving Size: 1 cookie
- Calories: 135
- Sugar: 12
- Sodium: 45
- Fat: 6
- Saturated Fat: 3.5
- Carbohydrates: 18
- Protein: 1
Keywords: Halloween sugar cookies, easy royal icing, sugar cookies, Halloween cookies, decorated cookies, spooky cookies