Love this? Save it for later!
Share the inspiration with your friends
I was supposed to be making chocolate-covered pretzels. You know, the simple kind—dip, sprinkle, done. But somewhere between melting the candy melts and realizing I’d forgotten to buy sprinkles, the whole plan fell apart. I stood there, staring at a tray of half-dipped pretzel rods, feeling that familiar panic creep in. The party was in three hours, my kitchen looked like a candy factory exploded, and I had nothing to show for it but a sticky mess.
Then I saw a single green almond sitting on the counter. Leftover from some baking project I’d abandoned weeks ago. And honestly, I don’t know what came over me. I just grabbed it, pressed it onto the end of a dipped pretzel, and laughed at how ridiculous it looked. It looked like a witch’s finger. I mean, a gnarled, creepy, slightly terrifying witch’s finger. And in that moment, I knew I’d stumbled onto something way better than plain chocolate pretzels.
Let me tell you, these Quick Witch’s Finger Pretzel Rods saved my Halloween that year. They’re the kind of recipe that makes you look like a crafty, organized parent when really you’re just a tired human who grabbed the wrong ingredient. Maybe you’ve been there—staring down a holiday deadline with nothing but a half-baked idea and a prayer. These pretzels are your answer. They come together in under 20 minutes, use stuff you probably already have, and honestly, they’re the best kind of happy accident I’ve ever made. I keep coming back to them because they remind me that sometimes the best things happen when you stop trying so hard.
Why You’ll Love This Recipe
Let’s be real for a second. Halloween treats can be a total hassle. Between the complicated fondant sculptures and the Pinterest-perfect cakes that take all day, who has the time? These Witch’s Finger Pretzel Rods are the antidote to all that stress. They’re proof that spooky doesn’t have to mean complicated.
- Quick & Easy : From start to finish, you’re looking at about 15 minutes of active work. The hardest part is waiting for the candy melts to set, and even that only takes 10 minutes in the fridge. Perfect for those “I forgot the class party is tomorrow” moments.
- Simple Ingredients : You only need four things—pretzel rods, green candy melts, slivered almonds, and a tiny bit of red gel food coloring. No special trips to a fancy baking supply store required.
- Perfect for Halloween Parties : These things disappear faster than candy corn at a kid’s party. They’re great for school events, office potlucks, or just a fun activity to do with your own little monsters at home.
- Crowd-Pleaser : I’ve brought these to three different Halloween gatherings now, and every single time, someone asks for the recipe. They’re creepy enough to be fun but tasty enough that people actually want to eat them.
- Unbelievably Delicious : The combination of salty pretzel, sweet vanilla candy coating, and crunchy almond is honestly addictive. It’s like a pretzel rod got a Halloween makeover and decided to stay.
What makes this recipe different from every other witch finger tutorial out there? It’s the texture. Most versions use almond slivers that just look like nails, but I’ve perfected the technique so the almond actually stays put and looks genuinely creepy. Plus, I’ve tested this with different candy melts—white, green, even purple—and I’ll tell you exactly which one works best so you don’t waste your money. This isn’t just another version of a Halloween treat. It’s the version that won’t make you want to throw your rolling pin across the kitchen.
There’s something about making these that just feels right for Halloween. It’s not about perfection—it’s about the fun of creating something delightfully gross-looking that tastes amazing. When my kids saw these for the first time, they actually screamed with laughter. That’s the kind of memory you can’t buy at the store.
What Ingredients You Will Need
This recipe uses simple, straightforward ingredients to deliver maximum creep factor with minimum effort. You probably already have most of these in your pantry, which is exactly how Halloween should be—no stress, just spooky fun.
- Pretzel rods : You’ll want the thick, sturdy kind—not the thin, fragile ones that snap when you look at them wrong. I prefer the Snyder’s of Hanover brand because they’re consistently thick and hold up well to dipping. Look for rods that are straight, not too curved, so they look more like actual fingers. You’ll need about 24 rods for a full batch.
- Green candy melts : This is where the magic happens. I’ve tried several brands, and Wilton’s green candy melts are my go-to. They melt smoothly, have a nice vibrant color, and don’t seize up as easily as some cheaper brands. You can also use white candy melts and add green food coloring, but honestly, the pre-colored ones save you a step and give a more consistent shade. You’ll need about 12 ounces for 24 pretzels.
- Slivered almonds : These become the fingernails, so you want the flat, wide slivers—not the tiny slivers or whole almonds. Look for Blue Diamond’s slivered almonds in the baking aisle. They’re the perfect shape and size for witch nails. You’ll need about 24 slivers, one per pretzel. (Pro tip: buy a small bag because you’ll have leftovers, and they’re great on salads.)
- Red gel food coloring : This is optional but highly recommended for that “bloody cuticle” effect. A tiny dab at the base of the almond nail makes these go from “fun” to “delightfully disturbing.” Wilton’s red gel is my favorite because it’s concentrated and doesn’t water down the candy coating.
- Optional: Cocoa powder or crushed graham crackers : If you want to make these look extra dirty or “dug up” from a grave, a light dusting of cocoa powder or crushed graham crackers adds a great earthy texture. I’ve done both, and the cocoa powder gives a more authentic “dirt” look.
Let me tell you a quick story about the first time I made these. I grabbed the wrong bag of almonds—I accidentally bought whole almonds instead of slivered ones. I spent 15 minutes trying to slice them by hand, and let me tell you, that was a disaster. My “fingernails” looked like a toddler had chewed them off. Don’t be like me. Just buy the slivered ones.
One more thing about the candy melts. If you’re in a pinch and can’t find green, you can use white candy melts and add green gel coloring. But here’s the catch—you have to use gel coloring, not liquid. Liquid food coloring will seize the candy melts and turn them into a grainy, unusable mess. I learned that the hard way. Twice.
For a dairy-free version, check the label on your candy melts. Some brands contain milk solids, but there are vegan-friendly options available. The pretzel rods themselves are typically vegan, so this is an easy swap if you need it.
Equipment Needed
You don’t need a professional pastry kitchen for these. In fact, the simpler your setup, the easier this goes. Here’s what you’ll want to have on hand.
- Microwave-safe bowl : A medium glass or ceramic bowl works best for melting the candy melts. Avoid plastic bowls—they can hold onto moisture and cause the candy to seize. I use a Pyrex measuring cup because the spout makes dipping easier.
- Baking sheet : You’ll need a flat surface to set the finished pretzels on. Line it with parchment paper or a silicone baking mat for easy cleanup. Wax paper works in a pinch, but parchment is better because the pretzels won’t stick.
- Small spatula or spoon : For stirring the candy melts and helping coat the pretzels. A silicone spatula is ideal because it won’t scratch your bowl and it scrapes the sides clean.
- Tweezers or small tongs : This sounds fancy, but trust me—your fingers will get sticky and frustrated trying to place those tiny almond slivers. A pair of kitchen tweezers (or even clean craft tweezers) makes the job so much easier.
- Toothpicks : For adding the red gel coloring detail at the base of the nail. A toothpick gives you more control than trying to squeeze from the bottle.
If you don’t have a microwave, you can melt the candy melts using a double boiler on the stovetop. Just bring an inch of water to a simmer in a small pot, place your heat-safe bowl on top (make sure it doesn’t touch the water), and stir until smooth. It takes a little longer, but it works perfectly.
I’ve made these at my sister’s house before, where she had none of the “right” equipment. I used a cereal bowl and a butter knife, and honestly? They turned out fine. Don’t let a missing tool stop you from making these.
Preparation Method
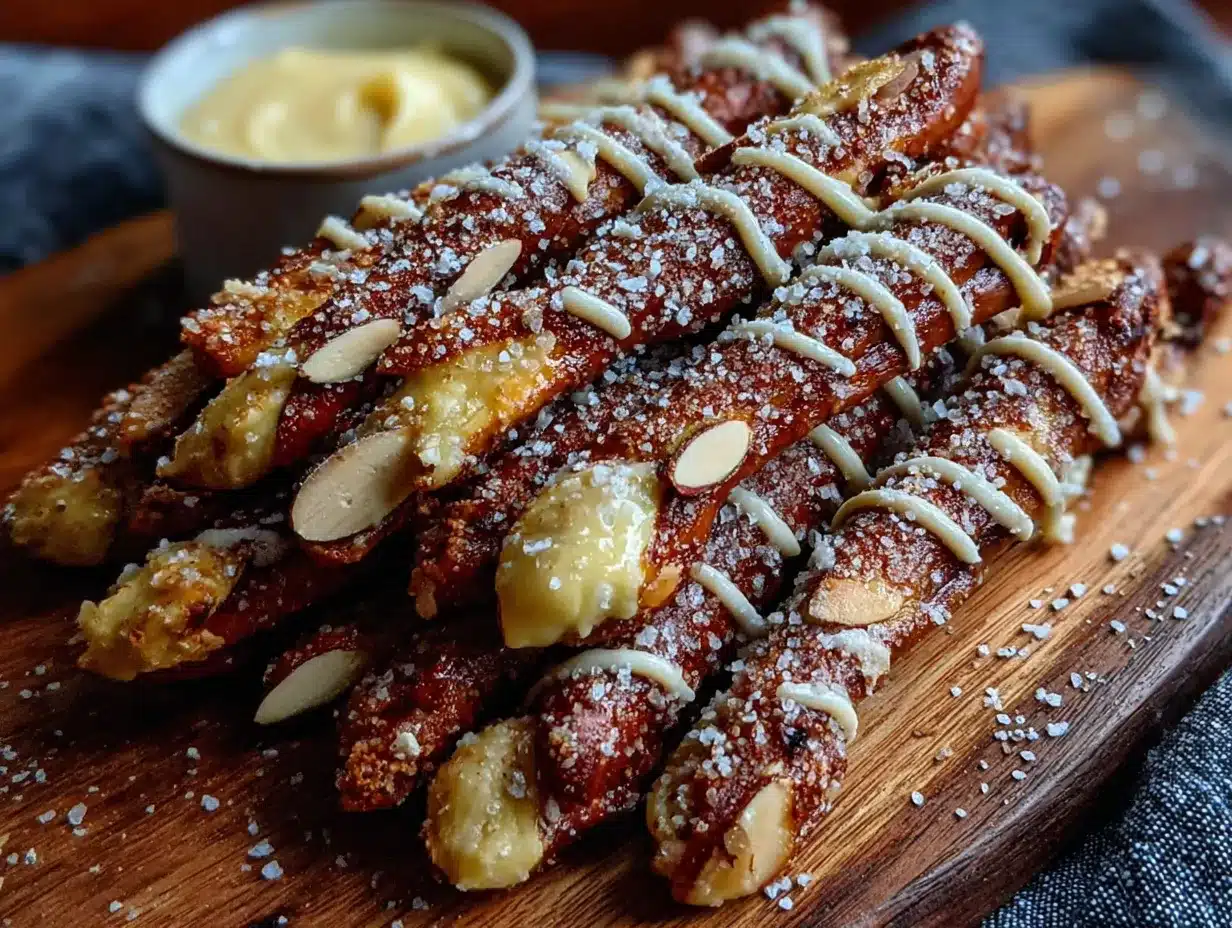
Here’s where the magic happens. Follow these steps, and you’ll have a tray of creepy, delicious witch fingers in no time. I’ve included all the little details that make the difference between “okay” and “everyone asks for the recipe.”
- Prep your workspace. Line a baking sheet with parchment paper. This is non-negotiable—if you skip the parchment, your pretzels will stick to the pan and you’ll have a sad, broken mess. Set the sheet aside where it can fit in your fridge later. Also, arrange your slivered almonds in a small bowl so they’re ready to grab. Trust me, once you start dipping, you won’t want to be hunting for almonds.
- Melt the candy melts. Pour your green candy melts into a microwave-safe bowl. Microwave in 30-second intervals at 50% power, stirring thoroughly between each interval. Don’t rush this step. I know it’s tempting to blast them on high, but that’s how you end up with burnt, lumpy candy. It usually takes me about 2-3 intervals total. The candy should be smooth and fully melted, with no lumps. If it’s too thick, you can add a teaspoon of vegetable shortening (not oil—shortening) to thin it out.
- Dip the pretzels. Hold a pretzel rod by one end and dip the other two-thirds into the melted candy. Let the excess drip off by holding it over the bowl for a few seconds. You don’t want a thick, gloppy coating—just a nice even layer. If you dip too far up, it won’t look like a finger. If you dip too little, it won’t look finished. Aim for about two-thirds of the pretzel covered.
- Add the “nail.” Immediately after dipping, place the pretzel on your parchment-lined sheet. While the candy is still wet, press a slivered almond onto the tip of the pretzel at a slight angle. You want it to look like a fingernail growing out from the end, not sitting flat on top. Gently press down so it adheres, but don’t push so hard that the almond sinks into the candy. This takes a little practice—my first few always look a bit wonky, and honestly, that adds to the creepy factor.
- Create the knuckle wrinkles. Using a toothpick or the tip of a small knife, gently drag lines across the candy coating to create “knuckle” wrinkles. You want 2-3 lines near the middle of the dipped portion. Don’t press too hard—you’re just creating a subtle indentation. If the candy has already started to set, these lines won’t hold, so work quickly.
- Add the “blood” detail. Dip a clean toothpick into your red gel food coloring and gently dab a tiny dot at the base of the almond nail. This creates the illusion of a bloody cuticle. Less is more here—you want a suggestion of blood, not a crime scene. I usually do this after I’ve finished all the pretzels so the candy has had a minute to set.
- Chill to set. Place the baking sheet in the refrigerator for 10-15 minutes, or until the candy coating is firm to the touch. Don’t skip this step—if you try to move them too soon, the coating will smudge and your beautiful knuckle wrinkles will disappear.
- Optional dirt effect. If you want the “dug up from the grave” look, lightly dust the set pretzels with a tiny bit of cocoa powder using a fine-mesh strainer. I do this right before serving so the powder doesn’t absorb into the coating and get soggy.
A few things to watch for: If your candy melts start to thicken while you’re working, pop the bowl back in the microwave for 15 seconds and stir. If the almond slivers won’t stick, your candy has cooled too much—just dip the almond in the melted candy before pressing it onto the pretzel. And if your pretzels look more like alien fingers than witch fingers, congratulations—you’ve accidentally created a new Halloween trend.
Cooking Tips & Techniques
I’ve made these pretzels more times than I care to count, and I’ve learned a few things the hard way. Let me save you some trouble.
Work in small batches. Don’t try to dip all 24 pretzels at once. I usually work in batches of 6-8. This keeps the candy melts warm and workable, and it gives you time to add the almond and knuckle details before the coating sets. If you try to do too many at once, the first ones will be hard before you get to the details, and the last ones will have lumpy coating from the candy cooling down.
Keep your almonds sorted. Before you start dipping, go through your slivered almonds and pick out the ones that are the best shape for fingernails. You want pieces that are relatively flat and wide, with a natural curve. Save the tiny, broken pieces for snacking. There’s nothing worse than being mid-dip and realizing you have no good almonds left.
Temperature matters. If your kitchen is warm, the candy melts will stay runny longer, which means your knuckle wrinkles might disappear as the coating settles. If your kitchen is cold, the candy will set too fast and your almonds won’t stick. Aim for a comfortable room temperature—about 70°F is perfect. If you’re working in a hot kitchen, pop the pretzels in the fridge for a minute between steps.
Don’t overthink the wrinkles. I used to obsess over making perfect knuckle lines, and you know what? They looked weird. Real fingers don’t have perfectly straight, evenly spaced wrinkles. They’re messy and organic. So just drag your toothpick across the coating a few times and let it be. Imperfections add character.
My biggest failure: The time I tried to make these with white chocolate chips instead of candy melts. Big mistake. White chocolate doesn’t set as hard, it’s more prone to blooming (those white streaks), and it doesn’t take food coloring as well. Plus, it’s way more expensive. Candy melts are specifically formulated for this kind of project—they set hard, they’re easy to work with, and they come in perfect Halloween colors. Just use them.
One more thing: if you’re making these with kids, expect a mess. That’s part of the fun. I let my kids do the dipping and almond placement, and I handle the knuckle wrinkles and red gel details. It’s a good division of labor that keeps everyone happy and the kitchen (mostly) intact.
Variations & Adaptations
These witch finger pretzels are surprisingly versatile. Here are some ways I’ve adapted them over the years.
Color variations. Green is classic, but you can use any color candy melts to match your party theme. Purple makes great “zombie” fingers. Orange works for a more playful Halloween look. I once made a batch with black candy melts and silver edible glitter, and they looked like witch fingers from a gothic fairy tale. Just keep in mind that darker colors hide the knuckle wrinkles better, so press a little deeper with your toothpick.
Dietary adaptations. For a gluten-free version, use gluten-free pretzel rods. They’re available at most grocery stores now, and they work just as well. The candy melts and almonds are naturally gluten-free, so this is an easy swap. For a vegan version, check your candy melts label—some brands contain milk solids. Mercken’s makes a vegan-friendly candy melt that works beautifully.
Flavor twists. Want to kick up the flavor? Try using chocolate candy melts instead of vanilla. The chocolate pairs amazingly with the salty pretzel, and it looks like dirt-covered witch fingers. I’ve also tried adding a drop of peppermint extract to the melted candy for a minty Halloween treat. Just don’t add too much—a little goes a long way, and too much extract can seize the candy.
Extra creepy details. For a more realistic look, add a few “hair” details using black licorice strings. Cut tiny pieces and press them onto the sides of the pretzel before the candy sets. I did this for a Halloween party last year, and people were genuinely unsettled. It was perfect. You can also add edible “warts” by pressing a tiny green candy sprinkle onto the knuckle area.
Different nail shapes. If you don’t have slivered almonds, you can use whole almonds (just cut them in half lengthwise) or even candy corn for a sweeter, more playful look. I tried pumpkin seeds once, and while they looked okay, they were too small to read as “fingernails.” Stick with almonds for the best effect.
Serving & Storage Suggestions
These witch finger pretzels are best served at room temperature, straight from the fridge. The candy coating should be firm but not cold-hard. I usually take them out about 5 minutes before serving so they warm up just slightly.
Presentation ideas: Arrange the pretzels on a black or dark purple platter to make the green pop. I like to place them in a “claw” shape, with all the fingernails pointing toward the center. For extra drama, scatter a few loose slivered almonds around the platter like fallen fingernails. (Gross? Yes. Effective? Absolutely.) You can also stand them upright in a small vase or jar filled with black beans or crushed Oreo “dirt” for a creepy centerpiece.
What to serve with them: These pair perfectly with a bowl of warm caramel dip or chocolate sauce. The salty-sweet combination is irresistible. For a full Halloween spread, I serve them alongside pumpkin dip and apple slices, or with a batch of spider web brownies for a complete spooky dessert table. They also go great with hot apple cider or a pumpkin spice latte.
Storage instructions: Store the pretzels in an airtight container at room temperature for up to 5 days. Do not refrigerate them long-term—the candy coating can develop condensation when you take them out, which makes them sticky. If you need to make them ahead, prepare them up to 3 days in advance and keep them in a cool, dry place. Layer them between sheets of parchment paper so the almonds don’t get knocked off.
Freezing: You can freeze these for up to a month. Place them in a single layer on a baking sheet and freeze until solid, then transfer to a freezer-safe container with parchment between layers. Thaw at room temperature for about 30 minutes before serving. The texture holds up surprisingly well, though the almond nails might loosen slightly.
Flavor development: Honestly, these taste best the day you make them. The pretzel stays crunchy, the candy coating is fresh, and the almonds have that perfect snap. After a day or two, the pretzel can start to soften slightly from the moisture in the candy coating. That’s why I recommend making these no more than 24 hours before you plan to serve them.
Nutritional Information & Benefits
Let’s be honest—these are a treat, not a health food. But here’s what you should know if you’re keeping an eye on things.
Per pretzel rod (approximate values):
- Calories: 120-140
- Total Fat: 6g
- Saturated Fat: 3g
- Carbohydrates: 17g
- Sugar: 10g
- Protein: 2g
- Sodium: 180mg
The almonds actually bring some nutritional value to the table. They’re a good source of vitamin E, magnesium, and healthy monounsaturated fats. So while these aren’t exactly a superfood, you’re getting a tiny bit of good stuff with your sugar rush.
If you’re watching your sugar intake, you can use sugar-free candy melts (available at specialty baking stores) or dark chocolate melts, which have less sugar than white or milk chocolate. Just keep in mind that sugar-free candy melts behave differently—they can be finicky to melt and don’t set as hard.
For those with allergies, note that these contain gluten (from the pretzels), tree nuts (almonds), and potentially dairy (from the candy melts). Always check labels if you’re serving to someone with food allergies. I’ve made a nut-free version using sunflower seed kernels instead of almonds, and while they don’t look quite as realistic, they still get the point across.
From a wellness perspective, I see these as a “sometimes food.” They’re for celebrations, for Halloween parties, for those moments when you want to create something fun and memorable with your family. Not everything has to be nutritious. Some things just have to be delicious and delightful.
Conclusion
These Quick Witch’s Finger Pretzel Rods are proof that you don’t need to be a professional baker to create something genuinely impressive for Halloween. They came from a moment of panic and a wrong ingredient, and now they’re one of my most-requested recipes every October. There’s something deeply satisfying about watching people’s faces go from “ew, gross” to “wait, these are actually amazing” in the span of one bite.
I love that this recipe doesn’t take itself too seriously. It’s fun. It’s a little bit ridiculous. And it’s exactly the kind of thing that makes Halloween special—not because it’s perfect, but because it’s playful. Whether you’re making these for a school party, a work event, or just a cozy night in with your family, I hope they bring you the same joy they’ve brought me.
Now I want to hear from you. Did you try these? Did your kids love them? Did you come up with a creepy variation I haven’t thought of? Drop a comment below and let me know. And if you post a photo on Pinterest or Instagram, tag me—I love seeing your spooky creations. Happy Halloween, and happy snacking!
Frequently Asked Questions
Can I make these witch finger pretzels ahead of time?
Absolutely. You can make them up to 3 days in advance. Store them in an airtight container at room temperature, layered between parchment paper. Just don’t refrigerate them long-term, or the coating might get sticky when you take them out.
My candy melts are too thick. What should I do?
Add a teaspoon of vegetable shortening (not oil or butter) and stir until smooth. The shortening will thin the candy without affecting the flavor or color. Heat the mixture for another 10 seconds in the microwave if needed.
Can I use white chocolate instead of candy melts?
You can, but I don’t recommend it. White chocolate doesn’t set as hard, it’s more prone to blooming, and it doesn’t take food coloring as well. Candy melts are specifically designed for dipping and will give you much better results.
The almonds keep falling off my pretzels. What am I doing wrong?
The candy coating is probably too cool when you’re pressing the almond on. Make sure you add the almond immediately after dipping, while the coating is still wet and warm. If the candy has started to set, dip the almond in the melted candy first, then press it onto the pretzel.
How do I get the knuckle wrinkles to show up better?
Press a little deeper with your toothpick, and make sure you do it while the candy is still soft. If the coating has started to set, the lines won’t hold. Work in small batches so you have time to add the details before the candy hardens.
Pin This Recipe!

Easy Witchs Finger Pretzel Rods: Best Halloween Treat

These Quick Witch’s Finger Pretzel Rods are a fun and easy Halloween treat made with pretzel rods, green candy melts, and slivered almonds. They come together in under 20 minutes and are perfect for parties, school events, or a spooky snack.
- Prep Time: 15 minutes
- Cook Time: 0 minutes
- Total Time: 25 minutes
- Yield: 24 servings 1x
- Category: Dessert
- Cuisine: American
Ingredients
- 24 pretzel rods (thick, sturdy kind, like Snyder’s of Hanover)
- 12 ounces green candy melts (Wilton’s recommended)
- 24 slivered almonds (flat, wide slivers, like Blue Diamond)
- Red gel food coloring (Wilton’s red gel, optional but recommended)
- Optional: cocoa powder or crushed graham crackers for dirt effect
Instructions
- Prep your workspace: Line a baking sheet with parchment paper. Arrange slivered almonds in a small bowl for easy access.
- Melt the candy melts: Pour green candy melts into a microwave-safe bowl. Microwave in 30-second intervals at 50% power, stirring thoroughly between each interval, until smooth (about 2-3 intervals). If too thick, add 1 teaspoon vegetable shortening.
- Dip the pretzels: Hold a pretzel rod by one end and dip the other two-thirds into the melted candy. Let excess drip off.
- Add the ‘nail’: Immediately place the dipped pretzel on the parchment-lined sheet. While candy is still wet, press a slivered almond onto the tip at a slight angle to look like a fingernail.
- Create knuckle wrinkles: Using a toothpick or small knife, gently drag 2-3 lines across the candy coating near the middle of the dipped portion to create knuckle wrinkles.
- Add the ‘blood’ detail: Dip a clean toothpick into red gel food coloring and dab a tiny dot at the base of the almond nail.
- Chill to set: Place the baking sheet in the refrigerator for 10-15 minutes, or until the candy coating is firm.
- Optional dirt effect: Lightly dust set pretzels with cocoa powder using a fine-mesh strainer right before serving.
Notes
Work in small batches of 6-8 pretzels to keep candy melts warm. If almonds won’t stick, dip them in melted candy first. For best results, use candy melts (not white chocolate) and gel food coloring (not liquid). Store in an airtight container at room temperature for up to 5 days. Can be frozen for up to 1 month.
Nutrition
- Serving Size: 1 pretzel rod
- Calories: 130
- Sugar: 10
- Sodium: 180
- Fat: 6
- Saturated Fat: 3
- Carbohydrates: 17
- Fiber: 1
- Protein: 2
Keywords: Halloween treats, witch finger pretzels, easy Halloween recipe, spooky snacks, pretzel rods, candy melts, Halloween party food