Love this? Save it for later!
Share the inspiration with your friends
There used to be a little bakery on Oak Street, tucked between a dry cleaner and a bookstore, that made the most incredible pudding cups. They called them “Worm Gardens,” and my kids lost their minds over them every single Halloween. When the bakery closed two years ago—the owner retired and moved to Florida, of all places—my youngest, Leo, actually asked me if we could just “visit the worm lady” instead of trick-or-treating. I mean, talk about a specific reaction. After four tries—including one batch where I accidentally used instant coffee instead of cocoa powder, which was a disaster—I finally got it. These Kid-Approved Halloween Dirt Cups with Gummy Worms are the exact replica of that bakery magic, and honestly, they might be even better because you can make them in your own kitchen without a trip to Oak Street. Maybe you’ve been there, standing in your kitchen, trying to recreate something your kids loved, and feeling like you just couldn’t get it right. Let me tell you, these dirt cups are the answer. They’re simple, they’re spooky, and they’re so good that even the pickiest eaters will ask for seconds.
Why You’ll Love This Recipe
I have tested this recipe more times than I care to admit—mostly because my kids kept eating the test batches before I could photograph them. But that’s exactly the kind of problem you want to have. These dirt cups are the real deal.
- Quick & Easy : Comes together in under 15 minutes of active prep time. Seriously, the hardest part is crushing the cookies, and you can let the kids do that.
- Simple Ingredients : No fancy grocery trips needed. You probably have pudding mix, milk, and vanilla wafers in your pantry right now.
- Perfect for Halloween : Great for classroom parties, spooky movie nights, or just a fun October afternoon treat.
- Crowd-Pleaser : Always gets rave reviews from kids and adults alike. I’ve yet to meet a grown-up who doesn’t smile when handed a dirt cup.
- Unbelievably Delicious : The creamy chocolate pudding paired with the crunchy cookie “dirt” and chewy gummy worms is next-level comfort food.
What makes this recipe different from the rest? It’s the texture. I use a specific ratio of pudding to crushed cookies that creates this perfect layers—creamy, crunchy, creamy again, and topped with more crunch. It’s not just another version; it’s my best version, tested by a family of five who are brutally honest about their snacks.
This recipe isn’t just good—it’s the kind that makes you close your eyes after the first bite. It’s Halloween fun reimagined, faster and easier, but with the same soul-soothing satisfaction. Perfect for impressing guests without stress, or turning a simple afternoon into something memorable.
What Ingredients You Will Need
This recipe uses simple, affordable ingredients to deliver that classic dirt cup experience without any fuss. Most of these are pantry staples, which makes this a last-minute Halloween win.
- 1 (3.9-ounce) package instant chocolate pudding mix (I recommend Jell-O brand for the creamiest texture)
- 2 cups (480 ml) cold whole milk (2% works too, but whole milk gives a richer pudding)
- 1 (15-ounce) package chocolate sandwich cookies (like Oreos, about 36 cookies)
- 1 (8-ounce) tub frozen whipped topping, thawed (like Cool Whip, for extra creaminess)
- 1 (4.2-ounce) package gummy worms (the sour kind add a nice tang, but regular works great)
- Optional: 1/2 teaspoon vanilla extract (adds a little extra warmth to the pudding)
- Optional: green food coloring (for a slime effect, but totally unnecessary)
For the best results, use cold milk when making the pudding—it helps it set faster and creamier. If you’re using a dairy-free milk alternative, go with unsweetened oat milk or almond milk, but know the pudding may be slightly less thick. I’ve tried it with coconut milk, and while it works, the flavor is a bit different. Stick with whole milk if you can.
One tip I learned from my second failed batch: don’t use reduced-fat sandwich cookies. They don’t crush into that fine, sandy dirt texture you want. Go for the full-fat, classic version. Trust me on this one.
Equipment Needed
You don’t need any fancy equipment for these dirt cups, which is part of why I love them. Here’s what you’ll need:
- 2 medium mixing bowls (one for pudding, one for crushing cookies)
- Whisk or electric mixer (a whisk works fine, but an electric mixer makes the pudding fluffier)
- Measuring cups and spoons
- Resealable plastic bag (for crushing cookies without the mess)
- Rolling pin or heavy-bottomed glass (to crush the cookies in the bag)
- 6 to 8 small cups or clear plastic cups (I use 8-ounce clear cups so you can see the layers)
- Spatula for scraping every last bit of pudding
If you don’t have clear cups, small mason jars or even disposable plastic cups work just fine. The key is being able to see the layers, which is half the fun for kids. I’ve also used small glass bowls, but the clear cups are definitely more Halloween-party ready. I bought a pack of 50 at the dollar store for like three bucks, and they’ve lasted me through three Halloweens.
Preparation Method
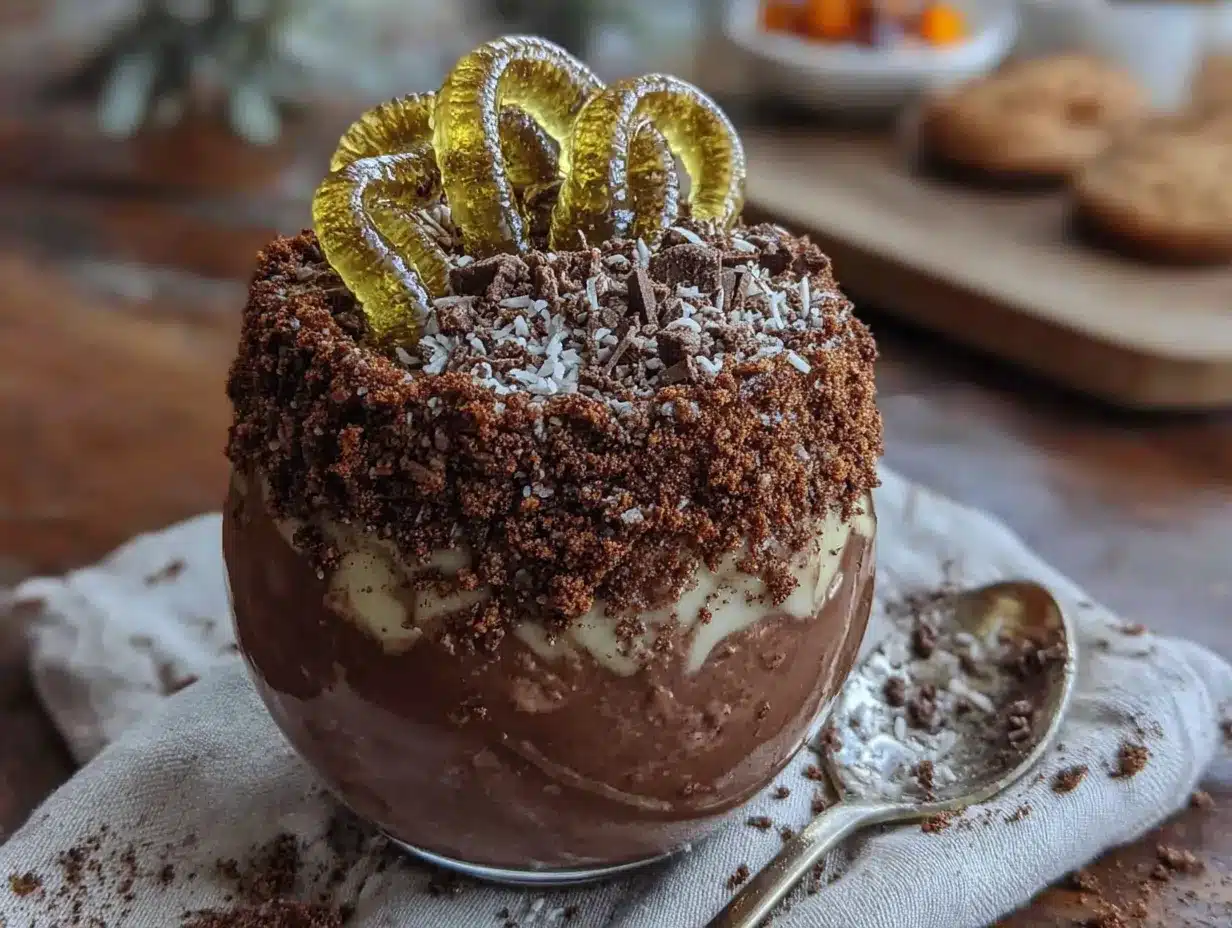
Step 1: Make the Pudding (5 minutes)
In a medium mixing bowl, whisk together the instant chocolate pudding mix and 2 cups of cold whole milk. Whisk for about 2 minutes, until the mixture thickens and starts to set. If you’re using an electric mixer, beat on low speed for 1 minute. The pudding should be thick but still pourable. Let it sit for 5 minutes to fully set. Pro tip: if you want an extra creamy texture, fold in the thawed whipped topping at this stage. It makes the pudding lighter and fluffier, almost like a mousse.
Step 2: Crush the Cookies (5 minutes)
Place the chocolate sandwich cookies in a resealable plastic bag. Seal it tightly, making sure to squeeze out as much air as possible. Using a rolling pin or the bottom of a heavy glass, crush the cookies until they resemble fine dirt. You want a mix of fine crumbs and some slightly larger pieces for texture. Don’t go too crazy—a few bigger chunks add a nice crunch. If you’re making these with kids, this is the step they’ll fight over. Let them take turns with the rolling pin. It’s messy, it’s fun, and it’s totally worth it.
Step 3: Assemble the Layers (10 minutes)
Take your clear cups and start layering. Spoon about 2 tablespoons of crushed cookies into the bottom of each cup. This is your “dirt” base. Next, spoon or pipe the chocolate pudding mixture on top, filling the cup about halfway. I use a piping bag or a resealable bag with the corner snipped off for cleaner layers, but a spoon works just fine. Add another layer of crushed cookies—about 1 tablespoon—then top with more pudding. Leave about 1/2 inch of space at the top of each cup.
Step 4: Add the Final Dirt and Worms (5 minutes)
Sprinkle a generous layer of crushed cookies on top of each cup, covering the pudding completely. This is your “topsoil.” Now for the fun part: poke 2 or 3 gummy worms into each cup, letting some dangle over the edge like they’re crawling out of the dirt. You can also bury a few worms halfway for that “just crawling out” look. I always add a few extra worms on top for maximum spooky effect.
Step 5: Chill and Serve (at least 30 minutes)
Refrigerate the dirt cups for at least 30 minutes before serving. This allows the pudding to fully set and the cookie crumbs to soften slightly, creating that perfect dirt-like texture. If you’re making these for a party, you can assemble them up to 24 hours in advance. Just wait to add the gummy worms until right before serving, so they stay chewy and don’t get soggy.
Cooking Tips & Techniques
I learned the hard way that not all pudding mixes are created equal. The first time I made these, I used a store-brand pudding mix, and it never set properly. It was basically chocolate soup with cookie crumbs floating in it. My kids still ate it, but it wasn’t the dirt cup experience I was going for. Stick with a name-brand instant pudding mix for the best results.
Another mistake I made? I crushed the cookies too fine. I was using a food processor, and I turned them into dust. The problem with dust is that it doesn’t give you that satisfying crunch. You want a mix of textures—some fine crumbs, some small chunks. The resealable bag and rolling pin method gives you way more control.
Here’s a timing strategy that works for me: make the pudding first and let it set while you crush the cookies. That way, everything is ready to go at the same time. If you’re making these for a classroom party, assemble them the night before and refrigerate overnight. The flavors meld together beautifully, and the texture stays perfect.
One more thing: if you’re worried about the gummy worms bleeding their color into the pudding, don’t be. I’ve tested this with several brands, and the color stays put. Just don’t add them more than a few hours before serving, and you’ll be fine.
Variations & Adaptations
Gluten-Free Version : Use gluten-free chocolate sandwich cookies and a gluten-free instant pudding mix. Most major brands offer gluten-free options now, and the taste is virtually identical. I’ve made this for a friend with celiac disease, and she couldn’t tell the difference.
Dairy-Free Version : Swap the whole milk for unsweetened oat milk or almond milk, and use a dairy-free whipped topping. The pudding will be slightly less thick, so add an extra tablespoon of cornstarch to help it set. I’ve also used coconut cream whipped topping, which adds a subtle tropical note that pairs surprisingly well with chocolate.
Peanut Butter Twist : Add a layer of peanut butter between the pudding and the cookie crumbs. Just melt 1/4 cup of peanut butter in the microwave for 20 seconds and drizzle it over the first layer of dirt. My oldest son, Sam, requests this version every year. It’s like a Reese’s cup in dirt cup form.
Pumpkin Spice Version : For a fall twist, replace the chocolate pudding with vanilla pudding and add 1 teaspoon of pumpkin pie spice. Use crushed graham crackers instead of chocolate cookies, and top with candy corn instead of gummy worms. It’s a completely different dessert, but just as fun.
Mint Chocolate Version : Add 1/2 teaspoon of peppermint extract to the chocolate pudding for a minty kick. Use crushed chocolate mint cookies if you can find them, or just add a few drops of green food coloring to the pudding for a slime effect. My neighbor’s kids went crazy for this version at our last Halloween block party.
Serving & Storage Suggestions
Serve these dirt cups chilled, straight from the fridge. The contrast between the cold, creamy pudding and the crunchy cookie dirt is what makes them so satisfying. I like to set them out on a platter with extra gummy worms scattered around for a spooky presentation.
These pair perfectly with a warm cup of apple cider or a glass of cold milk. If you’re serving them at a Halloween party, set up a “dirt cup bar” with extra toppings—sprinkles, candy eyes, more gummy worms—and let the kids customize their own. It’s chaos, but the good kind of chaos.
For storage, keep the dirt cups covered in the refrigerator for up to 3 days. The cookie crumbs will soften over time, but that’s actually part of the charm—it starts to look even more like real dirt. If you want to keep the crunch, store the crushed cookies separately and add them just before serving.
These do not freeze well, so don’t try to make a big batch ahead of time. The pudding gets icy and the texture changes. Stick to making them no more than 24 hours in advance.
Nutritional Information & Benefits
Let’s be real—these are a treat, not a health food. But here’s the estimated nutritional breakdown per serving (based on 8 servings):
| Nutrient | Amount Per Serving |
|---|---|
| Calories | 320 |
| Total Fat | 14g |
| Saturated Fat | 6g |
| Carbohydrates | 47g |
| Sugar | 32g |
| Protein | 5g |
| Calcium | 100mg |
On the bright side, the milk provides calcium and vitamin D, and the cocoa in the pudding has antioxidants. The gummy worms? Well, they’re mostly sugar, but they make the kids smile, and sometimes that’s enough. I’m a firm believer in balance—these are for special occasions, and that’s okay. You don’t need to feel guilty about giving your kids a fun Halloween treat. Honestly, the memories you make are worth more than the sugar content.
Frequently Asked Questions
Can I make these dirt cups ahead of time?
Absolutely! You can assemble them up to 24 hours in advance. Just wait to add the gummy worms until right before serving so they stay chewy and don’t get soggy.
Can I use homemade pudding instead of instant?
You can, but it changes the texture. Homemade pudding is thinner and won’t set as firmly. If you go that route, add an extra tablespoon of cornstarch to the recipe and cook it a bit longer.
How do I keep the gummy worms from sinking?
Poke them into the top layer of pudding before adding the final cookie crumbs. The pudding is thick enough to hold them in place. If you add them after the cookie crumbs, they’ll just sit on top and fall off.
Can I use different types of cookies?
Yes! Vanilla wafers, graham crackers, or even crushed pretzels work great. Just keep in mind that different cookies will change the flavor profile. Chocolate sandwich cookies give you that classic dirt look.
How many servings does this recipe make?
This recipe makes 6 to 8 servings, depending on the size of your cups. I usually get 8 servings from 8-ounce cups. If you’re using smaller cups, you can stretch it to 10 or 12.
Conclusion
These Kid-Approved Halloween Dirt Cups with Gummy Worms are the kind of recipe that makes you feel like a kitchen hero without actually having to do much work. They’re fun, they’re spooky, and they’re so simple that even the littlest hands can help. I love that I can make them with my kids on a rainy October afternoon and have them ready for a party the next day. The best part? Watching their faces light up when they see those wiggly worms crawling out of the dirt. It never gets old.
I’d love to hear how these turn out for you! Drop a comment below and let me know if your kids loved them as much as mine do. Did you add any fun twists? Did you use a different type of candy? Share your creations—I’m always looking for new ideas. And if you’re looking for more Halloween fun, try my spider web dip or mummy hot dogs for a full spooky spread. Happy Halloween, and happy cooking!
Pin This Recipe!
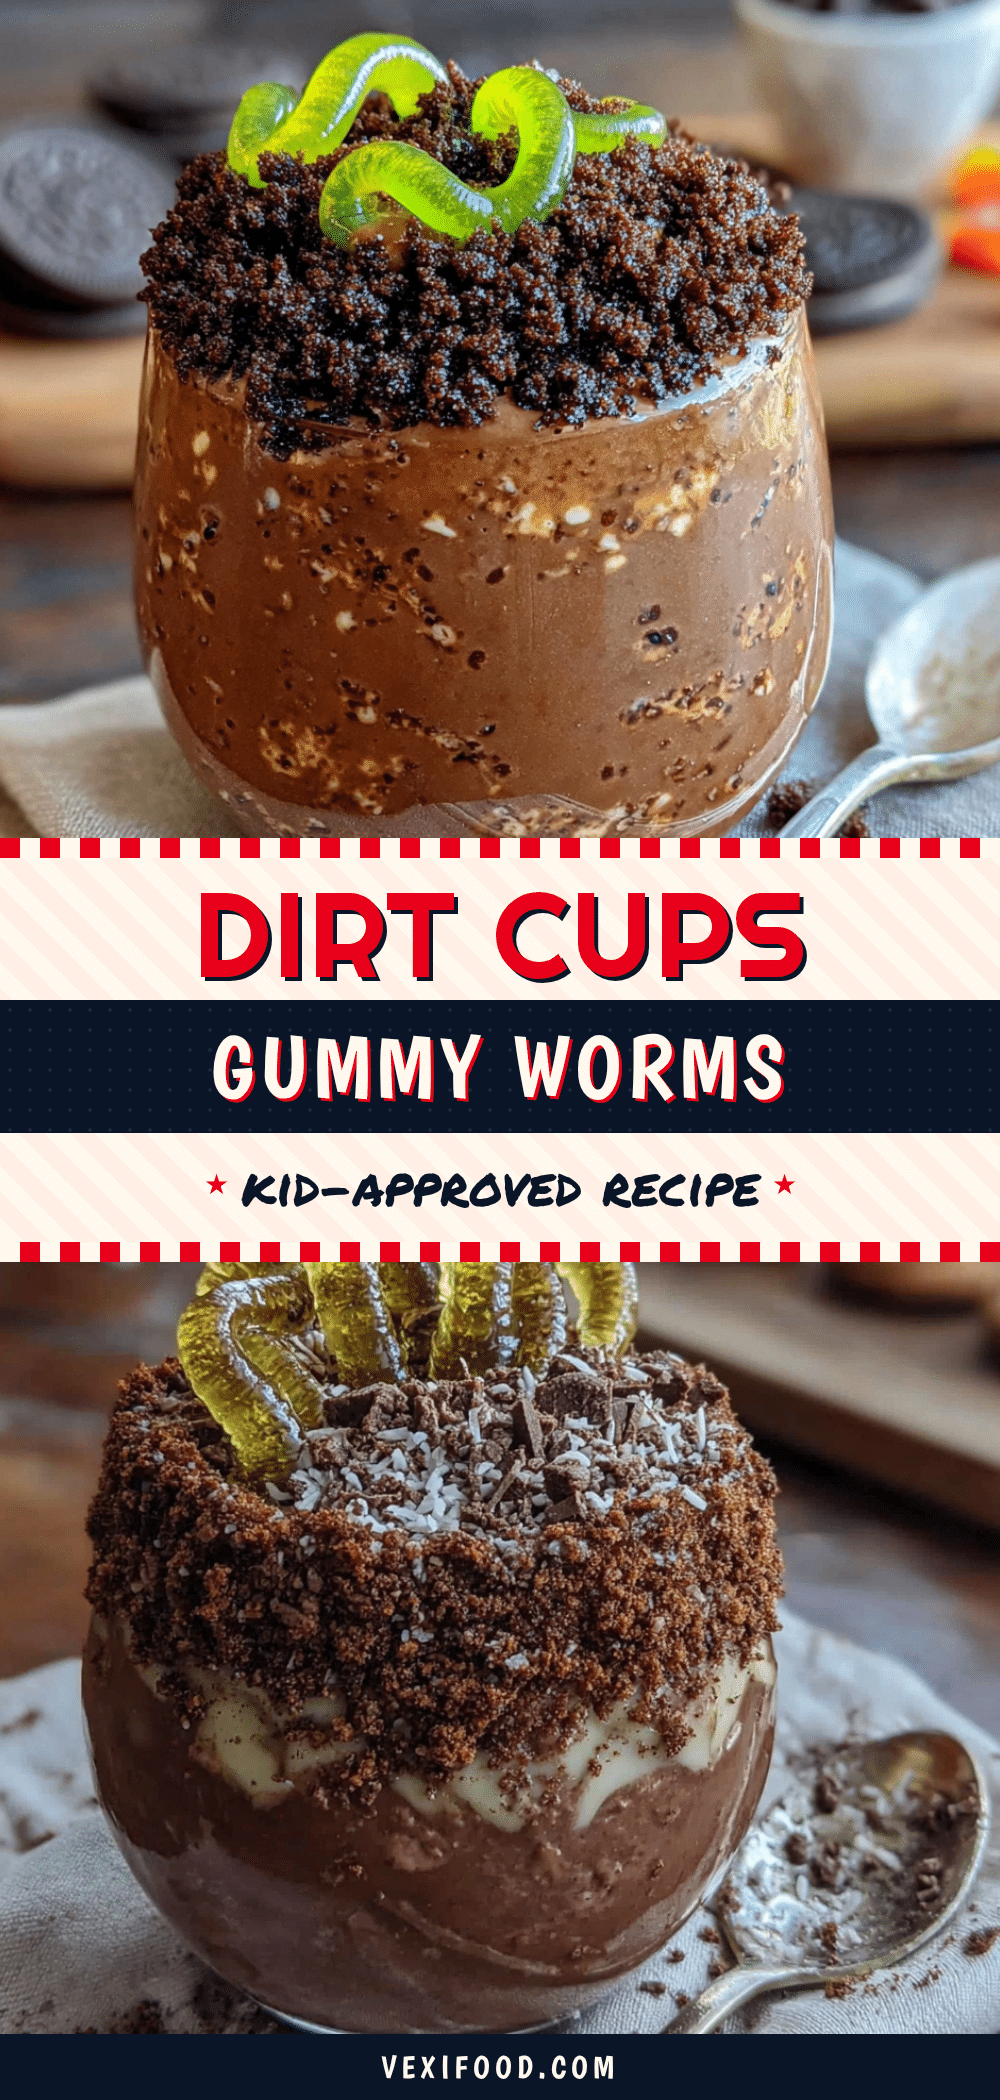
Easy Kid-Approved Halloween Dirt Cups with Gummy Worms
These spooky dirt cups are a quick and easy Halloween treat featuring creamy chocolate pudding, crunchy cookie ‘dirt,’ and gummy worms crawling out. Perfect for parties and guaranteed to delight kids and adults alike.
- Prep Time: 15 minutes
- Cook Time: 0 minutes
- Total Time: 45 minutes (includes chilling time)
- Yield: 8 servings 1x
- Category: Dessert
- Cuisine: American
Ingredients
- 1 (3.9-ounce) package instant chocolate pudding mix (recommended: Jell-O brand)
- 2 cups (480 ml) cold whole milk (2% works, but whole milk is richer)
- 1 (15-ounce) package chocolate sandwich cookies (like Oreos, about 36 cookies)
- 1 (8-ounce) tub frozen whipped topping, thawed (like Cool Whip)
- 1 (4.2-ounce) package gummy worms (sour or regular)
- Optional: 1/2 teaspoon vanilla extract
- Optional: green food coloring
Instructions
- In a medium mixing bowl, whisk together the instant chocolate pudding mix and 2 cups of cold whole milk for about 2 minutes until thickened. Let sit for 5 minutes to fully set. For extra creaminess, fold in the thawed whipped topping.
- Place the chocolate sandwich cookies in a resealable plastic bag, squeeze out air, and crush with a rolling pin or heavy glass until you have a mix of fine crumbs and small chunks.
- Spoon about 2 tablespoons of crushed cookies into the bottom of each clear cup. Add a layer of chocolate pudding, filling halfway. Add another tablespoon of crushed cookies, then more pudding, leaving about 1/2 inch of space at the top.
- Sprinkle a generous layer of crushed cookies on top. Poke 2-3 gummy worms into each cup, letting some dangle over the edge. Bury a few worms halfway for a ‘crawling out’ effect.
- Refrigerate for at least 30 minutes before serving. For best results, assemble up to 24 hours in advance but add gummy worms just before serving.
Notes
Use full-fat chocolate sandwich cookies for the best ‘dirt’ texture. For a gluten-free version, use gluten-free cookies and pudding mix. For dairy-free, use unsweetened oat milk and dairy-free whipped topping. Store covered in the refrigerator for up to 3 days; cookie crumbs will soften over time. Do not freeze.
Nutrition
- Serving Size: 1 dirt cup (8-ounce)
- Calories: 320
- Sugar: 32
- Sodium: 320
- Fat: 14
- Saturated Fat: 6
- Carbohydrates: 47
- Fiber: 1
- Protein: 5
Keywords: Halloween dirt cups, gummy worms, chocolate pudding, easy dessert, kid-friendly, spooky treat, no-bake



