Love this? Save it for later!
Share the inspiration with your friends
I was at the hardware store, of all places, last November, digging through a bin of clearance lightbulbs, when the guy behind the counter—a burly man named Dale with sawdust on his flannel—started talking about cookies. I wasn’t expecting baking advice from a hardware store employee, but there I was, holding a 60-watt bulb, listening to him describe exactly how to make the perfect chewy cookie. He said the secret wasn’t in the chocolate or the flour, but in browning the butter until it smelled like toasted nuts and something almost like caramel. I honestly thought he was messing with me at first. But Dale was dead serious. He scribbled the method on the back of a receipt, and I stuffed it into my pocket, half-convinced I’d never try it. A week later, on a particularly cold Tuesday, I found the crumpled receipt and figured I had nothing to lose. The result? These cookies. They have this warmth to them—a deep, cozy flavor that no regular cookie has ever given me. The brown butter changes everything, making each bite feel like a hug. Maybe you’ve been there, standing in an unexpected place, and someone shares a tip that changes your kitchen forever. That was my hardware store moment, and I’ve been making these cookies ever since. Honestly, I don’t think I’ll ever go back to plain butter again.
Why You’ll Love This Recipe
These aren’t just any chocolate chip cookies. They are the kind that makes you close your eyes after the first bite. I’ve tested this recipe more times than I care to count, tweaking the butter temperature, the resting time, and the ratio of brown to white sugar to get that perfect chew without the cakey texture that plagues so many recipes.
- Quick & Easy: Comes together in under 30 minutes of active time, perfect for a sudden craving or a cozy evening in.
- Simple Ingredients: No fancy grocery trips needed. You likely already have everything in your kitchen, except maybe an extra stick of butter.
- Perfect for Cold Weather: Great for a snowy afternoon, a rainy weekend, or any time you need a little comfort.
- Crowd-Pleaser: Always gets rave reviews from kids and adults alike. The nutty brown butter flavor is a game-changer.
- Unbelievably Chewy: The texture is next-level comfort food—crispy edges with a soft, tender center that stays chewy for days.
What makes this recipe different from the rest is the technique of browning the butter and then cooling it to the perfect temperature. It’s not just about melting it; it’s about coaxing out that deep, toasty flavor that makes the cookie taste like it came from a fancy bakery. This is comfort food reimagined—richer, warmer, and with the same soul-soothing satisfaction that makes you reach for a second (or third) cookie without any guilt.
What Ingredients You Will Need
This recipe uses simple, wholesome ingredients to deliver bold flavor and satisfying texture without the fuss. Most of these are pantry staples, but the quality of your butter and chocolate really matters here.
- Unsalted butter, 1 cup (2 sticks / 226g) — Browning the butter is the star move here. I recommend using a good quality brand like Kerrygold for a richer flavor, but any unsalted butter works.
- Dark brown sugar, 1 cup packed (200g) — This adds moisture and that deep, molasses-like sweetness that pairs so well with the nutty butter. (Don’t use light brown sugar; the darker the better.)
- Granulated sugar, ½ cup (100g) — Helps create those crispy edges we all love.
- Large egg, 1, room temperature — Room temperature eggs blend more evenly into the batter, creating a smoother texture.
- Egg yolk, 1, room temperature — This extra yolk is the secret to that ultra-chewy texture. It adds richness without making the cookie cakey.
- Vanilla extract, 2 teaspoons — Use pure vanilla extract if you have it; it makes a noticeable difference in the warmth of the flavor.
- All-purpose flour, 2 cups plus 2 tablespoons (270g) — Spoon and level your flour! Scooping directly from the bag packs in too much and makes cookies dry.
- Baking soda, 1 teaspoon — For just the right amount of spread and lift.
- Salt, 1 teaspoon — I use fine sea salt. It balances the sweetness and enhances the brown butter flavor.
- Chocolate chips or chopped chocolate, 1 ½ cups (270g) — I love using a mix of semi-sweet and dark chocolate chips. If you use a bar, chop it into irregular chunks for pools of melted chocolate. (Use dairy-free chocolate chips if needed.)
- Flaky sea salt (optional, for topping) — A pinch on top right out of the oven takes these from great to absolutely unforgettable.
Equipment Needed
You don’t need a fancy kitchen to pull these off, but a few specific tools make the process much smoother.
- Light-colored saucepan or skillet — A light-colored pan is crucial for browning butter because you can actually see the milk solids turn amber. Dark pans hide the color change, and you’ll end up with burnt butter.
- Stand mixer or hand mixer — Either works. I’ve used my trusty hand mixer for years, but a stand mixer makes creaming the butter and sugars effortless.
- Rubber spatula — For scraping every last bit of that precious brown butter into the mixing bowl.
- Baking sheets — Two large, light-colored baking sheets help cookies bake evenly. Dark sheets can cause the bottoms to burn before the centers are done.
- Parchment paper or silicone baking mat — Parchment paper is my go-to; it prevents sticking and makes cleanup a breeze. Silicone mats work too, but they can sometimes make cookies spread a little more.
- Cookie scoop (about 2 tablespoons) — For evenly sized cookies that bake uniformly. A #40 scoop is perfect.
- Wire cooling rack — Essential for letting cookies cool completely without getting soggy on the bottom.
Preparation Method
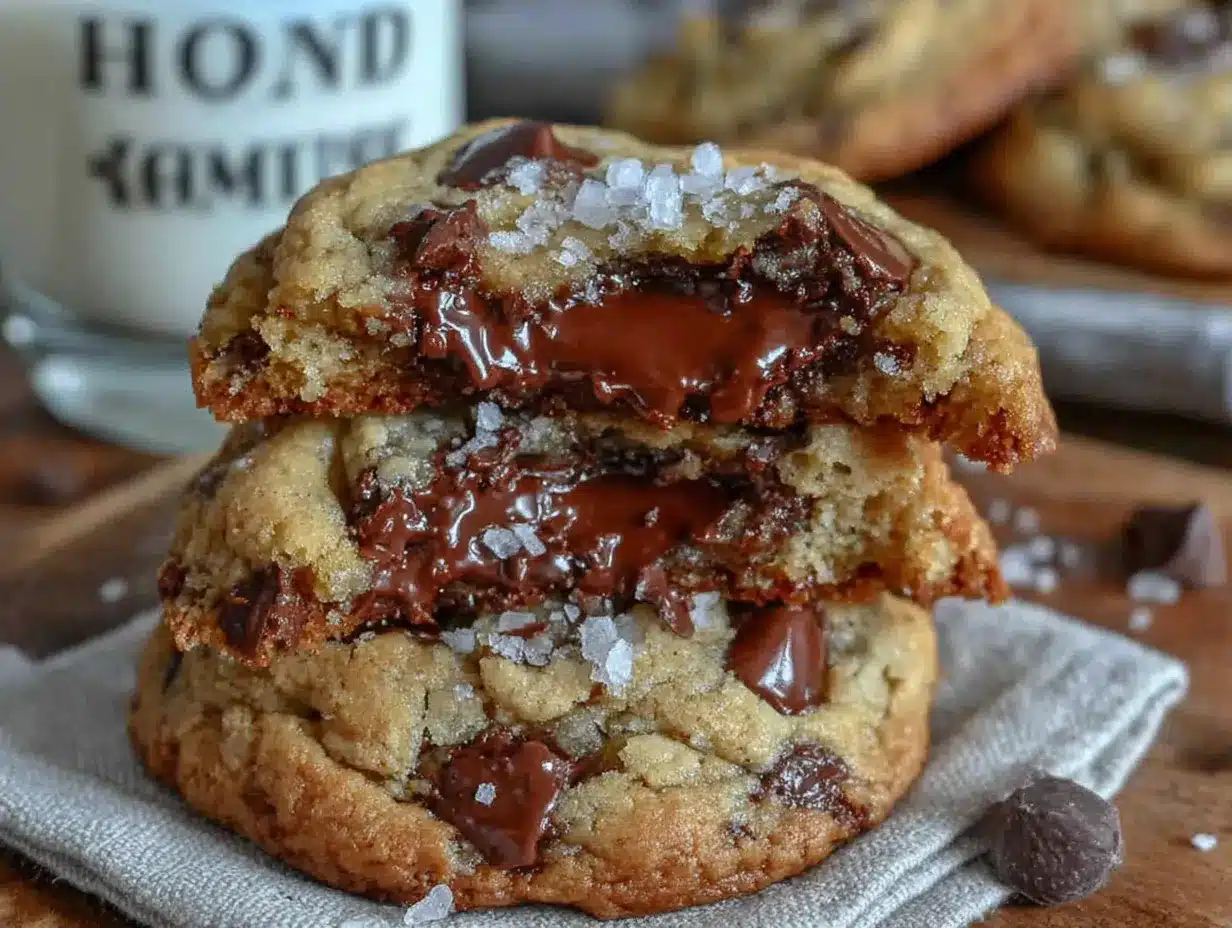
Let’s get to the good part. This method might look a little different from your usual cookie recipe, but trust the process—especially the chilling step. It’s non-negotiable for that chewy texture.
Step 1: Brown the Butter
Place the 1 cup of unsalted butter in your light-colored saucepan over medium heat. Let it melt completely, then stir occasionally. The butter will start to foam and crackle—that’s normal. Keep stirring gently. After about 5 to 7 minutes, the foam will subside, and you’ll see tiny brown specks forming at the bottom of the pan. The butter will smell nutty and wonderful. As soon as it turns a golden-amber color, remove it from the heat immediately. (It can go from perfect to burnt in seconds.) Pour the brown butter into a heat-safe bowl, making sure to scrape all those brown specks out—they’re pure flavor. Let it cool for 10 to 15 minutes. It should be warm but not hot to the touch.
Step 2: Mix the Wet Ingredients
In a large mixing bowl, combine the warm brown butter with the dark brown sugar and granulated sugar. Beat with your mixer on medium speed for about 2 minutes until the mixture looks like a thick, grainy paste. It won’t be fluffy like regular creamed butter, and that’s okay. Add the whole egg, the extra egg yolk, and the vanilla extract. Beat for another minute until the mixture is smooth, glossy, and a little lighter in color. Scrape down the sides of the bowl with your spatula.
Step 3: Combine the Dry Ingredients
In a separate medium bowl, whisk together the all-purpose flour, baking soda, and salt. This ensures the leavening and salt are evenly distributed so you don’t get a pocket of baking soda in one cookie. (Yes, I’ve done that. It’s not pleasant.)
Step 4: Bring It All Together
Gradually add the dry ingredients to the wet mixture, mixing on low speed. Stop when just a few streaks of flour remain. Over-mixing at this stage develops gluten and makes cookies tough. Fold in the chocolate chips or chopped chocolate with your spatula. The dough will be thick, sticky, and incredibly fragrant.
Step 5: The Chilling (Crucial Step!)
Cover the bowl with plastic wrap and refrigerate the dough for at least 30 minutes, but 60 minutes is better. This allows the brown butter to firm up slightly and the flavors to meld together. Chilling also prevents the cookies from spreading too thin in the oven. (I once skipped this step in a hurry, and ended up with one giant, flat cookie pancake. Don’t be like me.)
Step 6: Preheat and Scoop
Preheat your oven to 350°F (175°C). Line two baking sheets with parchment paper. Use your cookie scoop to portion out rounded tablespoons of dough (about 2 tablespoons each). Place them 2 inches apart on the prepared sheets. If you want that bakery-style look, press a few extra chocolate chips onto the tops of the dough balls.
Step 7: Bake to Perfection
Bake one sheet at a time for 10 to 12 minutes. The edges should be golden brown, but the centers will still look slightly soft and puffy. That’s exactly what you want. They will continue to set on the hot baking sheet. If you like softer cookies, bake for 10 minutes. For slightly crispier edges, go for 12 minutes.
Step 8: The Finishing Touch
As soon as the cookies come out of the oven, sprinkle a tiny pinch of flaky sea salt on top of each one. Let them cool on the baking sheet for 5 minutes—this is important for structure. Then transfer them to a wire rack to cool completely. Or, you know, eat one warm. I won’t judge.
Cooking Tips & Techniques
I’ve made plenty of cookie mistakes over the years, so let me save you some trouble.
- Don’t rush the browning: The first time I tried browning butter, I got impatient and cranked up the heat. The butter burned, and my cookies tasted bitter and sad. Keep the heat on medium and be patient. The nutty aroma is your cue, not the color.
- Room temperature eggs matter: Cold eggs can seize the warm brown butter, creating a greasy dough. Let your eggs sit on the counter for 20 minutes before starting, or place them in a bowl of warm water for 5 minutes.
- Measure flour correctly: Use a spoon to fluff the flour in your bag, then spoon it into your measuring cup and level it off with a knife. Scooping directly from the bag can add an extra 20-30 grams of flour, making your cookies dry and cakey.
- Chill the dough: I know it’s tempting to skip this, but the chill time is what gives you that thick, chewy center. If you’re in a real hurry, pop the scooped dough balls in the freezer for 15 minutes instead.
- Bake one sheet at a time: Putting two sheets in the oven at once creates uneven heat. The top sheet might burn while the bottom sheet is underdone. Your cookies deserve individual attention.
Variations & Adaptations
One of the best things about this cookie dough is how adaptable it is. I’ve played around with it more times than I can count.
- Gluten-Free Version: Substitute the all-purpose flour with a 1:1 gluten-free baking flour blend that contains xanthan gum. I’ve used Bob’s Red Mill 1-to-1 with great results. The texture will be slightly more delicate, but still deliciously chewy.
- Double Chocolate Twist: Reduce the flour by 2 tablespoons and add ¼ cup of unsweetened cocoa powder to the dry ingredients. Use white chocolate chips or milk chocolate chunks for a rich, brownie-like cookie.
- Nutty Addition: Toast ½ cup of pecans or walnuts and chop them roughly. Fold them in with the chocolate chips. The crunch adds a lovely contrast to the soft, chewy center. (I did this last Christmas, and they disappeared in minutes.)
- Sea Salt Caramel: Press a soft caramel candy into the center of each dough ball before baking. The caramel gets all gooey and melty, and the flaky salt on top cuts through the sweetness beautifully.
- Spiced Brown Butter: Add 1 teaspoon of cinnamon, ½ teaspoon of nutmeg, and a pinch of cloves to the dry ingredients. This makes them taste like a warm, cozy hug—perfect for fall or winter evenings.
Serving & Storage Suggestions
These cookies are best served slightly warm, when the chocolate is still a little melty and the brown butter flavor is at its peak. I like to serve them with a tall glass of cold milk or a hot cup of coffee for dipping. For a truly cozy dessert, sandwich two cookies with a scoop of vanilla ice cream for an instant ice cream sandwich.
Storage: Keep baked cookies in an airtight container at room temperature for up to 5 days. Place a slice of bread in the container with the cookies—it absorbs excess air and keeps them soft and chewy. (The bread gets stale, but the cookies stay perfect. It’s kitchen magic.)
Freezing: You can freeze the unbaked dough balls on a baking sheet until solid, then transfer them to a freezer bag. Bake directly from frozen, adding 2 to 3 minutes to the baking time. This is my secret weapon for last-minute cookie emergencies. Baked cookies also freeze well for up to 3 months. Thaw at room temperature or pop them in a 300°F oven for 5 minutes to refresh them.
How flavors develop: Honestly, these cookies taste even better the next day. The brown butter flavor deepens and the texture becomes perfectly chewy. If you can resist eating them all on day one, you’re in for a treat.
Nutritional Information & Benefits
Let’s be real—these are cookies, not health food. But that doesn’t mean they can’t have a few redeeming qualities. Here’s an approximate nutritional breakdown per cookie (based on 24 cookies):
| Nutrient | Amount per Cookie |
|---|---|
| Calories | 185 kcal |
| Fat | 10g |
| Saturated Fat | 6g |
| Carbohydrates | 24g |
| Sugar | 16g |
| Protein | 2g |
| Sodium | 120mg |
The dark chocolate in these cookies provides a small dose of antioxidants, and the brown butter actually contains more conjugated linoleic acid (a healthy fat) than regular butter. The dark brown sugar offers a touch of molasses, which contains minerals like calcium and potassium. Of course, this is a treat meant for enjoyment, not daily nutrition. But knowing you’re using high-quality ingredients like real butter and dark chocolate makes every bite feel a little more intentional and a lot more satisfying.
Conclusion
These Cozy Chewy Brown Butter Chocolate Chip Cookies are the kind of recipe that becomes a staple in your kitchen—the one you turn to on a rainy Sunday, the one you bring to a holiday party, the one that makes people ask for the recipe. The brown butter adds a depth of flavor that feels sophisticated, yet the process is simple enough for a beginner. I love how forgiving this recipe is; even my early attempts, with slightly over-browned butter or a too-warm dough, still turned out delicious. That’s the magic of it.
I encourage you to make them your own. Add your favorite mix-ins, adjust the salt level, or experiment with different chocolates. Cooking should be personal, and this dough is a perfect canvas. If you make these cookies, I’d love to hear about it. Drop a comment below and tell me how they turned out, or share a photo on social media with the hashtag #CozyBrownButterCookies. Happy baking, friends. May your kitchen smell like toasted butter and your cookies always be perfectly chewy.
Frequently Asked Questions
Can I use salted butter instead of unsalted?
Yes, you can. If you use salted butter, simply reduce the added salt in the recipe to ½ teaspoon. Keep in mind that salted butter can sometimes make the cookies taste a little saltier, but it’s still delicious.
Why did my cookies turn out flat?
Flat cookies are usually caused by butter that was too warm or skipping the chilling step. Make sure your brown butter is cooled to room temperature before mixing, and always chill the dough for at least 30 minutes. Also, check that your baking soda is fresh—old baking soda loses its power.
Can I make the dough ahead of time?
Absolutely! You can prepare the dough up to 3 days in advance and keep it covered in the refrigerator. The flavor actually improves as it rests. You can also freeze the dough balls for up to 3 months, as mentioned in the storage section.
How do I get that perfect chewy texture?
The key is the extra egg yolk and the brown butter. The egg yolk adds fat and moisture without thinning the dough, and the brown butter has less water than regular butter, which helps prevent spreading. Chilling the dough is also crucial for that thick, chewy center.
Can I use milk chocolate instead of semi-sweet?
Yes, but the cookies will be significantly sweeter. I recommend using semi-sweet or dark chocolate to balance the rich, nutty flavor of the brown butter. If you love milk chocolate, try using a mix of milk and dark chocolate chips for a more balanced sweetness.
Pin This Recipe!
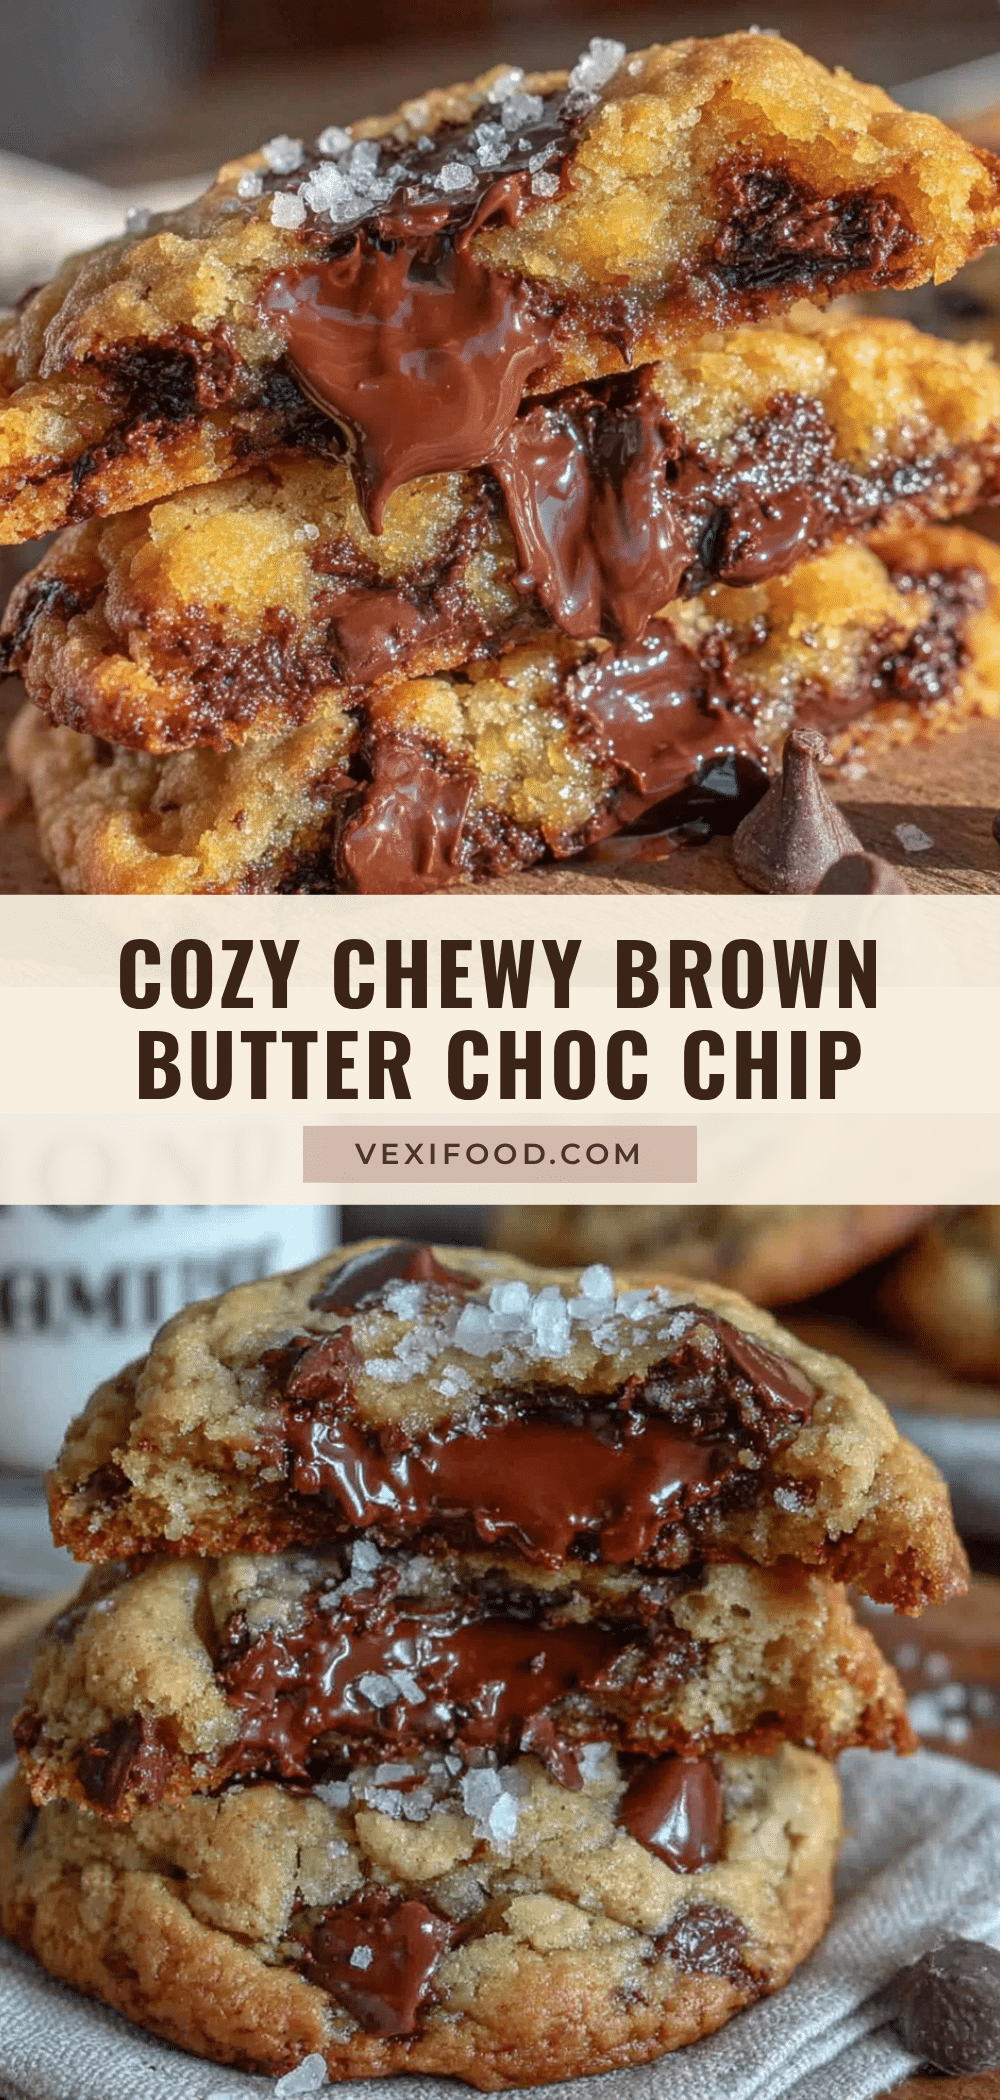
Cozy Chewy Brown Butter Chocolate Chip Cookies

These brown butter chocolate chip cookies have a deep, nutty flavor and a perfectly chewy texture. The secret is browning the butter until it smells like toasted nuts and caramel, creating a warm, cozy cookie that’s perfect for any occasion.
- Prep Time: 20 minutes
- Cook Time: 12 minutes
- Total Time: 1 hour 2 minutes (including 30 minutes chilling)
- Yield: 24 cookies 1x
- Category: Dessert
- Cuisine: American
Ingredients
- 1 cup (2 sticks / 226g) unsalted butter
- 1 cup packed (200g) dark brown sugar
- ½ cup (100g) granulated sugar
- 1 large egg, room temperature
- 1 egg yolk, room temperature
- 2 teaspoons vanilla extract
- 2 cups plus 2 tablespoons (270g) all-purpose flour
- 1 teaspoon baking soda
- 1 teaspoon fine sea salt
- 1 ½ cups (270g) chocolate chips or chopped chocolate (semi-sweet and dark mix recommended)
- Flaky sea salt (optional, for topping)
Instructions
- Brown the butter: Place 1 cup unsalted butter in a light-colored saucepan over medium heat. Melt completely, then stir occasionally. After 5-7 minutes, the butter will foam, then subside, and brown specks will form at the bottom. When it turns golden-amber and smells nutty, remove from heat immediately. Pour into a heat-safe bowl, scraping all brown specks. Cool for 10-15 minutes until warm but not hot.
- Mix wet ingredients: In a large bowl, combine warm brown butter with dark brown sugar and granulated sugar. Beat with mixer on medium speed for 2 minutes until thick and grainy. Add whole egg, egg yolk, and vanilla extract. Beat for 1 minute until smooth, glossy, and lighter in color. Scrape down sides.
- Combine dry ingredients: In a separate bowl, whisk together all-purpose flour, baking soda, and salt.
- Bring together: Gradually add dry ingredients to wet mixture, mixing on low speed until just a few streaks of flour remain. Fold in chocolate chips with a spatula. Dough will be thick, sticky, and fragrant.
- Chill dough: Cover bowl with plastic wrap and refrigerate for at least 30 minutes, preferably 60 minutes. This firms the butter and melds flavors.
- Preheat and scoop: Preheat oven to 350°F (175°C). Line two baking sheets with parchment paper. Scoop rounded tablespoons of dough (about 2 tablespoons each) and place 2 inches apart. Press extra chocolate chips on top if desired.
- Bake: Bake one sheet at a time for 10-12 minutes. Edges should be golden brown, centers still soft and puffy. For softer cookies, bake 10 minutes; for crispier edges, bake 12 minutes.
- Finish: Sprinkle flaky sea salt on hot cookies. Cool on baking sheet for 5 minutes, then transfer to wire rack to cool completely.
Notes
Don’t rush the browning process; keep heat on medium. Use room temperature eggs to avoid seizing the brown butter. Measure flour correctly by spooning and leveling. Chilling the dough is crucial for chewy texture. Bake one sheet at a time for even heat. Cookies taste even better the next day as flavors deepen.
Nutrition
- Serving Size: 1 cookie
- Calories: 185
- Sugar: 16
- Sodium: 120
- Fat: 10
- Saturated Fat: 6
- Carbohydrates: 24
- Fiber: 1
- Protein: 2
Keywords: brown butter chocolate chip cookies, chewy cookies, easy cookie recipe, homemade cookies, comfort food