Love this? Save it for later!
Share the inspiration with your friends
I was standing in line at the DMV—a place where culinary inspiration definitely doesn’t strike—when the woman ahead of me, clutching a folder of paperwork and wearing the most exhausted expression I’ve ever seen, started talking about her Halloween party menu. She wasn’t a chef or a party planner. She was an accountant, and she told me she’d given up on fancy themed desserts years ago. “I just throw cheese and crackers on a board and call it a day,” she said, shrugging. “People go crazy for it anyway.” Honestly, that moment changed my whole approach to holiday entertaining.
She mentioned how she always carves little ghost shapes out of mozzarella with a tiny cookie cutter and arranges them around a pile of pepperoni and grapes. I mean, it was so simple I almost laughed. But then I thought about it—why was I spending hours on elaborate Halloween treats that nobody actually finished? This Quick Halloween Charcuterie Boo-nut Board with Cheese Ghosts is the result of that DMV epiphany. It’s the kind of recipe you can pull together in twenty minutes flat, even after a long day, and it still looks like you tried. And let me tell you, the first time I set this out at a party, people took pictures before they even grabbed a plate. That’s when I knew the accountant was onto something.
Maybe you’ve been there—staring at a grocery list of complicated Halloween ingredients and wondering if it’s worth the mess. This board is your answer. It’s fast, it’s fun, and those little cheese ghosts are legitimately adorable. I’ve been making it every October since, and I honestly look forward to it more than the candy.
Why You’ll Love This Recipe
This isn’t just another charcuterie board. It’s a weeknight hero that doubles as a party showstopper, and I’ve tested it enough times to know exactly what works. As someone who’s spent years developing quick entertaining recipes, I can tell you this one checks every box for busy people who still want to impress.
- Quick & Easy: This board comes together in under 20 minutes. No cooking, no baking, no complicated steps. Just slice, arrange, and serve.
- Simple Ingredients: You probably already have most of these items in your fridge and pantry. Cream cheese, mozzarella, crackers, and your favorite cured meats—that’s the backbone.
- Perfect for Halloween Weeknights: Whether it’s a last-minute playdate, a casual dinner with friends, or just a fun family snack before trick-or-treating, this board fits the occasion without the stress.
- Crowd-Pleaser: Kids love the ghost-shaped cheese, and adults appreciate the savory-sweet balance. I’ve never had leftovers.
- Unbelievably Delicious: The combination of creamy cheese, salty meat, crunchy crackers, and sweet fruit is pure comfort food magic. It’s the kind of snack that makes you close your eyes after the first bite.
What makes this different from every other Halloween board out there is the technique. Using a small cookie cutter to shape cream cheese into ghosts isn’t just cute—it’s a smart way to make store-bought ingredients feel homemade. Plus, the “boo-nut” element (donut-shaped crackers or bagel chips) adds a playful texture that ties the whole theme together. This isn’t just another version of a cheese board. It’s your best version, designed for real life.
What Ingredients You Will Need
This recipe uses simple, everyday ingredients that come together to create something unexpectedly special. You don’t need a specialty grocery store or a dozen obscure items—just good-quality basics that do the heavy lifting for you.
- For the Cheese Ghosts:
- 8 ounces cream cheese, softened (I prefer Philadelphia for its smooth texture)
- 8 ounces fresh mozzarella pearls or small balls, drained
- 1 small ghost-shaped cookie cutter (about 1.5 inches wide)
- Black sesame seeds or poppy seeds for eyes (optional, but so worth it)
- For the Boo-nut Base:
- 1 cup mini donut-shaped crackers (like bagel chips or mini bagel crisps—look for the round ones with holes)
- 1 cup round crackers (like Ritz or buttery rounds)
- 1 cup pretzel sticks or twists
- For the Savory Elements:
- 4 ounces salami or pepperoni, thinly sliced
- 4 ounces prosciutto or ham, torn into pieces
- 1/2 cup black olives or green olives, pitted
- For the Sweet Elements:
- 1 cup red grapes, washed and dried
- 1/2 cup dried cranberries or cherries
- 1/4 cup dark chocolate chips or Halloween-themed M&Ms (adds a fun pop of color)
- For the Spreads & Dips:
- 1/4 cup honey or maple syrup (for drizzling over cream cheese ghosts)
- 1/4 cup pumpkin butter or apple butter (optional, but seasonal and delicious)
I personally recommend using a block of cream cheese instead of the spreadable tub kind—it holds its shape better when you cut it. For the mozzarella, look for the small pearls packed in water; they’re softer and easier to shape. If you can’t find a ghost cookie cutter, a small circle cutter works too—just use a knife to notch out a little triangle for the eyes. Honestly, I’ve used a bottle cap before in a pinch, and nobody noticed.
Equipment Needed
You don’t need a fancy kitchen to pull this off. Most of these tools are probably already in your drawers, and I’ll tell you which ones you can skip if you’re in a rush.
- Large wooden board or serving platter: At least 12 inches wide. A baking sheet lined with parchment works perfectly if you don’t have a board.
- Small ghost-shaped cookie cutter: About 1.5 to 2 inches. I found mine at a craft store for three dollars. A tiny round cutter or even a knife works as a backup.
- Small bowl or ramekins: For the honey and pumpkin butter. Keeps everything tidy.
- Cheese knife or spreading knife: For smoothing the cream cheese ghosts if needed.
- Cutting board: For slicing salami and arranging ingredients.
- Tongs or small spoons: For serving, so guests don’t touch everything.
If you’re new to charcuterie boards, don’t stress about having the perfect board. I’ve used a flat cutting board, a pizza pan, and even a clean cookie sheet. The key is surface area—you want enough room to spread things out so it looks abundant, not cramped.
Preparation Method
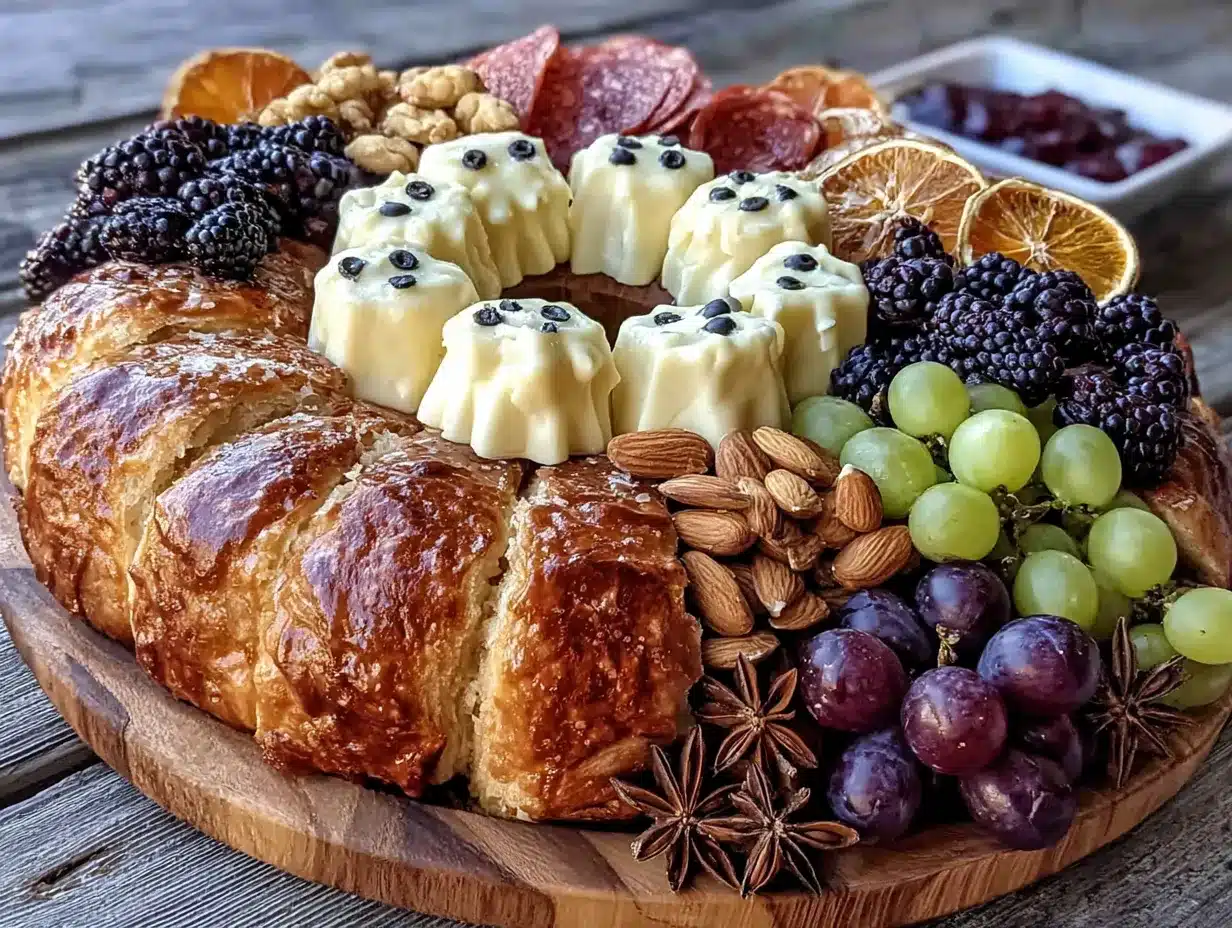
- Make the cheese ghosts (5 minutes): Take your softened cream cheese and roll it into a log about 1 inch thick. Wrap it in plastic wrap and twist the ends to seal. Pop it in the freezer for 10 minutes—this makes it firm enough to cut cleanly. Once firm, unwrap and slice into rounds about 1/4 inch thick. Press your ghost cookie cutter into each round and gently push the ghost out. Place them on a plate. If the edges are messy, just smooth them with your finger. For the mozzarella pearls, simply press the cutter through each pearl—they’re softer, so go slowly. Arrange the ghosts on one corner of your board. If you want to add eyes, press two black sesame seeds into each ghost face. Honestly, my first batch looked like blobs, but they still got eaten.
- Prepare the boo-nuts and crackers (3 minutes): Arrange your mini donut-shaped crackers and round crackers in clusters around the board. Leave some space between groups so the board doesn’t look crowded. I like to create little “piles” of three to five crackers each. The boo-nuts are the star here—they look like little wheels and give the board its name. If you can’t find mini bagel chips, any round cracker with a hole in the middle works.
- Add the meats (3 minutes): Fold the salami slices into quarters or roll them into little cones. Tear the prosciutto into bite-sized pieces. Scatter them in small clusters around the crackers. Don’t overlap too much—you want each ingredient to be visible and easy to grab. I learned the hard way that stacking everything on top of each other just makes a mess.
- Add the fruits and sweets (3 minutes): Place small bunches of grapes in a couple of spots. Sprinkle dried cranberries and chocolate chips in the gaps. The chocolate adds a little Halloween color, especially if you use orange and black M&Ms. This is also where you can add any seasonal touches—candy corn, mini pumpkins, whatever makes you happy.
- Add the dips and finishing touches (2 minutes): Pour honey into a small ramekin and place it near the cheese ghosts. If you’re using pumpkin butter, put it in another small bowl. Drizzle a tiny bit of honey over the cream cheese ghosts for a sweet-savory finish. Honestly, this step makes the board look intentional and polished.
- Final arrangement and garnish (2 minutes): Step back and look at your board. Fill any empty gaps with extra crackers or a few more grapes. Sprinkle a pinch of flaky sea salt over the whole thing if you’re feeling fancy. Serve immediately or cover with plastic wrap and refrigerate for up to 2 hours. Take it out 15 minutes before serving to let the cheese soften.
Cooking Tips & Techniques
I’ve made this board about a dozen times now, and I’ve definitely learned what works and what doesn’t. Here are the things I wish someone had told me the first time.
Don’t skip the freezer step for the cream cheese. I know it sounds extra, but soft cream cheese just squishes when you try to cut it. Ten minutes in the freezer makes it firm enough to hold the ghost shape. If you forget, just roll the cream cheese into a log and use a knife to cut freehand ghost shapes—they’ll be rustic but still cute.
Keep your hands dry. Moisture is the enemy of a good charcuterie board. Make sure your grapes are completely dry before adding them, or they’ll make the crackers soggy. Pat the mozzarella pearls with a paper towel before cutting them, too.
Layer strategically. Put the heavier items (meats, cheese ghosts) down first, then fill in with lighter items (crackers, fruit). This prevents the board from looking flat. I once put all the crackers down first and ended up with a board that looked like a pile of snacks instead of an intentional spread.
Use a variety of textures. The best boards have something creamy (cream cheese ghosts), something crunchy (crackers, pretzels), something chewy (dried cranberries), and something fresh (grapes). If you’re missing one texture, the board feels incomplete. I learned this after making a board with only soft cheeses and crackers—it was boring.
Don’t overthink the arrangement. Honestly, the most beautiful boards I’ve made were the ones I threw together in five minutes. When you stress about placement, it looks stiff. Just scatter things in clusters and let it feel organic. The cheese ghosts will do the heavy lifting visually.
Variations & Adaptations
This board is incredibly flexible, and I’ve tried several versions depending on what’s in my fridge. Here are some of my favorites.
Dairy-Free Version: Use vegan cream cheese and dairy-free mozzarella-style shreds. The ghost shapes won’t be as clean, but they’ll still look adorable. Pair with nut-based crackers and skip the honey if you’re avoiding sugar. I made this for a friend with lactose intolerance, and she ate half the board herself.
Sweet Halloween Board: Swap the meats for extra fruit and sweets. Add apple slices, pear slices, and a bowl of caramel dip. Use chocolate-covered pretzels and candy corn instead of crackers. The cheese ghosts stay, but everything else leans sweet. This version is perfect for a kids’ Halloween party.
Spicy Version: Add sliced jalapeños, pepper jack cheese (cut into ghost shapes if you can), and spicy salami. Drizzle with hot honey instead of regular honey. The sweet-spicy combo is incredible, and it’s my personal favorite for adult gatherings. I tried this after a friend brought over spicy honey from a farmers market—game changer.
Gluten-Free Version: Use gluten-free crackers, rice cakes cut into small rounds, or veggie chips. Most meats and cheeses are naturally gluten-free, so just check your labels. The board will look slightly different but taste just as good.
Seasonal Twist: In fall, add roasted pumpkin seeds, sliced apples, and a small bowl of cranberry sauce. In summer, swap grapes for fresh berries and add a dollop of whipped goat cheese. The base formula stays the same—just swap in what’s fresh.
Serving & Storage Suggestions
This board is best served at room temperature, so take it out of the fridge about 15 to 20 minutes before you plan to eat. The cream cheese ghosts soften slightly, and the flavors of the meats and fruits become more pronounced. I usually set it out right when guests arrive and let it sit while everyone grabs a drink.
For presentation, arrange everything on a large wooden board or a white platter—the contrast makes the colors pop. Place the cheese ghosts in a small cluster near the center or off to one side, so they’re the first thing people see. I like to put the honey ramekin right next to them, almost like a little dipping station. Add a few sprigs of fresh rosemary or thyme around the edges for a touch of green—it makes the board look professionally styled.
Storage: If you have leftovers (honestly, rare in my house), separate the components and store them in airtight containers. The cheese ghosts will keep in the fridge for up to 3 days, but they’ll soften and lose their shape a bit. Crackers and pretzels should be stored separately to stay crunchy. Grapes and dried fruit can go in the same container. Don’t store the assembled board in the fridge—everything will get soggy and sad.
Reheating: You don’t need to reheat anything, but if you want to refresh the crackers, pop them in a 350°F oven for 3 minutes. The cheese ghosts are best cold or at room temperature. If you’re serving the board again the next day, just reassemble it fresh—it only takes a few minutes.
One thing I’ve noticed is that the flavors actually get better after a few hours in the fridge. The honey soaks into the cream cheese slightly, and the fruit’s sweetness mingles with the saltiness of the meats. It’s a great make-ahead option for parties—just assemble everything except the crackers (add those right before serving) and cover tightly with plastic wrap.
Nutritional Information & Benefits
This board is meant to be shared, so the nutritional values below are per serving (about 1/6 of the board). It’s a balanced snack with protein, healthy fats, and carbs, plus a good dose of fruit for natural sweetness.
| Nutrient | Amount Per Serving |
|---|---|
| Calories | 320 |
| Protein | 12g |
| Fat | 18g |
| Carbohydrates | 28g |
| Fiber | 3g |
| Sugar | 14g |
| Sodium | 520mg |
Health Benefits: The cream cheese and mozzarella provide calcium and protein, which support bone health and muscle function. Grapes are packed with antioxidants like resveratrol, and dried cranberries offer vitamin C and fiber. The dark chocolate chips (if you use them) add a dose of flavonoids, which are great for heart health. If you’re watching your sodium, choose low-sodium meats and skip the pretzels.
Dietary Considerations: This recipe is naturally vegetarian (if you skip the meats) and can be made gluten-free with simple substitutions. It contains dairy, so it’s not vegan-friendly without modifications. The honey can be swapped for agave or maple syrup for a plant-based option. Always check labels if you’re serving guests with allergies—some crackers and meats contain hidden allergens.
From a personal wellness perspective, I love that this board feels indulgent but is actually pretty balanced. You get the satisfaction of cheese and crackers, but the fruit and portion control keep it from being a total splurge. It’s the kind of snack that leaves you feeling satisfied, not stuffed.
Conclusion
This Quick Halloween Charcuterie Boo-nut Board with Cheese Ghosts is honestly the easiest way to make Halloween feel special without spending hours in the kitchen. It’s proof that you don’t need elaborate recipes or fancy equipment to create something memorable—just a little creativity, a ghost-shaped cookie cutter, and a willingness to have fun with your food. I’ve made this board for Halloween parties, casual family dinners, and even just a Tuesday night when I needed a pick-me-up. It never fails to make people smile.
I’d love for you to try this and make it your own. Swap in your favorite meats, add different fruits, or experiment with the ghost shapes—maybe try bats or pumpkins if you have other cookie cutters. The beauty of a charcuterie board is that it’s endlessly customizable. And honestly, those little cheese ghosts are just too cute not to share.
If you make this board, I’d love to hear about it. Drop a comment below with your favorite variation, or tag me in your photos if you share them online. Let’s make Halloween a little less stressful and a lot more delicious. Happy haunting, and happy snacking!
Frequently Asked Questions
Can I make the cheese ghosts ahead of time?
Yes! You can make the cream cheese ghosts up to 2 days in advance. Store them in an airtight container in the fridge, separated by parchment paper so they don’t stick together. Add the sesame seed eyes just before serving, as they can soften and fall off over time.
What can I use if I don’t have a ghost cookie cutter?
No problem at all! Use a small round cookie cutter (like a bottle cap) to make circles, then use a knife to notch out a little triangle for the eyes. You can also cut freehand ghost shapes with a paring knife—they’ll look rustic but still adorable. I’ve even used a mini pumpkin-shaped cutter for a fall variation.
How do I keep the crackers from getting soggy?
The key is to add crackers just before serving. If you’re making the board ahead of time, store the crackers separately and arrange them on the board right before guests arrive. Also, make sure your grapes and other fruits are completely dry before adding them to the board—moisture is the enemy of crunch.
Can I make this board for a crowd larger than 6 people?
Absolutely! Simply double or triple the ingredients and use a larger board or multiple boards. For a crowd, I recommend setting up a “build your own” station with separate bowls of ingredients so guests can customize their plates. The cheese ghosts are still the star—just make a few extra batches.
What’s the best way to serve this board to kids?
Kids love the cheese ghosts! For a kid-friendly version, skip the spicy meats and strong cheeses. Add more sweet elements like apple slices, candy corn, and chocolate chips. You can also let kids help arrange the board—it’s a fun activity that gets them excited about eating. Just watch out for small cookie cutters and sharp edges.
Pin This Recipe!
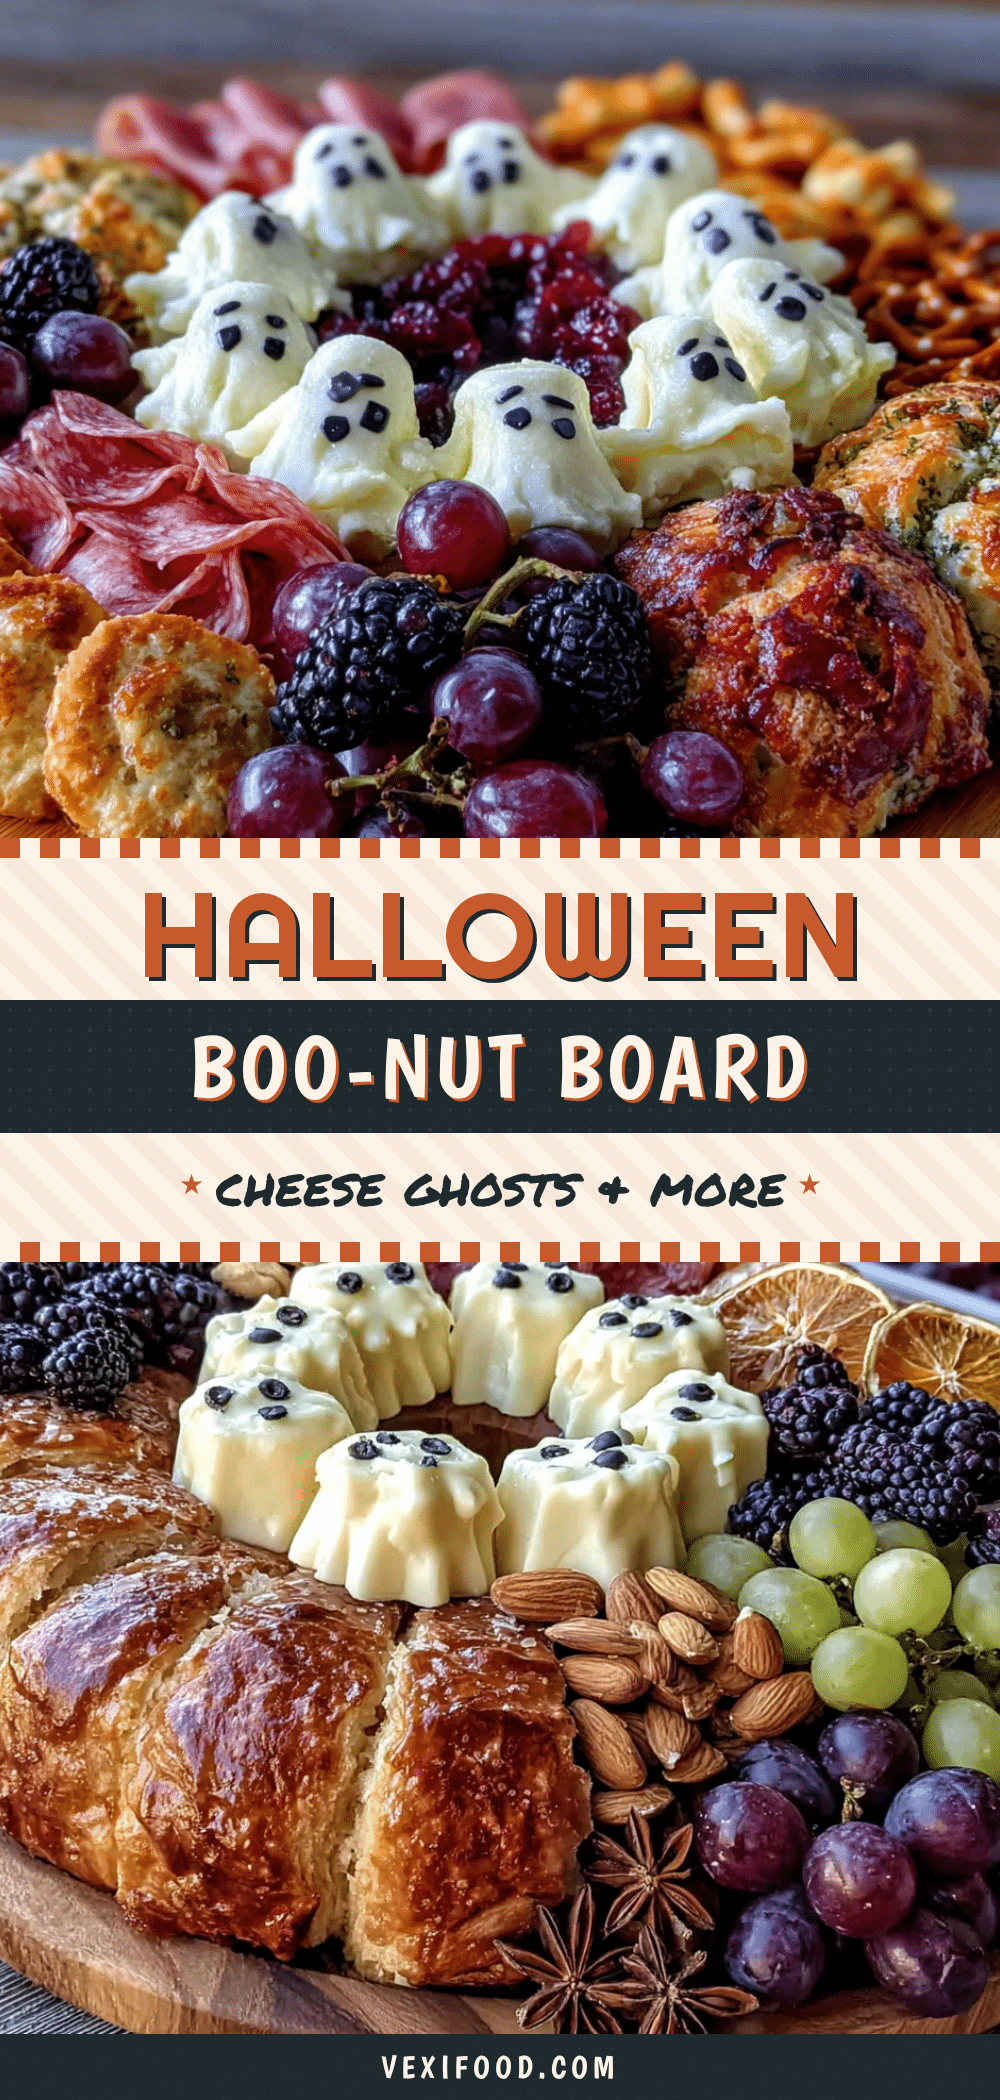
Quick Halloween Charcuterie Boo-nut Board with Cheese Ghosts
A quick and easy Halloween charcuterie board featuring adorable ghost-shaped cream cheese and mozzarella, surrounded by crackers, meats, fruits, and sweets. Perfect for last-minute parties or weeknight fun.
- Prep Time: 20 minutes
- Cook Time: 0 minutes
- Total Time: 20 minutes
- Yield: 6 servings 1x
- Category: Appetizer
- Cuisine: American
Ingredients
- 8 ounces cream cheese, softened
- 8 ounces fresh mozzarella pearls or small balls, drained
- 1 small ghost-shaped cookie cutter (about 1.5 inches wide)
- Black sesame seeds or poppy seeds for eyes (optional)
- 1 cup mini donut-shaped crackers (like bagel chips or mini bagel crisps)
- 1 cup round crackers (like Ritz or buttery rounds)
- 1 cup pretzel sticks or twists
- 4 ounces salami or pepperoni, thinly sliced
- 4 ounces prosciutto or ham, torn into pieces
- 1/2 cup black olives or green olives, pitted
- 1 cup red grapes, washed and dried
- 1/2 cup dried cranberries or cherries
- 1/4 cup dark chocolate chips or Halloween-themed M&Ms
- 1/4 cup honey or maple syrup
- 1/4 cup pumpkin butter or apple butter (optional)
Instructions
- Make the cheese ghosts: Roll softened cream cheese into a 1-inch thick log, wrap in plastic wrap, and freeze for 10 minutes. Unwrap and slice into 1/4-inch rounds. Press ghost cookie cutter into each round and gently push out the ghost. Place on a plate. For mozzarella pearls, press cutter through each pearl slowly. Optionally, press two black sesame seeds into each ghost for eyes.
- Prepare the boo-nuts and crackers: Arrange mini donut-shaped crackers and round crackers in clusters around the board, leaving space between groups.
- Add the meats: Fold salami slices into quarters or roll into cones. Tear prosciutto into bite-sized pieces. Scatter in small clusters around the crackers.
- Add the fruits and sweets: Place small bunches of grapes in a couple of spots. Sprinkle dried cranberries and chocolate chips in the gaps.
- Add the dips and finishing touches: Pour honey into a small ramekin and place near the cheese ghosts. If using pumpkin butter, put in another small bowl. Drizzle a tiny bit of honey over the cream cheese ghosts.
- Final arrangement and garnish: Fill any empty gaps with extra crackers or grapes. Sprinkle flaky sea salt over the whole thing if desired. Serve immediately or cover and refrigerate for up to 2 hours. Take out 15 minutes before serving.
Notes
Don’t skip the freezer step for the cream cheese—it makes cutting clean shapes easier. Keep hands dry to avoid soggy crackers. Layer heavier items first, then fill in with lighter ones. Use a variety of textures for best results. The board can be made ahead (except crackers) and refrigerated for up to 2 hours.
Nutrition
- Serving Size: 1/6 of the board
- Calories: 320
- Sugar: 14
- Sodium: 520
- Fat: 18
- Saturated Fat: 9
- Carbohydrates: 28
- Fiber: 3
- Protein: 12
Keywords: Halloween, charcuterie board, cheese ghosts, boo-nut board, quick appetizer, party snack, no-cook



