Love this? Save it for later!
Share the inspiration with your friends
There used to be a tiny bakery called The Whisk & Flour on a side street in Portland that made the most incredible sugar cookies I had ever tasted. When they closed their doors in 2019 — just up and vanished one day with a handwritten sign taped to the window — I honestly felt a little lost. Their turkey cookies for Thanksgiving were legendary: perfectly soft centers, crisp edges, and royal icing that looked like it was painted on by someone with a steady hand and a lot of patience.
After twelve tries — twelve, let me tell you — I finally cracked it. The first batch came out looking like sad blobs with legs. The second batch had icing that ran right off the cookie like a melted crayon. But batch number seven? That was the turning point. I had been testing different butter temperatures, different chilling times, and honestly, I was about to give up. Then my neighbor Karen knocked on my door with a plate of store-bought cookies, and something clicked. I realized I was overthinking the whole thing.
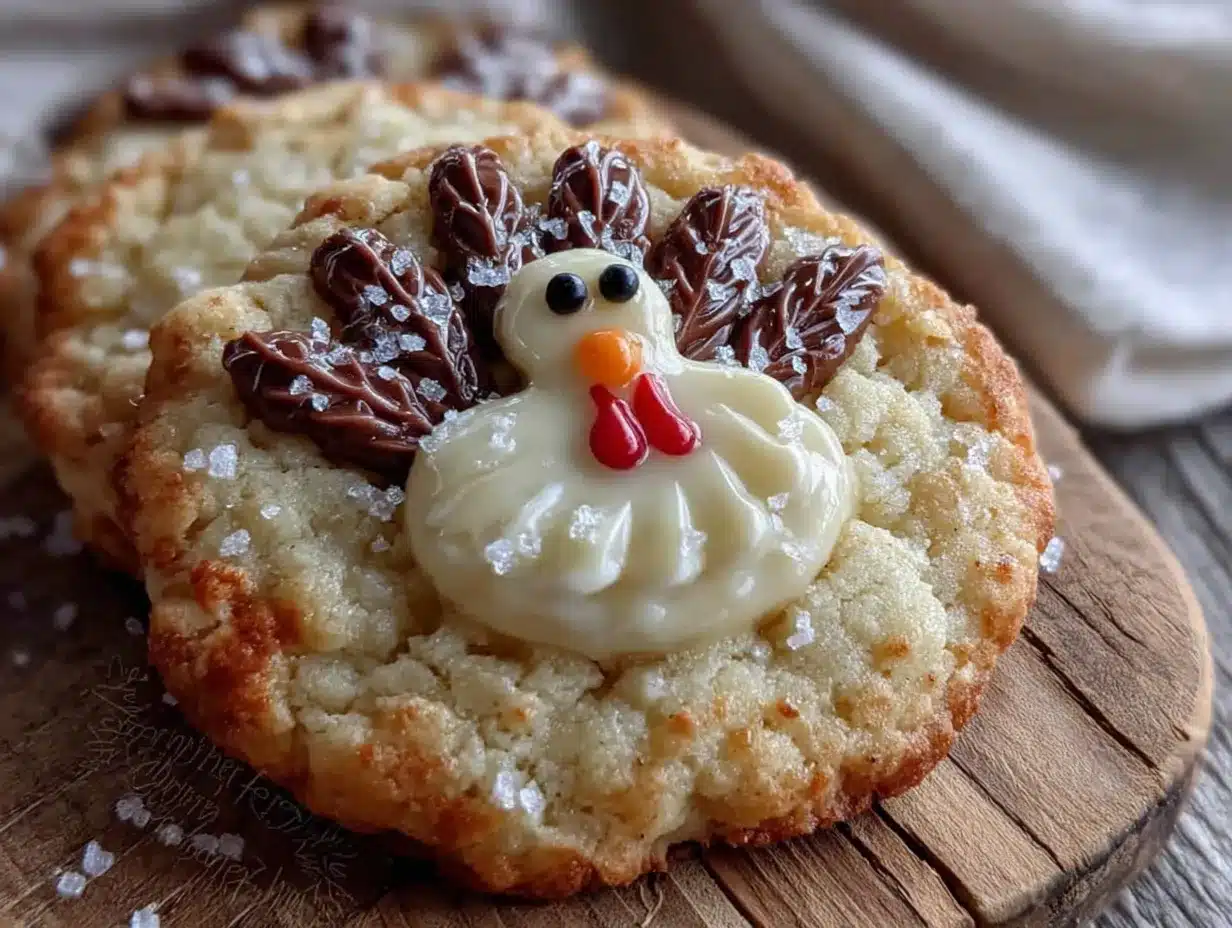
These crowd-pleasing Thanksgiving turkey sugar cookies are the result of all that trial and error. They are soft, buttery, and sturdy enough to hold detailed icing without crumbling. The dough comes together in under fifteen minutes, and the chilling step — don’t skip it — is what gives you that clean cut every single time. Maybe you have been there, staring at a batch of cookies that looked nothing like the picture in your head. I get it. But these little turkeys? They finally delivered that bakery magic I had been chasing.
Why You Will Love This Recipe
These turkey sugar cookies are not just another holiday dessert. They are the showstopper that makes people stop mid-conversation and say, “Wait, you made these?” I have brought them to three different Thanksgiving gatherings now, and every single time, someone asks for the recipe before they have even finished eating one.
- Simple Ingredients: You probably have everything in your pantry right now. Butter, sugar, flour, eggs, vanilla — no fancy extracts or hard-to-find specialty items.
- Perfect for Hosting: Since you are the one hosting this year, you can make the dough three days ahead and bake fresh the morning of your dinner. That is a game-changer when you have a turkey to worry about.
- Crowd-Pleaser: Kids love decorating them, adults love eating them, and everyone loves how they look on the dessert table. I watched my cousin’s seven-year-old eat three in a row last Thanksgiving.
- Unbelievably Delicious: The texture is that perfect middle ground — soft enough to melt in your mouth but firm enough to hold icing detail. The butter-to-sugar ratio took me five tries to nail, and it was worth every failed batch.
- Freezer-Friendly: You can freeze the baked cookies for up to three months. Just thaw and decorate when you are ready to impress your guests.
What makes these different from every other sugar cookie recipe out there? It is the technique. I use a slightly higher butter temperature than most recipes call for, which gives you a more tender crumb without the cookies spreading into puddles. Plus, the chilling method I developed — thirty minutes in the fridge, then ten in the freezer — creates edges so clean you will think a machine cut them.
This is the kind of cookie that makes you close your eyes after the first bite. It is comfort food reimagined for the holiday table, and honestly? It makes you look like a hero without spending all day in the kitchen.
What Ingredients You Will Need
This recipe uses simple, wholesome ingredients to deliver bold flavor and satisfying texture without the fuss. Most of these are pantry staples, which means you can whip up a batch even if the grocery store is already sold out of everything.
For the Cookie Dough
- 1 cup (226g) unsalted butter, softened to room temperature (I prefer Kerrygold for the richness, but any good-quality butter works)
- 1 cup (200g) granulated sugar (adds sweetness and helps with that slight crisp edge)
- 1 large egg, room temperature (cold eggs will seize the butter)
- 1 teaspoon vanilla extract (use pure, not imitation — trust me on this)
- 2 ½ cups (312g) all-purpose flour (spoon and level it — scooping directly gives you too much)
- ½ teaspoon baking powder (for that gentle lift)
- ¼ teaspoon salt (balances the sweetness and enhances flavor)
For the Royal Icing
- 2 cups (240g) powdered sugar, sifted (lumps are the enemy of smooth icing)
- 2 tablespoons meringue powder (I use Wilton brand for consistency)
- 3-4 tablespoons water, room temperature (add slowly — you can always add more but cannot take it out)
- Gel food coloring: brown, orange, red, yellow, and black (Americolor is my go-to brand because the colors stay vibrant without altering the icing consistency)
For Decoration
- Edible glitter or sanding sugar (optional, but it makes them sparkle on the dessert table)
- Candy corn (for the turkey feathers — this is the secret weapon)
- Mini chocolate chips (for eyes, or you can pipe them with black icing)
Ingredient Selection Tips: Look for butter that is pliable but not greasy — if it slides off the knife, it is too soft. For the flour, I have tested this with Gold Medal and King Arthur, and both work beautifully. If you are using a different brand, just make sure to spoon and level rather than scooping directly from the bag.
Substitution Guidance: Need a dairy-free option? Swap the butter for a high-quality vegan butter stick (I like Earth Balance). The texture will be slightly less tender, but still delicious. For a gluten-free version, use a 1:1 gluten-free flour blend that contains xanthan gum — I have tested with Bob’s Red Mill and it worked great.
Equipment Needed
You do not need a professional bakery setup to make these cookies look amazing. Here is what I use and what you can substitute if you are working with a basic kitchen.
- Turkey cookie cutter (about 4 inches tall — I found mine at a craft store for three dollars, but Amazon has plenty of options)
- Stand mixer or hand mixer (I use my KitchenAid, but a hand mixer works just fine — you will just need to cream the butter a little longer)
- Baking sheets (light-colored aluminum gives the most even browning; dark sheets can over-brown the bottoms)
- Parchment paper or silicone baking mat (parchment is cheaper and works perfectly)
- Rolling pin with thickness guides (I use a wooden pin with removable rings, but you can also use two chopsticks on either side as guides)
- Piping bags or squeeze bottles (squeeze bottles are easier for flooding icing, but piping bags give you more control for details)
- Small offset spatula (for spreading icing smoothly — this was a game-changer for me)
- Cooling rack (wire rack lets air circulate so cookies cool evenly)
- Plastic wrap (for chilling the dough)
Budget-Friendly Tip: Do not have a turkey cutter? Use a round cutter and turn it into a turkey by adding candy corn feathers — it looks just as cute and costs nothing extra. I have done this when I forgot my cutter at a friend’s house, and honestly, nobody noticed the difference.
Preparation Method
Follow these steps carefully, and you will have bakery-quality cookies that make your Thanksgiving table look like it belongs in a magazine.
- Cream the butter and sugar (5 minutes): In a large mixing bowl, beat the softened butter and granulated sugar together on medium speed until light and fluffy. Scrape down the sides halfway through. The mixture should look pale yellow and feel airy when you lift the beater. Do not rush this step — proper creaming is what gives you that tender texture.
- Add the egg and vanilla (2 minutes): Beat in the egg and vanilla extract until fully combined. The mixture might look slightly curdled at this point — that is normal, especially if your egg was a little cold. Just keep mixing until it comes back together.
- Mix the dry ingredients (3 minutes): In a separate bowl, whisk together the flour, baking powder, and salt. Gradually add this to the wet mixture on low speed, mixing just until the dough comes together. Stop as soon as you no longer see streaks of flour. Overmixing here will make your cookies tough.
- Chill the dough (40 minutes total): Divide the dough in half, flatten each half into a disc about 1 inch thick, and wrap tightly in plastic wrap. Refrigerate for 30 minutes, then transfer to the freezer for 10 more minutes. This two-step chill is my secret — it firms the butter without making the dough so hard that it cracks when you roll it.
- Preheat and prepare (10 minutes): Preheat your oven to 350°F (175°C). Line two baking sheets with parchment paper. Take one dough disc out of the freezer and let it sit at room temperature for 3-4 minutes — just until it is pliable enough to roll without cracking.
- Roll and cut (10 minutes): On a lightly floured surface, roll the dough to ¼-inch thickness. Use your turkey cutter to cut out shapes, re-rolling the scraps once. Arrange cookies on the prepared baking sheets, leaving at least 1 inch of space between each one. If the dough gets sticky, pop it back in the freezer for 5 minutes.
- Bake (8-10 minutes): Bake one sheet at a time on the middle rack. The cookies are done when the edges are just barely golden — the centers should still look pale and slightly soft. They will continue to set as they cool. Let them rest on the baking sheet for 5 minutes, then transfer to a wire rack to cool completely.
- Make the royal icing (5 minutes): In a medium bowl, whisk together the powdered sugar and meringue powder. Add 3 tablespoons of water and whisk until smooth. The icing should be thick but flow slowly — like honey. Add the remaining tablespoon of water if needed. Divide the icing into separate bowls and color with gel food coloring as desired.
- Decorate the cookies (30-45 minutes): Outline each turkey cookie with stiff icing using a piping bag fitted with a #2 tip. Let the outlines dry for 10 minutes, then flood the centers with thinner icing. While the icing is still wet, add candy corn feathers and mini chocolate chip eyes. Let the decorated cookies dry completely — at least 4 hours or overnight.
Sensory Cue: When you roll the dough, it should feel smooth and supple, not sticky or greasy. If it sticks to your rolling pin, dust lightly with flour. The baked cookies should smell like vanilla and butter — that warm, golden aroma that makes everyone wander into the kitchen asking what you are making.
Personal Tip: I always bake a test cookie first — just one. It tells me if my oven temperature is accurate and if the dough has spread too much. That single cookie has saved me from ruining entire batches more times than I can count.
Cooking Tips & Techniques
After twelve batches of trial and error, I learned a few things the hard way. Let me save you the frustration.
Butter Temperature is Everything: I cannot stress this enough. Your butter should be soft enough that a finger pressed into it leaves an indent, but not so soft that it feels greasy or slides off the knife. If you microwave it to soften it — and I know you will be tempted — do it in 5-second bursts and watch it like a hawk. Melted butter will make your cookies spread into flat, sad pancakes.
Chill Between Batches: After you cut and bake the first batch, pop the remaining dough back in the freezer while the first sheet bakes. Warm dough spreads more, and you want those turkey shapes to stay sharp. I learned this lesson when my second batch came out looking more like abstract blobs than turkeys.
Use a Light Touch with Flour: When rolling out the dough, use just enough flour to prevent sticking. Too much flour makes the cookies dry and crumbly. I keep a small bowl of flour next to my rolling surface and dip my fingers in it instead of dusting the whole area.
The Icing Consistency Trick: For outlining, your icing should be stiff enough to hold a peak when you lift the whisk. For flooding, it should flow like warm maple syrup — thick but pourable. If you drop a spoonful of flooding icing back into the bowl, the surface should smooth out within 10 seconds. If it stays lumpy, add a drop more water.
Timing Your Decoration: I always decorate my cookies the day before Thanksgiving. That way, I am not rushing between basting the turkey and piping feathers. The icing sets completely overnight, and the cookies stay fresh for days in an airtight container.
Variations & Adaptations
One of the best things about this recipe is how flexible it is. Here are some variations I have tried and loved.
Chocolate Turkey Cookies: Replace ¼ cup of the flour with unsweetened cocoa powder. The chocolate version pairs beautifully with orange icing and tastes like a Thanksgiving-themed Oreo. I made these for a friend who claimed she did not like sugar cookies, and she ate four.
Vegan Version: Use vegan butter and replace the egg with a flax egg (1 tablespoon ground flaxseed mixed with 3 tablespoons water, let sit for 5 minutes). The texture is slightly less tender, but the flavor is still incredible. For the royal icing, use aquafaba (chickpea water) instead of meringue powder.
Spiced Sugar Cookies: Add 1 teaspoon of pumpkin pie spice to the dry ingredients. This gives the cookies a warm, autumnal flavor that makes them taste like fall in cookie form. I tested this version at a Friendsgiving and it was the first plate cleared.
Mini Turkey Cookies: Use a smaller cutter and reduce baking time to 6-7 minutes. These are perfect for kids or for creating a cookie platter with variety. I made a batch of minis last year and arranged them around a larger turkey cookie — it looked like a mama turkey with her babies.
Gluten-Free Adaptation: I have tested this with Cup4Cup gluten-free flour blend, and it works beautifully. The dough is slightly more fragile, so handle it gently when transferring to the baking sheet. Chill the cut cookies on the sheet for 5 extra minutes before baking to help them hold their shape.
Serving & Storage Suggestions
These turkey cookies are designed to be the centerpiece of your Thanksgiving dessert table. Here is how to serve and store them like a pro.
Serving Temperature: Serve at room temperature. The icing is firm but not hard, and the cookie stays perfectly soft. If you have refrigerated them, let them sit out for 20 minutes before serving.
Presentation Ideas: Arrange the cookies on a large wooden board or a white platter in a fan shape — like a turkey tail. Place a small bowl of caramel dip in the center for dipping. I did this last year and my aunt took a photo for her Instagram before anyone was allowed to touch them.
What to Serve Alongside: These cookies pair beautifully with hot apple cider, spiced chai, or a warm pumpkin latte. For a dessert spread, serve them alongside pecan pie bars and pumpkin cheesecake bites.
Storage Instructions: Store undecorated cookies in an airtight container at room temperature for up to one week. Decorated cookies should be stored in a single layer — do not stack them or the icing will smudge. If you must stack them, place a sheet of parchment paper between each layer.
Freezer Instructions: Baked, undecorated cookies freeze beautifully for up to three months. Wrap them tightly in plastic wrap and place in a freezer-safe bag. When you are ready to decorate, thaw them at room temperature for 30 minutes. The icing will adhere perfectly to thawed cookies.
Flavor Development: Here is something interesting — these cookies actually taste better the day after baking. The flavors meld together and the texture softens slightly. So do not stress about baking them fresh on Thanksgiving morning. Bake them two days ahead and decorate the night before.
Nutritional Information & Benefits
Let us be real — these are sugar cookies, so they are a treat. But here is what you should know.
Per Cookie (approximate, based on 24 cookies): 180 calories, 8g fat, 25g carbohydrates, 2g protein, 12g sugar. These numbers will vary based on your icing thickness and decorations.
Health Benefits: The butter provides vitamin A and healthy fats, while the eggs offer protein. The vanilla extract has antioxidants. Okay, I am stretching here — but hey, it is Thanksgiving, and sometimes joy is the most important nutrient.
Dietary Considerations: This recipe contains dairy, eggs, and gluten. For allergen-friendly versions, see the variations section above. The vegan version is dairy-free and egg-free, and the gluten-free version works well for those with celiac or gluten sensitivity.
My Perspective: I believe in balance. These cookies are not an everyday food, and they should not be. But on Thanksgiving, surrounded by family and friends, they are exactly what the table needs. One cookie with your coffee, maybe two if nobody is watching, and you have made the meal feel complete.
Conclusion
These crowd-pleasing Thanksgiving turkey sugar cookies are more than just a dessert — they are the memory you are creating around the table. I think about that little bakery in Portland every time I make them, and honestly, I smile now instead of feeling sad. The Whisk & Flour may be gone, but their spirit lives on in my kitchen, and now in yours too.
I want you to make these your own. Maybe you add extra cinnamon to the dough, or you pipe little pilgrim hats on half of them. Maybe you let the kids go wild with sprinkles and end up with cookies that look like abstract art. That is the beauty of this recipe — it is forgiving enough for beginners and versatile enough for experienced bakers.
So go ahead. Preheat that oven, pull out your turkey cutter, and make something that will have your guests asking for the recipe before they have even finished their first bite. And when you do, come back and tell me about it. I would love to hear how your turkeys turned out — the beautiful ones, the funny ones, and the ones that somehow looked more like ducks. They are all welcome here.
Frequently Asked Questions
Can I make the dough ahead of time?
Absolutely. You can prepare the dough up to three days in advance and keep it wrapped tightly in the refrigerator. Let it sit at room temperature for about 10 minutes before rolling so it softens slightly.
Why did my cookies spread in the oven?
This usually happens when the butter is too soft or the dough was not chilled long enough. Make sure your butter is at room temperature — not melted — and do not skip the chilling step. If your kitchen is warm, chill the cut cookies on the baking sheet for 10 minutes before baking.
Can I use store-bought icing instead of making royal icing?
You can, but it will not dry as hard and the details will not be as sharp. Royal icing gives you that professional, bakery-quality finish. If you are short on time, try a simple glaze made from powdered sugar and milk.
How do I get clean edges when cutting the dough?
Dip your cookie cutter in flour before each cut. Press straight down without twisting — twisting seals the edges and prevents the cookies from rising evenly. The freezer step in my method also helps keep those edges razor-sharp.
Can I freeze the decorated cookies?
It is better to freeze undecorated cookies. The royal icing can become sticky when thawed if there is any moisture in the freezer. Bake and freeze the plain cookies, then decorate them after thawing for the best results.
Pin This Recipe!
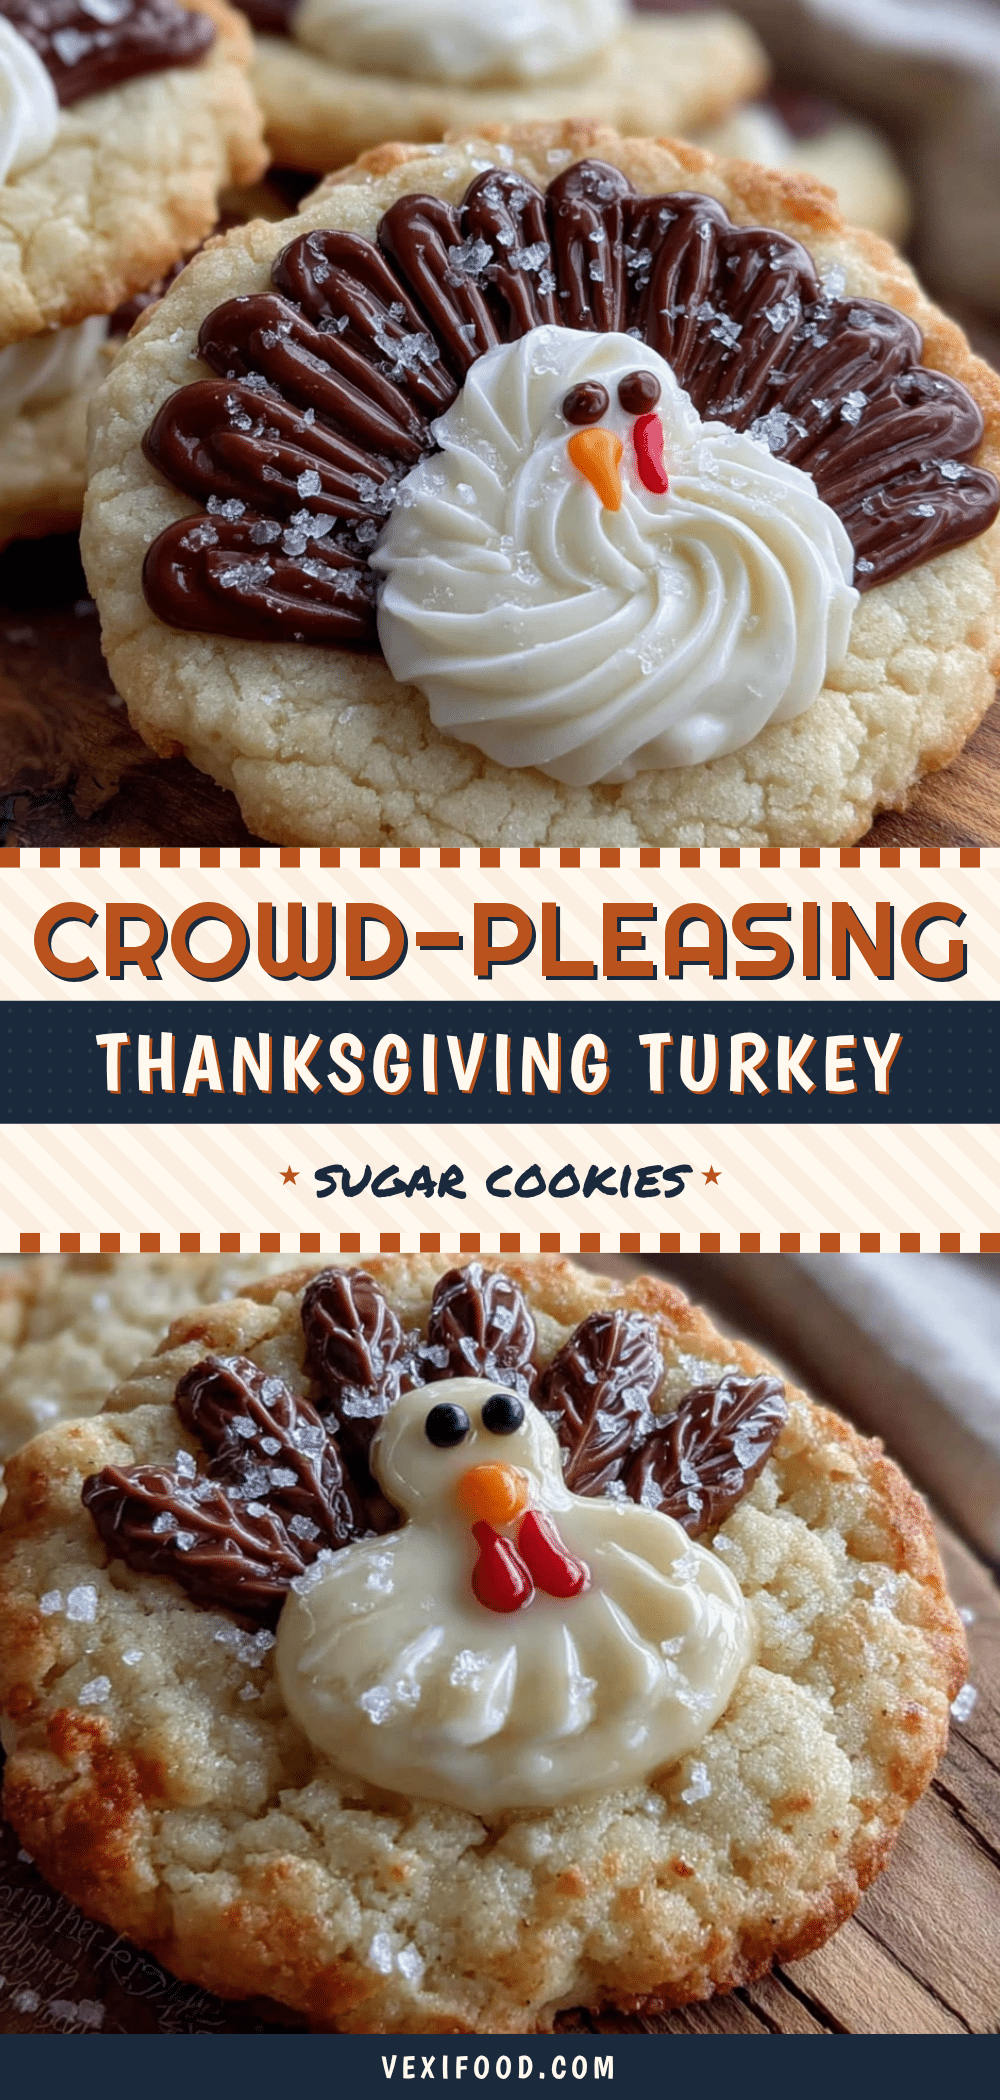
Best Easy Thanksgiving Turkey Sugar Cookies
These crowd-pleasing Thanksgiving turkey sugar cookies are soft, buttery, and sturdy enough to hold detailed icing without crumbling. The dough comes together in under fifteen minutes, and the chilling step gives you that clean cut every single time.
- Prep Time: 15 minutes
- Cook Time: 10 minutes
- Total Time: 1 hour 5 minutes
- Yield: 24 servings 1x
- Category: Dessert
- Cuisine: American
Ingredients
- 1 cup (226g) unsalted butter, softened to room temperature
- 1 cup (200g) granulated sugar
- 1 large egg, room temperature
- 1 teaspoon vanilla extract
- 2 ½ cups (312g) all-purpose flour
- ½ teaspoon baking powder
- ¼ teaspoon salt
- 2 cups (240g) powdered sugar, sifted
- 2 tablespoons meringue powder
- 3–4 tablespoons water, room temperature
- Gel food coloring: brown, orange, red, yellow, and black
- Edible glitter or sanding sugar (optional)
- Candy corn
- Mini chocolate chips
Instructions
- Cream the butter and sugar (5 minutes): In a large mixing bowl, beat the softened butter and granulated sugar together on medium speed until light and fluffy. Scrape down the sides halfway through. The mixture should look pale yellow and feel airy when you lift the beater.
- Add the egg and vanilla (2 minutes): Beat in the egg and vanilla extract until fully combined. The mixture might look slightly curdled at this point — that is normal, especially if your egg was a little cold. Just keep mixing until it comes back together.
- Mix the dry ingredients (3 minutes): In a separate bowl, whisk together the flour, baking powder, and salt. Gradually add this to the wet mixture on low speed, mixing just until the dough comes together. Stop as soon as you no longer see streaks of flour.
- Chill the dough (40 minutes total): Divide the dough in half, flatten each half into a disc about 1 inch thick, and wrap tightly in plastic wrap. Refrigerate for 30 minutes, then transfer to the freezer for 10 more minutes.
- Preheat and prepare (10 minutes): Preheat your oven to 350°F (175°C). Line two baking sheets with parchment paper. Take one dough disc out of the freezer and let it sit at room temperature for 3-4 minutes — just until it is pliable enough to roll without cracking.
- Roll and cut (10 minutes): On a lightly floured surface, roll the dough to ¼-inch thickness. Use your turkey cutter to cut out shapes, re-rolling the scraps once. Arrange cookies on the prepared baking sheets, leaving at least 1 inch of space between each one. If the dough gets sticky, pop it back in the freezer for 5 minutes.
- Bake (8-10 minutes): Bake one sheet at a time on the middle rack. The cookies are done when the edges are just barely golden — the centers should still look pale and slightly soft. They will continue to set as they cool. Let them rest on the baking sheet for 5 minutes, then transfer to a wire rack to cool completely.
- Make the royal icing (5 minutes): In a medium bowl, whisk together the powdered sugar and meringue powder. Add 3 tablespoons of water and whisk until smooth. The icing should be thick but flow slowly — like honey. Add the remaining tablespoon of water if needed. Divide the icing into separate bowls and color with gel food coloring as desired.
- Decorate the cookies (30-45 minutes): Outline each turkey cookie with stiff icing using a piping bag fitted with a #2 tip. Let the outlines dry for 10 minutes, then flood the centers with thinner icing. While the icing is still wet, add candy corn feathers and mini chocolate chip eyes. Let the decorated cookies dry completely — at least 4 hours or overnight.
Notes
Butter temperature is crucial: it should be soft enough to leave an indent when pressed, but not greasy. Chill the dough between batches to keep the shapes sharp. For best results, decorate the day before serving and let the icing set overnight.
Nutrition
- Serving Size: 1 cookie
- Calories: 180
- Sugar: 12
- Sodium: 60
- Fat: 8
- Saturated Fat: 5
- Carbohydrates: 25
- Protein: 2
Keywords: Thanksgiving, turkey cookies, sugar cookies, royal icing, holiday cookies, easy sugar cookies