Love this? Save it for later!
Share the inspiration with your friends
There used to be a tiny café tucked into the side of a used bookstore in Portland that made the most ridiculous caramel apple crumble bar. I mean, the kind of ridiculous where you’d find excuses to drive across town just to grab one with your afternoon coffee. When they closed—suddenly, with a handwritten sign taped to the door that said “Off to find more sunshine”—I honestly felt a little lost. That bar had become my secret Tuesday ritual, my little reward for adulting, my proof that simple things could still feel extraordinary.
After twelve tries—twelve, let me tell you, including one batch that turned into a sticky, smoky disaster because I forgot the salt in the caramel—I finally got it. And then I made it lighter because, well, my jeans were starting to have opinions about my café habit. The original version had enough butter to make a French chef blush. My version keeps all that cozy, spiced, buttery-crunchy magic but swaps in smarter fats, less sugar, and a whole lot more apple per bite.
You know that feeling when you take a bite of something and you just *know* it’s going to be a problem because you’re going to want it all the time? That’s this bar. But now it’s a problem you can feel pretty good about. Honestly, I think the café version would approve—maybe even ask for the recipe. These lighter caramel apple crumble bars have that same soul-soothing satisfaction, just with a little less guilt and a lot more room for a second helping.
Why You’ll Love This Recipe
These aren’t just another apple bar that leaves you feeling heavy and sluggish. After years of testing healthier desserts—and, full disclosure, failing plenty of times—I landed on a version that actually delivers on both flavor and feel. I’ve brought these to potlucks, family dinners, and even a book club where someone asked for the recipe before she finished her first bite. That’s the kind of trust this recipe builds.
- Quick & Easy: From start to warm-out-of-the-oven bliss in about an hour. The hands-on time is maybe 20 minutes, which means you can pull these together while your coffee’s still hot.
- Simple Ingredients: No weird health-food-store finds here. Apples, oats, a little coconut oil or butter, some Greek yogurt, and a secret weapon for the caramel that you probably already have in your fridge.
- Perfect for Fall (and all year): Great for Thanksgiving dessert tables, weekend baking projects, or just because it’s Wednesday and you deserve something warm and spiced.
- Crowd-Pleaser: I’ve watched kids go back for thirds right next to their health-conscious moms. Nobody guesses it’s lighter until you tell them—and even then, they don’t care.
- Unbelievably Delicious: The contrast between the tender, cinnamon-spiced apples and that crunchy oat topping, all held together with a silky caramel that doesn’t come from a bag of melted candies? It’s next-level comfort food, period.
What makes this different from every other apple crumble bar out there is the caramel situation. Instead of heavy cream and a pound of sugar, I use a clever blend of dates and a touch of coconut milk that creates this rich, almost buttery caramel that’s honestly hard to stop eating with a spoon. And the topping? It’s got this perfect crunch from oats and a little almond flour, with just enough coconut oil to make it golden without being greasy. This isn’t just another version—it’s my best version, tested on neighbors, coworkers, and my very honest sister-in-law.
What Ingredients You Will Need
This recipe relies on simple, wholesome ingredients to create that deep, comforting apple flavor and satisfying crumble texture. Most of these are pantry staples, and I’ve included easy swaps for whatever you have on hand.
For the Apple Filling
- 4 medium apples (about 600g or 1.3 lbs), peeled, cored, and diced into ½-inch pieces (I prefer Honeycrisp or Fuji for sweetness that holds up during baking; Granny Smith works too if you like a tarter bite)
- 2 tablespoons maple syrup or honey (adds natural sweetness without refined sugar)
- 1 tablespoon lemon juice (keeps the apples from browning and brightens the flavor)
- 1 teaspoon ground cinnamon (the backbone of any good apple dessert)
- ¼ teaspoon ground nutmeg (freshly grated if you have it—worth the extra 30 seconds)
- 1 tablespoon arrowroot powder or cornstarch (thickens the juices so you don’t get a soggy bottom)
For the Crust and Crumble Topping
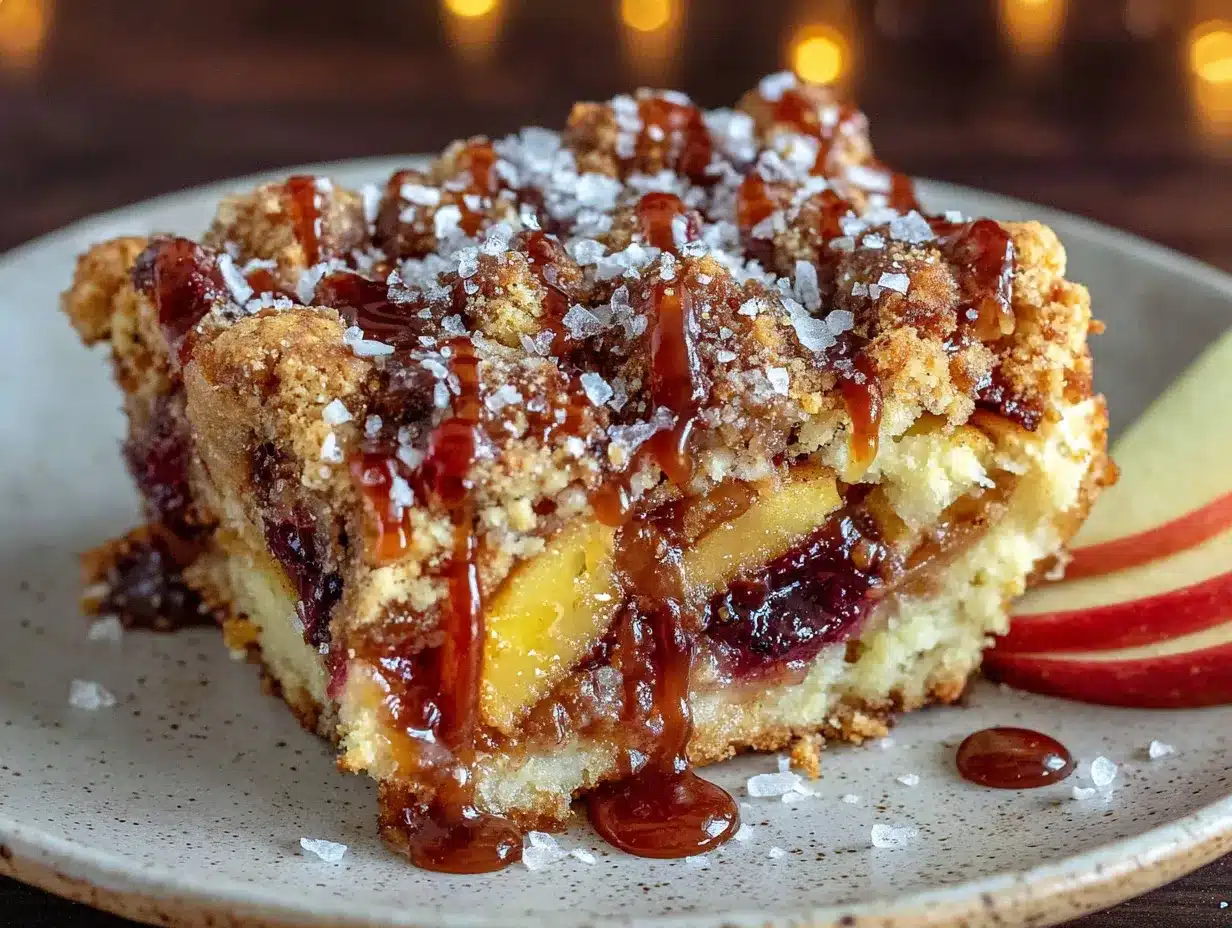
- 1 ½ cups rolled oats (not quick oats—they get mushy; use certified gluten-free if needed)
- 1 cup almond flour (adds richness and keeps the crumble tender; you can sub whole wheat pastry flour if nuts aren’t your thing)
- ¼ cup coconut sugar or brown sugar (I like coconut sugar for its lower glycemic impact and subtle caramel notes)
- ½ teaspoon baking powder (gives the crust just a little lift)
- ¼ teaspoon salt (don’t skip this—it makes everything taste more like itself)
- 6 tablespoons coconut oil, solid but soft (or unsalted butter if you’re not dairy-free; I’ve tested both and honestly love the butter version for a slightly richer flavor)
- 1 large egg, lightly beaten (helps bind the crust; for a vegan version, use a flax egg: 1 tablespoon ground flax mixed with 3 tablespoons water, let sit for 5 minutes)
For the Lighter Caramel Sauce
- 1 cup soft Medjool dates, pitted (about 6-8 large dates; soak them in hot water for 10 minutes if they’re firm)
- ¼ cup full-fat coconut milk from a can (the creamy part; light coconut milk works but makes a thinner sauce)
- 2 tablespoons coconut oil or butter, melted
- 1 teaspoon vanilla extract
- ¼ teaspoon salt (flaky sea salt is lovely here)
- 1-2 tablespoons warm water, as needed for consistency
I’ve been using Medjool dates from Trader Joe’s for years—they’re consistently soft and sweet, and they blend into the silkiest caramel. If you’re using a different variety, just make sure they’re soft and sticky. The coconut milk gives this sauce a richness that’s honestly shocking for something with no cream or refined sugar.
Equipment Needed
You don’t need a fancy bakery setup for these bars, which is one of the reasons I make them so often. Here’s what you’ll want to have handy:
- 8×8 inch baking pan (a 9×9 works too, but the bars will be slightly thinner; adjust baking time by 3-5 minutes)
- Parchment paper (for easy lifting—I always cut two strips that cross in the pan like a sling)
- Food processor or high-speed blender (for the date caramel; a good immersion blender with a small cup works too, I’ve done it)
- Mixing bowls (one large, one medium)
- Sharp knife and cutting board (for dicing apples evenly—trust me, uneven pieces lead to uneven baking)
- Measuring cups and spoons
- Rubber spatula (for pressing the crust down evenly)
- Cooling rack (optional but helpful for even cooling)
If you don’t have a food processor, you can make the caramel by mashing the dates with a fork and whisking in the other ingredients—it takes more elbow grease but works in a pinch. I’ve also used my Vitamix for the caramel and it comes out incredibly smooth in about 30 seconds.
Preparation Method
Let’s get baking. I’ve broken this down so you can move through it without feeling rushed. The whole thing comes together in about an hour, and most of that is hands-off oven time.
Step 1: Prep Your Pan and Oven
Preheat your oven to 350°F (175°C). Line your 8×8 pan with parchment paper, leaving a little overhang on two opposite sides—this is your sling for lifting the bars out later. Lightly grease the parchment with a tiny bit of coconut oil so nothing sticks.
Step 2: Make the Date Caramel
If your dates feel firm, soak them in hot water for 10 minutes, then drain. Add the pitted dates, coconut milk, melted coconut oil, vanilla, and salt to your food processor. Blitz until completely smooth, scraping down the sides once or twice. Add warm water a tablespoon at a time if it’s too thick—you want a pourable, silky consistency, like thick honey. Taste it. I dare you not to eat a spoonful. Set aside.
Step 3: Cook the Apple Filling
In a medium bowl, toss the diced apples with maple syrup, lemon juice, cinnamon, nutmeg, and arrowroot powder. Let it sit for 5 minutes while you make the crust—this helps the apples release some juice and the arrowroot starts working its thickening magic. For deeper flavor, you can sauté the apples in a pan over medium heat for 5 minutes until slightly softened, but honestly, I skip this step most of the time and they come out perfectly tender from baking.
Step 4: Make the Crust and Topping Base
In a large bowl, combine the rolled oats, almond flour, coconut sugar, baking powder, and salt. Add the solid coconut oil (or cold butter, cut into small pieces) and use your fingers or a pastry cutter to work it into the dry ingredients until the mixture looks like coarse crumbs with some pea-sized bits of fat still visible. Add the beaten egg and stir until everything is just combined. The mixture will be crumbly but should hold together when you squeeze a handful.
Step 5: Assemble the Bars
Press about two-thirds of the oat mixture firmly into the bottom of your prepared pan. I use the bottom of a flat measuring cup to really pack it down—this is your crust, and a tight crust keeps the bars from falling apart. Spread the apple mixture evenly over the crust. Drizzle about half the date caramel over the apples—you don’t want to drown them, just coat them nicely. Reserve the rest for serving. Sprinkle the remaining oat mixture over the top, breaking it into clumps as you go. Don’t press it down; you want those crumbly bits to get golden and crunchy.
Step 6: Bake
Bake for 35-40 minutes, until the top is deeply golden and the apple filling is bubbling around the edges. If the top is browning too fast after 25 minutes, tent loosely with foil. Let the pan cool on a wire rack for at least 20 minutes before lifting out and cutting—I know it’s hard to wait, but the bars set as they cool and cutting too early turns them into crumble chaos. I learned this the hard way after serving what looked like delicious apple oatmeal.
Step 7: Drizzle and Serve
Once cut, drizzle the remaining date caramel over the top. If the caramel has thickened, warm it gently with a splash of coconut milk. Serve warm or at room temperature. The first bite should make you close your eyes. If it doesn’t, add a tiny pinch of flaky salt—it wakes everything up.
Cooking Tips & Techniques
After making these bars more times than I care to count, I’ve collected a few hard-earned lessons that will save you from my early mistakes.
Don’t overmix the crust. I know it’s tempting to keep working the fat into the flour until it’s totally uniform, but those little pockets of coconut oil or butter are what create the flaky, tender texture. Stop when you see pea-sized bits. Your bars will thank you.
Let the apples speak. The first few times I made these, I added extra sugar and cinnamon because I thought more was better. Turns out, good apples—especially Honeycrisp or Fuji—are sweet enough on their own. The maple syrup and spices are there to support, not overwhelm. Let the apple flavor be the star.
Patience with the caramel. My biggest failure came when I didn’t soak my dates long enough. The caramel came out grainy and wouldn’t blend smooth. If your dates are even slightly firm, give them a hot bath for a full 10 minutes. And if your caramel is too thick after blending, add warm water one tablespoon at a time until it flows like lava—slow but steady.
Watch your oven like a hawk. Every oven runs differently. My old apartment oven would brown the top in 25 minutes while the middle was still raw. I learned to rotate the pan halfway through and check at the 30-minute mark. The bars are done when the edges are bubbly and the top is a deep golden brown. A toothpick inserted in the center should come out with a few moist crumbs, not wet batter.
Multitasking is your friend. While the apples are sitting in their spiced bath, make the crust. While the crust chills for a few minutes (if you have time—I rarely do), prep your pan. The whole process flows smoothly if you think ahead. I’ve made these with a toddler hanging on my leg, and the key is having everything measured and ready before you start mixing.
Variations & Adaptations
One of the best things about this recipe is how flexible it is. I’ve played around with it more than I’d like to admit, and here are some of my favorite twists.
Gluten-Free Version: This recipe is naturally gluten-free if you use certified gluten-free oats. Just double-check your almond flour and baking powder labels. I’ve served this to gluten-sensitive friends without telling them and they never noticed a difference.
Vegan Adaptation: Swap the egg for a flax egg (1 tablespoon ground flaxseed mixed with 3 tablespoons water, let sit for 5 minutes until gel-like). Use coconut oil instead of butter, and make sure your sugar is vegan-friendly. The bars hold together beautifully—the flax adds a nice binding quality.
Seasonal Fruit Swap: In summer, try this with sliced peaches or nectarines instead of apples. In winter, pears with a pinch of cardamom are gorgeous. I once made a version with half apple, half ripe pear, and it was so good I wrote it down for next year.
Nut-Free Option: Replace the almond flour with an equal amount of oat flour (just grind rolled oats in your food processor until powdery). The texture will be slightly less tender but still delicious. I’ve also used sunflower seed flour successfully, though it turns the crust a little green from the natural reaction—still tastes great.
Extra Crunchy Topping: Add ¼ cup chopped pecans or walnuts to the crumble topping before baking. Toast them lightly first for maximum flavor. My husband insists this is the only way to make them.
My personal favorite variation is adding a teaspoon of fresh ginger, grated right into the apple mixture. It adds this warm, slightly spicy kick that pairs beautifully with the caramel. I stumbled on this by accident when I had leftover ginger from a stir-fry, and now I do it every time.
Serving & Storage Suggestions
These bars are at their absolute best warm, about 15 minutes out of the oven, with a generous drizzle of that date caramel and maybe a scoop of vanilla ice cream or a dollop of Greek yogurt. The contrast between the warm, tender apples and the cold, creamy topping is honestly one of my favorite things in the world.
They’re also fantastic at room temperature, which makes them perfect for packing in lunchboxes or bringing to a fall picnic. I’ve even eaten one cold from the fridge the next morning with my coffee, and let me tell you, it’s a dangerous habit to start.
Storage: Keep any leftover bars in an airtight container in the refrigerator for up to 5 days. The flavors actually meld and deepen overnight, so day-two bars are often even better. Just let them come to room temperature or warm them briefly before serving.
Freezing: These freeze beautifully. Wrap individual bars tightly in plastic wrap, then place them in a freezer-safe bag or container. They’ll keep for up to 3 months. To reheat, unwrap and warm in a 300°F oven for 10-15 minutes, or microwave for 30-45 seconds. I always keep a stash in the freezer for when the craving hits unexpectedly.
Reheating: The microwave works in a pinch, but the oven or toaster oven does a better job of reviving the crunchy topping. If you’re reheating just one bar, the toaster oven at 325°F for about 8 minutes is perfect. If the top starts to brown too fast, cover loosely with foil.
One thing I’ve noticed: the date caramel thickens in the fridge. If you’re serving these cold, let the bars sit out for 10 minutes or warm the extra caramel with a splash of coconut milk before drizzling. It makes a difference in the overall experience.
Nutritional Information & Benefits
Let’s be real—these are still a dessert, and they’re meant to be enjoyed. But compared to traditional caramel apple crumble bars, which can pack 400+ calories and a scary amount of sugar per serving, these are a genuinely smarter choice.
Per bar (based on 9 servings): approximately 285 calories, 14g fat (8g saturated), 38g carbohydrates, 5g fiber, 18g sugar (from natural sources), 5g protein. The fiber and protein help keep you satisfied, so one bar actually feels like enough.
The star ingredients here are doing real work. Apples provide pectin and quercetin, both linked to heart health and stable blood sugar. Oats offer beta-glucan, which helps lower cholesterol—a nice bonus for a dessert. The dates in the caramel are packed with potassium, magnesium, and antioxidants, and they provide sweetness without the blood sugar spike of refined sugar. Coconut oil contains medium-chain triglycerides (MCTs) that some research suggests may support metabolism.
This recipe is naturally gluten-free (with certified oats), dairy-free (if using coconut oil), and free from refined sugar. It’s suitable for most dietary preferences, though it does contain nuts (almond flour) and eggs. For a nut-free or vegan version, see the variations above.
My personal philosophy? Food should nourish you, but it should also make you happy. These bars do both. They’re the kind of dessert I feel good about serving my family—and myself—on a random Tuesday night.
Conclusion
These lighter caramel apple crumble bars are proof that you don’t have to choose between eating well and eating something that feels like a real treat. They’ve got all the cozy, spiced, buttery-crunchy comfort of the original café version I fell in love with, but they’re made with ingredients that actually do something good for your body. The date caramel alone is worth the price of admission—I honestly keep a jar of it in my fridge now for drizzling on oatmeal, yogurt, or just eating by the spoonful when nobody’s looking.
I’d love for you to try these and make them your own. Maybe you’ll add extra cinnamon, swap in pears, or double the caramel like I always do. However you make them, I hope they bring you that same moment of quiet satisfaction—the kind where you take a bite and everything feels a little bit better.
If you do make them, come back and let me know how they turned out. Did you try a variation? Did your family fight over the last bar? I genuinely want to hear about it. And if you’re looking for other cozy, healthier desserts, you might love my healthy pumpkin bars or my no-bake chocolate oat bites for when you need something sweet in a hurry. Happy baking, friends.
Frequently Asked Questions
Can I use quick oats instead of rolled oats?
I don’t recommend it. Quick oats are more processed and absorb liquid differently, which can make your crust and topping turn out mushy instead of crunchy. Rolled oats give you that satisfying texture that holds up during baking. If rolled oats are all you have, you’re golden—if only quick oats are in the pantry, I’d wait until you can pick up the right kind.
Can I make these bars ahead of time for a party?
Absolutely. In fact, they’re even better the next day because the flavors have time to meld. Bake them the day before, let them cool completely, and store them in the fridge. Before serving, let them come to room temperature or warm them gently in the oven. Drizzle the caramel right before serving for the prettiest presentation.
Why did my bars fall apart when I cut them?
This usually happens when the bars haven’t cooled long enough. The filling needs time to set as it cools—cutting too early is like trying to slice warm jam. Let the pan cool on a wire rack for at least 20-30 minutes, then lift out using the parchment sling. For cleanest cuts, use a sharp knife and wipe it clean between slices. If they’re still crumbly, don’t worry—they’ll taste just as good in a bowl with a spoon.
Can I use a different sweetener in the caramel?
Dates are really the magic here—they create that thick, silky caramel texture that other sweeteners can’t replicate. If you absolutely must substitute, you could try using a combination of maple syrup and a tablespoon of coconut flour to thicken, but the flavor and consistency won’t be the same. I’d recommend sticking with the dates for the best results.
How do I know when the apples are done baking?
You’re looking for two signs: the top should be a deep golden brown, and you should see the apple filling bubbling gently around the edges of the pan. If you insert a toothpick into the center, it should come out with a few moist crumbs but no wet batter. The apples will continue to soften as the bars cool, so don’t worry if they still have a little bite when you pull them from the oven.
Pin This Recipe!
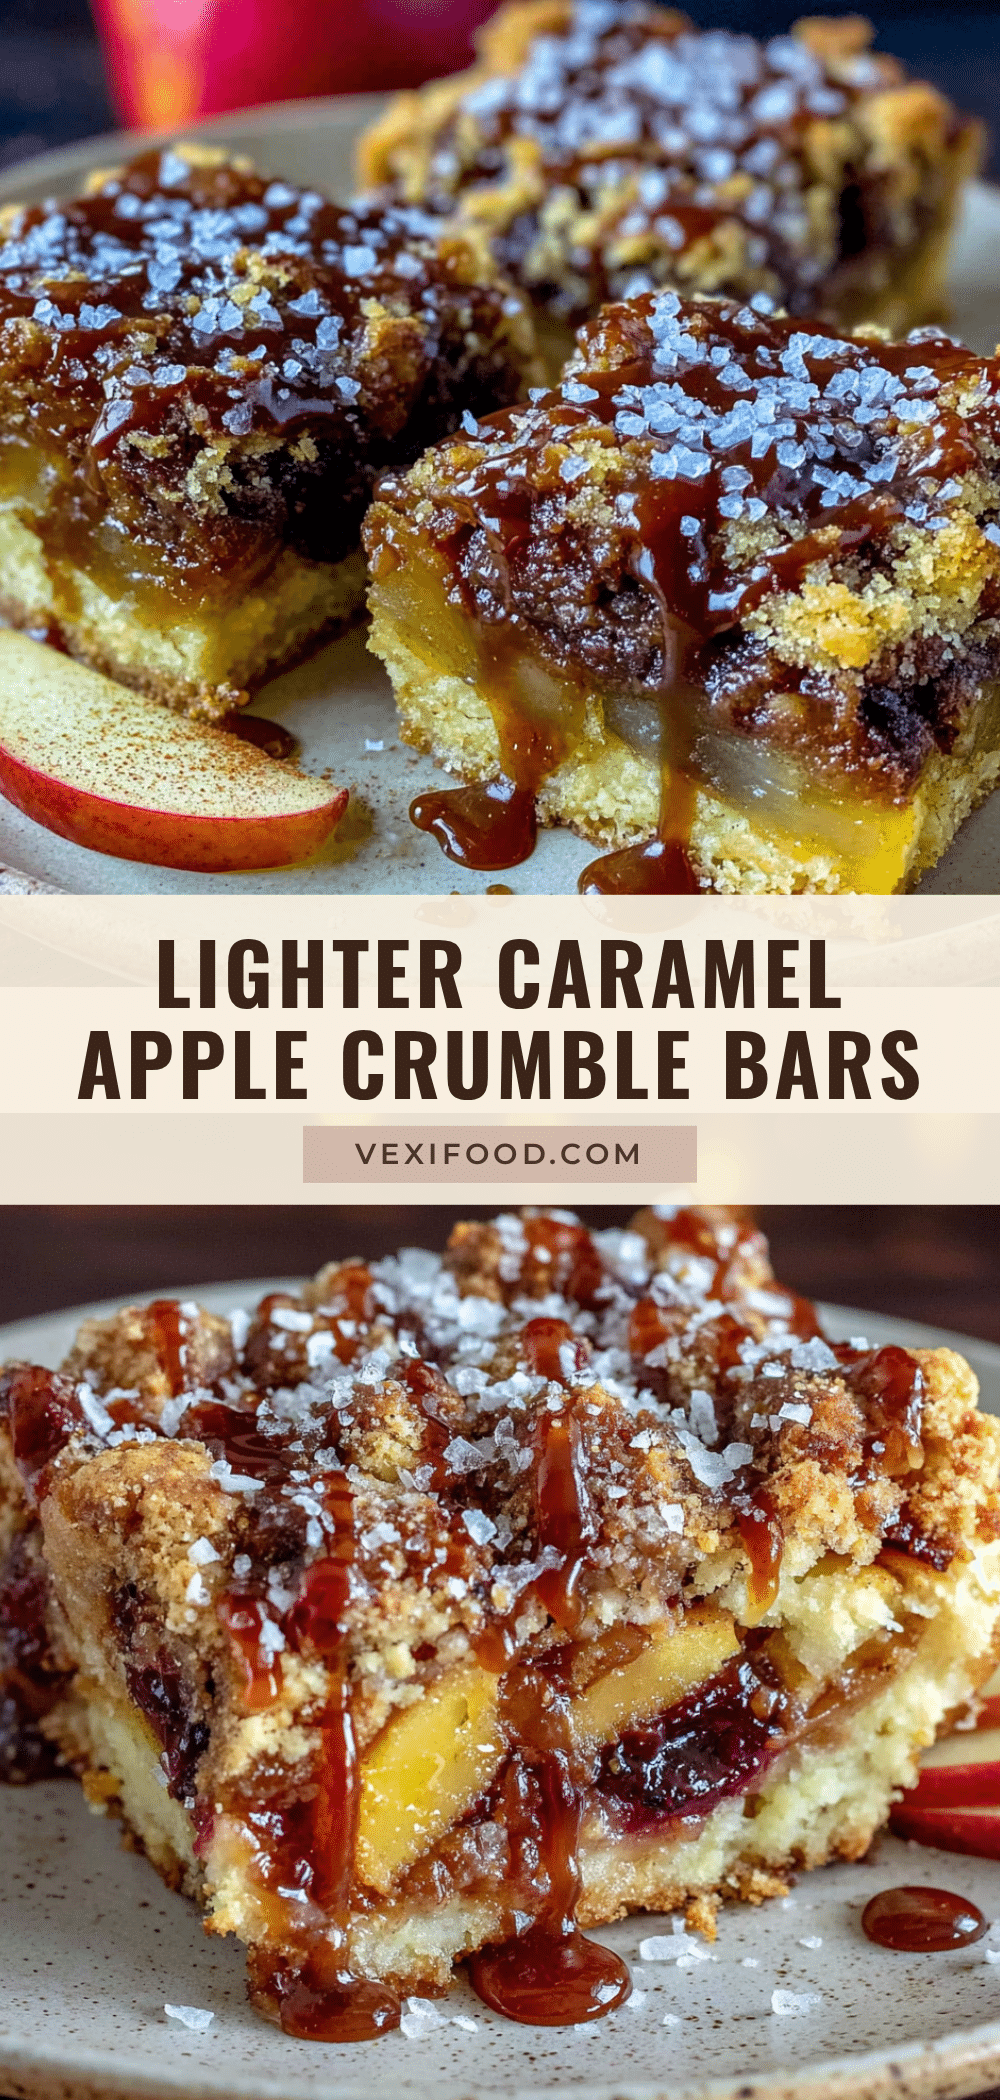
Lighter Caramel Apple Crumble Bars

These lighter caramel apple crumble bars are a healthier twist on a classic fall dessert, featuring a date-based caramel sauce, tender cinnamon-spiced apples, and a crunchy oat topping. They’re quick to make, naturally sweetened, and perfect for any occasion.
- Prep Time: 20 minutes
- Cook Time: 35-40 minutes
- Total Time: 55-60 minutes
- Yield: 9 servings 1x
- Category: Dessert
- Cuisine: American
Ingredients
- 4 medium apples (about 600g or 1.3 lbs), peeled, cored, and diced into ½-inch pieces
- 2 tablespoons maple syrup or honey
- 1 tablespoon lemon juice
- 1 teaspoon ground cinnamon
- ¼ teaspoon ground nutmeg
- 1 tablespoon arrowroot powder or cornstarch
- 1 ½ cups rolled oats
- 1 cup almond flour
- ¼ cup coconut sugar or brown sugar
- ½ teaspoon baking powder
- ¼ teaspoon salt
- 6 tablespoons coconut oil, solid but soft (or unsalted butter)
- 1 large egg, lightly beaten
- 1 cup soft Medjool dates, pitted (about 6–8 large dates)
- ¼ cup full-fat coconut milk from a can
- 2 tablespoons coconut oil or butter, melted
- 1 teaspoon vanilla extract
- ¼ teaspoon salt
- 1–2 tablespoons warm water, as needed
Instructions
- Preheat your oven to 350°F (175°C). Line an 8×8 inch baking pan with parchment paper, leaving overhang on two opposite sides. Lightly grease the parchment with coconut oil.
- If dates are firm, soak them in hot water for 10 minutes, then drain. In a food processor, combine pitted dates, coconut milk, melted coconut oil, vanilla, and salt. Blend until smooth, scraping down sides as needed. Add warm water 1 tablespoon at a time if too thick. Set aside.
- In a medium bowl, toss diced apples with maple syrup, lemon juice, cinnamon, nutmeg, and arrowroot powder. Let sit for 5 minutes.
- In a large bowl, combine rolled oats, almond flour, coconut sugar, baking powder, and salt. Add solid coconut oil (or cold butter, cut into small pieces) and work into dry ingredients until mixture resembles coarse crumbs with pea-sized bits of fat. Add beaten egg and stir until just combined.
- Press about two-thirds of the oat mixture firmly into the bottom of the prepared pan. Spread apple mixture evenly over crust. Drizzle about half the date caramel over the apples. Sprinkle remaining oat mixture over the top, breaking into clumps.
- Bake for 35-40 minutes, until top is deeply golden and apple filling is bubbling around edges. If top browns too fast after 25 minutes, tent loosely with foil. Let cool on a wire rack for at least 20 minutes before lifting out and cutting.
- Once cut, drizzle remaining date caramel over the top. Serve warm or at room temperature.
Notes
Don’t overmix the crust; leave pea-sized bits of fat for flakiness. Let apples be the star—good apples are sweet enough. Soak dates fully for smooth caramel. Rotate pan halfway through baking. Let bars cool completely before cutting to prevent crumbling.
Nutrition
- Serving Size: 1 bar
- Calories: 285
- Sugar: 18
- Sodium: 150
- Fat: 14
- Saturated Fat: 8
- Carbohydrates: 38
- Fiber: 5
- Protein: 5
Keywords: caramel apple crumble bars, healthy apple dessert, fall dessert, gluten-free apple bars, date caramel, lighter dessert