Love this? Save it for later!
Share the inspiration with your friends
I was wrestling with a bag of flour that had somehow exploded all over my kitchen counter—Tuesday afternoon, three days before Halloween, and my kids were bouncing off the walls with that pre-candy electricity that makes you question your life choices. My neighbor, a retired plumber named Frank who I’d only ever seen watering his petunias in cargo shorts, knocked on my back door holding a baking sheet covered in the most ridiculous-looking brownies I’d ever seen. They had these spiderwebs drawn on top in what looked like peanut butter, and honestly, my first thought was that Frank had finally lost it. But there he was, standing in my flour-dusted doorway, grinning like he’d just won the lottery, saying his granddaughter had helped him make them last weekend and they were “the only thing that kept the little monsters happy for a full hour.”
Frank is not the kind of guy you expect baking tips from. The man once told me he considered a can of chili a complete meal. But those brownies? Let me tell you, they were something else. The peanut butter spiderweb wasn’t just cute—it was genius. It turned a regular pan of brownies into the star of the Halloween party without any fancy piping bags or food coloring that stains your fingers for days. I stood there, flour still settling on my shoulders, while Frank explained how he’d messed up the first batch because he used crunchy peanut butter and the web kept breaking. “Smooth, always smooth,” he said, tapping the side of his head like he’d just shared the secret to the universe.
I made my own batch that night, and maybe you’ve been there—standing in your kitchen at 9 PM with chocolate batter on your elbow, wondering if this was really worth the effort. It was. The kids came running when they smelled the brownies baking, and the spiderweb decorating turned into a full family activity. My youngest kept giggling and calling it “spooky spaghetti.” I’ve made these every Halloween since, and they’ve never failed to bring that same energy. Frank moved away last year, but his spiderweb brownies stuck around. That’s the thing about a good recipe—it doesn’t matter where it comes from. What matters is that it works, and that it makes the people around your table happy.
Why You’ll Love This Recipe
These Halloween brownies aren’t just another festive dessert. They’re the kind of recipe that actually delivers on every promise, and I’ve tested them enough times to know exactly what works. Here’s what makes them special:
- Kid-Friendly from Start to Finish : The decorating part is so simple that even little hands can help. No piping bags, no complicated techniques—just a fork and some peanut butter. My kids have been making these since they were three, and the spiderwebs always turn out adorable, even when they’re a little lopsided.
- Budget-Friendly Ingredients : You probably already have most of this stuff in your pantry. Cocoa powder, flour, sugar, eggs, butter, and peanut butter. No specialty Halloween candy, no expensive food coloring, no trips to a fancy baking supply store. This is real-people cooking.
- Perfect for Halloween Parties and School Events : These brownies travel well, they don’t melt, and they look impressive without being fussy. I’ve brought them to classroom parties, neighborhood gatherings, and family dinners, and they always disappear first.
- Picky Eater Approved : Let’s be real—some kids are suspicious of anything that looks too weird. The peanut butter spiderweb is familiar enough that even the most cautious eater will give it a try. And chocolate brownies? That’s basically a universal language.
- Leftovers That Actually Last : These brownies stay fudgy and delicious for days. I’ve kept them in an airtight container on the counter for almost a week, and they were still soft and rich on day five. That’s huge for busy families who need snacks that hold up.
What sets this recipe apart from every other Halloween brownie you’ll find online is the technique. Most recipes use melted chocolate or complicated ganache for the web, which sounds fancy but ends up being a sticky mess. The peanut butter method is foolproof—it sets firm enough to hold its shape but stays soft enough to bite through easily. Plus, the salty-sweet combination with the rich chocolate is just unbeatable. It’s comfort food with a spooky twist, and honestly, it’s the kind of dessert that makes you close your eyes after the first bite.
What Ingredients You Will Need
This recipe uses simple, honest ingredients that work together to create brownies that are fudgy, rich, and perfectly Halloween-ready. No weird additives or hard-to-find items here—just pantry staples that deliver real results.
For the Brownies
- 1 cup (226g) unsalted butter — I use Land O’Lakes because it has a consistent fat content that gives the brownies that perfect fudgy texture. Melt it slowly so it doesn’t separate.
- 2 cups (400g) granulated sugar — Regular white sugar works best here. Brown sugar would change the texture and make them too dense.
- 4 large eggs — Room temperature eggs blend more smoothly into the batter. If you forgot to take them out early, place them in a bowl of warm water for five minutes.
- 1 tablespoon vanilla extract — Pure vanilla makes a difference, but honestly, I’ve used imitation in a pinch and nobody noticed. Use what you have.
- 1 cup (120g) all-purpose flour — Spoon and level your flour for accurate measuring. Scooping directly from the bag packs it down and makes brownies dry.
- 3/4 cup (65g) unsweetened cocoa powder — I prefer Hershey’s Special Dark for a deeper chocolate flavor, but regular cocoa powder works great too.
- 1/2 teaspoon salt — This balances the sweetness and brings out the chocolate flavor. Don’t skip it.
- 1/2 teaspoon baking powder — Just enough to give the brownies a slight lift without making them cakey.
For the Peanut Butter Spiderweb
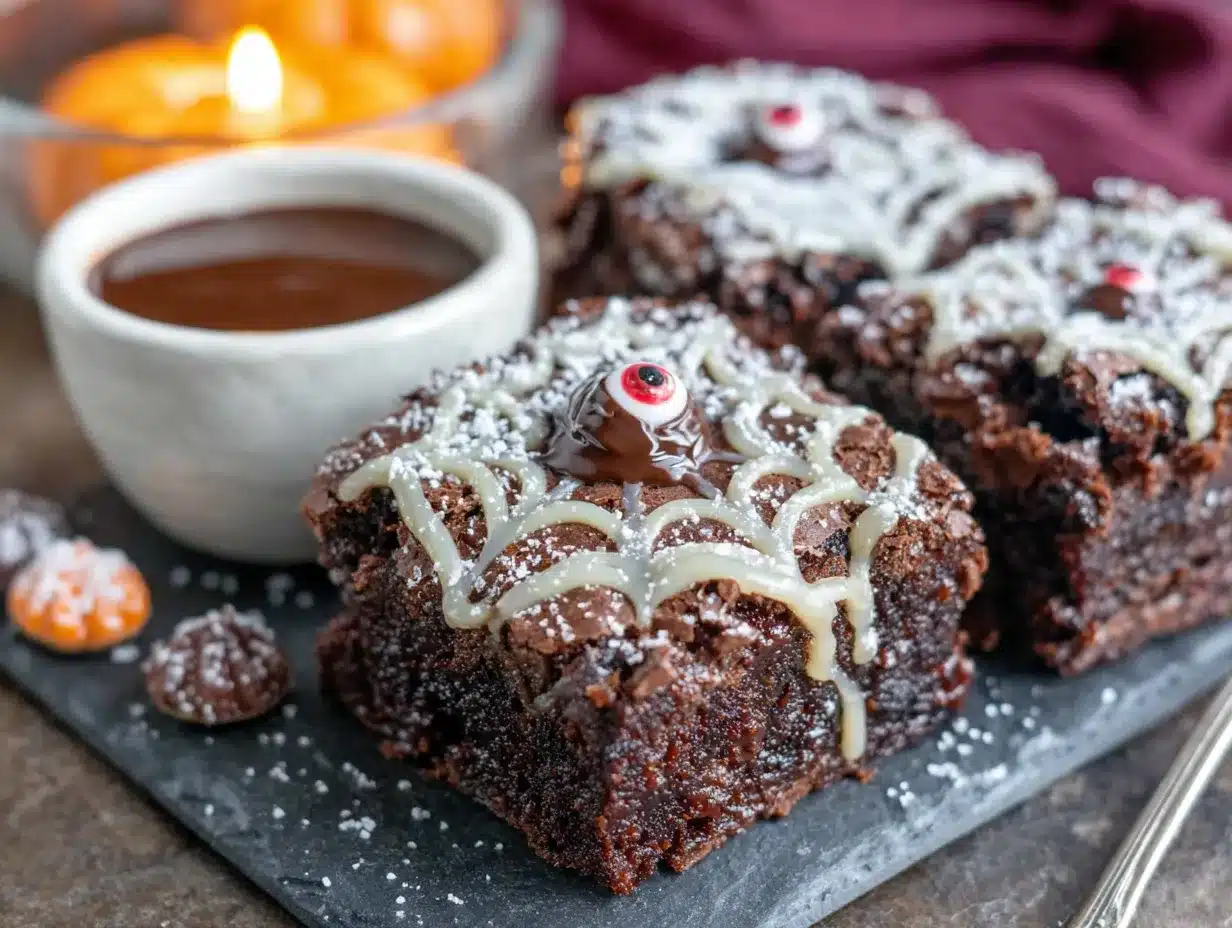
- 1/2 cup (130g) smooth peanut butter — This is non-negotiable. Crunchy peanut butter will break your spiderwebs. I use Jif or Skippy for the best consistency. Natural peanut butter that separates is too runny and won’t hold the web shape.
- 2 tablespoons powdered sugar — This helps the peanut butter firm up so the spiderweb lines stay crisp. It also adds a touch of sweetness.
- 1-2 tablespoons milk — Whole milk works best, but any milk you have will do. Add it slowly until the peanut butter reaches a drizzling consistency.
Ingredient Tips from My Kitchen : If you’re dairy-free, use vegan butter and a plant-based milk. The texture will be slightly different, but still delicious. For nut-free versions, sunflower seed butter works surprisingly well, though the color is a bit darker. I tested it last year for a school party, and the kids didn’t even notice the difference.
Equipment Needed
- 9×13 inch baking pan — This gives you the perfect thickness for fudgy brownies. Glass or metal both work, but metal pans give you slightly crispier edges.
- Parchment paper — Line your pan with it, leaving overhang on two sides. This makes lifting the entire batch out a breeze. Trust me, trying to cut brownies in the pan is a disaster waiting to happen.
- Large mixing bowl — You’ll need room to whisk everything together without splashing batter everywhere.
- Whisk and rubber spatula — A whisk for the wet ingredients and a spatula for folding in the dry ingredients. Don’t overmix or your brownies will be tough.
- Small microwave-safe bowl — For melting the peanut butter mixture. You can also use a small saucepan on low heat.
- Fork or toothpick — This is your spiderweb drawing tool. A fork gives you thicker lines, while a toothpick creates delicate webs.
- Cooling rack — Essential for letting the brownies cool completely before decorating. Warm brownies will turn your spiderweb into a puddle.
You don’t need any fancy piping bags or decorating tips for this recipe. I’ve made these brownies with nothing but a fork and a butter knife, and they turned out beautiful. If you have a squeeze bottle, that works great for the peanut butter, but it’s absolutely not necessary.
Preparation Method
- Preheat your oven to 350°F (175°C) and line your 9×13 pan with parchment paper. Make sure the paper overhangs on the long sides so you can lift the brownies out later. Lightly grease the paper with butter or non-stick spray.
- Melt the butter in a large microwave-safe bowl. Heat in 30-second intervals, stirring between each, until completely melted. Let it cool for two minutes—you don’t want it hot enough to cook the eggs when you add them.
- Add the sugar to the melted butter and whisk until combined. The mixture will look grainy, and that’s exactly right. Whisk for about a minute until it starts to look glossy.
- Add the eggs one at a time, whisking well after each addition. The batter should look smooth and slightly thickened. Add the vanilla and whisk again.
- Sift the flour, cocoa powder, salt, and baking powder together into a separate bowl. I know sifting seems like an extra step, but it breaks up clumps in the cocoa powder and gives you a smoother batter. If you’re in a hurry, just whisk the dry ingredients together thoroughly.
- Fold the dry ingredients into the wet ingredients using a rubber spatula. Use gentle, sweeping motions—don’t stir in circles. Stop as soon as you no longer see streaks of flour. Overmixing develops gluten and makes brownies cakey instead of fudgy.
- Pour the batter into the prepared pan and spread it evenly. The batter will be thick, so take your time. Use the spatula to push it into the corners.
- Bake for 25-30 minutes . Start checking at 25 minutes. The brownies are done when a toothpick inserted into the center comes out with a few moist crumbs attached—not wet batter, but not completely clean either. If it comes out clean, you’ve overbaked them. The edges should be set and slightly pulling away from the pan.
- Let the brownies cool completely in the pan on a cooling rack. This takes about 1-2 hours. Don’t rush this step. I’ve made the mistake of trying to decorate warm brownies, and the peanut butter just slides right off. Patience pays off here.
- Make the peanut butter spiderweb mixture while the brownies cool. In a small microwave-safe bowl, combine the peanut butter and powdered sugar. Microwave for 20 seconds, then stir. Add milk one tablespoon at a time until the mixture is smooth and drizzling consistency. It should be thin enough to flow from a fork but thick enough to hold its shape on the brownies.
- Lift the cooled brownies out of the pan using the parchment paper overhang. Place them on a cutting board. Use a sharp knife to cut them into squares—wipe the knife clean between cuts for neat edges.
- Create the spiderweb design on each brownie. Dip a fork or toothpick into the peanut butter mixture and drizzle a spiral starting from the center and working outward. Then, use a clean toothpick to drag lines from the center to the edges, creating the web effect. Work quickly while the peanut butter is still wet. If it thickens up, microwave it for another 10 seconds.
Sensory Cue : When the brownies are done, your kitchen will smell like a chocolate factory exploded. The top should look cracked and shiny, and the edges will be slightly darker than the center. If you press gently on the top, it should feel firm but spring back slightly.
Cooking Tips & Techniques
I’ve made these brownies at least twenty times, and I’ve learned a few things the hard way. Here’s what I wish someone had told me from the start.
Don’t overbake — This is the number one mistake people make with brownies. They look underdone when they’re actually perfect. Remember, they continue cooking from residual heat after you pull them out of the oven. If you’re unsure, err on the side of underbaking. Fudgy brownies are forgiving; dry brownies are not.
Use room temperature eggs — Cold eggs seize up the melted butter and create a lumpy batter. I learned this the hard way when I made a batch for a school bake sale and ended up with weird butter chunks in the batter. Place your eggs in a bowl of warm water for five minutes if you forgot to take them out ahead of time.
Line your pan properly — I cannot stress this enough. Parchment paper with overhang is your best friend. I once skipped this step and spent twenty minutes chiseling brownies out of the pan with a butter knife. Never again. The overhang creates handles that let you lift the entire batch out in one piece.
Let the brownies cool completely — This is where most people mess up the spiderweb. Warm brownies melt the peanut butter into a puddle, and your beautiful web turns into a brown smear. I’ve done it, and it’s heartbreaking. Give them the full two hours on the cooling rack. If you’re in a rush, pop them in the fridge for 30 minutes after they’ve cooled to room temperature.
Work in batches for the spiderweb — Don’t try to decorate all the brownies at once if you’re slow at drawing. The peanut butter mixture will thicken as it sits. Reheat it in the microwave for 10 seconds between batches to keep it flowing smoothly.
Practice on a piece of parchment paper first — If you’re nervous about the spiderweb design, do a few test runs on parchment paper. It takes the pressure off and lets you figure out the right consistency for your peanut butter mixture.
Variations & Adaptations
One of the best things about this recipe is how flexible it is. Here are some variations I’ve tried and loved.
Gluten-Free Version : Substitute the all-purpose flour with a 1:1 gluten-free baking flour blend. I’ve used Bob’s Red Mill with great results. The texture is slightly more delicate, so be gentle when cutting. Add an extra tablespoon of cocoa powder to help with structure.
Dairy-Free Version : Use vegan butter and a plant-based milk in both the brownies and the spiderweb. I’ve tested this with oat milk and it works beautifully. The brownies are slightly less rich, but still incredibly satisfying.
Nut-Free Version : Replace the peanut butter with sunflower seed butter or WowButter. The color will be darker—almost greenish—but the taste is still great. Add an extra tablespoon of powdered sugar to help it firm up, since seed butters tend to be runnier than peanut butter.
Extra Spooky Version : Add a few drops of orange food coloring to the peanut butter mixture for a Halloween twist. You can also sprinkle edible glitter or candy eyeballs on top of the spiderweb before it sets. My kids go crazy for this version.
Mint Chocolate Version : Add 1/2 teaspoon of peppermint extract to the brownie batter along with the vanilla. The combination of chocolate, mint, and peanut butter is surprisingly amazing. I discovered this by accident when I grabbed the wrong bottle, and now it’s my secret party trick.
White Chocolate Spiderweb : For a completely different look, melt white chocolate chips with a teaspoon of coconut oil and use that instead of peanut butter. The white web on dark brownies is striking, though it’s sweeter and less balanced than the peanut butter version.
Serving & Storage Suggestions
These brownies are best served at room temperature, which lets the peanut butter spiderweb stay slightly soft and the brownie stay fudgy. Arrange them on a Halloween-themed platter or a simple white plate to make the spiderwebs pop. I like to serve them alongside a glass of cold milk or a warm cup of apple cider for a cozy fall treat.
If you’re bringing them to a party or school event, place them in a single layer in a container with a tight-fitting lid. Put a piece of parchment paper between layers if you need to stack them. The spiderwebs are sturdy enough to hold up during transport, but they can smudge if you’re not careful.
Storage Instructions : Store leftover brownies in an airtight container at room temperature for up to 5 days. Do not refrigerate them—the cold dries out brownies and makes the peanut butter hard and crumbly. If you need to keep them longer, freeze them without the spiderweb decoration. Wrap each brownie individually in plastic wrap, then place them in a freezer bag. They’ll keep for up to 3 months. Thaw at room temperature, then add the spiderweb decoration fresh.
Flavor Development : These brownies actually taste better the next day. The flavors meld together overnight, and the texture becomes even more fudgy. I sometimes make them a day ahead on purpose for this reason. Just wait to add the spiderweb until right before serving so it stays fresh and pretty.
Nutritional Information & Benefits
Per brownie (based on 24 servings): Approximately 220 calories, 12g fat, 28g carbohydrates, 4g protein, 2g fiber, 18g sugar. These values are estimates and will vary based on specific ingredients and portion sizes.
While these are definitely a treat, there are a few redeeming qualities. The peanut butter adds protein and healthy fats that help balance the sugar rush, keeping blood sugar levels more stable than a plain sugar bomb. The cocoa powder is rich in antioxidants called flavonoids, which support heart health and reduce inflammation. Dark chocolate has been shown to improve mood and cognitive function—though let’s be honest, we’re eating these because they taste amazing, not because they’re health food.
Dietary Considerations : This recipe contains gluten, dairy, eggs, and peanuts. For allergen-friendly versions, check the variations section above. If you’re watching your sugar intake, you can reduce the sugar to 1 3/4 cups without significantly affecting the texture, though the brownies will be less sweet.
Conclusion
These Halloween brownies with peanut butter spiderweb are the kind of recipe that becomes a tradition. They’re simple enough for a Tuesday afternoon baking session with the kids, but impressive enough to steal the show at any Halloween gathering. The combination of fudgy chocolate and creamy peanut butter is timeless, and the spiderweb design adds just the right amount of spooky fun without requiring any artistic talent.
I love that this recipe came from an unexpected place—my neighbor Frank, the retired plumber who never seemed like the baking type. It’s a reminder that good ideas can come from anywhere, and that the best recipes often have the simplest origins. Every time I make these brownies, I think of him standing in my doorway with that baking sheet, and I smile.
Now I want to hear from you. Have you tried making these brownies? Did your kids help with the spiderwebs? Did you come up with your own twist on the design? Drop a comment below and share your experience. And if you loved this recipe, share it with a friend who needs a little Halloween magic in their kitchen. Happy baking, and may your spiderwebs always be spooky and delicious!
Frequently Asked Questions
Can I use boxed brownie mix instead of making from scratch?
Absolutely. This recipe works great with any standard 9×13 boxed brownie mix. Just prepare the mix according to the package directions, bake, and cool completely before adding the peanut butter spiderweb. The spiderweb recipe stays the same regardless of which brownie base you use.
Why did my peanut butter spiderweb turn into a puddle?
This usually happens for one of two reasons: your brownies were still warm when you added the spiderweb, or your peanut butter mixture was too thin. Make sure the brownies are completely cooled to room temperature. If your peanut butter mixture seems runny, add more powdered sugar one tablespoon at a time until it thickens.
Can I make these brownies ahead of time?
Yes! You can bake the brownies up to two days ahead and store them in an airtight container at room temperature. Add the spiderweb decoration on the day you plan to serve them for the best visual effect. The peanut butter web stays fresh for about 24 hours before it starts to absorb moisture from the brownies and lose its crisp lines.
My brownies turned out cakey instead of fudgy. What went wrong?
There are a few possible culprits. You may have overmixed the batter after adding the flour, which develops gluten and creates a cakey texture. You might have overbaked them—remember to pull them out when a toothpick comes out with moist crumbs, not clean. Or you could have used too much flour. Always spoon and level your flour rather than scooping directly from the bag.
Can I freeze these brownies with the spiderweb already on them?
I don’t recommend it. The peanut butter spiderweb can become discolored and lose its shape during freezing and thawing. Instead, freeze the undecorated brownies, then thaw them at room temperature and add the spiderweb fresh. This gives you the best results and the most impressive presentation.
Pin This Recipe!
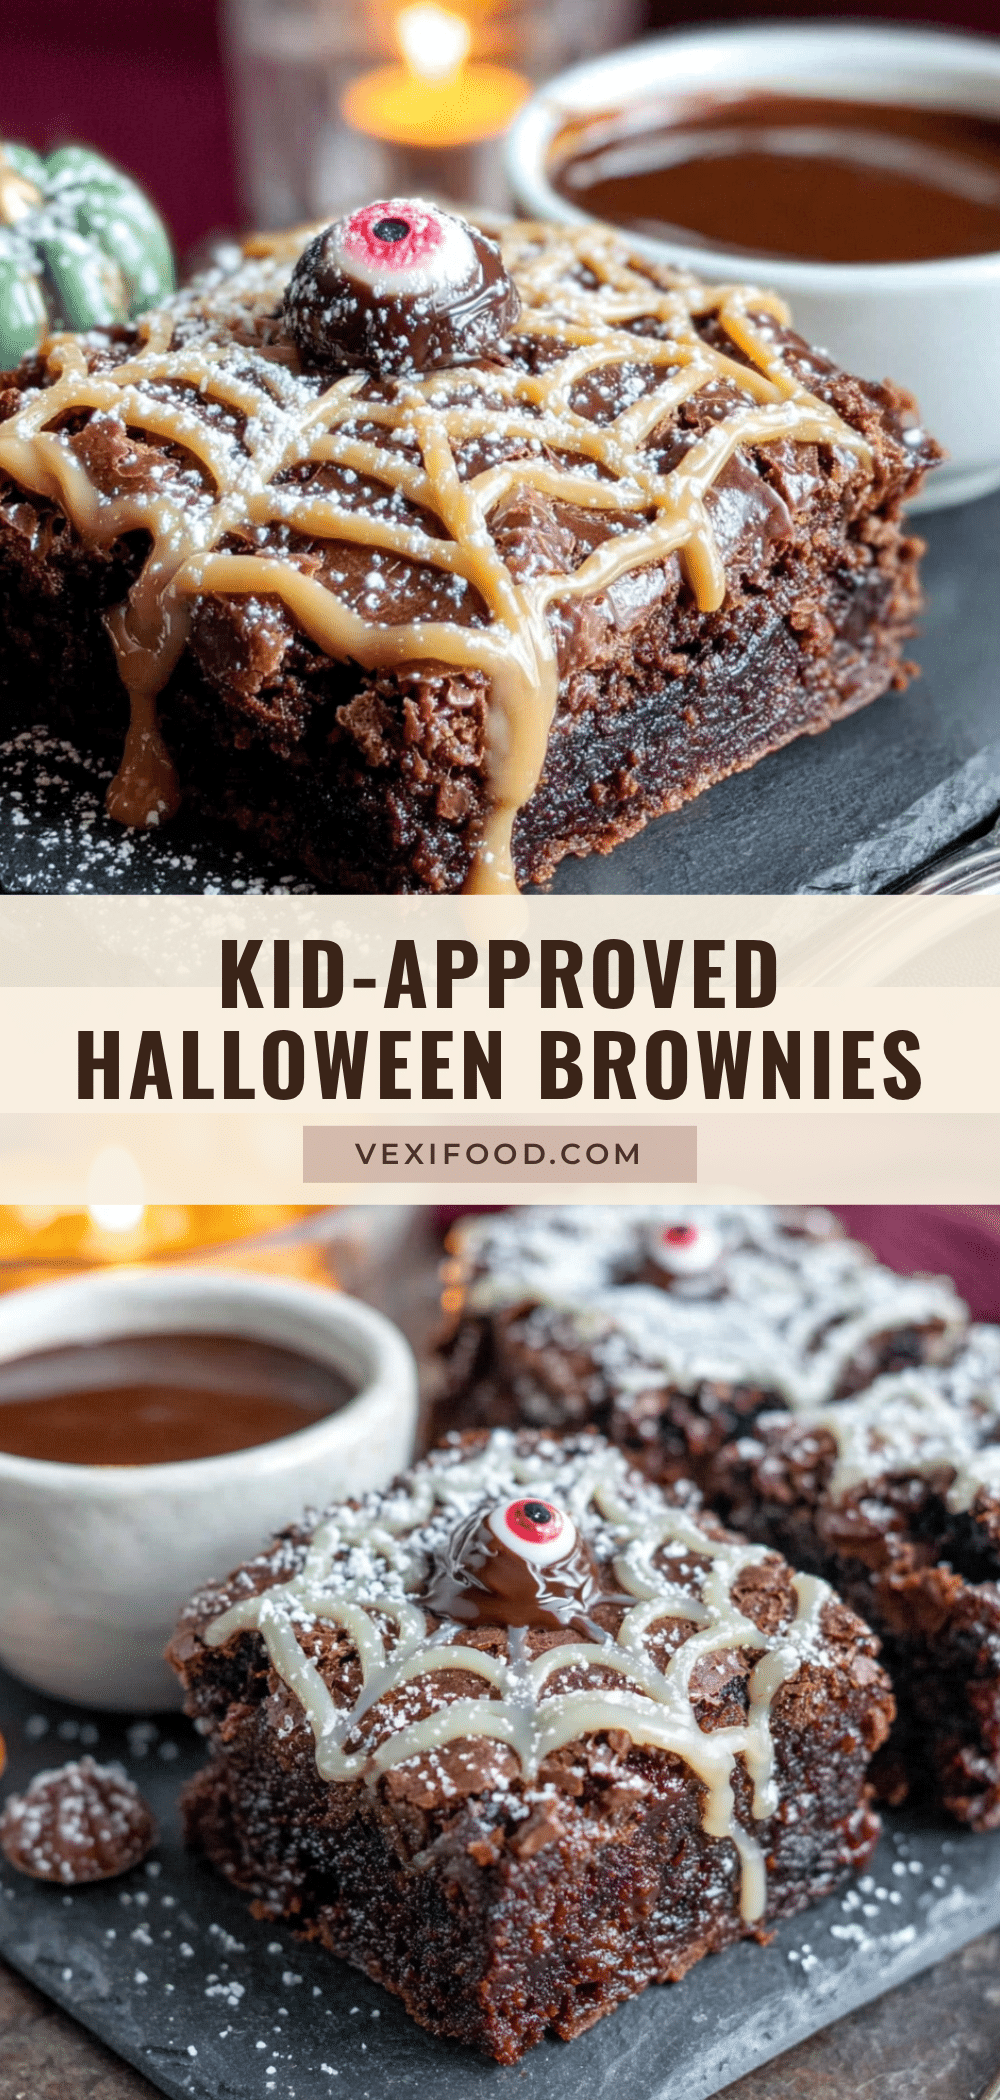
Kid-Approved Halloween Brownies with Easy Peanut Butter Spiderweb
Fudgy homemade brownies topped with a simple peanut butter spiderweb design that kids can help create. This budget-friendly Halloween treat uses pantry staples and delivers a perfect salty-sweet combination that picky eaters love.
- Prep Time: 15 minutes
- Cook Time: 30 minutes
- Total Time: 45 minutes
- Yield: 24 servings 1x
- Category: Dessert
- Cuisine: American
Ingredients
- 1 cup (226g) unsalted butter
- 2 cups (400g) granulated sugar
- 4 large eggs, room temperature
- 1 tablespoon vanilla extract
- 1 cup (120g) all-purpose flour
- 3/4 cup (65g) unsweetened cocoa powder
- 1/2 teaspoon salt
- 1/2 teaspoon baking powder
- 1/2 cup (130g) smooth peanut butter
- 2 tablespoons powdered sugar
- 1–2 tablespoons milk
Instructions
- Preheat oven to 350°F (175°C). Line a 9×13 inch baking pan with parchment paper, leaving overhang on the long sides. Lightly grease the paper.
- Melt butter in a large microwave-safe bowl in 30-second intervals. Let cool for 2 minutes.
- Add sugar to melted butter and whisk until combined and glossy, about 1 minute.
- Add eggs one at a time, whisking well after each. Add vanilla and whisk again.
- Sift together flour, cocoa powder, salt, and baking powder in a separate bowl.
- Fold dry ingredients into wet ingredients using a rubber spatula until just combined. Do not overmix.
- Pour batter into prepared pan and spread evenly.
- Bake for 25-30 minutes, until a toothpick inserted in center comes out with moist crumbs. Cool completely in pan on a cooling rack, about 1-2 hours.
- While brownies cool, make spiderweb mixture: Combine peanut butter and powdered sugar in a small microwave-safe bowl. Microwave 20 seconds, then stir. Add milk 1 tablespoon at a time until drizzling consistency.
- Lift cooled brownies from pan using parchment overhang. Cut into squares.
- To create spiderweb: Dip a fork or toothpick into peanut butter mixture and drizzle a spiral on each brownie from center outward. Use a clean toothpick to drag lines from center to edges, creating web effect. Work quickly while mixture is wet.
Notes
Don’t overbake – brownies are done when toothpick comes out with moist crumbs. Cool completely before decorating or peanut butter will melt. Use smooth peanut butter only; crunchy will break the webs. For best results, make brownies a day ahead and add spiderweb fresh before serving. Store in airtight container at room temperature up to 5 days.
Nutrition
- Serving Size: 1 brownie
- Calories: 220
- Sugar: 18
- Sodium: 120
- Fat: 12
- Saturated Fat: 6
- Carbohydrates: 28
- Fiber: 2
- Protein: 4
Keywords: Halloween brownies, peanut butter spiderweb, kid-friendly Halloween dessert, fudgy brownies, easy Halloween treat, spooky brownies, peanut butter brownies



