Love this? Save it for later!
Share the inspiration with your friends
I used to think trifles were for people who had their lives together. You know, the type who own matching serving bowls and never spill whipped cream on their shirt five minutes before guests arrive. For years, I’d scroll past those gorgeous layered desserts on my feed, convinced they required hours of meticulous assembly and a pastry chef’s patience. Then last Tuesday—the Tuesday before Labor Day weekend, actually—I found myself staring at a fridge full of berries that were about two hours from turning sad, a box of stale ladyfingers I’d bought on a whim, and absolutely no desire to turn on my oven in the late August humidity. My neighbor Karen had just texted asking if I was “bringing something pretty” to the block party, and I may have groaned loud enough for her to hear through the wall. So I threw this together, fully expecting it to be a soggy, unphotogenic mess that I’d eat standing over the sink while pretending it didn’t happen. Instead, I caught my husband sneaking a spoonful before dinner, and then another, and then I brought it to Karen’s party where it disappeared in fifteen flat minutes. Honestly, maybe you’ve been there—needing a dessert that looks like you fussed but actually lets you keep your sanity and your air conditioning. That’s this trifle. It stayed with me because it proved that sometimes the best things come from not trying too hard, and from trusting that simple ingredients, layered with a little patience, can make magic without breaking a sweat.
Why You’ll Love This Recipe
This Easy No-Bake Berry Trifle isn’t just another dessert—it’s the one you’ll reach for every time you need to impress without the stress. I’ve tested this version through three different block parties, two family reunions, and one very humid picnic where the ice cream melted before we even sat down. It passed every single test with flying colors, and here’s why it works.
- No-Bake & Stress-Free: The oven stays off, which matters when your kitchen feels like a sauna. This comes together in about 20 minutes of active work, then chills while you do literally anything else.
- Simple Ingredients: You probably have most of this in your fridge and pantry right now. No weird extracts, no obscure specialty items, no last-minute trips to three different stores.
- Perfect for Labor Day Weekend: Whether you’re heading to a cookout, hosting a casual dinner, or just want something pretty to snack on while watching the barbecue tournament on TV, this fits right in.
- Crowd-Pleaser: I’ve watched kids bypass the brownie platter for this trifle. Adults ask for the recipe every single time. It’s that rare dessert that hits every age group.
- Unbelievably Delicious: The texture combo—soft cream, tender cake, juicy berries, that tiny crunch from the cookie layer—is next-level comfort food. It tastes like you spent hours, but you didn’t.
What makes this version different from every other berry trifle out there is the layering technique I stumbled onto by accident. Instead of just dumping everything in, I let each layer sit for a minute before adding the next. This tiny pause lets the flavors start mingling before they even hit the fridge, and it prevents that dreaded soggy-bottom situation. Plus, I use a mix of fresh and lightly macerated berries, which gives you both brightness and that deep, jammy sweetness without cooking anything. It’s comfort food reimagined—lighter, faster, but with the same soul-soothing satisfaction. Perfect for impressing guests without stress, or turning a simple weekend into something memorable.
What Ingredients You Will Need
This recipe uses simple, wholesome ingredients to deliver bold flavor and satisfying texture without the fuss. Most of these are pantry staples or easy summer finds, and I’ve included notes on substitutions where they actually work.
For the Berry Layer
- 2 cups fresh strawberries, hulled and sliced (look for bright red, fragrant berries—they’ll taste better)
- 1 cup fresh blueberries (I like the wild ones for their tiny size and intense flavor)
- 1 cup fresh raspberries (handle gently, they’re fragile)
- 2 tablespoons granulated sugar (helps draw out the berry juices)
- 1 tablespoon fresh lemon juice (brightens everything up)
For the Cream Layer
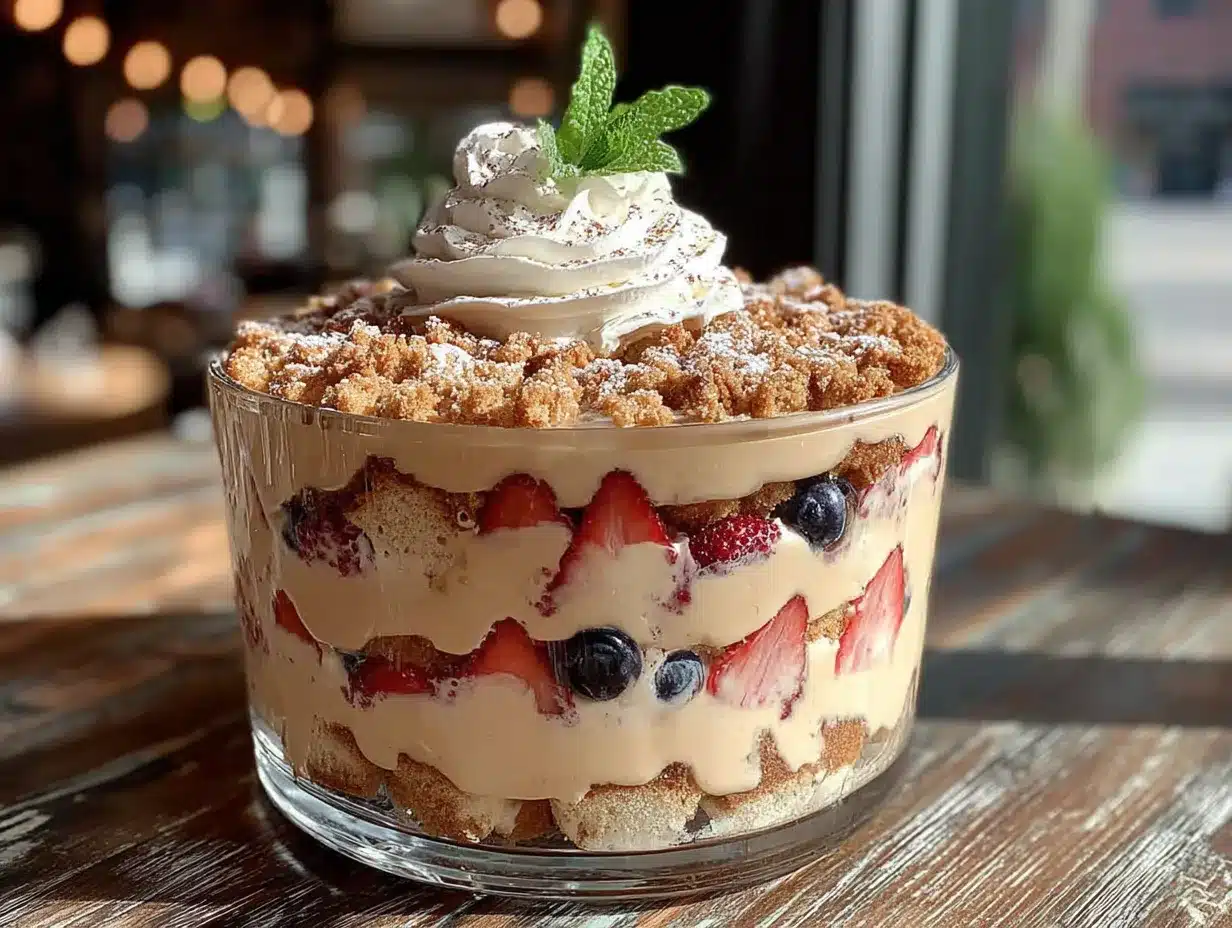
- 2 cups heavy whipping cream (cold from the fridge—this matters for whipping)
- 1/4 cup powdered sugar (adds sweetness without grittiness)
- 1 teaspoon vanilla extract (use real vanilla, not imitation, for best flavor)
- 8 ounces mascarpone cheese, softened (adds richness and stability to the cream)
For the Cake Layer
- 1 store-bought pound cake or angel food cake, cut into 1-inch cubes (about 4 cups) (I prefer Sara Lee pound cake for its sturdy texture, but any brand works)
- 1/4 cup berry juice or simple syrup (optional, for moistening the cake—I save the juice from macerating berries)
For Assembly & Garnish
- 1/2 cup crumbled shortbread cookies or graham crackers (adds a lovely crunch)
- Fresh mint leaves for garnish (optional but pretty)
- Extra berries for the top layer
I recommend using full-fat mascarpone here—the low-fat versions tend to separate and make the cream grainy. For a dairy-free option, use a high-quality coconut cream instead of heavy cream and a dairy-free cream cheese alternative for the mascarpone. If berries are out of season, frozen wild blueberries and thawed raspberries work fine; just drain them well before using so you don’t end up with a pink puddle at the bottom of your trifle bowl.
Equipment Needed
You don’t need much for this recipe, which is honestly half the appeal. Here’s what you’ll want on hand:
- Large trifle bowl or glass serving dish: A clear glass bowl about 8 inches wide and 5 inches deep works perfectly. I found mine at a thrift store for three bucks, and it’s my favorite kitchen possession. Any clear glass bowl lets you show off those pretty layers.
- Electric mixer or whisk: A hand mixer makes whipping cream a two-minute job. If you’re feeling ambitious, a whisk and some elbow grease work too—I’ve done it, and it’s a great arm workout.
- Medium mixing bowls: You’ll need two or three for the berries and cream. Nothing fancy.
- Rubber spatula: For folding the mascarpone into the cream without deflating it. A gentle hand matters here.
- Sharp knife and cutting board: For hulling strawberries and cubing the cake.
- Measuring cups and spoons: Because eyeballing cream ratios can get messy fast.
If you don’t have a trifle bowl, a large glass mixing bowl or even a wide-mouth mason jar for individual servings works beautifully. I’ve also used a rectangular glass baking dish in a pinch—it’s not as pretty, but it tastes the same.
Preparation Method
Let me walk you through this step by step. Trust me, if I can do this while simultaneously trying to keep a toddler from eating raw berries off the counter, you can handle it.
- Macerate the berries (15 minutes before starting): In a medium bowl, combine the sliced strawberries, blueberries, and raspberries. Sprinkle the 2 tablespoons of sugar and 1 tablespoon of lemon juice over the top. Gently toss everything together with a rubber spatula—you want to coat the berries without crushing them. Let them sit at room temperature for about 15 minutes. You’ll see a beautiful ruby-colored syrup start to pool at the bottom. This is liquid gold, don’t throw it away.
- Make the cream layer (5 minutes): In a large mixing bowl, combine the cold heavy cream, powdered sugar, and vanilla extract. Using an electric mixer on medium-high speed, whip until soft peaks form—this means when you lift the beaters, the cream holds a gentle peak that flops over slightly. This takes about 2-3 minutes. Add the softened mascarpone cheese and continue whipping on low speed just until combined and smooth. Be careful not to overmix, or the cream will turn grainy. You’re looking for a thick, spreadable consistency that holds its shape when you spoon it.
- Prepare the cake (2 minutes): Cut the pound cake or angel food cake into 1-inch cubes. If you’re using the reserved berry juice from maceration, lightly brush or drizzle it over the cake cubes. This step is optional, but it adds a lovely extra berry flavor and keeps the cake from being too dry. Don’t soak them—just a light touch.
- First layer—cake (1 minute): Spread half of the cake cubes evenly across the bottom of your trifle bowl. Press them down gently so they form a solid base.
- Second layer—berries (1 minute): Spoon half of the macerated berries over the cake layer, including about half of the syrup. Spread them out evenly, letting some juice drip down into the cake.
- Third layer—cream (2 minutes): Spoon half of the mascarpone cream over the berries. Use your spatula to spread it gently to the edges, creating an even layer. Don’t press down—just let it settle naturally.
- Fourth layer—crunch (30 seconds): Sprinkle half of the crumbled shortbread cookies or graham crackers over the cream. This adds a lovely texture contrast that will surprise people.
- Repeat the layers: Add the remaining cake cubes, then the remaining berries and syrup, then the remaining cream. Spread the top cream layer smoothly with your spatula.
- Garnish and chill (at least 4 hours, ideally overnight): Top with the reserved fresh berries and a few mint leaves if you’re feeling fancy. Cover the bowl with plastic wrap and refrigerate for at least 4 hours. Overnight is even better—the flavors meld together, and the cake softens into a pudding-like texture that’s absolutely dreamy. The waiting is the hardest part, I know, but it’s worth it.
One important note: If you’re serving this at a party, don’t skip the chilling time. The trifle needs that time to set up properly. I learned this the hard way when I served it after just an hour and ended up with a soupy mess that tasted fine but looked like a disaster. Patience, my friend.
Cooking Tips & Techniques
I’ve made this trifle maybe twenty times now, and I’ve learned a few things the hard way so you don’t have to. Here are my best tips for trifle success.
Don’t overwhip the cream. This was my biggest early mistake. I’d get distracted and keep mixing, and suddenly I had butter. Soft peaks are your goal—the cream should be billowy and light, not stiff and grainy. If you accidentally go too far, add a tablespoon of cold cream and fold it in gently to bring it back.
Let the macerated berries sit the full 15 minutes. I know it’s tempting to rush this step, but that time is what draws out the natural juices and creates that gorgeous syrup. Without it, your trifle will be dry and the layers won’t meld together properly. Set a timer if you have to.
Use cold ingredients for the cream. This is non-negotiable. Cold heavy cream whips faster and holds its shape better. If your kitchen is warm, chill your mixing bowl and beaters in the freezer for 10 minutes before you start. It makes a noticeable difference.
Layer with intention, not speed. Each layer should be even and deliberate. I used to just dump everything in and hope for the best, and the result was a messy, uneven trifle that looked more like a science experiment than a dessert. Taking those extra 30 seconds per layer transforms the final presentation.
Make it ahead. This trifle actually gets better after 24 hours in the fridge. The cake absorbs the berry juices and cream, becoming almost like a berry bread pudding. I often make it the day before Labor Day, then just pull it out and garnish with fresh berries before serving. It’s one less thing to worry about on party day.
Variations & Adaptations
This recipe is incredibly forgiving and flexible. Here are some ways I’ve adapted it for different occasions and dietary needs.
Berry Swap: Not a fan of raspberries? Use all strawberries and blueberries. In summer, I’ve added sliced peaches or nectarines for a stone fruit twist. In winter, use thawed frozen mixed berries—just drain them well. The syrup won’t be as vibrant, but the flavor is still wonderful.
Dairy-Free Version: Substitute the heavy cream with full-fat coconut cream (chill the can overnight and scoop off the solid part). Use a dairy-free cream cheese alternative for the mascarpone. The texture is slightly different—a bit less fluffy—but it’s still delicious and rich.
Gluten-Free Adaptation: Use a gluten-free pound cake or angel food cake (many store-bought versions are already gluten-free). Swap the shortbread cookies for gluten-free graham crackers or crushed gluten-free vanilla wafers.
Individual Servings: For a party, layer everything in small mason jars or clear plastic cups. This is great for picnics or barbecues where people are eating standing up. Plus, they look adorable lined up on a table.
Boozy Adult Version: Add 2 tablespoons of limoncello or berry liqueur to the macerating berries. Or brush the cake cubes with a bit of Grand Marnier. I tried this for a friend’s birthday and it was a hit—just be aware it’ll be a bit softer.
Chocolate Twist: Add a layer of chocolate shavings or mini chocolate chips between the cream and berries. The combination of chocolate and berries is classic for a reason. I’ve also used chocolate wafers instead of shortbread for a richer crunch.
Serving & Storage Suggestions
This trifle is best served cold, straight from the fridge. The texture is at its peak when the cream is firm but still fluffy, the berries are juicy, and the cake has softened into that perfect pudding-like consistency.
For presentation, I like to bring the trifle to the table on a small cake stand or a pretty platter. The clear glass shows off those beautiful layers, and it always gets a “wow” when people see it. Spoon it into bowls or onto plates, making sure everyone gets a bit of each layer. A small dollop of extra whipped cream on top never hurts, but it’s not necessary.
This pairs beautifully with a glass of iced tea, lemonade, or a crisp white wine like Sauvignon Blanc. For a full Labor Day spread, serve it alongside grilled burgers, corn on the cob, and a fresh green salad. It’s light enough to not weigh anyone down after a big meal.
Storage: Cover the trifle bowl tightly with plastic wrap and refrigerate for up to 3 days. The texture will continue to soften, but it stays delicious. I actually prefer it on day two when the flavors have fully melded. Do not freeze this—the cream will separate and become watery when thawed.
Reheating: Don’t. This is a cold dessert. If you want a warm berry dessert, make a crisp or cobbler instead. Trust me on this one.
Nutritional Information & Benefits
Here’s an approximate nutritional breakdown per serving (based on 8 servings):
| Nutrient | Amount per Serving |
|---|---|
| Calories | 380 |
| Total Fat | 24g |
| Saturated Fat | 14g |
| Cholesterol | 85mg |
| Sodium | 180mg |
| Total Carbohydrates | 38g |
| Dietary Fiber | 3g |
| Sugars | 26g |
| Protein | 4g |
| Vitamin C | 35% DV |
Berries are packed with antioxidants and vitamin C, which support immune health and reduce inflammation. The calcium from the cream and mascarpone is good for bone health. While this is definitely a treat, it’s a more wholesome one than many desserts—you’re getting real fruit and minimal processed ingredients. For a lighter version, use low-fat cream cheese and reduce the sugar in the cream layer by half. This dessert is naturally gluten-free if you choose a gluten-free cake, and it can be made dairy-free with the substitutions mentioned above. Potential allergens include dairy (cream, mascarpone) and gluten (cake, cookies).
Conclusion
This Easy No-Bake Berry Trifle is proof that you don’t need a culinary degree or a fully stocked bakery to create something beautiful and delicious. It’s the dessert that lets you show up to the Labor Day barbecue with your head held high and your oven still cool to the touch. I love this recipe because it’s honest—it doesn’t pretend to be something it’s not. It’s simple, it’s forgiving, and it tastes like summer in a bowl. Whether you use strawberries from the farmers market or frozen berries from your freezer, whether you layer it in a fancy crystal bowl or a simple glass dish, it will work. It will be good. And people will ask for the recipe. So go ahead and make it your own—swap the berries, add some chocolate, make it dairy-free, or keep it classic. I’d love to hear how it turns out. Drop a comment below and tell me your favorite variation, or tag me in your trifle photos. Happy Labor Day, and happy cooking!
Frequently Asked Questions
Can I use frozen berries instead of fresh?
Yes, absolutely. Thaw them first and drain off any excess liquid before macerating. Frozen berries tend to release more juice, so you might want to reduce the sugar slightly and skip adding extra syrup to the cake layer.
How far in advance can I make this trifle?
You can make it up to 2 days ahead. In fact, it tastes even better on day two when the flavors have fully melded. Just wait to add the final garnish of fresh berries and mint until right before serving so they stay bright and fresh.
Can I use a different type of cake?
Absolutely. Pound cake is traditional, but angel food cake, sponge cake, or even vanilla cake works well. Leftover birthday cake? That works too. Just avoid chocolate cake unless you’re going for that specific flavor profile—it can overpower the berries.
What if I don’t have a trifle bowl?
No problem. Use a large glass mixing bowl, a rectangular baking dish, or even individual mason jars or wine glasses. The presentation will be different, but the taste is the same. Individual servings in jars are actually great for parties because people can grab their own.
Can I make this recipe vegan?
Yes, with some substitutions. Use full-fat coconut cream instead of heavy cream, a vegan cream cheese for the mascarpone, and a vegan pound cake. The texture will be slightly different—less fluffy and a bit more dense—but it’s still delicious. Just make sure everything is well-chilled before whipping.
Pin This Recipe!
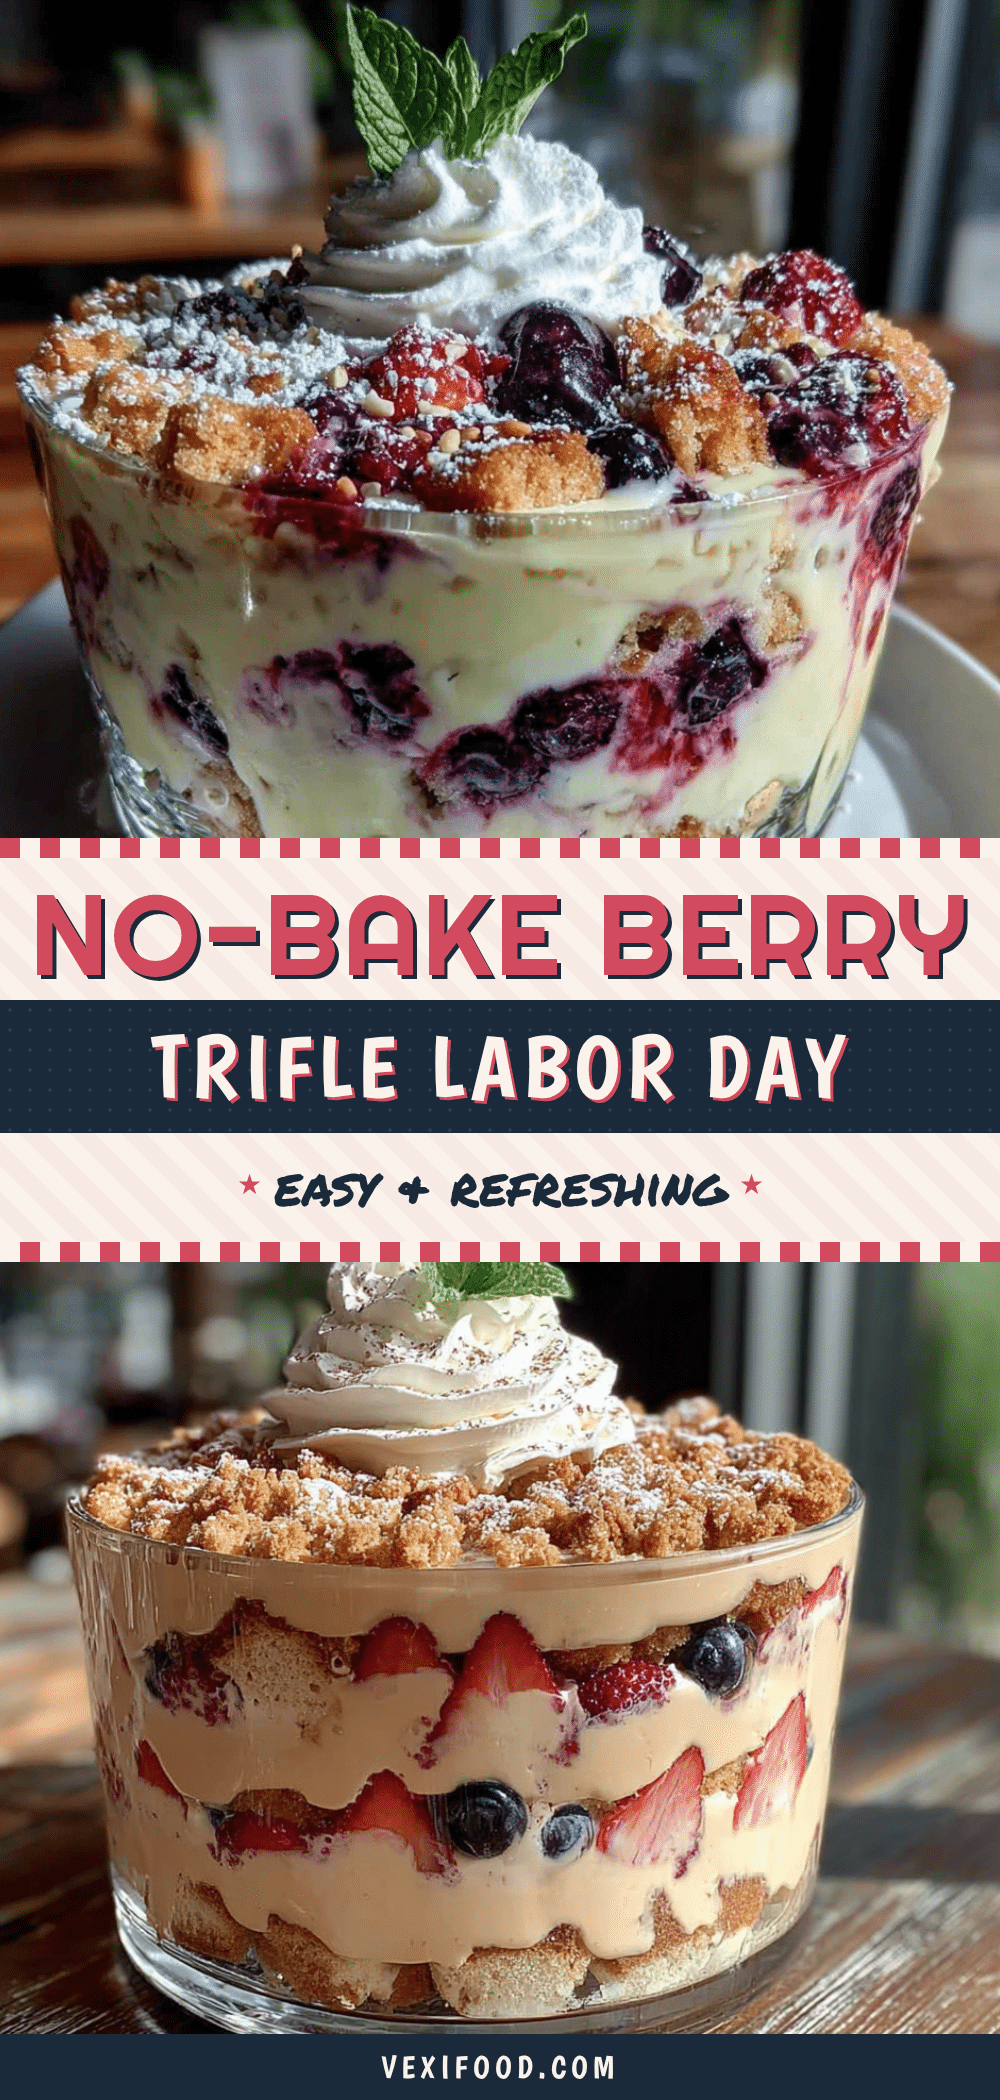
Easy No-Bake Berry Trifle: Best Labor Day Dessert
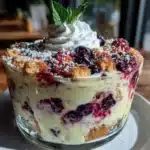
This Easy No-Bake Berry Trifle is the perfect stress-free dessert for Labor Day weekend. With layers of fresh macerated berries, creamy mascarpone, tender cake, and a crunchy cookie topping, it comes together in just 20 minutes of active work and looks stunning without turning on the oven.
- Prep Time: 20 minutes
- Cook Time: 0 minutes
- Total Time: 4 hours 20 minutes (includes chilling)
- Yield: 8 servings 1x
- Category: Dessert
- Cuisine: American
Ingredients
- 2 cups fresh strawberries, hulled and sliced
- 1 cup fresh blueberries
- 1 cup fresh raspberries
- 2 tablespoons granulated sugar
- 1 tablespoon fresh lemon juice
- 2 cups heavy whipping cream, cold
- 1/4 cup powdered sugar
- 1 teaspoon vanilla extract
- 8 ounces mascarpone cheese, softened
- 1 store-bought pound cake or angel food cake, cut into 1-inch cubes (about 4 cups)
- 1/4 cup berry juice or simple syrup (optional)
- 1/2 cup crumbled shortbread cookies or graham crackers
- Fresh mint leaves for garnish (optional)
- Extra berries for the top layer
Instructions
- Macerate the berries: In a medium bowl, combine sliced strawberries, blueberries, and raspberries. Sprinkle with 2 tablespoons sugar and 1 tablespoon lemon juice. Gently toss to coat. Let sit at room temperature for 15 minutes until syrup forms.
- Make the cream layer: In a large mixing bowl, combine cold heavy cream, powdered sugar, and vanilla extract. Using an electric mixer on medium-high speed, whip until soft peaks form (about 2-3 minutes). Add softened mascarpone cheese and whip on low speed just until combined and smooth.
- Prepare the cake: Cut pound cake or angel food cake into 1-inch cubes. If desired, lightly brush or drizzle with reserved berry juice or simple syrup.
- First layer: Spread half of the cake cubes evenly across the bottom of a trifle bowl. Press down gently.
- Second layer: Spoon half of the macerated berries over the cake layer, including about half of the syrup.
- Third layer: Spoon half of the mascarpone cream over the berries. Spread gently to the edges.
- Fourth layer: Sprinkle half of the crumbled shortbread cookies or graham crackers over the cream.
- Repeat layers: Add remaining cake cubes, then remaining berries and syrup, then remaining cream. Spread top cream layer smoothly.
- Garnish and chill: Top with reserved fresh berries and mint leaves. Cover with plastic wrap and refrigerate for at least 4 hours, ideally overnight.
Notes
Don’t skip the chilling time—the trifle needs at least 4 hours to set properly. Overnight is even better. Use full-fat mascarpone for best results. If using frozen berries, thaw and drain well before using. For a dairy-free version, use full-fat coconut cream and dairy-free cream cheese. For gluten-free, use gluten-free cake and cookies.
Nutrition
- Serving Size: 1 serving
- Calories: 380
- Sugar: 26
- Sodium: 180
- Fat: 24
- Saturated Fat: 14
- Carbohydrates: 38
- Fiber: 3
- Protein: 4
Keywords: no-bake dessert, berry trifle, Labor Day dessert, easy dessert, summer dessert, no-bake, trifle, berries, mascarpone