Love this? Save it for later!
Share the inspiration with your friends
It was 10:47 PM on a Tuesday in early September, and I had a sudden, desperate need to bake something that smelled like the New Year. I didn’t have the fancy apple cake recipe my grandmother swore by, but I had a bag of Honeycrisps that were starting to soften, a jar of local honey that was crystallizing at the edges, and a memory of a cake I’d eaten once at a tiny bakery in Jerusalem. That night, I just started mixing things in a bowl—no measuring spoons, just a lot of hope and a little bit of prayer. The result was so absurdly good that I actually wrote it down on a napkin before I forgot what I’d done. Honestly, I think the late hour made me bolder. I used olive oil instead of the usual vegetable oil because it was closer to the stove. I added a pinch of black pepper because something in my tired brain said “apples need warmth, not just sweetness.” And you know what? It worked.
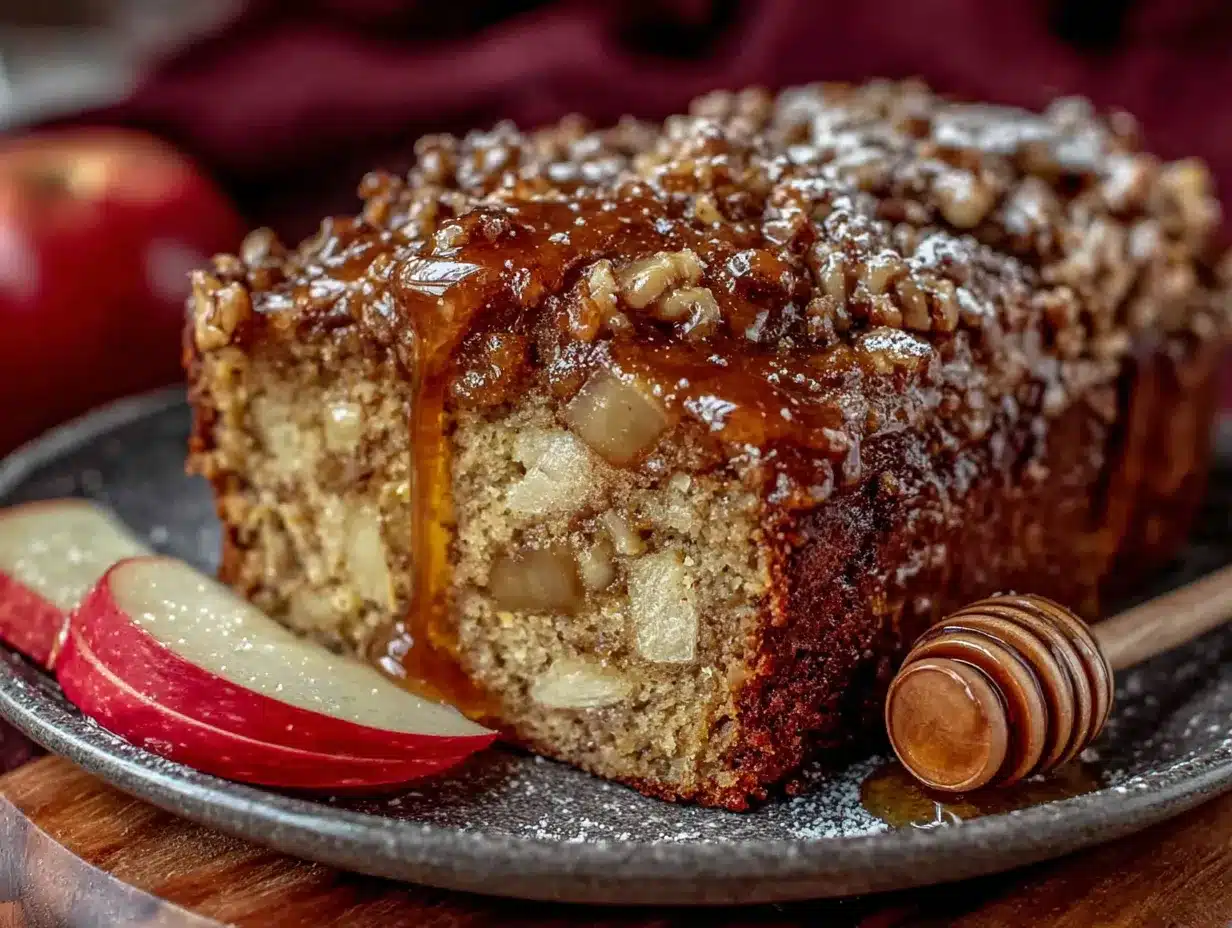
This Perfect Honey Apple Cake for Rosh Hashanah is the direct result of that slightly unhinged Tuesday night. It’s not the cake I planned to make, but it’s the one I keep making every year since. It has that deep, floral honey flavor that you want for the holiday, but it’s not cloying. The apples stay tender and almost jammy in the center, and the top gets this gorgeous, crackly crust that makes it look like you spent hours on it. I brought it to my neighbor’s Rosh Hashanah dinner the next evening, and she asked for the recipe before I even finished slicing. Maybe you’ve been there—scrambling at the last minute for a dessert that feels meaningful but doesn’t require a trip to three different specialty stores. This is that cake.
Why You’ll Love This Recipe
Let me tell you why this Perfect Honey Apple Cake for Rosh Hashanah has become my absolute go-to for the holiday. I’ve tested this recipe at least a dozen times—once with a friend who’s a pastry chef, once for a crowd of picky eaters, and once when I was so distracted I almost forgot the eggs. It passed every single test with flying colors.
- Quick & Easy: This cake comes together in about 15 minutes of active prep time. The oven does the rest of the work. Perfect for those busy holiday mornings when you’re juggling brisket and kugel and trying to get the table set.
- Simple Ingredients: You probably have everything in your pantry right now. No need to hunt down obscure flours or imported extracts. Just good, honest ingredients that work together beautifully.
- Perfect for Rosh Hashanah: The honey and apples symbolize a sweet new year, and this cake delivers that promise in every single bite. It’s traditional enough to feel meaningful, but modern enough to impress guests who think they’ve had every apple cake out there.
- Crowd-Pleaser: I’ve served this to everyone from my gluten-free aunt to my sugar-shy uncle, and it disappears every time. Kids love the tender apple chunks, and adults appreciate that it’s not overly sweet.
- Unbelievably Delicious: The texture is what gets me every time. The outside has this delicate crunch, while the inside stays incredibly moist and almost pudding-like around the apples. It’s next-level comfort food, honest.
What makes this recipe different from every other honey apple cake you’ve seen? It’s the technique of macerating the apples in honey and lemon juice before adding them to the batter. This little step draws out the apple juices and concentrates the flavor, so you get these pockets of intense, jammy apple goodness throughout the cake. Plus, using olive oil instead of butter gives it a subtle fruity note that pairs perfectly with the honey. It’s not just another version—it’s my best version, and I’m pretty proud of it.
What Ingredients You Will Need
This Perfect Honey Apple Cake for Rosh Hashanah uses simple, wholesome ingredients to deliver bold flavor and satisfying texture without any fuss. Most of these are pantry staples, which makes this recipe incredibly accessible even when you’re short on time.
- For the apples:
- 3 medium Honeycrisp or Granny Smith apples, peeled, cored, and diced into ½-inch cubes (about 3 cups) – I prefer Honeycrisp for their sweetness and firm texture
- 3 tablespoons honey (local honey adds a lovely floral note)
- 1 tablespoon fresh lemon juice (adds brightness and prevents browning)
- For the dry ingredients:
- 2 cups all-purpose flour (spooned and leveled)
- 1 teaspoon baking powder
- ½ teaspoon baking soda
- ½ teaspoon salt
- 1 teaspoon ground cinnamon
- ½ teaspoon ground ginger
- ¼ teaspoon ground nutmeg (freshly grated if you have it)
- Pinch of black pepper (trust me on this—it’s not spicy, it just deepens the flavor)
- For the wet ingredients:
- ¾ cup extra-virgin olive oil (use a mild, fruity variety—I like California Olive Ranch)
- ½ cup honey (plus extra for drizzling at the end)
- ½ cup granulated sugar
- ¼ cup light brown sugar, packed
- 2 large eggs, room temperature
- 1 teaspoon vanilla extract
- ½ cup whole milk, room temperature (or unsweetened almond milk for dairy-free)
- For the topping (optional but recommended):
- 1 tablespoon turbinado or demerara sugar for sprinkling
- Thin apple slices arranged on top for decoration
For the best results, I recommend using a good-quality honey—something you’d actually enjoy eating off a spoon. The flavor really comes through in the finished cake. If you’re using a very strong, dark honey like buckwheat, you might want to reduce it slightly and add a touch more sugar to balance the intensity.
Equipment Needed
You don’t need a fancy kitchen to make this Perfect Honey Apple Cake for Rosh Hashanah. Here’s what you’ll need:
- 9-inch round cake pan – A springform pan works beautifully here because it makes removing the cake a breeze. If you don’t have one, a regular cake pan lined with parchment paper works just fine.
- Mixing bowls – You’ll need one large bowl for the dry ingredients and one medium bowl for the wet ingredients.
- Whisk – For combining the dry ingredients and for mixing the wet ingredients.
- Spatula – A rubber spatula is perfect for folding the apples into the batter without crushing them.
- Chef’s knife and cutting board – For dicing the apples. A vegetable peeler also helps if your apples have thick skins.
- Measuring cups and spoons – For accuracy, especially with the honey and oil.
- Cooling rack – Essential for letting the cake cool evenly without getting a soggy bottom.
I’ve made this cake with both a hand mixer and by hand, and honestly, I prefer doing it by hand. It’s less cleanup, and you’re less likely to overmix the batter. If you’re using a stand mixer, use the paddle attachment on low speed and stop as soon as everything comes together.
Preparation Method
- Preheat and prep your pan. Preheat your oven to 350°F (175°C). Grease a 9-inch round cake pan with butter or non-stick spray, then line the bottom with a circle of parchment paper. This step is non-negotiable—trust me, I learned the hard way when my first attempt stuck like glue to the pan.
- Macerate the apples. In a medium bowl, toss the diced apples with 3 tablespoons of honey and 1 tablespoon of lemon juice. Let them sit while you prepare the rest of the batter—at least 10 minutes. This step draws out the apple juices and softens them slightly, so they bake into tender, jammy pockets instead of crunchy chunks. Give them a stir halfway through.
- Mix the dry ingredients. In a large bowl, whisk together the flour, baking powder, baking soda, salt, cinnamon, ginger, nutmeg, and that pinch of black pepper. Make sure everything is evenly distributed—you don’t want a pocket of baking soda in your slice.
- Combine the wet ingredients. In a separate medium bowl, whisk together the olive oil, ½ cup honey, granulated sugar, and brown sugar until smooth. Add the eggs one at a time, whisking well after each addition. Stir in the vanilla extract and milk until everything is fully combined. The mixture should look glossy and slightly thickened.
- Make the batter. Pour the wet ingredients into the dry ingredients and stir with a spatula until just combined. A few streaks of flour are okay—overmixing will make the cake tough. The batter will be quite thick, almost like a muffin batter.
- Fold in the apples. Using a spatula, gently fold the macerated apples into the batter. Don’t overmix here—you want the apples distributed evenly, but you don’t want to break them down. The batter will look chunky and rustic, which is exactly what we want.
- Transfer to the pan. Scrape the batter into the prepared pan and spread it evenly with the spatula. It will be thick, so take your time to get it into the corners. If you’re decorating the top with apple slices, arrange them in a concentric circle pattern now, gently pressing them into the batter. Sprinkle the turbinado sugar evenly over the top for that gorgeous crackly crust.
- Bake. Place the pan on the middle rack of your preheated oven and bake for 45-55 minutes, or until a toothpick inserted into the center comes out clean or with just a few moist crumbs. The top should be deep golden brown and the edges should be pulling away from the pan slightly. If the top is browning too quickly after 30 minutes, tent loosely with aluminum foil.
- Cool. Let the cake cool in the pan on a wire rack for 15 minutes. Then run a knife around the edges, invert onto the rack, and carefully remove the parchment paper. Let it cool completely—at least 1 hour—before slicing. I know it’s tempting to cut into it warm, but it will be much easier to slice and the flavors will have settled.
- Finish and serve. Just before serving, drizzle a little extra honey over the top of the cake. This adds a beautiful sheen and an extra hit of honey flavor. Slice with a sharp knife, wiping the blade clean between cuts for neat slices.
Cooking Tips & Techniques
Over the years, I’ve made every mistake in the book with this Perfect Honey Apple Cake for Rosh Hashanah. Here’s what I’ve learned so you don’t have to repeat my failures:
Don’t skip macerating the apples. I know it seems like an extra step, but it’s the secret to this cake’s incredible texture. If you add the apples straight to the batter without macerating, they release their juices during baking and create a soggy, wet layer at the bottom of the cake. Taking those 10 minutes to draw out the juices first means the apples stay tender and the cake bakes up perfectly moist but not wet.
Room temperature ingredients matter. This is one of those baking rules that actually makes a difference. Cold eggs and cold milk will seize the olive oil and give you a dense, heavy cake. Leave your eggs and milk on the counter for 30 minutes before you start baking. If you forget (which I do, constantly), place the eggs in a bowl of warm water for 5 minutes and microwave the milk for 10 seconds.
The pepper is not a mistake. I know it sounds weird—black pepper in a sweet cake? But trust me, it’s not about heat. A tiny pinch of black pepper enhances the warm spices and makes the honey taste more floral and complex. You won’t taste pepper at all, but you’ll notice the cake has this mysterious depth that makes people ask “what’s in this?”
Check for doneness early. Every oven runs differently. Start checking your cake at 40 minutes, even if the recipe says 45-55. Insert a toothpick into the center—if it comes out with wet batter, give it 5 more minutes. If it comes out with a few moist crumbs, it’s done. Overbaking is the number one way to ruin this cake, turning it from moist and tender to dry and crumbly.
Variations & Adaptations
This Perfect Honey Apple Cake for Rosh Hashanah is wonderfully adaptable. Here are some variations I’ve tried and loved:
- Gluten-Free Version: Substitute the all-purpose flour with a good quality 1:1 gluten-free baking flour blend. I’ve had great results with Bob’s Red Mill Gluten-Free 1-to-1 Baking Flour. Add an extra tablespoon of milk since gluten-free flours tend to absorb more liquid.
- Dairy-Free Version: Use unsweetened almond milk, oat milk, or coconut milk in place of the whole milk. The cake still bakes up beautifully moist and tender. I’ve also used full-fat canned coconut milk for an extra-rich version that’s absolutely delicious.
- Spiced Apple Cake: Add ¼ teaspoon of cardamom and ⅛ teaspoon of cloves along with the other spices. This gives the cake a more complex, warming flavor profile that’s perfect for fall gatherings.
- Nutty Addition: Fold in ½ cup of toasted walnuts or pecans along with the apples. The crunch adds a lovely textural contrast to the tender cake and soft apples.
- Apple Variation: If you don’t have Honeycrisp apples, Fuji, Gala, or Braeburn work beautifully. Granny Smith apples give a tarter flavor that balances the honey nicely. Avoid Red Delicious—they’re too soft and mealy for baking.
One of my favorite personal variations is swapping half the olive oil for melted butter. It gives the cake a richer, more traditional flavor while still keeping that moist texture from the oil. I’ve done this for family members who are skeptical of olive oil in desserts, and they never guess the secret.
Serving & Storage Suggestions
This Perfect Honey Apple Cake for Rosh Hashanah is best served at room temperature, which allows the flavors to fully develop. If you’ve refrigerated it, let it sit on the counter for at least 30 minutes before serving.
For presentation, I love to place the cake on a beautiful platter and drizzle it with a little extra honey right before serving. A dusting of powdered sugar also looks lovely, especially if you’ve decorated the top with apple slices. Serve each slice with a dollop of lightly sweetened whipped cream or a scoop of vanilla ice cream for an extra special treat.
This cake pairs beautifully with a cup of hot tea or coffee. For a Rosh Hashanah dinner, it’s wonderful alongside a glass of apple cider or a sweet kosher wine like Moscato.
Storage: Store the cake in an airtight container at room temperature for up to 3 days. The flavors actually improve on the second day as the honey and spices meld together. If your kitchen is very warm, you can refrigerate it, but bring it back to room temperature before serving for the best texture.
Freezing: This cake freezes beautifully. Wrap the completely cooled cake tightly in plastic wrap, then in a layer of aluminum foil. Freeze for up to 3 months. To thaw, remove the foil and let it come to room temperature on the counter, still wrapped in plastic, for about 4 hours. Drizzle with honey just before serving.
Reheating: If you prefer your cake warm, place individual slices in a 300°F (150°C) oven for 5-7 minutes, or microwave for 15-20 seconds. Be careful not to overheat, or the cake can become dry.
Nutritional Information & Benefits
While this Perfect Honey Apple Cake for Rosh Hashanah is definitely a treat, it does have some redeeming nutritional qualities. Here’s an approximate breakdown per slice (based on 10 servings):
- Calories: 345
- Total Fat: 18g
- Saturated Fat: 3g
- Cholesterol: 37mg
- Sodium: 210mg
- Total Carbohydrates: 45g
- Dietary Fiber: 2g
- Sugars: 30g
- Protein: 4g
The apples provide a good source of fiber and vitamin C, while the honey offers antioxidants and has natural antibacterial properties. Olive oil contributes heart-healthy monounsaturated fats. Of course, this is still a dessert, so enjoy it mindfully and savor every bite.
This recipe is vegetarian and can easily be made dairy-free and gluten-free with the substitutions mentioned above. It contains eggs, wheat (unless using gluten-free flour), and dairy (unless using a milk alternative).
Conclusion
This Perfect Honey Apple Cake for Rosh Hashanah has become more than just a recipe in my kitchen—it’s a tradition. It’s the cake I make when I want to welcome the New Year with something that feels both meaningful and delicious. It’s the cake I bring to friends when I want to say “may your year be sweet” without needing a lot of words. And honestly, it’s the cake I make on random Tuesday nights in September when I just need something warm and comforting to remind me that good things are worth waiting for.
I hope you’ll make this cake your own. Tweak the spices, swap the apples, add some nuts if that’s your thing. The beauty of this recipe is that it’s forgiving and adaptable, just like the best holiday traditions. When you make it, I’d love to hear how it turned out. Leave a comment below and let me know what variations you tried, or tag me in your photos on social media. There’s something special about sharing a recipe that started as a late-night experiment and became a holiday staple.
Here’s to a sweet New Year, full of good food, good company, and maybe a second slice of cake. Because honestly, isn’t that what Rosh Hashanah is all about?
Frequently Asked Questions
Can I make this cake ahead of time?
Absolutely! This cake actually tastes better the next day as the flavors meld together. You can bake it up to 2 days in advance and store it tightly wrapped at room temperature. Just drizzle with honey right before serving.
Can I use a different type of honey?
Yes, but keep in mind that different honeys have different flavor intensities. A mild clover or orange blossom honey works beautifully. If you’re using a strong dark honey like buckwheat, reduce it to ⅓ cup and add an extra 2 tablespoons of sugar to balance the flavor.
Why did my cake sink in the middle?
This usually happens for one of three reasons: the oven door was opened too early (before the cake had set), the cake was underbaked, or the batter was overmixed. Make sure your oven is fully preheated, avoid opening the door for the first 30 minutes, and mix just until combined.
Can I bake this in a different size pan?
Yes! This recipe works well in an 8×8-inch square pan (bake for 40-50 minutes) or as a loaf cake in a 9×5-inch loaf pan (bake for 50-60 minutes). Adjust baking time as needed and check for doneness with a toothpick.
Is this cake suitable for people with nut allergies?
Yes, this recipe as written is nut-free. Just be sure to check your baking powder and other ingredients for potential cross-contamination if you’re serving someone with severe allergies. The olive oil and milk are naturally nut-free.
Pin This Recipe!
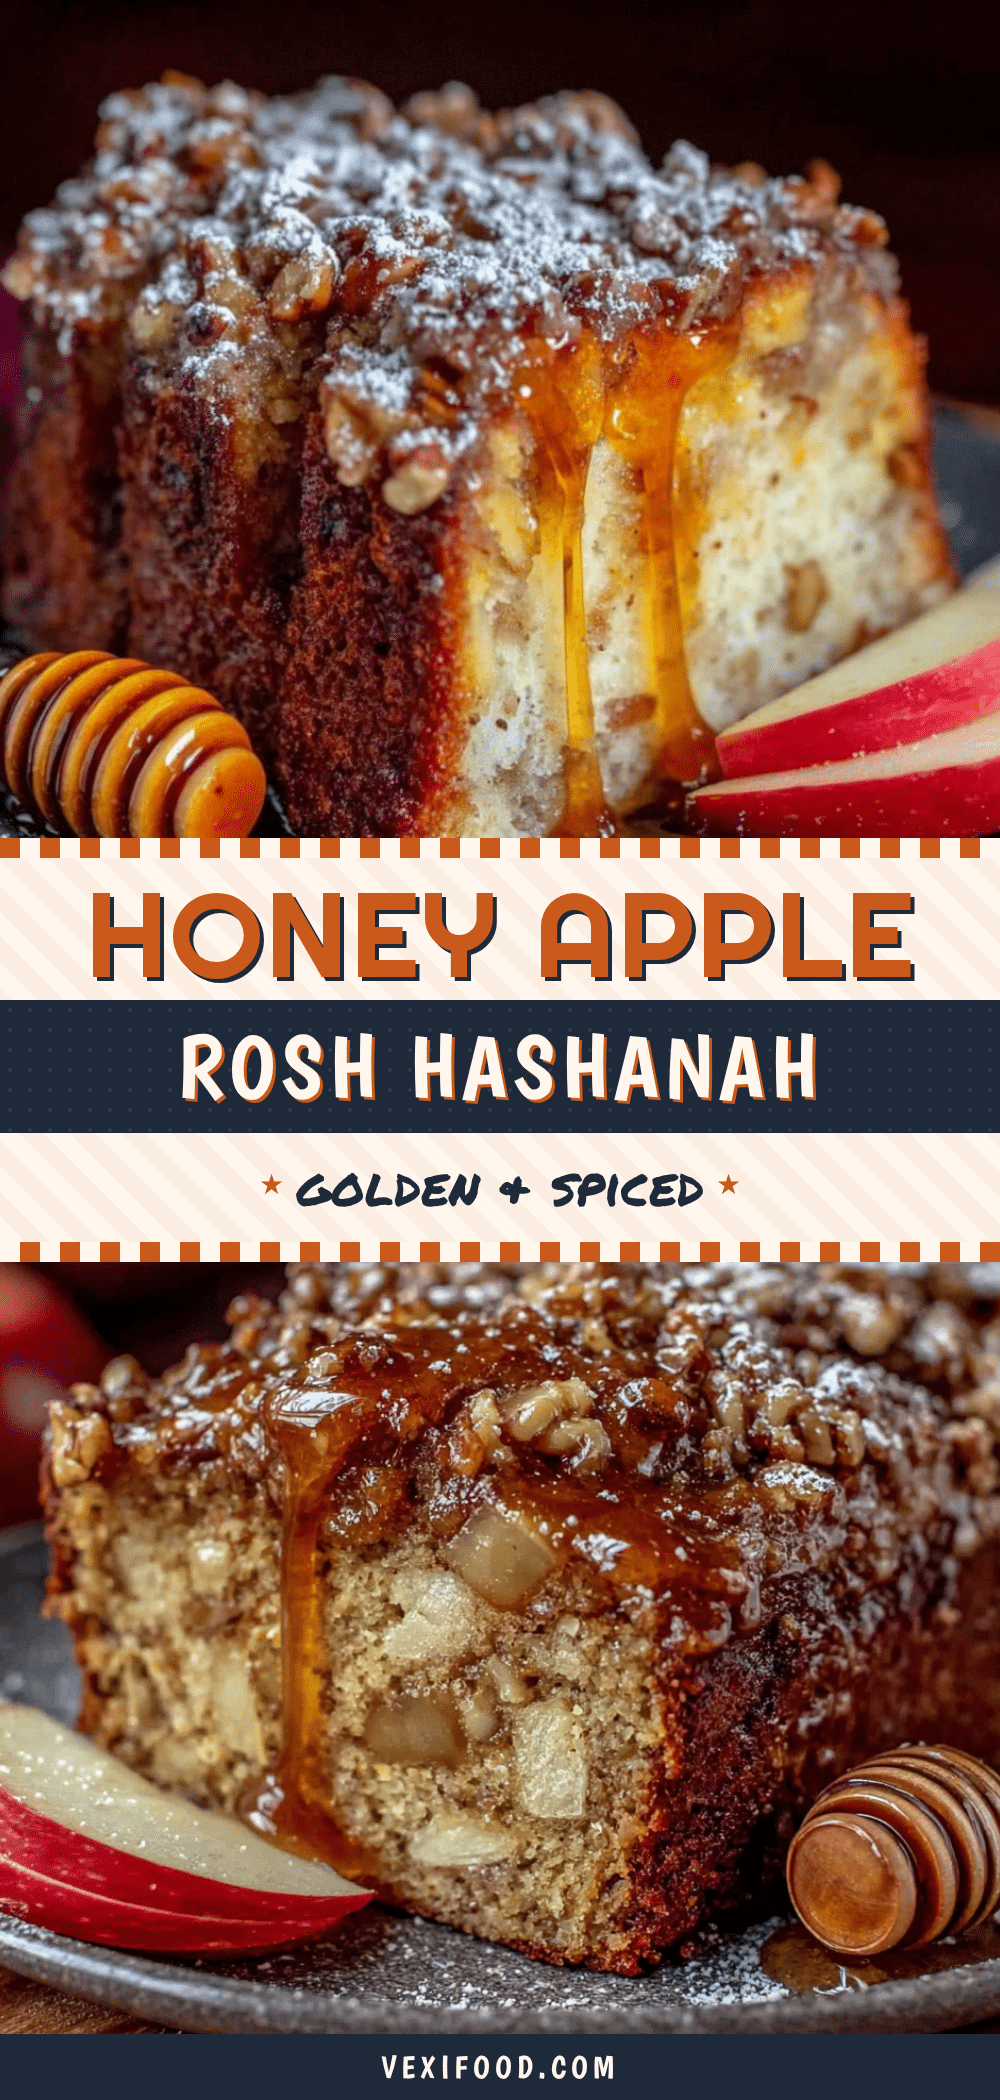
Perfect Honey Apple Cake for Rosh Hashanah (Easy Recipe)
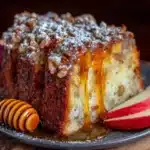
This Perfect Honey Apple Cake for Rosh Hashanah is a moist, tender cake with deep floral honey flavor and tender, jammy apple chunks. It’s quick to make with simple ingredients and perfect for the holiday or any fall gathering.
- Prep Time: 15 minutes
- Cook Time: 45-55 minutes
- Total Time: 1 hour 10 minutes
- Yield: 10 servings 1x
- Category: Dessert
- Cuisine: Jewish
Ingredients
- 3 medium Honeycrisp or Granny Smith apples, peeled, cored, and diced into ½-inch cubes (about 3 cups)
- 3 tablespoons honey
- 1 tablespoon fresh lemon juice
- 2 cups all-purpose flour (spooned and leveled)
- 1 teaspoon baking powder
- ½ teaspoon baking soda
- ½ teaspoon salt
- 1 teaspoon ground cinnamon
- ½ teaspoon ground ginger
- ¼ teaspoon ground nutmeg (freshly grated if you have it)
- Pinch of black pepper
- ¾ cup extra-virgin olive oil (mild, fruity variety)
- ½ cup honey
- ½ cup granulated sugar
- ¼ cup light brown sugar, packed
- 2 large eggs, room temperature
- 1 teaspoon vanilla extract
- ½ cup whole milk, room temperature (or unsweetened almond milk for dairy-free)
- 1 tablespoon turbinado or demerara sugar (for topping, optional)
- Thin apple slices arranged on top (for decoration, optional)
Instructions
- Preheat your oven to 350°F (175°C). Grease a 9-inch round cake pan with butter or non-stick spray, then line the bottom with a circle of parchment paper.
- In a medium bowl, toss the diced apples with 3 tablespoons of honey and 1 tablespoon of lemon juice. Let them sit while you prepare the rest of the batter—at least 10 minutes. Give them a stir halfway through.
- In a large bowl, whisk together the flour, baking powder, baking soda, salt, cinnamon, ginger, nutmeg, and black pepper.
- In a separate medium bowl, whisk together the olive oil, ½ cup honey, granulated sugar, and brown sugar until smooth. Add the eggs one at a time, whisking well after each addition. Stir in the vanilla extract and milk until everything is fully combined.
- Pour the wet ingredients into the dry ingredients and stir with a spatula until just combined. A few streaks of flour are okay.
- Using a spatula, gently fold the macerated apples into the batter. Don’t overmix.
- Scrape the batter into the prepared pan and spread it evenly with the spatula. If decorating with apple slices, arrange them in a concentric circle pattern now, gently pressing them into the batter. Sprinkle the turbinado sugar evenly over the top.
- Place the pan on the middle rack of your preheated oven and bake for 45-55 minutes, or until a toothpick inserted into the center comes out clean or with just a few moist crumbs. If the top is browning too quickly after 30 minutes, tent loosely with aluminum foil.
- Let the cake cool in the pan on a wire rack for 15 minutes. Then run a knife around the edges, invert onto the rack, and carefully remove the parchment paper. Let it cool completely—at least 1 hour—before slicing.
- Just before serving, drizzle a little extra honey over the top of the cake. Slice with a sharp knife, wiping the blade clean between cuts for neat slices.
Notes
Don’t skip macerating the apples—it prevents a soggy bottom. Room temperature ingredients are important for best texture. The pinch of black pepper is not a mistake; it enhances the warm spices and honey flavor. Check for doneness early (at 40 minutes) to avoid overbaking. The cake tastes even better the next day.
Nutrition
- Serving Size: 1 slice
- Calories: 345
- Sugar: 30
- Sodium: 210
- Fat: 18
- Saturated Fat: 3
- Carbohydrates: 45
- Fiber: 2
- Protein: 4
Keywords: honey apple cake, Rosh Hashanah, apple cake, honey cake, Jewish holiday dessert, easy apple cake, fall dessert