Love this? Save it for later!
Share the inspiration with your friends
I was up to my elbows in potting soil, repotting a spider plant that had seen better days, when my neighbor, a retired plumber named Gus who I’d only ever exchanged waves with, hollered over the fence. “Hey, you look like you need some banana bread, not more dirt!” I laughed, assuming it was a joke. But ten minutes later, he appeared at my gate with a foil-wrapped loaf that was still warm. I was skeptical—Gus didn’t strike me as a baker. But that first slice? Honestly, it was the most perfectly moist banana bread I’d ever had. No mixer, no fuss, just one bowl and a fork. I asked him for the secret, and he just shrugged and said, “Don’t overthink it, and use the ugly bananas.”
That was two years ago, and I haven’t used a mixer for banana bread since. This recipe is a direct result of that sunny afternoon chat with Gus. It’s the kind of recipe you commit to memory because it’s that simple. You probably have all the ingredients right now, and you definitely have a bowl. Maybe you’ve been there—staring at a bunch of spotty bananas on the counter, knowing you should bake something but dreading the cleanup. I mean, who wants to wash a mixer, a bowl, and a spatula for a quick bread?
This easy one-bowl banana bread is the answer. No mixer needed, just a little elbow grease and a fork. It comes out perfectly moist with a tender crumb every single time. It’s the recipe that made me realize that great baking doesn’t require fancy equipment—just good instincts and a willingness to listen to a plumber. It’s stayed with me because it’s forgiving, fast, and always, always delivers. Let’s get to it.
Why You’ll Love This Recipe
This isn’t just another banana bread recipe. I’ve tested dozens over the years, from complicated sourdough versions to ones that required a stand mixer and a degree in patience. This one wins, hands down, for its sheer simplicity and reliability. It’s the recipe I turn to when I need a guaranteed win with zero stress.
- Quick & Easy: From start to oven in about 10 minutes. No mixer means less cleanup and more time for you. It’s perfect for a last-minute dessert or a breakfast that feels like a treat.
- Simple Ingredients: You likely have everything in your pantry right now. No weird extracts, no specialty flours. Just real, recognizable ingredients that do the job beautifully.
- Perfect for Busy Weeknights: Got a craving at 8 PM? This comes together while you watch a show. It’s the ultimate low-effort, high-reward bake.
- Crowd-Pleaser: I’ve brought this to potlucks and office parties, and it disappears faster than anything else. Kids and adults alike go back for seconds. It’s that good.
- Unbelievably Moist: The texture is what sets it apart. Using melted butter and overripe bananas creates a dense, almost pudding-like crumb that stays moist for days. It’s next-level comfort food.
What makes this recipe different from the rest is the technique. By mashing the bananas with melted butter first, you create an emulsion that traps moisture. It’s a simple trick, but it changes everything. This isn’t just another version—it’s the best version. It’s the kind of bread that makes you close your eyes after the first bite. It’s comfort food reimagined—faster, easier, but with the same soul-soothing satisfaction. Perfect for impressing guests without stress, or turning a simple Tuesday into something memorable.
What Ingredients You Will Need
This recipe relies on pantry staples to deliver big flavor. The magic is in how they come together. Here’s what you’ll need, with a few notes from my own kitchen trials.
- Overripe Bananas (3 medium, about 1 ½ cups mashed): The browner, the better. Spotted or fully black bananas are sweeter and easier to mash. If yours aren’t ripe enough, pop them in a 300°F oven for 15 minutes to soften and sweeten.
- Melted Unsalted Butter (½ cup, 1 stick): I prefer unsalted to control the salt level. Melt it gently—don’t let it boil. This is what replaces the mixer, creating a rich texture without overworking the batter.
- Granulated Sugar (¾ cup): Just enough to sweeten without overpowering the banana. You can reduce to ½ cup if your bananas are very ripe.
- Large Egg (1, room temperature): Bring it to room temp by placing it in a bowl of warm water for 5 minutes if you forgot to take it out. This helps it emulsify better.
- Vanilla Extract (1 teaspoon): Pure vanilla adds depth. I use homemade vanilla extract for a richer flavor, but store-bought works perfectly.
- All-Purpose Flour (1 ½ cups, 180g): Spoon and level it into your measuring cup. Scooping directly can pack the flour, leading to dry bread.
- Baking Soda (1 teaspoon): This is your leavener. Make sure it’s fresh—test it by dropping a bit into vinegar; it should fizz vigorously.
- Salt (½ teaspoon): Enhances the sweetness and balances the flavors. Don’t skip it.
- Optional Mix-ins (½ cup total): Chopped walnuts, pecans, chocolate chips, or dried fruit. I love semi-sweet chocolate chips for a classic combo. Fold them in gently at the end.
Substitution Guidance: For a dairy-free version, use melted coconut oil or vegan butter in place of the butter. For a gluten-free option, swap the all-purpose flour with a 1:1 gluten-free baking blend. The texture will be slightly denser but still delicious. If you’re out of granulated sugar, brown sugar works beautifully and adds a deeper flavor.
Equipment Needed
You won’t need much for this one, which is the whole point. Here’s the short list:
- Large Mixing Bowl: Any bowl will do, but a wide, shallow one makes mashing easier.
- Fork or Potato Masher: A fork is fine, but a potato masher gets the job done in seconds. I’ve used a pastry cutter in a pinch, too.
- 9×5-inch Loaf Pan: A standard size. If you use an 8×4-inch pan, the bread will take a few minutes longer to bake and have a higher dome.
- Parchment Paper (optional but recommended): Lining the pan makes cleanup a breeze and guarantees the loaf comes out intact. I use binder clips to hold the paper in place while I pour the batter.
- Measuring Cups and Spoons: For accuracy. I recommend a set of dry measuring cups for flour and sugar, and a liquid measuring cup for the melted butter.
- Cooling Rack: Essential for even cooling. If you don’t have one, use an overturned baking sheet to allow air circulation.
I’ve made this in a glass loaf pan and a metal one, and both work fine. The metal pan gives a slightly crispier crust. Just don’t use a non-stick spray with flour in it—it can leave a white residue. Stick to butter and a dusting of flour, or parchment paper.
Preparation Method
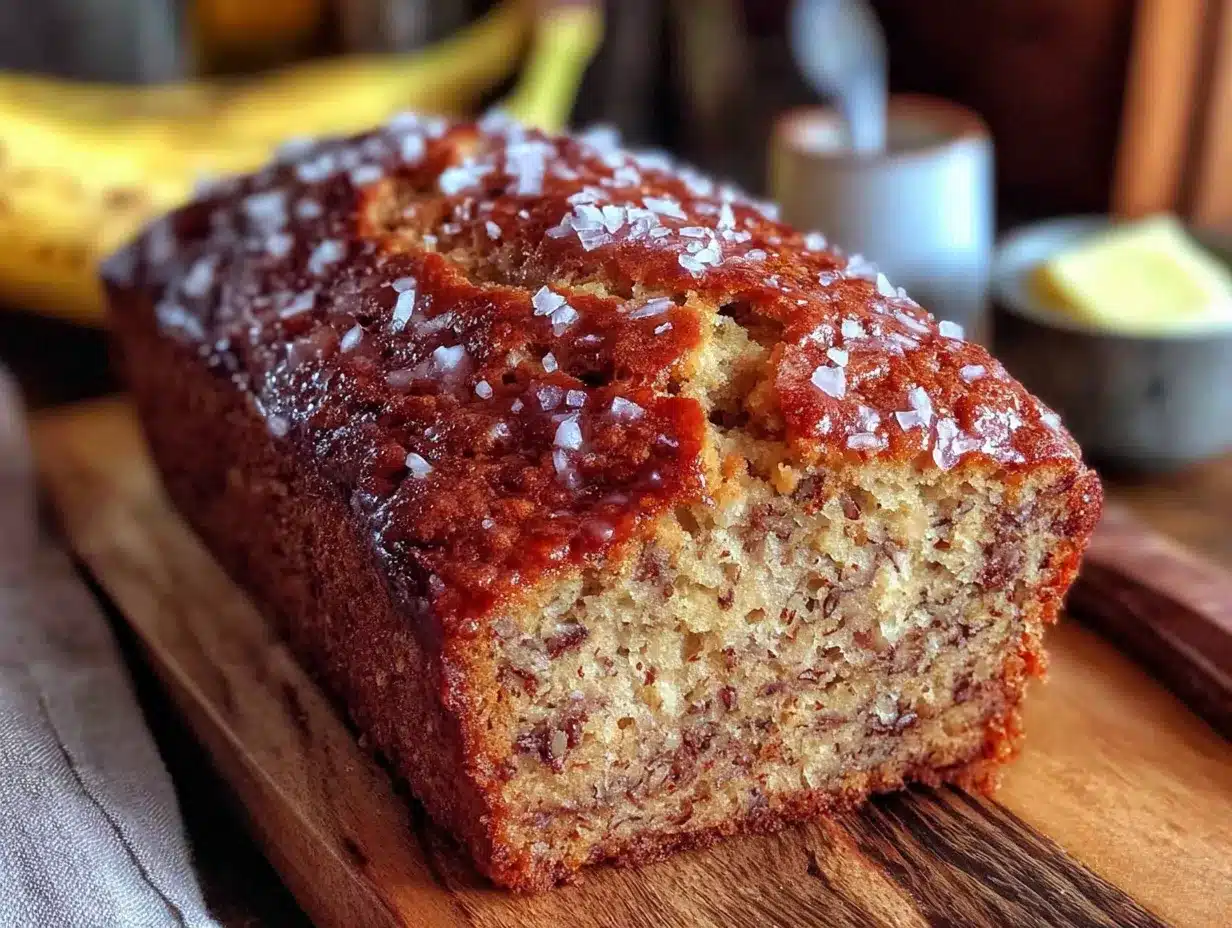
Follow these steps, and you’ll have a perfect loaf every time. Trust the process—it’s simpler than it looks.
- Preheat and Prep: Preheat your oven to 350°F (175°C). Grease your 9×5-inch loaf pan with butter or line it with parchment paper, leaving an overhang on the long sides for easy lifting.
- Mash the Bananas: In your large mixing bowl, add the peeled bananas. Mash them with a fork until mostly smooth, with a few small lumps for texture. You should have about 1 ½ cups. Don’t over-mash—a little chunkiness is nice.
- Add Melted Butter and Sugar: Pour the melted (but not hot) butter over the bananas. Add the granulated sugar. Stir with the fork until combined. The mixture will look a bit grainy—that’s okay.
- Add Egg and Vanilla: Crack the egg into the bowl and add the vanilla extract. Stir vigorously until the egg is fully incorporated and the mixture is smooth and glossy. This takes about 30 seconds of stirring. The batter will look slightly separated at first, but keep going until it comes together.
- Add Dry Ingredients: Sprinkle the flour, baking soda, and salt evenly over the wet mixture. Use the fork to gently stir until just combined. A few streaks of flour are fine—overmixing will make the bread tough. Fold in your mix-ins now if using.
- Pour and Bake: Scrape the batter into your prepared loaf pan and smooth the top. Bake for 50-60 minutes, or until a toothpick inserted into the center comes out clean or with a few moist crumbs. The top should be golden brown and cracked.
- Cool: Let the bread cool in the pan for 10 minutes. Then lift it out using the parchment paper and transfer to a cooling rack. Cool completely before slicing—about 1 hour. I know it’s hard to wait, but slicing too early will make it crumble.
Pro Tip: If the top is browning too quickly after 40 minutes, tent the loaf loosely with aluminum foil. This prevents the crust from burning while the center finishes baking.
Cooking Tips & Techniques
I’ve made this recipe at least fifty times, and I’ve learned a few things the hard way. Here’s what I wish someone had told me.
Don’t Overmix. I know I’ve said it, but it’s the most common mistake. Overmixing develops gluten, which leads to a tough, rubbery loaf. Stir until the flour just disappears. A few lumps are your friend.
Room Temperature Ingredients Matter. Cold egg can seize the melted butter, creating a lumpy batter. Take the egg out 30 minutes before you start, or warm it in a bowl of hot water for 5 minutes. The same goes for the butter—it should be melted but not hot.
Use a Kitchen Scale for Flour. If you have one, weigh your flour. A cup of all-purpose flour should weigh 120-125g. Too much flour is the #1 reason for dry banana bread. I once scooped carelessly and ended up with a loaf that was more like a brick.
The Toothpick Test. Insert it into the thickest part of the loaf. If it comes out with wet batter, bake for 5 more minutes. If it comes out with a few moist crumbs, it’s done. If it comes out clean, it’s perfect. Don’t rely on the timer alone.
Let It Cool. This is the hardest part. The bread continues to cook and set as it cools. Slicing too early releases steam and makes the texture gummy. I’ve burned my fingers more times than I’d like to admit trying to sneak a slice.
Variations & Adaptations
This recipe is a fantastic base for customization. Here are a few ways I’ve changed it up over the years.
- Chocolate Chip Banana Bread: Fold in ½ cup of semi-sweet chocolate chips. The warm, melted pockets of chocolate are a game-changer. I use mini chips for more even distribution.
- Nutty Banana Bread: Add ½ cup of toasted walnuts or pecans. Toast them in a dry pan for 3-4 minutes until fragrant before folding them in. It adds a wonderful crunch.
- Vegan Banana Bread: Replace the butter with melted coconut oil, and use a flax egg (1 tablespoon flaxseed meal + 3 tablespoons water, left to sit for 5 minutes). The texture is slightly denser but still incredibly moist.
- Gluten-Free Banana Bread: Use a 1:1 gluten-free baking blend. I’ve had good luck with the Bob’s Red Mill brand. Add 1 teaspoon of xanthan gum if your blend doesn’t include it.
- Spiced Banana Bread: Add 1 teaspoon of cinnamon, ½ teaspoon of nutmeg, and ¼ teaspoon of ground ginger to the dry ingredients. It makes the kitchen smell like autumn.
I once made a version with shredded coconut and dark chocolate chunks that was dangerously good. The coconut added a chewy texture that paired perfectly with the moist crumb. Don’t be afraid to experiment—this recipe is forgiving.
Serving & Storage Suggestions
This banana bread is wonderful at room temperature, but it’s even better warm. Here’s how I like to serve and store it.
Serving: Slice it thick and serve plain, or spread with a pat of salted butter. For a treat, toast a slice and drizzle it with honey or maple syrup. It’s also fantastic with a dollop of Greek yogurt and fresh berries for breakfast. Pair it with a cup of coffee or a tall glass of cold milk.
Storage: Store the cooled loaf wrapped tightly in plastic wrap or in an airtight container at room temperature for up to 4 days. The flavors actually deepen after a day. Do not refrigerate—it will dry out the bread.
Freezing: This bread freezes beautifully. Wrap the whole loaf or individual slices in plastic wrap, then in aluminum foil, and freeze for up to 3 months. To thaw, leave it at room temperature for a few hours or pop a slice in the toaster. I always keep a few slices in the freezer for emergencies.
Reheating: For a warm slice, microwave for 15-20 seconds, or toast in a toaster oven at 350°F for 5 minutes. The toaster oven method gives you a slightly crisp edge and a soft center.
Nutritional Information & Benefits
Here’s the approximate nutritional breakdown for one slice (assuming 10 slices per loaf):
| Nutrient | Amount per Slice |
|---|---|
| Calories | 245 |
| Fat | 11g |
| Saturated Fat | 7g |
| Carbohydrates | 34g |
| Fiber | 2g |
| Sugar | 17g |
| Protein | 4g |
Bananas are a great source of potassium and vitamin B6, which support heart health and energy metabolism. Using melted butter instead of oil adds a touch of vitamin A. This recipe is lower in sugar than many store-bought versions, and you can easily reduce the sugar further if your bananas are very ripe. It’s not health food, but it’s a wholesome treat you can feel good about. For a lower-carb option, use almond flour and a sugar substitute like monk fruit.
Conclusion
This easy one-bowl banana bread is more than just a recipe—it’s a reminder that the best things in life are often the simplest. No mixer, no fuss, just a bowl, a fork, and a few spotty bananas. It’s the bread I make when I need a little comfort, when I want to fill my kitchen with a warm, sweet smell, or when I just need to use up those bananas on the counter.
I hope you give it a try and make it your own. Add chocolate chips, throw in some nuts, or keep it plain and simple. Whatever you do, don’t overthink it. That’s the lesson Gus taught me, and it’s one I carry into every bake.
If you make this, I’d love to hear about it. Drop a comment below and tell me how it turned out—did you add anything? Did you sneak a slice while it was still warm? Share your photos and tag me on social media. Happy baking, friend!
Frequently Asked Questions
Can I use frozen bananas for this recipe?
Absolutely! Thaw them completely, then drain off any excess liquid before mashing. Frozen bananas are actually sweeter and more flavorful, making for an even moister bread.
Why did my banana bread sink in the middle?
This usually happens if the bread is underbaked or if you opened the oven door too early. The center needs time to set. Make sure to bake until a toothpick comes out clean, and resist the urge to peek until the 50-minute mark.
Can I make this recipe into muffins?
Yes! Grease a 12-cup muffin tin and divide the batter evenly. Bake at 350°F for 18-22 minutes, or until a toothpick comes out clean. Muffins are great for grab-and-go breakfasts.
How do I know when my bananas are ripe enough?
Look for bananas with plenty of brown spots or even fully black peels. They should be soft to the touch and smell sweet. If they’re still yellow and firm, they won’t mash well or provide enough sweetness.
Can I add yogurt or sour cream to make it even moister?
You can, but you’ll need to adjust the flour. Add ¼ cup of plain yogurt or sour cream and reduce the flour by 2 tablespoons. It will create an even more tender crumb, but the basic recipe is already very moist.
Pin This Recipe!
Easy One-Bowl Banana Bread Recipe (No Mixer & Perfectly Moist)
This easy one-bowl banana bread is the answer. No mixer needed, just a little elbow grease and a fork. It comes out perfectly moist with a tender crumb every single time.
- Prep Time: 10 minutes
- Cook Time: 55 minutes
- Total Time: 1 hour 5 minutes
- Yield: 10 servings 1x
- Category: Dessert
- Cuisine: American
Ingredients
- 3 medium overripe bananas (about 1 ½ cups mashed)
- ½ cup (1 stick) unsalted butter, melted
- ¾ cup granulated sugar
- 1 large egg, room temperature
- 1 teaspoon vanilla extract
- 1 ½ cups all-purpose flour (180g)
- 1 teaspoon baking soda
- ½ teaspoon salt
- ½ cup optional mix-ins (chopped walnuts, pecans, chocolate chips, or dried fruit)
Instructions
- Preheat oven to 350°F (175°C). Grease a 9×5-inch loaf pan with butter or line with parchment paper, leaving an overhang on the long sides.
- In a large mixing bowl, mash the bananas with a fork until mostly smooth with a few small lumps.
- Add melted butter and granulated sugar to the bananas. Stir with a fork until combined.
- Add the egg and vanilla extract. Stir vigorously until fully incorporated and the mixture is smooth and glossy, about 30 seconds.
- Sprinkle flour, baking soda, and salt evenly over the wet mixture. Gently stir with a fork until just combined (a few streaks of flour are fine). Fold in optional mix-ins if using.
- Pour batter into prepared loaf pan and smooth the top. Bake for 50-60 minutes, or until a toothpick inserted into the center comes out clean or with a few moist crumbs.
- Let the bread cool in the pan for 10 minutes, then lift out using parchment paper and transfer to a cooling rack. Cool completely before slicing, about 1 hour.
Notes
For dairy-free, use melted coconut oil or vegan butter. For gluten-free, use a 1:1 gluten-free baking blend. If the top browns too quickly after 40 minutes, tent loosely with aluminum foil. Do not overmix the batter.
Nutrition
- Serving Size: 1 slice
- Calories: 245
- Sugar: 17
- Sodium: 240
- Fat: 11
- Saturated Fat: 7
- Carbohydrates: 34
- Fiber: 2
- Protein: 4
Keywords: banana bread, easy banana bread, one-bowl banana bread, no mixer banana bread, moist banana bread