Love this? Save it for later!
Share the inspiration with your friends
My husband had refused to eat oatmeal for breakfast for almost a decade. Ten years. He claimed it was “baby food” and “boring” and “why would anyone choose that when bacon exists.” Fair points, honestly. Then last fall, I was testing recipes for a meal prep series I was working on, and I made a batch of these pumpkin baked oatmeal cups just for myself. I left them on the counter to cool and went to take a shower. When I came back, three were missing. He was standing at the counter, caught red-handed, with crumbs on his shirt and this look on his face like he’d been caught stealing cookies from a jar. “These are good,” he said, like it physically pained him to admit it. “They’re not oatmeal. They’re like… pumpkin muffins.” And that’s how a skeptic became the biggest fan of these little cups.
Maybe you’ve been there too. You want something warm and comforting for breakfast, but you need it to be fast and portable because mornings are chaos. You want it to be healthy, but you also want it to actually taste good. I mean, let’s face it, we’ve all choked down a sad, dry breakfast bar while running out the door. These pumpkin baked oatmeal cups are the answer to that exact problem. They’re soft, they’re spiced just right, and they honestly taste like you’re eating a slice of pumpkin pie for breakfast—minus the guilt and the crust.
The best part? You can make a batch on Sunday and have breakfast sorted for the whole week. No more standing over a stove stirring oatmeal while your coffee gets cold. No more soggy microwaved oats that look like wallpaper paste. These little cups hold their shape, they reheat beautifully, and they make you feel like you actually have your life together. And honestly, that feeling alone is worth the 30 minutes it takes to make them.
Why You’ll Love This Recipe
Look, I’ve tested a lot of oatmeal recipes over the years. Some were too dry, some were too mushy, and some just tasted like cardboard with cinnamon. These pumpkin baked oatmeal cups are different. They hit that perfect sweet spot between a muffin and a bowl of oatmeal, and they do it without any fancy ingredients or complicated steps. Here’s why you’re going to love them:
- Quick & Easy: From start to finish, these come together in about 30 minutes. Mix, scoop, bake, done. No standing over the stove, no constant stirring.
- Simple Ingredients: You probably already have most of these in your pantry right now. Oats, pumpkin puree, eggs, milk, maple syrup, and spices. That’s it.
- Perfect for Meal Prep: Make a batch on Sunday, and you’ve got breakfast for the whole week. They store beautifully in the fridge and freezer.
- Crowd-Pleaser: My kids devour these. My oatmeal-hating husband devours these. Even my mom, who is notoriously picky about breakfast, asked for the recipe.
- Unbelievably Delicious: The pumpkin and spice combo is pure comfort food. They smell like fall baking while they’re in the oven, and that first bite is just pure cozy happiness.
What makes these different from every other oatmeal cup recipe out there? It’s the texture. I spent weeks tweaking the ratio of oats to liquid to get it just right. Too much liquid and they’re soggy. Too little and they’re dry and crumbly. These come out perfectly tender, with a slight chew from the oats and a soft, almost cake-like interior. Plus, the pumpkin keeps them incredibly moist without being heavy. It’s not just another oatmeal recipe—it’s the one I keep coming back to, week after week.
This is the kind of breakfast that makes you actually look forward to getting out of bed. It’s warm, it’s comforting, and it takes zero effort on a busy morning. Just grab one, pop it in the microwave for 20 seconds, and you’re out the door with a smile on your face.
What Ingredients You Will Need
This recipe uses simple, wholesome ingredients that work together to create something greater than the sum of their parts. Nothing weird, nothing hard to find—just good, honest food that delivers on flavor and texture. Here’s what you’ll need:
For the Oatmeal Cups
- 2 cups rolled oats (not quick oats—they get too mushy. I prefer Bob’s Red Mill old-fashioned oats for the best texture.)
- 1 cup pumpkin puree (make sure it’s 100% pumpkin, not pumpkin pie filling. Libby’s is my go-to brand.)
- 1/2 cup milk (any milk works here. I use whole milk for richness, but almond milk or oat milk work great too.)
- 1/3 cup maple syrup (real maple syrup, not pancake syrup. It adds a depth of flavor that honey or sugar just can’t match.)
- 2 large eggs (room temperature if you remember, but straight from the fridge works too.)
- 1 teaspoon vanilla extract (pure vanilla extract, not imitation. It makes a difference.)
- 1 teaspoon baking powder (this gives them a little lift so they’re not dense hockey pucks.)
- 1 teaspoon pumpkin pie spice (or make your own with cinnamon, nutmeg, ginger, and cloves.)
- 1/2 teaspoon cinnamon (because you can never have too much cinnamon with pumpkin.)
- 1/4 teaspoon salt (just a pinch to balance the sweetness.)
Optional Mix-Ins
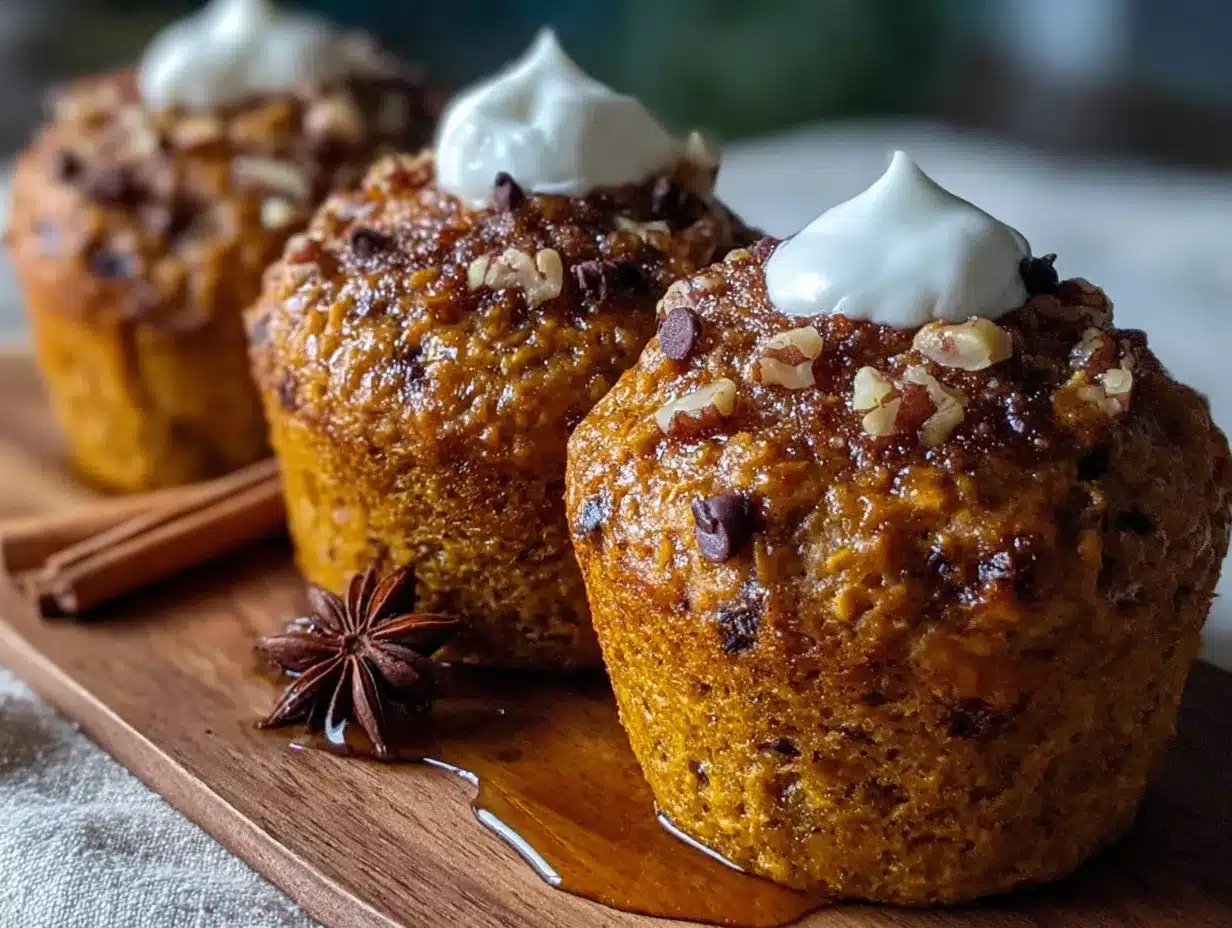
- 1/3 cup chocolate chips (dark chocolate is my favorite here—it pairs beautifully with the pumpkin.)
- 1/3 cup chopped pecans or walnuts (adds a nice crunch. Toast them first for extra flavor.)
- 2 tablespoons chia seeds or flax seeds (for an extra fiber boost. You won’t even notice them.)
A quick note on the oats: rolled oats are non-negotiable here. Steel-cut oats won’t cook through properly, and instant oats will turn into mush. Stick with old-fashioned rolled oats for that perfect chewy texture that holds its shape even after baking.
And about the pumpkin puree—if you’re feeling ambitious, you can roast and puree your own pumpkin. But honestly? Canned pumpkin is perfectly fine. It’s consistent, it’s convenient, and it’s available year-round. Just don’t accidentally grab the pumpkin pie filling, which has sugar and spices already added. That will throw off the whole recipe.
Equipment Needed
You don’t need a fancy kitchen to make these. Here’s what you’ll need:
- 12-cup muffin tin (standard size, not mini. If you only have a 6-cup tin, just bake in two batches.)
- Muffin liners (paper or silicone. I prefer parchment paper liners because nothing sticks to them. If you don’t have liners, grease the tin well with butter or cooking spray.)
- Large mixing bowl (for combining the wet ingredients.)
- Medium mixing bowl (for mixing the dry ingredients separately.)
- Whisk (for beating the eggs and mixing the wet ingredients.)
- Rubber spatula (for folding everything together without overmixing.)
- Measuring cups and spoons (accuracy matters in baking, even for something this simple.)
- Ice cream scoop or cookie scoop (for evenly portioning the batter. Not essential, but it makes the job so much easier.)
- Oven (preheated to 350°F.)
If you don’t have a muffin tin, you can actually bake this in an 8×8 baking dish and slice it into squares. Just add about 5-10 minutes to the baking time. I’ve done it before when my muffin tin was in the dishwasher, and it works perfectly. You just lose the individual portion convenience.
One more tip: if you’re using silicone muffin liners, place them on a baking sheet before filling them. Silicone is floppy and hard to handle when it’s empty. The baking sheet gives you a stable surface to work with and makes transferring them to the oven much easier.
Preparation Method
Alright, let’s get cooking. This is straightforward, I promise. Here’s how it goes:
- Preheat your oven to 350°F (175°C). Line your muffin tin with paper liners or grease it well. I like to do this first so the oven is ready when I am.
- In a large bowl, whisk together the wet ingredients. Add the pumpkin puree, milk, maple syrup, eggs, and vanilla extract. Whisk until everything is smooth and well combined. It should look like a thick, creamy orange liquid. Don’t worry if there are a few tiny lumps—they’ll bake out.
- In a separate medium bowl, mix the dry ingredients. Combine the rolled oats, baking powder, pumpkin pie spice, cinnamon, and salt. Give it a stir with a fork or whisk to distribute everything evenly. This step matters—you don’t want to bite into a pocket of baking powder.
- Pour the dry ingredients into the wet ingredients. Use your rubber spatula to fold them together gently. Stir just until everything is combined and no dry oats are visible. Overmixing will make the oatmeal cups tough, so stop as soon as it comes together. The batter will look thick and scoopable, like a chunky muffin batter.
- Fold in any mix-ins. If you’re using chocolate chips, nuts, or seeds, gently fold them in now. Distribute them evenly throughout the batter, but don’t overmix.
- Scoop the batter into the prepared muffin tin. Use your ice cream scoop or a spoon to divide the batter evenly among the 12 cups. Fill each cup almost to the top—these don’t rise much, so you want them full. A heaping 1/4 cup per cup is about right.
- Bake for 18-22 minutes. The oatmeal cups are done when the tops are set and golden brown, and a toothpick inserted into the center comes out clean or with just a few moist crumbs. Every oven is different, so start checking at 18 minutes. Mine usually take exactly 20 minutes.
- Let them cool in the pan for 5 minutes. This is important—they need time to set up. If you try to remove them immediately, they might fall apart. After 5 minutes, transfer them to a wire rack to cool completely.
- Enjoy warm or at room temperature. I always eat one right away while they’re still warm from the oven. It’s my reward for making breakfast for the whole week.
A few things to watch for: If the tops are browning too quickly but the centers aren’t set yet, tent the pan loosely with aluminum foil for the last few minutes of baking. If your oatmeal cups come out too dry, you might have overbaked them. Next time, check them a couple minutes earlier. And if they’re too wet in the center, give them another 2-3 minutes and test again.
One more thing—the batter will look quite wet when you first mix it. Don’t panic. The oats need time to absorb the liquid, and they’ll do that as they bake. Trust the process.
Cooking Tips & Techniques
I’ve made these pumpkin baked oatmeal cups more times than I can count, and I’ve learned a few things along the way. Here are my best tips for perfect results every time:
Let the batter rest before baking. If you have 10 minutes to spare, let the batter sit in the muffin tin before you put it in the oven. This gives the oats time to start absorbing the liquid, which results in a softer, more tender texture. I learned this trick after making a batch that came out a little too chewy. The resting time made a huge difference.
Don’t skip the liners. I know, I know, it’s an extra step and another thing to buy. But these oatmeal cups can be sticky, especially if you add chocolate chips. Paper liners make removal effortless and cleanup a breeze. If you’re out of liners, grease the tin really well with butter or coconut oil, and let the cups cool completely before trying to remove them.
Use a cookie scoop for even portions. This is one of those small tools that makes a big difference. A #20 or #24 scoop (about 3 tablespoons) gives you perfectly even portions every time. No more guessing, no more uneven baking. Plus, it’s faster than using a spoon.
Double the batch. Seriously. These freeze beautifully, so make a double batch while you’re at it. You’ll thank yourself on those mornings when you’re running late and need breakfast in 30 seconds. I always make at least 24 at a time now.
Watch your oven temperature. Ovens run hot or cold, and it’s easy to overbake these. I recommend using an oven thermometer to make sure your oven is actually at 350°F. I learned this the hard way after burning two batches in a row. Turns out my oven was running 25 degrees hot.
Let them cool completely before storing. If you put warm oatmeal cups in an airtight container, the steam will make them soggy. Let them cool completely on a wire rack, then transfer to a container. They’ll stay fresh for up to 5 days in the fridge.
Variations & Adaptations
One of the best things about this recipe is how flexible it is. Here are some of my favorite variations:
Dairy-Free Version
Swap the regular milk for almond milk, oat milk, or coconut milk. Use dairy-free chocolate chips if you’re adding them. Everything else stays the same. I’ve made this version for my sister-in-law who’s lactose intolerant, and she couldn’t tell the difference.
Gluten-Free Version
Use certified gluten-free rolled oats. That’s literally the only change. Oats are naturally gluten-free, but they’re often processed in facilities that handle wheat, so look for the certified label if you’re sensitive. I’ve tested this with gluten-free oats and the texture is identical.
Lower Sugar Version
Reduce the maple syrup to 1/4 cup and add 1/2 teaspoon more vanilla extract. You can also add a mashed ripe banana for natural sweetness. The banana adds moisture too, so you might need to bake them a minute or two longer. I make this version when I’m trying to cut back on sugar, and honestly, I don’t miss the extra sweetness.
Pumpkin Chocolate Chip
Add 1/3 cup dark chocolate chips to the batter. The combination of pumpkin and chocolate is honestly underrated. The slight bitterness of dark chocolate balances the sweetness of the maple syrup perfectly. This is my husband’s favorite version.
Pumpkin Cranberry Walnut
Swap the chocolate chips for dried cranberries and chopped walnuts. The tartness of the cranberries and the crunch of the walnuts add so much texture and flavor. This version feels a little more grown-up and sophisticated, perfect for brunch with friends.
Pumpkin Peanut Butter
Swirl 2 tablespoons of peanut butter into the batter before baking. Drop small spoonfuls of peanut butter on top of each cup and use a toothpick to swirl it in. The peanut butter adds protein and makes these even more satisfying. My kids lose their minds over this version.
Honestly, you can customize these however you like. Throw in some shredded coconut, add a pinch of cardamom, top them with a streusel crumble—the possibilities are endless. The base recipe is forgiving enough to handle almost any addition.
Serving & Storage Suggestions
These pumpkin baked oatmeal cups are incredibly versatile when it comes to serving. Here’s how I like to enjoy them:
Warm or cold. They’re delicious straight out of the fridge, but I prefer them warm. Just microwave one for 20-30 seconds and it’s like fresh from the oven. The oats soften up again and the spices become more aromatic.
With a drizzle. A little extra maple syrup or a dollop of Greek yogurt on top takes these to another level. Sometimes I heat up a tablespoon of peanut butter and drizzle it over the top. It’s decadent without being over the top.
As a snack. These aren’t just for breakfast. I often grab one as an afternoon snack when I need something satisfying but not heavy. They’re perfect with a cup of coffee or tea.
Storage: Store them in an airtight container in the refrigerator for up to 5 days. Place a paper towel at the bottom of the container to absorb any excess moisture, and replace it if it gets damp. This keeps them from getting soggy.
Freezing: These freeze beautifully. Let them cool completely, then place them in a single layer on a baking sheet and freeze for 1 hour. Transfer the frozen cups to a freezer-safe bag or container. They’ll keep for up to 3 months. To reheat, microwave one for 30-40 seconds straight from the freezer, or let it thaw in the fridge overnight.
Make-ahead tip: You can also prep the dry ingredients in a bag and the wet ingredients in a jar, then mix them together the morning you want to bake. This is great if you’re taking them to a brunch or gathering and want fresh-baked oatmeal cups without the prep work.
Nutritional Information & Benefits
These pumpkin baked oatmeal cups are packed with good-for-you ingredients. Here’s a rough estimate of what’s in one cup (without mix-ins):
- Calories: 180
- Protein: 6g
- Carbohydrates: 30g
- Fiber: 4g
- Sugar: 12g (from maple syrup and natural sugars)
- Fat: 4g
- Vitamin A: 70% of your daily needs (thanks to the pumpkin!)
The health benefits here are real. Oats are packed with soluble fiber, which helps lower cholesterol and keeps you full all morning. Pumpkin is loaded with vitamin A for eye health and immune support. The eggs add high-quality protein, and the maple syrup provides a more natural source of sweetness than refined sugar. Plus, you’re getting a serving of vegetables before 9 AM. That’s a win in my book.
If you’re watching your sugar intake, the lower sugar variation is a great option. And if you need more protein, add a scoop of collagen or protein powder to the batter—just reduce the milk by a couple tablespoons to compensate for the extra dry ingredient.
Conclusion
These pumpkin baked oatmeal cups have become a staple in my kitchen for a reason. They’re easy, they’re delicious, and they make my mornings infinitely better. No more standing over the stove, no more sad breakfast bars, no more skipping breakfast entirely. Just a warm, comforting, nutritious breakfast that’s ready in 30 seconds.
I love that this recipe is flexible enough to adapt to whatever I have in my pantry. Sometimes I add chocolate chips, sometimes I add nuts, sometimes I keep it simple. It always works, and it always makes me happy. And honestly, that’s what cooking should be about—making food that nourishes you and brings you joy, without making your life harder.
So go ahead, give these a try. Make a batch this weekend and see how much easier your mornings become. I promise you’ll wonder why you didn’t start making them sooner. And if you come up with a variation I haven’t tried, drop it in the comments! I’m always looking for new ideas to test in my kitchen. Happy cooking, friends.
Frequently Asked Questions
Can I use quick oats instead of rolled oats?
I don’t recommend it. Quick oats are more finely processed and will absorb liquid too quickly, resulting in a mushy, dense texture. Rolled oats give you that perfect chewy bite that holds its shape even after baking. Stick with old-fashioned rolled oats for the best results.
Can I make these without eggs?
Yes, you can substitute the eggs with flax eggs. Mix 2 tablespoons of ground flaxseed with 6 tablespoons of water and let it sit for 5 minutes until it forms a gel. The texture will be slightly less fluffy, but they’ll still be delicious. I’ve tested this and it works well.
How do I know when they’re done baking?
The tops should be set and golden brown, and a toothpick inserted into the center should come out clean or with just a few moist crumbs. If the tops are browning too quickly but the centers are still wet, tent the pan with foil and continue baking. Every oven is different, so start checking at 18 minutes.
Can I use pumpkin pie filling instead of pumpkin puree?
No, please don’t. Pumpkin pie filling has added sugar and spices, which will throw off the balance of the recipe. You need 100% pure pumpkin puree. If you accidentally grab the wrong can, just save it for making a pie and get the right one for this recipe.
How long do these last in the freezer?
These will keep in the freezer for up to 3 months. Just make sure they’re completely cooled before freezing, and store them in an airtight container or freezer bag. To reheat, microwave one for 30-40 seconds straight from the freezer, or let it thaw in the fridge overnight. They taste just as good as fresh.
Pin This Recipe!
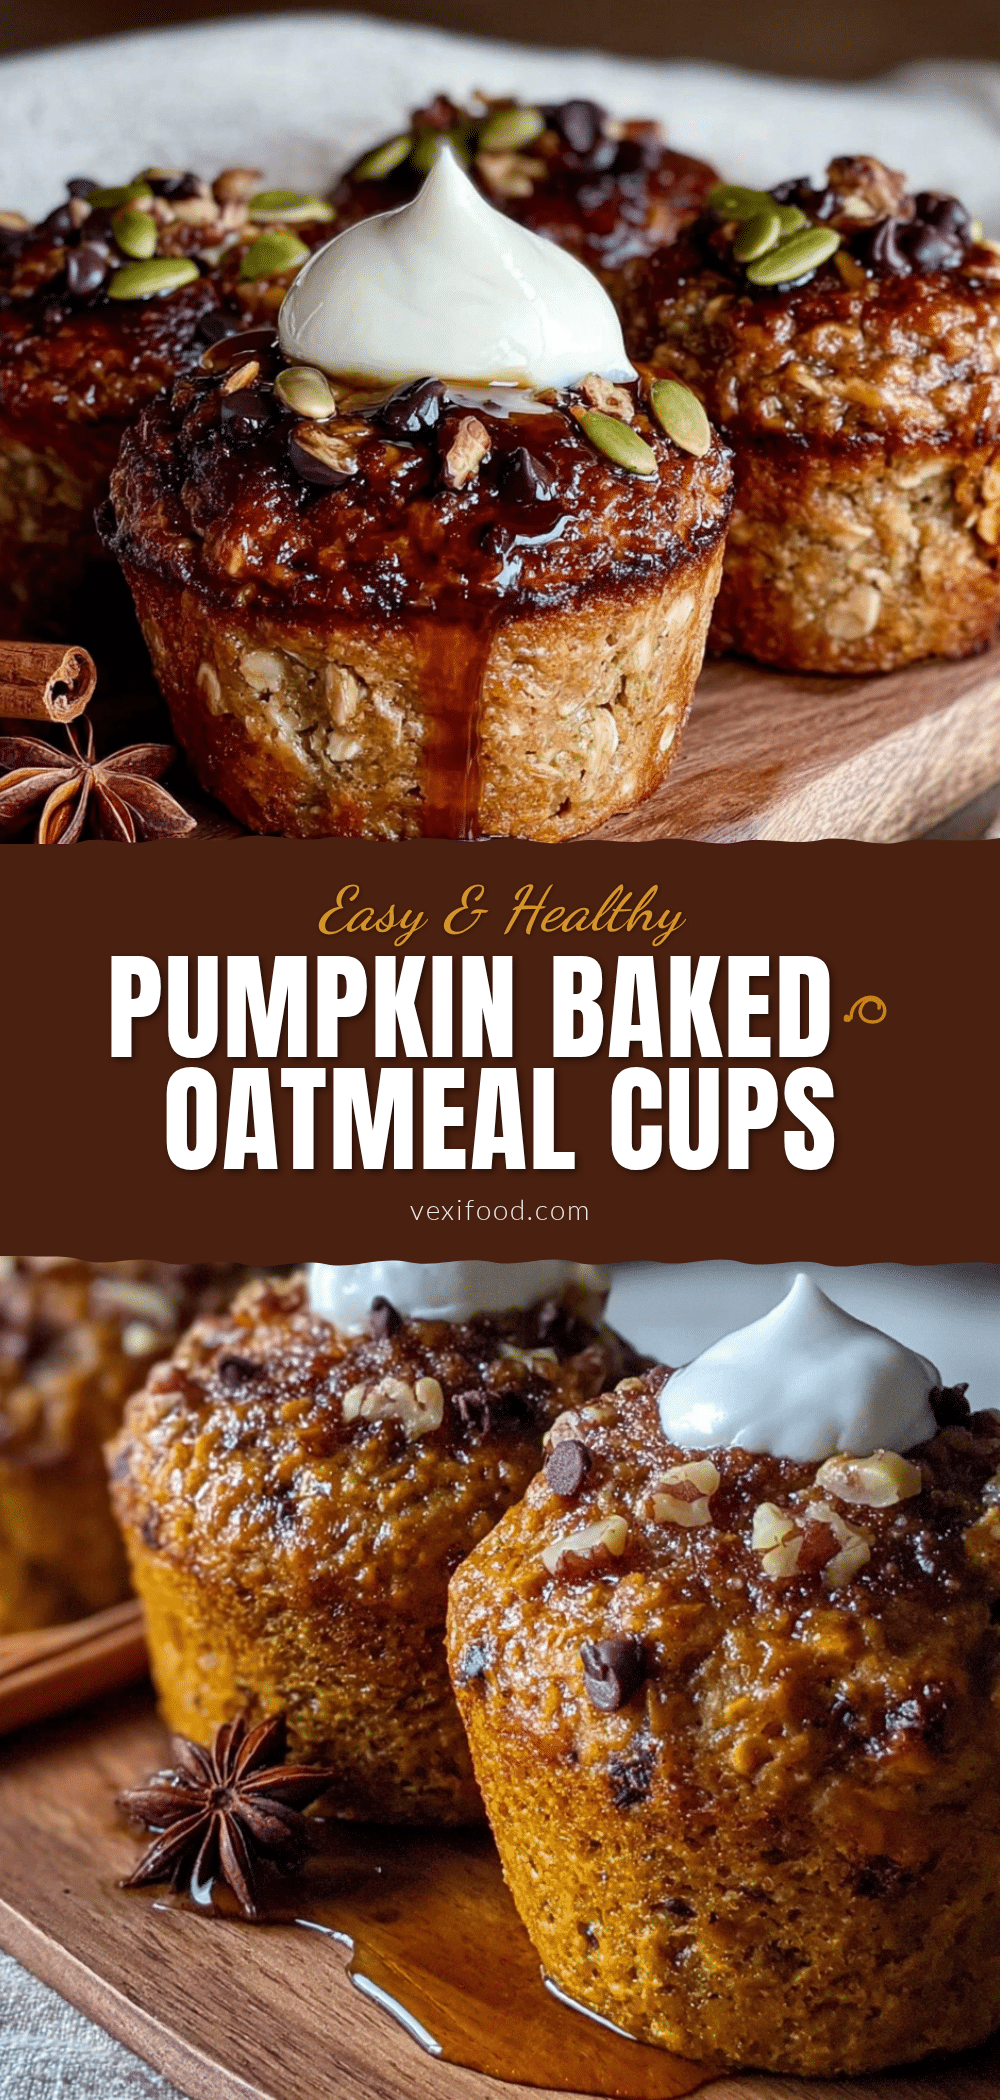
Easy Pumpkin Baked Oatmeal Cups for Perfect Meal Prep
Soft, spiced pumpkin baked oatmeal cups that taste like pumpkin pie for breakfast. Perfect for meal prep, these come together in 30 minutes and reheat beautifully for a quick, healthy breakfast all week long.
- Prep Time: 10 minutes
- Cook Time: 20 minutes
- Total Time: 30 minutes
- Yield: 12 servings 1x
- Category: Breakfast
- Cuisine: American
Ingredients
- 2 cups rolled oats (not quick oats)
- 1 cup pumpkin puree (100% pumpkin, not pumpkin pie filling)
- 1/2 cup milk (any milk works; whole milk for richness)
- 1/3 cup maple syrup (real maple syrup)
- 2 large eggs (room temperature preferred)
- 1 teaspoon vanilla extract (pure vanilla extract)
- 1 teaspoon baking powder
- 1 teaspoon pumpkin pie spice
- 1/2 teaspoon cinnamon
- 1/4 teaspoon salt
- 1/3 cup chocolate chips (optional, dark chocolate recommended)
- 1/3 cup chopped pecans or walnuts (optional, toasted for extra flavor)
- 2 tablespoons chia seeds or flax seeds (optional)
Instructions
- Preheat your oven to 350°F (175°C). Line a 12-cup muffin tin with paper liners or grease well.
- In a large bowl, whisk together the pumpkin puree, milk, maple syrup, eggs, and vanilla extract until smooth and well combined.
- In a separate medium bowl, mix the rolled oats, baking powder, pumpkin pie spice, cinnamon, and salt until evenly distributed.
- Pour the dry ingredients into the wet ingredients. Fold gently with a rubber spatula until just combined and no dry oats are visible. Do not overmix.
- If using, fold in chocolate chips, nuts, or seeds gently until evenly distributed.
- Scoop the batter into the prepared muffin tin, filling each cup almost to the top (about a heaping 1/4 cup per cup).
- Bake for 18-22 minutes, until the tops are set and golden brown and a toothpick inserted into the center comes out clean or with a few moist crumbs.
- Let cool in the pan for 5 minutes, then transfer to a wire rack to cool completely.
- Enjoy warm or at room temperature.
Notes
Let the batter rest for 10 minutes before baking for a softer texture. Use an oven thermometer to ensure accurate temperature. Cool completely before storing to prevent sogginess. For dairy-free, use almond, oat, or coconut milk. For gluten-free, use certified gluten-free rolled oats. For lower sugar, reduce maple syrup to 1/4 cup and add 1/2 teaspoon more vanilla extract or a mashed ripe banana.
Nutrition
- Serving Size: 1 oatmeal cup
- Calories: 180
- Sugar: 12
- Sodium: 150
- Fat: 4
- Saturated Fat: 1
- Carbohydrates: 30
- Fiber: 4
- Protein: 6
Keywords: pumpkin baked oatmeal cups, meal prep breakfast, healthy oatmeal cups, pumpkin oatmeal, easy breakfast recipe