Love this? Save it for later!
Share the inspiration with your friends
My neighbor, a retired schoolteacher named Mrs. Gable, watched me struggle with a massive turkey carcass the day after Thanksgiving. She didn’t say anything at first. Then she just shook her head, smiled, and said, “You’re overthinking it, honey. The kids don’t want a carving station. They want something they can grab with their hands.” She walked me back to her kitchen, which smelled like cinnamon and butter, and showed me how she’d been feeding her grandkids for years. No fancy plating, no carving knife skills needed. Just a baking dish, some soft rolls, and the best parts of the holiday meal layered together like a warm, cozy blanket. Honestly, I felt a little silly for not thinking of it myself.
That conversation stuck with me, especially when I started thinking about Friendsgiving with my own crew of little ones running around. You know that feeling when you want the kids to feel included in the celebration, but you also want to actually sit down and enjoy a conversation while your food is still warm? That’s where these Kid-Friendly Friendsgiving Pull-Apart Turkey and Stuffing Sliders come in. They’re the answer to a prayer I didn’t even know I’d prayed.
The first time I made them, I forgot the cranberry sauce. I mean, I had the turkey, the stuffing, the melty cheese—everything was perfect. But I realized my mistake halfway through assembling, and I just layered it in anyway. And you know what? It was fine. Better than fine, actually. It taught me that this recipe is forgiving. It’s meant to be adapted, not followed with military precision. Maybe you’ve been there, standing in your kitchen with a sink full of dishes and a timer beeping, wondering if you’re doing it all wrong. This recipe doesn’t care about perfection. It just wants to feed the people you love.
These sliders have become my go-to for every Friendsgiving since. They’re the dish that disappears first, the one the kids ask for by name, and the one I make even when it’s not a holiday. Because honestly, any day that ends with pull-apart bread and melted cheese is a good day.
Why You’ll Love This Recipe
Let me tell you why these sliders have officially retired my big roasting pan for kid-friendly gatherings. I’ve tested this recipe through three Friendsgivings, two birthday parties, and one very chaotic Tuesday night dinner. It’s been through the wringer, and it came out golden every single time.
- Quick & Easy: From start to finish, you’re looking at about 25 minutes of active prep and 20 minutes in the oven. That’s less time than it takes to argue about who gets the drumstick.
- Simple Ingredients: You probably have most of these in your fridge right now. Leftover turkey, a box of stuffing mix, some Hawaiian rolls, and cheese. No special trips to the fancy grocery store required.
- Perfect for Friendsgiving: Whether you’re hosting a table full of toddlers or a crowd of adults who just want something easy to eat while chatting, these sliders fit the bill. They’re portable, they’re messy in the best way, and they feed a crowd without breaking the bank.
- Crowd-Pleaser: I’ve watched picky eaters go back for thirds. The combination of soft bread, savory turkey, herby stuffing, and gooey cheese is basically kid kryptonite.
- Unbelievably Delicious: The secret is in the butter brush on top. A little garlic powder, some poppy seeds, and melted butter turn these simple sliders into something that tastes like you spent hours in the kitchen. You didn’t, but nobody has to know that.
What makes this recipe different from every other slider recipe out there? It’s the way the stuffing gets all crispy on the edges while staying soft in the middle. It’s the way the cheese pulls apart in long, satisfying strings. It’s the fact that your kids can help you assemble them without any sharp knives or hot pans. This isn’t just another version of a turkey sandwich. It’s the version that makes you close your eyes after the first bite and remember why you love cooking for the people you love.
What Ingredients You Will Need
This recipe uses simple, everyday ingredients to create something that tastes like a full Thanksgiving dinner in every bite. Most of these are pantry staples or leftovers you probably already have hanging around your fridge.
For the Sliders
- 12-count package Hawaiian sweet rolls (I prefer King’s Hawaiian for that soft, buttery texture—they hold up perfectly without getting soggy)
- 2 cups cooked turkey, shredded or chopped (leftover roasted turkey works best, but rotisserie chicken is a great substitute if you’re making these outside of the holiday season)
- 2 cups prepared stuffing (homemade or boxed—I’ve used both and honestly, the boxed version works beautifully and saves time)
- 1 cup whole berry cranberry sauce (jellied works too, but whole berry gives you those little bursts of tartness that cut through the richness)
- 1 ½ cups shredded sharp cheddar cheese (or a mix of cheddar and mozzarella for extra meltiness—use dairy-free cheese if needed)
- ½ cup mayonnaise (optional, but it adds moisture and richness—Greek yogurt works as a lighter swap)
For the Butter Topping
- 4 tablespoons unsalted butter, melted
- 1 teaspoon garlic powder
- 1 teaspoon poppy seeds (sesame seeds work too if that’s what you have)
- ½ teaspoon dried parsley
- Pinch of salt
A few notes on ingredient selection. When I’m buying turkey for these sliders, I look for dark meat if I can find it—it stays juicier during baking. But white meat works perfectly fine, especially if you shred it rather than chop it. For the stuffing, I’m partial to Pepperidge Farm’s herb-seasoned stuffing mix, but any brand will do. Just make sure you prepare it according to the package directions before you start assembling. And here’s a little tip I learned the hard way: don’t skip the cranberry sauce. It might seem like an extra step, but that sweet-tart pop is what keeps these sliders from feeling one-note. In summer, I’ve swapped in leftover grilled chicken and a dollop of mango chutney instead of cranberry sauce, and it was fantastic. Don’t be afraid to play around with what you have.
Equipment Needed
You don’t need a lot of fancy tools to make these sliders, which is part of the beauty. Here’s what you’ll need:
- 9×13-inch baking dish (or any similar-sized pan—I’ve used a 9×9 in a pinch, just adjust the roll count)
- Sharp knife or serrated bread knife (for cutting the rolls in half without squishing them)
- Small mixing bowl (for the butter topping)
- Pastry brush (a silicone one is my favorite—easy to clean and doesn’t shed bristles)
- Cutting board
- Aluminum foil (for covering during the first part of baking)
If you don’t have a pastry brush, don’t worry. You can use a spoon to drizzle the butter mixture over the tops of the rolls. It won’t be as even, but it’ll still taste amazing. I’ve also used a paper towel in a desperate moment, and honestly, it worked fine. The key is just getting that butter on there. For budget-friendly options, a dollar store baking dish works just as well as a fancy one—these sliders aren’t picky about their vessel.
Preparation Method
- Preheat your oven to 350°F (175°C). While it’s heating up, lightly grease your 9×13-inch baking dish with a little butter or non-stick spray. I use butter because it adds flavor, but spray works fine.
- Prepare the rolls. Without separating the individual rolls, carefully slice the entire slab of Hawaiian rolls in half horizontally. You want to keep them connected in one big sheet. Place the bottom half of the rolls in your prepared baking dish. If your knife is dragging or squishing the bread, try a serrated knife with a gentle sawing motion—it makes a huge difference.
- Layer the turkey. Spread your shredded or chopped turkey evenly over the bottom layer of rolls. Don’t pile it too thick in the center—you want an even layer so every slider gets some protein. If your turkey is dry, you can mix it with a tablespoon of melted butter or turkey gravy before layering.
- Add the stuffing. Spoon your prepared stuffing over the turkey layer. Press it down gently with the back of a spoon to create an even surface. This is where you can really pack it in—the stuffing is the heart of these sliders.
- Spread the cranberry sauce. Dollop your cranberry sauce over the stuffing and spread it gently. It doesn’t have to be perfect—some swirls and pockets of cranberry are actually better than a solid layer. If you’re using jellied sauce, you can slice it thin and lay the slices over the stuffing.
- Add the cheese. Sprinkle your shredded cheese evenly over the cranberry layer. Don’t skimp here—the cheese is what holds everything together and creates that irresistible pull-apart effect.
- Top with the other half of the rolls. Carefully place the top half of the rolls over the filling. Press down gently to help everything settle.
- Make the butter topping. In your small bowl, whisk together the melted butter, garlic powder, poppy seeds, dried parsley, and salt. Brush this mixture generously over the tops of the rolls. Make sure you get into the crevices between the rolls—that’s where the magic happens.
- Bake covered for 15 minutes. Cover the dish with aluminum foil and bake for 15 minutes. This steams the filling and ensures everything is hot all the way through.
- Bake uncovered for 5-10 more minutes. Remove the foil and bake until the tops are golden brown and the cheese is bubbly. You’ll know it’s done when you can see the cheese oozing out the sides and the tops are a deep, toasty brown.
- Let rest for 5 minutes. This is the hardest part, I know. But letting them rest allows the cheese to set slightly so the sliders hold their shape when you pull them apart. Use a spatula to lift them out of the dish—they should separate easily.
A quick note on timing: if you’re making these for a crowd, you can assemble them up to 24 hours in advance and keep them covered in the fridge. Just add 5-10 minutes to the covered baking time. I’ve done this for two Friendsgivings now, and nobody has ever guessed they weren’t made fresh that day.
Cooking Tips & Techniques
I’ve made these sliders enough times to have a few disasters under my belt, and I’m sharing them so you don’t have to repeat my mistakes.
The soggy bottom problem. The first time I made these, I was heavy-handed with the cranberry sauce, and the bottom rolls turned into a sad, soggy mess. The fix is simple: don’t oversaturate. You want a thin layer of cranberry sauce, not a swimming pool. If you’re using homemade cranberry sauce that’s particularly runny, you can drain off some of the liquid before spreading.
Temperature matters. Make sure your turkey and stuffing are at room temperature before assembling. Cold filling straight from the fridge will cool down the whole dish, and you’ll end up with a cold center and burnt edges. I usually pull my leftovers out about 30 minutes before I start assembling.
Cheese strategy. Pre-shredded cheese has anti-caking agents that prevent it from melting as smoothly as freshly shredded cheese. If you have the time, buy a block of cheese and shred it yourself. It makes a noticeable difference in the creaminess of the final dish. That said, I’ve used pre-shredded in a pinch, and it still tastes great—it just doesn’t look as pretty.
Multitasking like a pro. While the sliders are baking covered, use that 15 minutes to clean up your workstation and set out serving plates. When you pop off the foil for the final baking stage, you can make a quick salad or warm up some gravy for dipping. Those little pockets of time add up.
The pull-apart trick. For the cleanest separation, use two forks to gently tease the sliders apart rather than just yanking them. This keeps the filling from spilling out everywhere. But honestly, if you’re feeding kids, they’re going to make a mess anyway, so don’t stress about it too much.
Variations & Adaptations
One of the best things about this recipe is how flexible it is. Here are some variations I’ve tried and loved:
Vegetarian version. Swap the turkey for roasted mushrooms and caramelized onions. I made this for a vegetarian friend last year, and she said it was better than the original. The mushrooms add that same savory, umami depth that turkey brings, and the onions add sweetness. Use vegetable broth in your stuffing to keep it fully vegetarian.
Spicy kick. If your family likes heat, add a layer of pickled jalapeños between the turkey and the stuffing. The acidity cuts through the richness beautifully. I did this for a Friendsgiving with my brother-in-law, who puts hot sauce on everything, and he ate six sliders. Six.
Breakfast sliders. This might sound weird, but trust me. Use breakfast sausage instead of turkey, swap the cranberry sauce for apple butter, and use a sharp white cheddar. Serve them at your next brunch gathering, and watch them disappear. I accidentally discovered this variation when I had leftover stuffing and no turkey—desperate times, delicious results.
Gluten-free option. Use gluten-free Hawaiian rolls (they exist and they’re surprisingly good) and gluten-free stuffing mix. Everything else in the recipe is naturally gluten-free. Just check your cranberry sauce label to be safe.
Dairy-free adaptation. Use dairy-free butter, dairy-free cheese shreds, and skip the mayonnaise. The sliders won’t be quite as rich, but they’ll still be delicious. I’ve tested this with Violife cheddar-style shreds, and my kids didn’t notice the difference.
Serving & Storage Suggestions
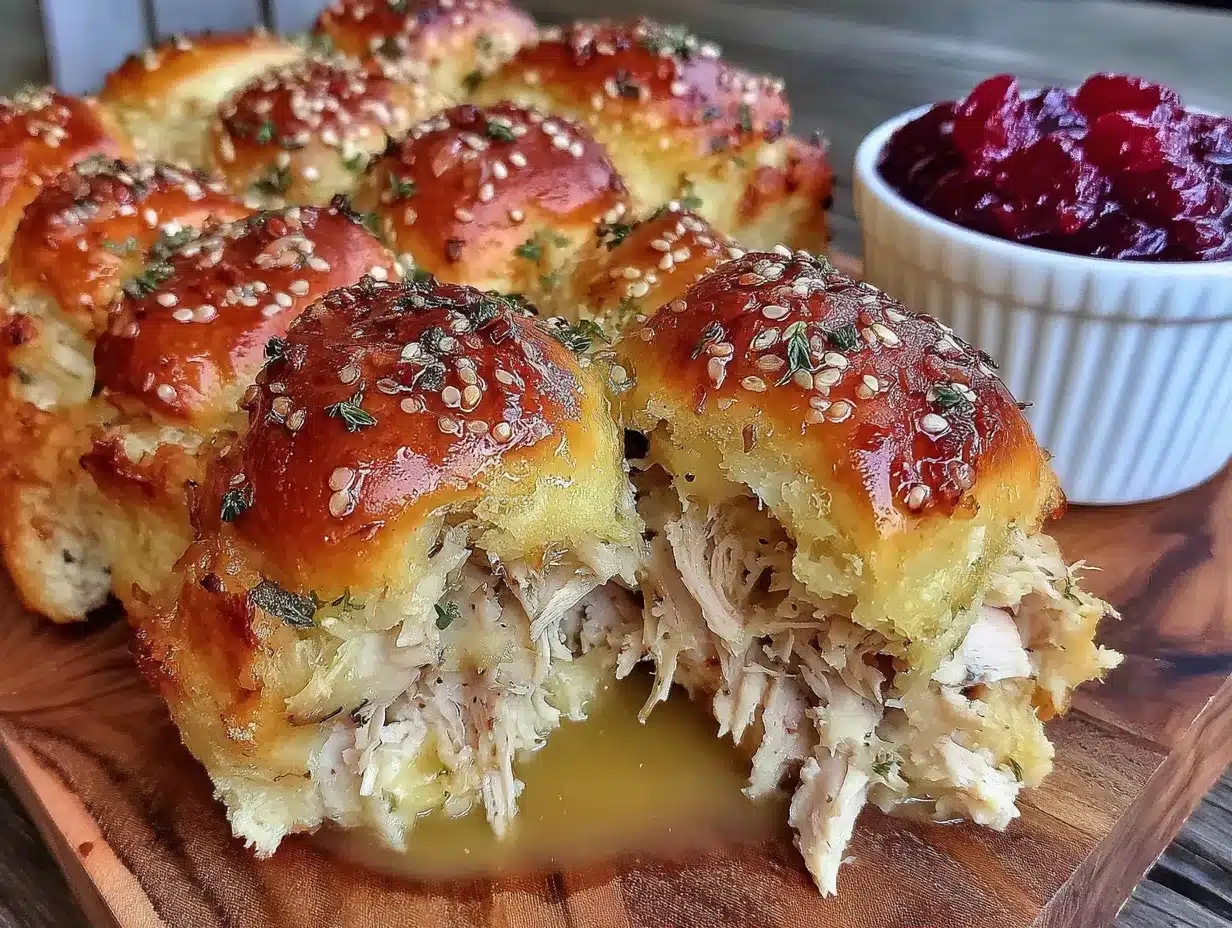
These sliders are best served warm, straight from the oven, when the cheese is still stretchy and the tops are perfectly golden. I like to set them out on a large wooden board or a simple white platter so the golden tops really pop. If you’re serving a crowd, you can keep them warm in a low oven (200°F) for up to 30 minutes—just tent them loosely with foil so they don’t dry out.
What to serve alongside: A simple green salad with a tangy vinaigrette balances the richness of the sliders perfectly. I also love serving them with warm turkey gravy for dipping—it takes them over the top. For drinks, apple cider or a crisp white wine like Sauvignon Blanc works beautifully for the adults, while the kids are happy with sparkling apple juice.
Storage: These sliders store beautifully. Let them cool completely, then wrap the entire dish tightly in foil or transfer individual sliders to an airtight container. They’ll keep in the refrigerator for up to 4 days. The flavors actually meld together overnight, so leftovers taste even better than the fresh batch.
Reheating: The best way to reheat is in a 350°F oven for about 10 minutes, covered with foil. This restores the crispy top while keeping the inside moist. The microwave works in a pinch, but the rolls will be softer and the cheese won’t have that same stretchy quality. If you’re reheating a single slider, the microwave is fine—just do 30-second intervals so you don’t turn the bread into rubber.
Freezer instructions: You can freeze these sliders fully assembled but unbaked. Wrap the entire dish in plastic wrap, then foil, and freeze for up to 3 months. When you’re ready to bake, thaw overnight in the fridge, then follow the baking instructions as written, adding 5-10 minutes to the covered baking time. I’ve done this for two different Friendsgivings now, and it’s a lifesaver when you’re trying to get ahead of the holiday chaos.
Nutritional Information & Benefits
Here’s a rough estimate for one slider (based on 12 servings):
| Nutrient | Amount per Slider |
|---|---|
| Calories | 285 |
| Total Fat | 14g |
| Saturated Fat | 7g |
| Cholesterol | 45mg |
| Sodium | 520mg |
| Total Carbohydrates | 26g |
| Dietary Fiber | 2g |
| Sugars | 8g |
| Protein | 16g |
These sliders offer a solid balance of protein from the turkey and cheese, carbohydrates for energy, and a little sweetness from the Hawaiian rolls and cranberry sauce. The turkey provides lean protein that’s great for growing kids, while the whole wheat in some stuffing mixes adds a bit of fiber. If you’re watching your sodium intake, you can use low-sodium stuffing mix and reduce the added salt in the butter topping.
From a wellness perspective, I love that this recipe lets me use up leftovers in a way that feels fresh and exciting. It’s comfort food that doesn’t require a ton of extra ingredients or effort. And honestly, the joy on my kids’ faces when they see that golden baking dish coming out of the oven is worth every single calorie.
Conclusion
These Kid-Friendly Friendsgiving Pull-Apart Turkey and Stuffing Sliders have become a non-negotiable part of my holiday rotation. They’re the recipe that makes me feel like I’ve got this whole hosting thing figured out, even on days when I’m running on three hours of sleep and a cup of cold coffee. They’re forgiving, they’re flexible, and they feed the people you love without making you miss a single moment of the celebration.
I hope you make these sliders your own. Maybe you’ll add a little extra cheese. Maybe you’ll swap in your grandma’s famous stuffing recipe. Maybe you’ll forget the cranberry sauce like I did and discover that it’s still perfect. That’s the beauty of a recipe like this—it’s a starting point, not a rulebook.
When you make these, I’d love to hear about it. Drop a comment below and tell me how they turned out, what variations you tried, or if your kids went back for thirds like mine always do. And if you have a favorite Friendsgiving tradition, share that too. Because honestly, the best part of any holiday isn’t the food—it’s the people we share it with. These sliders just make that sharing a little bit easier, a little bit warmer, and a whole lot more delicious.
Frequently Asked Questions
Can I make these sliders ahead of time?
Absolutely. You can assemble the sliders up to 24 hours in advance and keep them covered in the fridge. When you’re ready to bake, just add 5-10 minutes to the covered baking time to account for the cold start.
Can I use chicken instead of turkey?
Yes, rotisserie chicken works beautifully in this recipe. Shredded or chopped, it’s a great substitute, especially if you’re making these sliders outside of the Thanksgiving season.
How do I keep the bottom rolls from getting soggy?
The key is not oversaturating the cranberry sauce layer. Use a thin, even layer, and make sure your stuffing isn’t too wet. If your cranberry sauce is particularly runny, drain off some of the liquid before spreading.
Can I freeze these sliders?
Yes! Assemble them unbaked, wrap tightly in plastic wrap and foil, and freeze for up to 3 months. Thaw overnight in the fridge before baking, adding a few extra minutes to the covered baking time.
What’s the best cheese for these sliders?
Sharp cheddar is my go-to for its bold flavor and excellent melting properties. A mix of cheddar and mozzarella gives you extra stretchiness. Gruyere or Swiss also work wonderfully if you want a more sophisticated flavor profile.
Pin This Recipe!
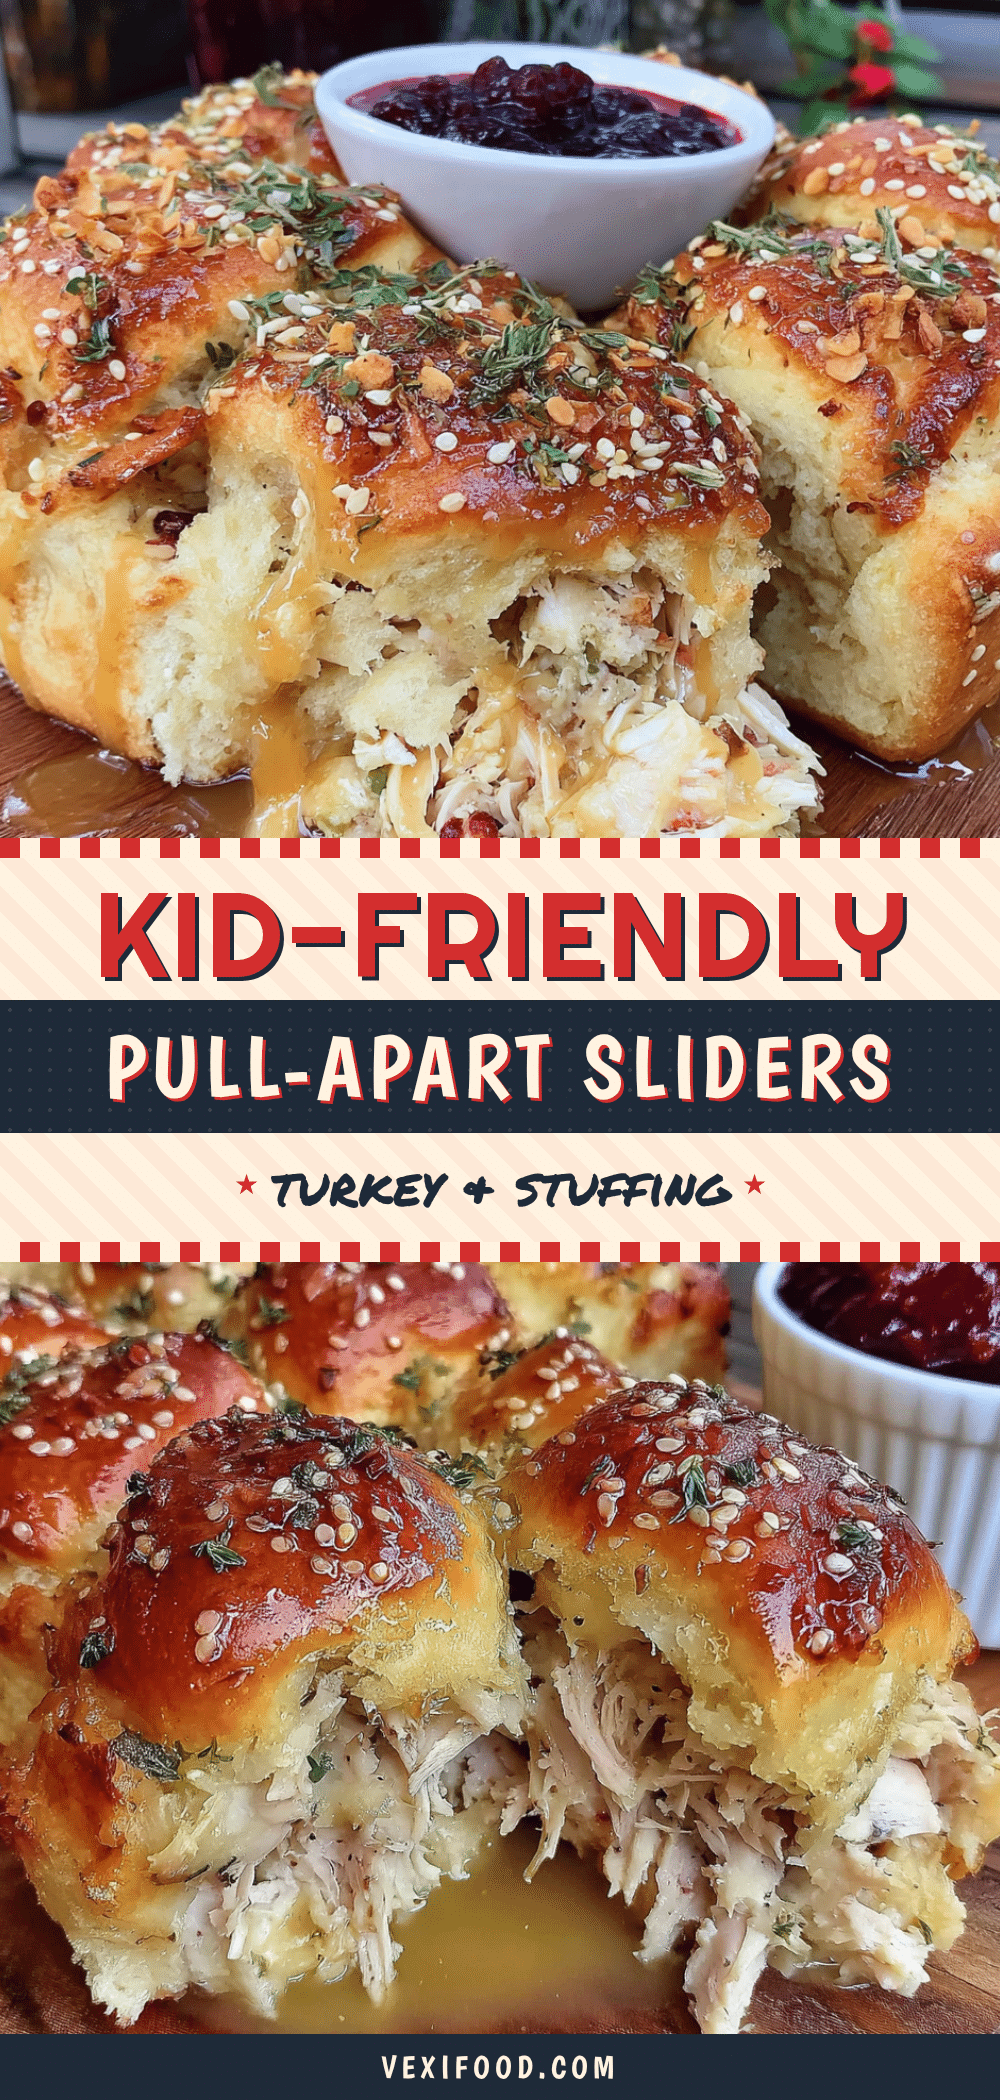
Best Kid-Friendly Friendsgiving Pull-Apart Turkey Sliders
These pull-apart turkey and stuffing sliders are the perfect kid-friendly Friendsgiving dish. Made with soft Hawaiian rolls, leftover turkey, stuffing, cranberry sauce, and melted cheese, they’re easy to assemble and always a crowd-pleaser.
- Prep Time: 25 minutes
- Cook Time: 20 minutes
- Total Time: 45 minutes
- Yield: 12 servings 1x
- Category: Main Course
- Cuisine: American
Ingredients
- 12-count package Hawaiian sweet rolls (e.g., King’s Hawaiian)
- 2 cups cooked turkey, shredded or chopped
- 2 cups prepared stuffing (homemade or boxed)
- 1 cup whole berry cranberry sauce
- 1 ½ cups shredded sharp cheddar cheese (or cheddar and mozzarella mix)
- ½ cup mayonnaise (optional)
- 4 tablespoons unsalted butter, melted
- 1 teaspoon garlic powder
- 1 teaspoon poppy seeds
- ½ teaspoon dried parsley
- Pinch of salt
Instructions
- Preheat oven to 350°F (175°C). Lightly grease a 9×13-inch baking dish with butter or non-stick spray.
- Without separating the rolls, carefully slice the entire slab of Hawaiian rolls in half horizontally. Place the bottom half in the prepared baking dish.
- Spread the shredded or chopped turkey evenly over the bottom layer of rolls.
- Spoon the prepared stuffing over the turkey layer and press down gently with the back of a spoon.
- Dollop the cranberry sauce over the stuffing and spread gently.
- Sprinkle the shredded cheese evenly over the cranberry layer.
- Place the top half of the rolls over the filling and press down gently.
- In a small bowl, whisk together melted butter, garlic powder, poppy seeds, dried parsley, and salt. Brush this mixture generously over the tops of the rolls, getting into the crevices.
- Cover the dish with aluminum foil and bake for 15 minutes.
- Remove the foil and bake for 5-10 more minutes, until the tops are golden brown and the cheese is bubbly.
- Let rest for 5 minutes before pulling apart. Use a spatula to lift them out of the dish.
Notes
For best results, use room temperature turkey and stuffing. Avoid oversaturating with cranberry sauce to prevent soggy bottoms. Freshly shredded cheese melts more smoothly. Sliders can be assembled up to 24 hours in advance and refrigerated; add 5-10 minutes to covered baking time. To freeze, assemble unbaked, wrap tightly, and freeze for up to 3 months; thaw overnight in fridge before baking.
Nutrition
- Serving Size: 1 slider
- Calories: 285
- Sugar: 8
- Sodium: 520
- Fat: 14
- Saturated Fat: 7
- Carbohydrates: 26
- Fiber: 2
- Protein: 16
Keywords: turkey sliders, Friendsgiving, kid-friendly, pull-apart sliders, Thanksgiving leftovers, Hawaiian roll sliders



