Love this? Save it for later!
Share the inspiration with your friends
This was supposed to be a last-minute side dish. I had double-booked a Saturday—promised to bring a hearty pasta bake to a friend’s potluck but also agreed to help my sister move a sofa into her third-floor walk-up. By the time I stumbled back into my kitchen, it was 4 PM, my arms were shaking, and I had exactly one hour before I needed to walk out the door with something impressive. I grabbed a block of cheddar, some milk I was pretty sure was still good, and a box of elbow macaroni that had been hiding in the back of the pantry. The oven was preheating, the water was boiling, and I was already in a full sweat. Halfway through grating the cheese, my phone rang—it was my sister asking if I had the sofa cushions. I answered, got distracted, and dumped the entire block of cheese into the pot of pasta water instead of the colander. Honestly, I wanted to cry. But I fished out what I could, stirred in the remaining cheese with some cream, and threw a handful of panko on top because that’s all I had left. What came out of the oven was nothing like the plan—and better. The crust was golden and shattery, the inside was creamy without being gluey, and it reheated perfectly the next day. I mean, I’ve made mac and cheese a hundred times, but this happy little disaster taught me something: sometimes the best recipes come from the moments you think you’ve ruined everything. Maybe you’ve been there, staring at a half-melted block of cheese in boiling water, wondering how it all went wrong. Let me tell you—this one is worth the mess.
Why You’ll Love This Recipe
If you are hosting a dinner party, a holiday gathering, or just a casual get-together with friends, this make-ahead baked mac and cheese with panko crust is your secret weapon. It is the dish that gets passed around the table twice, the one people ask for the recipe before they’ve even finished their plate. And the best part? You can assemble it a full day ahead, pop it in the fridge, and bake it off right before your guests arrive. No last-minute scrambling, no burnt fingers, no stress.
- Perfect for Hosting: This dish scales beautifully for a crowd. Double the recipe for a 9×13 pan and feed 12 people without breaking a sweat.
- Make-Ahead Magic: Assemble it up to 24 hours in advance. The flavors actually get better as they meld overnight.
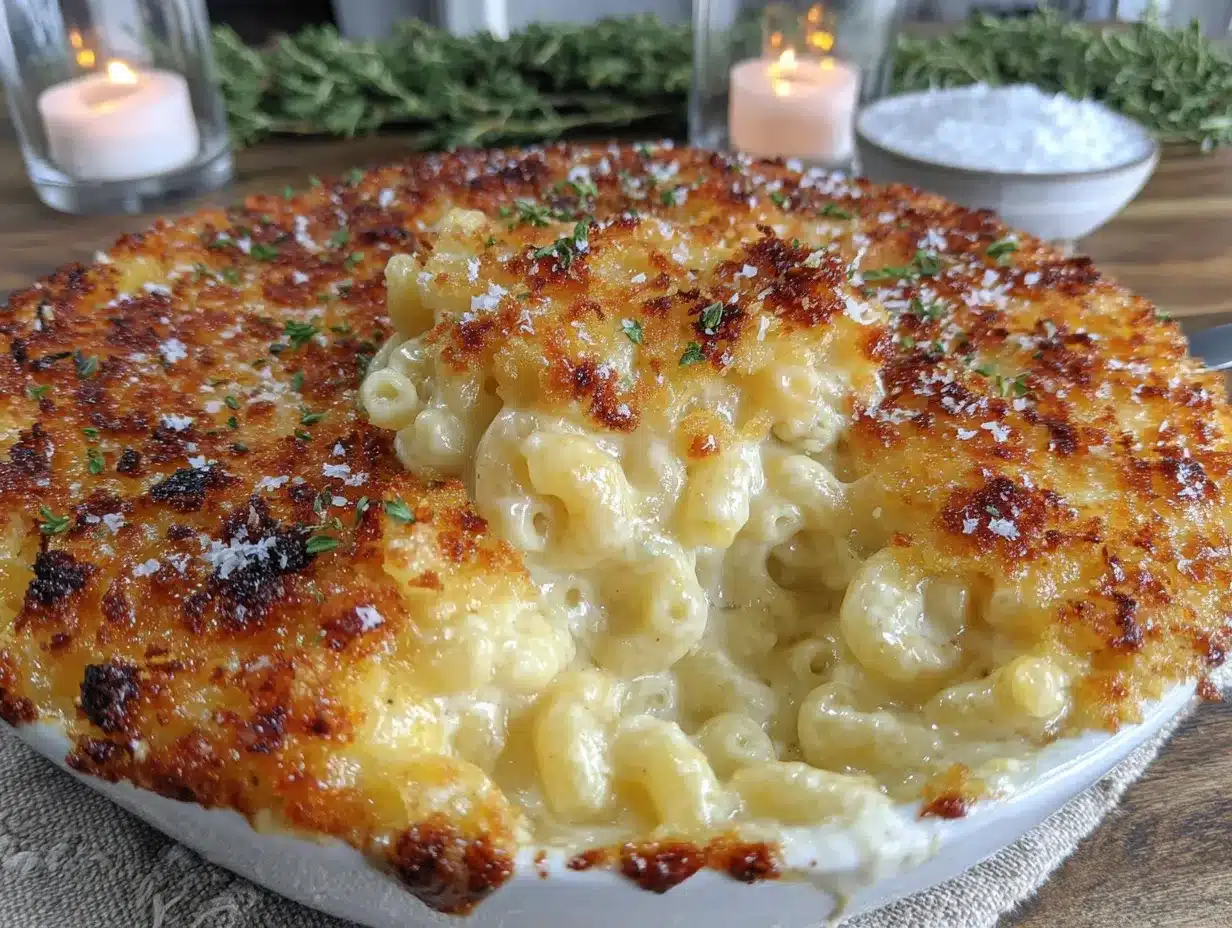
- That Panko Crust: The golden, buttery, crunchy topping is what sets this mac and cheese apart. It adds texture and a little bit of drama when you bring it to the table.
- Creamy, Not Gluey: No one wants a stiff, dry casserole. This recipe uses a simple technique to keep the sauce silky and luscious.
- Crowd-Pleaser: Kids love the crunchy top, adults love the rich, cheesy flavor. It disappears fast.
- Simple Ingredients: No fancy cheese shop runs needed. Sharp cheddar, whole milk, butter, and panko are all you need for something truly special.
This isn’t just another mac and cheese recipe. It is the one that makes you close your eyes after the first bite. The kind that feels like a warm hug on a cold evening, but also fancy enough to serve at a holiday table. It is comfort food reimagined—creamy, crunchy, and completely unforgettable.
What Ingredients You Will Need
This recipe uses simple, honest ingredients that you probably already have in your kitchen. The magic is in how they come together. Here is everything you need for the best make-ahead baked mac and cheese with panko crust.
For the Pasta
- 1 pound (450g) elbow macaroni – or any short pasta like cavatappi, shells, or rotini. Cavatappi holds the sauce particularly well.
- Salt – for the pasta water. Use about 1 tablespoon per 4 quarts of water. It seasons the pasta from the inside out.
For the Cheese Sauce
- 4 tablespoons (56g) unsalted butter – I prefer Kerrygold for its rich flavor, but any good unsalted butter works.
- 1/4 cup (31g) all-purpose flour – this thickens the sauce without making it pasty.
- 3 cups (720ml) whole milk – full-fat milk is non-negotiable here for creaminess. Do not use skim.
- 1 cup (240ml) heavy cream – adds richness and helps the sauce stay smooth when reheated.
- 3 cups (340g) sharp cheddar cheese, freshly grated – pre-shredded cheese has anti-caking agents that prevent smooth melting. Grate it yourself for the best texture.
- 1 cup (113g) Gruyère cheese, freshly grated – optional but highly recommended. It adds a nutty, slightly sweet depth that cheddar alone can’t match.
- 1/2 teaspoon garlic powder – just enough to enhance the savory notes.
- 1/2 teaspoon onion powder – adds subtle sweetness.
- 1/2 teaspoon paprika – smoked paprika adds a lovely warmth, but sweet works too.
- 1/4 teaspoon cayenne pepper – optional, for a tiny kick. It doesn’t make the dish spicy, just more interesting.
- 1 teaspoon Dijon mustard – this is the secret ingredient. It brightens the cheese flavor and helps the sauce emulsify.
- Salt and freshly ground black pepper – to taste. Go easy on the salt since the cheese is already salty.
For the Panko Crust
- 1 cup (120g) panko breadcrumbs – they are lighter and flakier than regular breadcrumbs, giving you that signature crunch.
- 3 tablespoons (42g) unsalted butter, melted – coats the panko for even browning.
- 1/4 cup (28g) freshly grated Parmesan cheese – adds umami and helps the crust get extra crispy.
- 2 tablespoons fresh parsley, finely chopped – for color and freshness. Optional but pretty.
- 1/4 teaspoon garlic powder – because garlic makes everything better.
Ingredient Tips
Cheese Selection: I always recommend grating your own cheese. It melts more smoothly and the flavor is noticeably better. For the sharp cheddar, look for a block that feels firm and smells tangy. If you want to swap Gruyère, try Gouda or Monterey Jack for a milder flavor.
Milk and Cream: Whole milk and heavy cream give the sauce its velvety texture. If you need a lighter option, use all whole milk and skip the cream—the sauce will be slightly less rich but still delicious.
Panko: Regular breadcrumbs won’t give you the same crunch. Panko is key for that golden, shattery crust. Look for it in the Asian foods aisle or near the breadcrumbs.
Equipment Needed
You don’t need a professional kitchen to pull this off. Here is what you will need:
- Large pot (6-8 quarts) – for boiling the pasta. Make sure it’s big enough to give the pasta room to move.
- Colander – for draining the pasta.
- Large saucepan or Dutch oven – for making the cheese sauce. A heavy-bottomed pan prevents scorching.
- Whisk – essential for a smooth, lump-free sauce.
- Wooden spoon or silicone spatula – for stirring.
- 9×13-inch baking dish – this is the standard size for a full recipe. If you are halving it, use an 8×8-inch dish.
- Box grater or food processor with grating disc – for grating cheese. A box grater gives you more control.
- Small bowl – for mixing the panko topping.
- Aluminum foil – for covering the dish during baking and storage.
Budget-Friendly Tip: If you don’t have a 9×13 baking dish, use two 8×8 dishes or even a cast-iron skillet. Just adjust the baking time slightly—smaller dishes cook faster. I have used a cheap glass baking dish for years and it works perfectly. No need to splurge on fancy bakeware.
Maintenance Note: If you use a glass dish, let it come to room temperature before putting it in a hot oven. Glass can shatter with sudden temperature changes. I learned this the hard way on Thanksgiving.
Preparation Method
This make-ahead baked mac and cheese with panko crust comes together in a few simple steps. Follow them carefully, and you will have a dish that looks like you spent hours on it.
Step 1: Cook the Pasta (10 minutes)
Bring a large pot of generously salted water to a rolling boil. Add the elbow macaroni and cook according to package directions until al dente—about 1 to 2 minutes less than the recommended time. The pasta will continue to cook in the oven, so you want it slightly firm. Drain the pasta in a colander and rinse with cool water to stop the cooking. Drizzle with a tiny bit of olive oil and toss to prevent sticking. Set aside.
Step 2: Make the Cheese Sauce (15 minutes)
In a large saucepan or Dutch oven, melt the butter over medium heat. Once it is bubbling, whisk in the flour and cook for 1 to 2 minutes, stirring constantly. This is called a roux, and it should smell nutty and look like wet sand. Slowly pour in the milk and heavy cream, whisking continuously to prevent lumps. Bring the mixture to a gentle simmer—do not let it boil hard—and cook for 3 to 4 minutes until it thickens enough to coat the back of a spoon.
Reduce the heat to low. Add the shredded cheddar and Gruyère a handful at a time, stirring until each addition is fully melted before adding more. Stir in the garlic powder, onion powder, paprika, cayenne (if using), Dijon mustard, and a pinch of salt and pepper. Taste the sauce—it should be creamy, cheesy, and well-seasoned. If it tastes flat, add a little more salt or mustard. Remove from heat.
Step 3: Combine and Assemble (5 minutes)
Add the cooked pasta to the cheese sauce and stir until every piece is coated. The sauce will seem a little loose—that is normal. It will thicken as it bakes and sets. Pour the mixture into your greased 9×13 baking dish and spread it into an even layer.
Step 4: Make the Panko Crust (5 minutes)
In a small bowl, combine the panko breadcrumbs, melted butter, grated Parmesan, chopped parsley, and garlic powder. Stir with a fork until the crumbs are evenly coated. Sprinkle the panko mixture evenly over the top of the mac and cheese.
Step 5: Bake or Refrigerate
If baking immediately: Preheat your oven to 375°F (190°C). Bake the mac and cheese uncovered for 20 to 25 minutes, or until the sauce is bubbly around the edges and the panko crust is deep golden brown. If the top is browning too quickly, tent loosely with foil for the last 10 minutes.
If making ahead: Cover the assembled dish tightly with aluminum foil and refrigerate for up to 24 hours. When ready to bake, remove from the refrigerator and let it sit at room temperature for 30 minutes while the oven preheats. Bake covered with foil at 375°F (190°C) for 20 minutes, then remove the foil and bake for another 15 to 20 minutes until the crust is golden and the sauce is bubbling.
Visual Cue: The sauce should be bubbling gently around the edges, and the crust should look like toasted breadcrumbs—golden, with some darker spots for texture. If you tap the dish, the center should feel slightly firm but still jiggle a little.
Cooking Tips & Techniques
Over the years, I have made this dish more times than I can count, and I have learned a few things the hard way. Here are my best tips for the perfect make-ahead baked mac and cheese with panko crust.
Don’t Overcook the Pasta. This is the most common mistake. If you cook the pasta to full tenderness on the stove, it will turn mushy after baking. Always cook it al dente—firm to the bite. When in doubt, take it out a minute early.
Grate Your Own Cheese. I know it is tempting to buy the bagged shredded cheese, but it really does make a difference. The anti-caking agents in pre-shredded cheese prevent it from melting smoothly, leaving you with a grainy sauce. Spend the extra three minutes grating a block of cheddar—your sauce will thank you.
Low and Slow for the Sauce. When you add the cheese to the béchamel, keep the heat on low. High heat can cause the cheese to separate and become greasy. Stir gently and patiently. The sauce should be smooth and glossy.
The Mustard Trick. Dijon mustard is not just for flavor—it helps stabilize the cheese sauce and prevents it from breaking when you reheat it. Do not skip it. Even if you think you don’t like mustard, use it. You won’t taste it, I promise.
Rest Before Serving. Let the mac and cheese rest for 5 to 10 minutes after it comes out of the oven. This allows the sauce to set slightly so it doesn’t run all over the plate. It will still be creamy and hot, just more manageable.
Timing for Hosting: If you are serving a crowd, assemble everything the day before. On the day of your gathering, just pop it in the oven about 40 minutes before you plan to eat. That gives you time to relax, set the table, and pour yourself a glass of wine while it bakes. Honestly, this is the kind of hosting I can get behind.
Variations & Adaptations
This recipe is incredibly flexible. Here are some ways to make it your own, depending on your guests, the season, or what you have in the fridge.
1. Add Protein
For a heartier dish, stir in 2 cups of cooked, shredded rotisserie chicken, crumbled bacon, or diced ham before baking. It turns this side dish into a full meal. I have done this for a casual dinner party and it was a hit—no one missed the meat course.
2. Vegetarian Upgrade
Add 1 cup of sautéed mushrooms, caramelized onions, or roasted broccoli florets. Mushrooms add an earthy, umami depth that pairs beautifully with the cheese sauce. Roasted broccoli adds a slight bitterness that cuts through the richness.
3. Spice It Up
If you like heat, add 1/2 teaspoon of chipotle powder or a diced jalapeño to the cheese sauce. You can also sprinkle some red pepper flakes over the panko crust before baking. It gives the dish a subtle warmth that surprises people in the best way.
4. Gluten-Free Option
Use gluten-free pasta and substitute the all-purpose flour with a 1:1 gluten-free flour blend. For the panko crust, use gluten-free panko or crushed pork rinds for a low-carb twist. The texture will be slightly different, but still delicious.
5. Dairy-Free Adaptation
Use unsweetened oat milk or cashew milk in place of whole milk, and a dairy-free butter substitute. For the cheese, use a high-quality vegan cheddar shred that melts well. The crust can be made with dairy-free butter and nutritional yeast instead of Parmesan. I tested this for a friend with lactose intolerance, and while it is not identical, it is still creamy and satisfying.
Serving & Storage Suggestions
This make-ahead baked mac and cheese with panko crust is a showstopper on any table. Here is how to serve it, store it, and enjoy it again later.
Serving Temperature: Serve it hot, straight from the oven. The contrast between the warm, creamy interior and the crisp, golden crust is the whole point. Let it rest for 5 minutes before serving so it holds its shape on the plate.
What to Serve Alongside: This dish pairs beautifully with simple roasted meats like herb-crusted chicken, grilled steak, or roasted pork tenderloin. For a vegetarian spread, serve it with a bright green salad dressed with lemon vinaigrette and some roasted asparagus. The richness of the mac and cheese balances perfectly with something fresh and acidic.
Beverage Pairing: A crisp white wine like Sauvignon Blanc or a light Chardonnay cuts through the creaminess. If you prefer red, go for a Pinot Noir—it is light enough not to overpower the dish. For beer lovers, a pale ale or pilsner works wonderfully.
Storage: Store leftovers in an airtight container in the refrigerator for up to 4 days. The panko crust will soften over time, but the flavor will deepen. To reheat, place a portion in a small baking dish, cover with foil, and warm in a 350°F (175°C) oven for 10 to 15 minutes. You can also microwave individual servings, but the crust will not stay crispy.
Freezing: This mac and cheese freezes beautifully. Assemble the dish completely (including the panko crust), wrap it tightly in plastic wrap and then foil, and freeze for up to 3 months. To bake from frozen, remove the plastic wrap, cover with foil, and bake at 375°F (190°C) for 45 to 50 minutes. Remove the foil for the last 15 minutes to crisp the crust. The texture will be slightly different—a bit more dense—but still incredibly delicious.
Flavor Development: Honestly, this dish tastes even better the next day. The flavors meld together overnight, and the sauce thickens to a perfect consistency. If you are making it for a gathering, I actually recommend assembling it a day ahead for the best flavor.
Nutritional Information & Benefits
While this is definitely a comfort food indulgence, it does offer some nutritional benefits worth noting. Here is an approximate breakdown per serving (based on 12 servings):
- Calories: 485
- Protein: 22g
- Fat: 28g
- Carbohydrates: 38g
- Fiber: 1g
- Sugar: 6g
- Sodium: 580mg
Key Nutritional Highlights:
- Protein: The combination of cheese, milk, and pasta provides a solid amount of protein, making this a more satisfying side dish.
- Calcium: Cheese and milk are excellent sources of calcium, which supports bone health.
- Vitamin A: From the butter and cheese, this vitamin is important for vision and immune function.
Dietary Considerations: This recipe contains gluten, dairy, and eggs (if you use them). For gluten-free and dairy-free adaptations, see the variations section above. It is not suitable for vegans without significant modifications.
My Perspective: I believe in balance. This is not a health food, but it is real food made with real ingredients. When you are hosting, you want to feed people something that feels special and nourishing. This mac and cheese does exactly that. Serve it with a big green salad and enjoy every bite without guilt.
Conclusion
This make-ahead baked mac and cheese with panko crust is the dish I turn to again and again when I want to impress without stress. It is creamy, crunchy, cheesy, and completely forgiving. Whether you are hosting a holiday dinner, a casual potluck, or a weeknight family meal, this recipe delivers every single time.
I love that it can be made ahead, that it feeds a crowd, and that it makes me look like I spent hours in the kitchen when really, I just followed a simple formula. But more than that, I love the way it makes people feel—warm, satisfied, and a little bit spoiled.
I encourage you to make this recipe your own. Add your favorite mix-ins, adjust the spices, or double the panko crust if you are a crunch lover. The beauty of cooking is that you are always in control. And if something goes wrong? Well, that might just be the start of something better.
Have you tried this recipe? I would love to hear how it turned out for you. Drop a comment below, share your variations, or tag me in your photos. Let’s keep the conversation going—and the mac and cheese coming.
Frequently Asked Questions
Can I use a different type of pasta?
Absolutely. While elbow macaroni is classic, any short pasta works well. Cavatappi, shells, rotini, or penne are all great choices. Just make sure to cook it al dente since it will continue to cook in the oven.
Why did my cheese sauce turn out grainy?
Grainy cheese sauce is usually caused by high heat or pre-shredded cheese. Always grate your cheese from a block and add it to the sauce over low heat. If the sauce gets too hot, the cheese can separate and become grainy.
Can I make this without the panko crust?
Yes, you can skip the panko crust for a classic baked mac and cheese. The dish will still be creamy and delicious. If you want a lighter crunch, you can also use crushed crackers or even crushed potato chips.
How do I reheat leftovers without drying them out?
The best way to reheat leftovers is in the oven. Place the mac and cheese in a small baking dish, cover with foil, and warm at 350°F (175°C) for 10 to 15 minutes. If you are in a hurry, microwave individual portions on medium power, stirring halfway through.
Can I freeze the mac and cheese after baking?
Yes, you can freeze baked mac and cheese. Let it cool completely, then wrap it tightly in plastic wrap and foil. Freeze for up to 3 months. Thaw in the refrigerator overnight before reheating in the oven. The texture will be slightly softer, but the flavor will still be great.
Pin This Recipe!
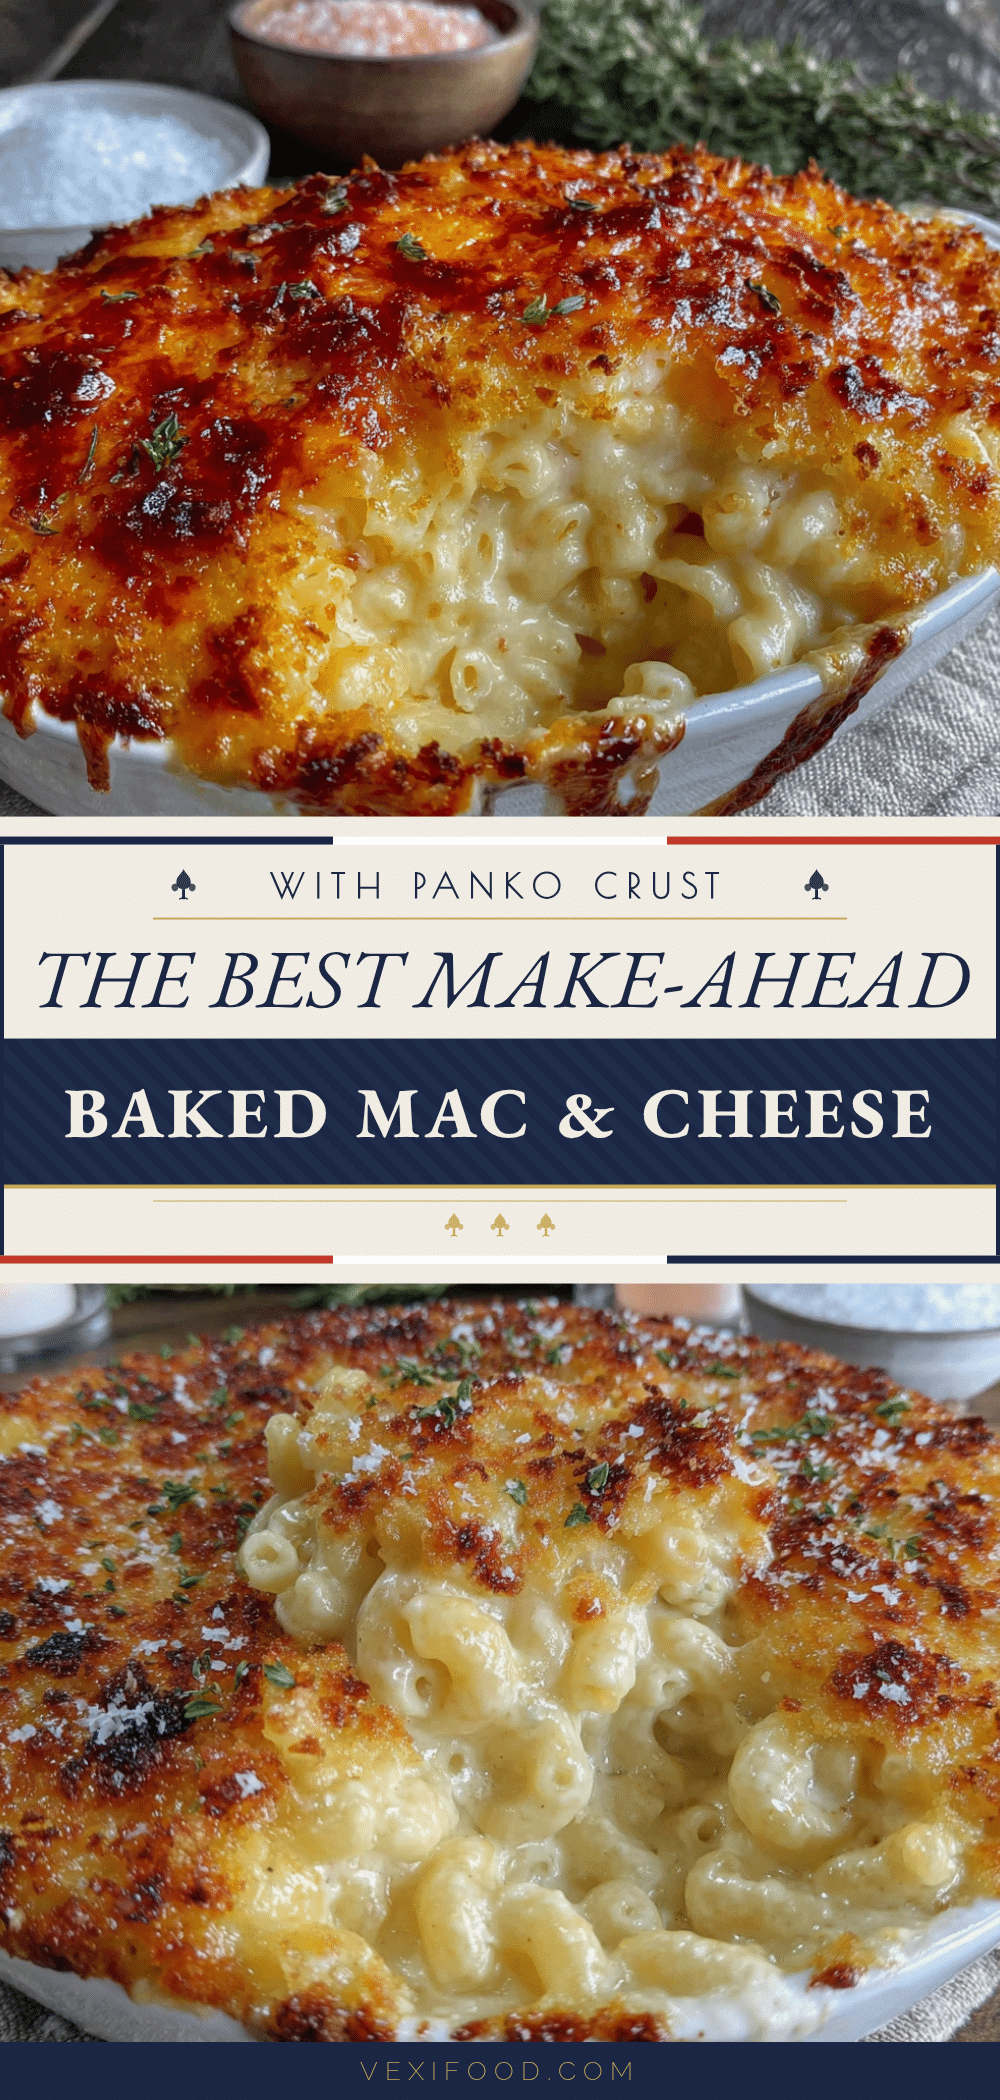
Best Make-Ahead Baked Mac and Cheese with Panko Crust
This creamy, crunchy, and completely forgiving mac and cheese is perfect for hosting. Assemble it a day ahead, bake when ready, and enjoy a dish that tastes like a warm hug.
- Prep Time: 20 minutes
- Cook Time: 25 minutes
- Total Time: 45 minutes
- Yield: 12 servings 1x
- Category: Main Course
- Cuisine: American
Ingredients
- 1 pound (450g) elbow macaroni
- Salt (for pasta water)
- 4 tablespoons (56g) unsalted butter
- 1/4 cup (31g) all-purpose flour
- 3 cups (720ml) whole milk
- 1 cup (240ml) heavy cream
- 3 cups (340g) sharp cheddar cheese, freshly grated
- 1 cup (113g) Gruyère cheese, freshly grated
- 1/2 teaspoon garlic powder
- 1/2 teaspoon onion powder
- 1/2 teaspoon paprika
- 1/4 teaspoon cayenne pepper (optional)
- 1 teaspoon Dijon mustard
- Salt and freshly ground black pepper to taste
- 1 cup (120g) panko breadcrumbs
- 3 tablespoons (42g) unsalted butter, melted
- 1/4 cup (28g) freshly grated Parmesan cheese
- 2 tablespoons fresh parsley, finely chopped
- 1/4 teaspoon garlic powder
Instructions
- Cook the pasta: Bring a large pot of generously salted water to a rolling boil. Add the elbow macaroni and cook according to package directions until al dente—about 1 to 2 minutes less than the recommended time. Drain and rinse with cool water. Drizzle with a tiny bit of olive oil and toss to prevent sticking. Set aside.
- Make the cheese sauce: In a large saucepan or Dutch oven, melt the butter over medium heat. Whisk in the flour and cook for 1 to 2 minutes, stirring constantly. Slowly pour in the milk and heavy cream, whisking continuously. Bring to a gentle simmer and cook for 3 to 4 minutes until thickened. Reduce heat to low. Add the shredded cheddar and Gruyère a handful at a time, stirring until melted. Stir in garlic powder, onion powder, paprika, cayenne (if using), Dijon mustard, and a pinch of salt and…
- Combine and assemble: Add the cooked pasta to the cheese sauce and stir until coated. Pour into a greased 9×13-inch baking dish and spread evenly.
- Make the panko crust: In a small bowl, combine panko breadcrumbs, melted butter, grated Parmesan, chopped parsley, and garlic powder. Stir with a fork until evenly coated. Sprinkle over the mac and cheese.
- Bake or refrigerate: If baking immediately, preheat oven to 375°F (190°C). Bake uncovered for 20 to 25 minutes until bubbly and golden. If making ahead, cover tightly with foil and refrigerate for up to 24 hours. When ready to bake, let sit at room temperature for 30 minutes, then bake covered at 375°F for 20 minutes, then uncovered for 15 to 20 minutes until golden and bubbling.
Notes
For best results, grate your own cheese. Do not overcook the pasta; cook it al dente. The Dijon mustard helps stabilize the sauce. Let the mac and cheese rest for 5 to 10 minutes after baking before serving. The dish tastes even better the next day.
Nutrition
- Serving Size: 1 serving
- Calories: 485
- Sugar: 6
- Sodium: 580
- Fat: 28
- Saturated Fat: 16
- Carbohydrates: 38
- Fiber: 1
- Protein: 22
Keywords: baked mac and cheese, make-ahead mac and cheese, panko crust mac and cheese, creamy mac and cheese, holiday side dish, comfort food



