Love this? Save it for later!
Share the inspiration with your friends
My friend Jenna asked why I couldn’t just swirl the pumpkin batter right into the brownie mix instead of layering it. I started to explain why that wouldn’t work — then stopped. Honestly, I had no good reason. I’d been making pumpkin brownies the “proper” way for years, carefully spreading one layer over the other like I was building a tiny dessert house. But Jenna, who once set off her smoke detector boiling pasta, was staring at me with this perfectly logical idea.
I tried it. The swirl thing. And let me tell you — the first batch came out of the oven looking like a work of art. Those marbled ribbons of spiced pumpkin cutting through fudgy chocolate? I almost dropped the pan on my kitchen floor because I was so excited. I mean, I actually did drop a spatula. It bounced right into the sink. That’s the kind of chaos that happens when you realize you’ve been overcomplicating something for years.
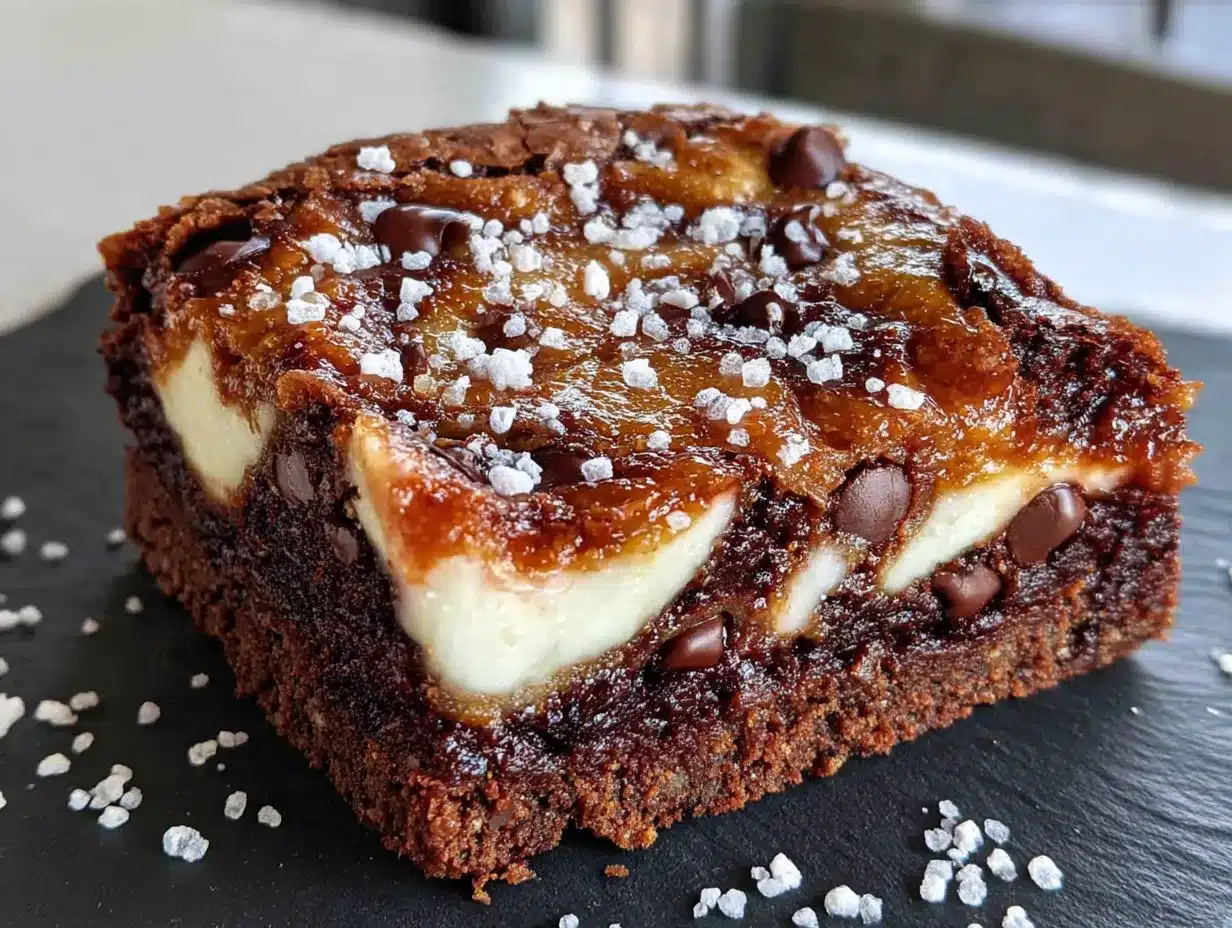
These pumpkin swirl fudge brownies are now my go-to for every fall gathering. They’re the dessert that makes people stop mid-conversation and ask, “Wait, what’s in this?” The chocolate base is dense and rich — the kind that leaves a little gloss on your lips. The pumpkin swirl is creamy, lightly spiced, and just sweet enough to balance the cocoa. Together, they create this thing that feels both indulgent and somehow appropriate for a Thursday afternoon.
Maybe you’ve been there — stuck in your ways with a recipe, convinced your method is the only method. I get it. But sometimes the best ideas come from the person who’s just learning. That batch I made with Jenna’s suggestion? It got devoured at a potluck in under twenty minutes. Someone actually asked me if I’d bought them from a bakery. I told them the truth: a friend who can’t boil pasta taught me something new.
That’s why I keep making these brownies. Not just because they’re delicious — though they absolutely are — but because every swirl reminds me that being wrong can taste pretty sweet.
Why You’ll Love This Recipe
These pumpkin swirl fudge brownies are the kind of dessert that makes you look like you spent hours in the kitchen when you really didn’t. They’re built for hosting, plain and simple. You can make them the night before your party, and they’ll still taste incredible the next day. That’s a win in my book.
- Perfect for a Crowd : This recipe makes a generous 9×13 pan — enough for twelve to sixteen servings. No more cutting tiny squares and hoping nobody takes two.
- Make-Ahead Friendly : Bake them a day early. The flavors actually get better as they sit, and you’ll have one less thing to worry about when guests arrive.
- Stunning Presentation : That pumpkin swirl isn’t just for flavor — it makes each square look like a little piece of art. Your guests will think you’re a pastry chef.
- No Fancy Equipment : You don’t need a stand mixer or a food processor. Just bowls, a whisk, and a spatula. That’s it.
- Seriously Crowd-Pleasing : Kids love the chocolate. Adults love the pumpkin. Everyone wins, and nobody leaves hungry.
What sets this recipe apart from the dozens of pumpkin brownie recipes out there? It’s the texture. The brownie base stays fudgy — not cakey, not dry — while the pumpkin swirl adds this creamy, almost cheesecake-like contrast. I tested this six times to get the ratios right. Six times. My neighbors started knocking on my door asking if I was opening a bakery. The secret is using melted butter and just enough flour to hold things together without making the brownies puff up too much.
This isn’t just another pumpkin dessert. It’s the one that disappears first at every party. It’s the one people text you about the next morning asking for the recipe. And honestly? It’s the one I’m most proud of.
What Ingredients You Will Need
This recipe uses simple, everyday ingredients that come together to create something truly special. Most of these are probably already in your pantry — which makes these brownies perfect for those “I need to bring something to a party tonight” moments.
For the Brownie Base
- 1 cup (226g) unsalted butter — melted and slightly cooled. I use Land O’Lakes for consistent results, but any good-quality butter works.
- 2 cups (400g) granulated sugar — regular white sugar gives the brownies that crackly top we all love.
- 4 large eggs — room temperature is best. If you forget to take them out early, place them in a bowl of warm water for five minutes.
- 2 teaspoons vanilla extract — pure vanilla makes a difference here. Skip the imitation stuff if you can.
- 1 cup (120g) all-purpose flour — spoon and level it. Don’t scoop directly from the bag or you’ll end up with dry brownies.
- 1 cup (85g) unsweetened cocoa powder — I prefer Ghirardelli or Hershey’s Special Dark for a richer flavor.
- 1/2 teaspoon salt — just enough to balance the sweetness.
- 1/2 teaspoon baking powder — gives the brownies a slight lift without making them cakey.
For the Pumpkin Swirl
- 1 cup (245g) pumpkin puree — not pumpkin pie filling. Make sure you grab the pure stuff. Libby’s is my go-to.
- 4 ounces (113g) cream cheese — softened to room temperature. This is what makes the swirl creamy and luxurious.
- 1/4 cup (50g) granulated sugar — just enough sweetness to complement the pumpkin.
- 1 large egg yolk — this helps the swirl set properly without making it too runny.
- 1 teaspoon pumpkin pie spice — or make your own with cinnamon, nutmeg, ginger, and cloves.
- 1/2 teaspoon cinnamon — because you can never have too much cinnamon in a fall dessert.
- 1/4 teaspoon vanilla extract — rounds out the flavors nicely.
A quick note on substitutions: If you’re dairy-free, you can use a plant-based butter stick and dairy-free cream cheese. I’ve tried it with Violife brand cream cheese, and it works surprisingly well. For a gluten-free version, swap the all-purpose flour with a 1:1 gluten-free baking blend. Just make sure it contains xanthan gum for structure.
One thing I learned the hard way — don’t use low-fat cream cheese. The swirl will turn out watery and won’t hold its shape. Trust me on this. I made that mistake once, and my brownies looked like a swamp. A delicious swamp, but still a swamp.
Equipment Needed
You don’t need a professional kitchen to make these brownies. In fact, you probably already own everything on this list.
- 9×13-inch baking pan — metal pans work best for even baking. Glass pans can work too, but you may need to add a few extra minutes to the baking time.
- Parchment paper — this is non-negotiable. It makes lifting the brownies out so much easier, and cleanup becomes a breeze.
- Large mixing bowls — one for the brownie batter and one for the pumpkin swirl.
- Whisk — for combining the wet ingredients smoothly.
- Rubber spatula — for folding the dry ingredients and scraping every last bit of batter.
- Hand mixer or stand mixer — useful for the pumpkin swirl to get it really smooth, but a strong arm and a whisk will do in a pinch.
- Butter knife or skewer — for creating the swirl pattern. A toothpick works too if that’s all you have.
- Cooling rack — helps the brownies cool evenly so they don’t get soggy on the bottom.
If you don’t have a hand mixer, just soften your cream cheese really well and whisk it vigorously. It takes a little elbow grease, but it works. I’ve done it plenty of times when my mixer was buried somewhere in the back of a cabinet.
Preparation Method
Let’s get these brownies into your oven. Trust the process, and don’t skip any steps — each one matters.
- Preheat your oven to 350°F (175°C). Line your 9×13 pan with parchment paper, leaving some overhang on the long sides. This creates handles for lifting the brownies out later. Spray the parchment lightly with nonstick spray just to be safe.
- Melt the butter. Place 1 cup of unsalted butter in a microwave-safe bowl and heat in 30-second intervals until fully melted. Set it aside to cool for a few minutes. You don’t want it hot enough to cook the eggs when you add them.
- Mix the wet ingredients for the brownies. In a large bowl, whisk together the melted butter and 2 cups of granulated sugar until well combined. It should look like wet sand. Add the 4 eggs one at a time, whisking well after each addition. Stir in the 2 teaspoons of vanilla extract. The mixture should be smooth and glossy.
- Combine the dry ingredients. In a separate bowl, whisk together 1 cup of all-purpose flour, 1 cup of cocoa powder, 1/2 teaspoon of salt, and 1/2 teaspoon of baking powder. Make sure there are no lumps — cocoa powder loves to clump up.
- Fold the dry into the wet. Add the flour mixture to the wet ingredients and fold gently with a rubber spatula. Stop as soon as you no longer see streaks of flour. Overmixing will make your brownies tough. The batter will be thick and fudgy — that’s exactly what you want.
- Spread the brownie batter. Transfer the batter to your prepared pan and spread it into an even layer. It will be thick, so take your time. A small offset spatula works great here.
- Make the pumpkin swirl. In a medium bowl, beat the softened cream cheese with a hand mixer until smooth. Add 1/4 cup of granulated sugar and beat until fluffy. Add the pumpkin puree, egg yolk, pumpkin pie spice, cinnamon, and vanilla extract. Mix until everything is combined and silky. Scrape down the sides of the bowl as needed.
- Add the swirl. Drop spoonfuls of the pumpkin mixture all over the brownie batter. Don’t worry about making it pretty — you’re going to swirl it anyway. Use a butter knife or skewer to drag through the pumpkin and brownie batter in a figure-eight pattern. Don’t over-swirl or you’ll lose the distinct layers. About six to eight passes is plenty.
- Bake. Place the pan on the center rack of your oven and bake for 30 to 35 minutes. The edges should look set and slightly pulling away from the pan, but the center should still look a little soft. A toothpick inserted into the chocolate part (not the pumpkin) should come out with a few moist crumbs. If it comes out clean, you’ve overbaked them.
- Cool completely. This is the hardest part, I know. Let the brownies cool in the pan on a wire rack for at least 2 hours. The swirl needs time to set, and cutting into warm brownies will make a mess. I speak from experience — I once served brownie soup to my book club.
- Lift and cut. Use the parchment overhang to lift the entire block of brownies out of the pan. Place it on a cutting board and use a sharp knife to cut into squares. Wipe the knife clean between cuts for the neatest edges.
Cooking Tips & Techniques
I’ve made these brownies more times than I can count, and I’ve learned a few things along the way. Here’s what I wish someone had told me.
Don’t overmix the brownie batter. I know it’s tempting to keep stirring until everything looks perfectly smooth, but that develops the gluten and gives you cakey brownies. We want fudgy. Stop mixing as soon as the flour disappears. A few lumps are totally fine.
Room temperature ingredients matter. Cold eggs and cold cream cheese don’t incorporate well. Your batter will look lumpy, and your swirl will be streaky instead of creamy. Take everything out of the fridge about 30 minutes before you start. If you’re in a rush, place the eggs in warm water for five minutes and microwave the cream cheese for 10 seconds at half power.
The swirl technique is everything. I used to over-swirl, thinking more movement meant a prettier pattern. It doesn’t. Too much swirling turns your brownies into a muddy mess where you can’t tell where the chocolate ends and the pumpkin begins. Less is more. Six gentle figure-eights, and you’re done.
Watch the bake time carefully. Every oven runs differently. My old apartment oven baked these in exactly 32 minutes. My current oven takes 35. Start checking at 28 minutes if you’re nervous. The brownies will continue to set as they cool, so it’s better to pull them out a minute early than a minute late.
Let them cool fully. I cannot stress this enough. If you cut into these brownies while they’re still warm, the pumpkin swirl will ooze out and your beautiful squares will turn into a delicious but ugly pile. I’ve done it. My guests didn’t complain, but I knew. Let them cool for 2 hours minimum. Overnight is even better.
Use good cocoa powder. This is one of those recipes where the quality of your cocoa really shows. Cheap cocoa can taste flat and chalky. Splurge a little on a brand like Ghirardelli or Valrhona. Your brownies will taste noticeably richer.
Variations & Adaptations
One of the best things about this recipe is how easily it adapts. Here are a few ways to make it your own.
Add chocolate chips. Fold 1 cup of semi-sweet or dark chocolate chips into the brownie batter before spreading it in the pan. They add little pockets of melted chocolate that make each bite even more indulgent. I did this for a Halloween party once, and people lost their minds.
Make it gluten-free. Swap the all-purpose flour with a 1:1 gluten-free baking blend that contains xanthan gum. I’ve tested this with King Arthur’s Measure for Measure flour, and the texture is nearly identical. Nobody at your party will know the difference.
Try a different spice blend. Not a fan of pumpkin pie spice? Use 1 teaspoon of cinnamon, 1/2 teaspoon of ginger, and a pinch of nutmeg. Or go chai-inspired with cardamom and a touch of black pepper. The swirl is forgiving enough to handle experimentation.
Make it dairy-free. Use a plant-based butter stick and dairy-free cream cheese. Miyoko’s and Violife both work well. The texture will be slightly softer, but the flavor is still fantastic.
Go nutty. Sprinkle 1/2 cup of chopped pecans or walnuts over the top before baking. The crunch adds a lovely contrast to the fudgy brownie and creamy swirl. Just make sure your guests know there are nuts in there — I learned that one the hard way at a potluck.
Turn it into a dessert bar. Cut the brownies into smaller squares and serve them on a platter with fresh whipped cream and a dusting of cinnamon. It looks fancy with almost zero extra effort.
Serving & Storage Suggestions
These brownies are at their best when served at room temperature or slightly warm. If you’re reheating them for a party, pop individual squares in the microwave for about 10 seconds. The chocolate gets all melty, and the pumpkin swirl softens beautifully.
For presentation, arrange the brownies on a wooden board or a white platter. A light dusting of powdered sugar or cinnamon makes them look extra special. I like to add a few fresh cranberries or small cinnamon sticks around the edges for a seasonal touch. It takes two minutes and makes everything look intentional.
These pair wonderfully with a scoop of vanilla ice cream or a dollop of fresh whipped cream. For drinks, a hot cup of coffee or a glass of cold milk is perfect. If you’re serving them at a fall party, a warm apple cider or a pumpkin spice latte on the side is a nice touch.
Storage: Keep leftover brownies in an airtight container at room temperature for up to 3 days. If your kitchen is warm, store them in the fridge — they’ll last up to a week. Just let them come to room temperature before serving for the best texture.
Freezing: These brownies freeze beautifully. Wrap individual squares tightly in plastic wrap, then place them in a freezer-safe bag. They’ll keep for up to 3 months. When you’re ready to serve, thaw them in the fridge overnight or at room temperature for about an hour. I always keep a stash in my freezer for unexpected guests.
Flavor development: Honestly, these brownies taste even better the next day. The flavors meld together overnight, and the texture becomes even fudgier. So if you’re making them for a party, bake them a day ahead. Your future self will thank you.
Nutritional Information & Benefits
Here’s the estimated nutritional breakdown for one brownie (based on 16 servings):
| Nutrient | Amount per Serving |
|---|---|
| Calories | 320 |
| Total Fat | 18g |
| Saturated Fat | 11g |
| Cholesterol | 85mg |
| Sodium | 180mg |
| Total Carbohydrates | 38g |
| Dietary Fiber | 3g |
| Sugars | 28g |
| Protein | 5g |
While these brownies are definitely a treat, they do offer some nutritional benefits. Pumpkin is packed with vitamin A and fiber, which supports eye health and digestion. Cocoa powder is rich in antioxidants called flavonoids, which can help reduce inflammation. The cream cheese adds a bit of calcium and protein.
If you’re watching your sugar intake, you can reduce the sugar in the brownie base to 1 3/4 cups without affecting the texture too much. The pumpkin swirl doesn’t need much sugar since the pumpkin itself adds natural sweetness.
These brownies contain gluten, dairy, and eggs. For allergen-friendly options, check the variations section above.
Conclusion
These pumpkin swirl fudge brownies are everything I want in a fall dessert — rich, chocolatey, spiced, and just a little bit fancy. They’re the kind of treat that makes people gather around the kitchen counter, asking for the recipe before they’ve even finished their first square.
What I love most about this recipe is how forgiving it is. You don’t need to be a pastry chef to pull it off. You just need a little patience while they cool and a willingness to let the swirl be imperfect. Because honestly? The imperfect ones always look the most beautiful.
I hope you make these for your next gathering. I hope they disappear in record time. And I hope someone asks you where you bought them, so you can smile and say, “I made them myself.”
If you try this recipe, I’d love to hear about it. Leave a comment below and let me know how it turned out. Did you add chocolate chips? Did you try a different spice blend? Share your version — I’m always looking for new ideas.
Happy baking, and here’s to being wrong sometimes. It leads to the best discoveries.
Frequently Asked Questions
Can I use pumpkin pie filling instead of pumpkin puree?
No, please don’t. Pumpkin pie filling is pre-sweetened and spiced, which will throw off the balance of the swirl. It also contains thickeners that can make the texture gummy. Stick with 100% pure pumpkin puree for the best results.
Why did my pumpkin swirl sink into the brownie batter?
This usually happens when the brownie batter is too thin or the pumpkin mixture is too heavy. Make sure your brownie batter is thick and fudgy before adding the swirl. Also, don’t drop large spoonfuls of the pumpkin mixture — smaller dollops distribute better and are less likely to sink.
Can I make these brownies in an 8×8 pan?
You can, but the baking time will change. An 8×8 pan is smaller, so the brownies will be thicker and need more time in the oven — about 40 to 45 minutes. Keep an eye on them and use the toothpick test to check for doneness.
How do I get clean, neat cuts on my brownies?
Use a sharp knife and wipe it clean between each cut. For the cleanest edges, chill the brownies in the fridge for 30 minutes before slicing. A plastic knife also works surprisingly well — it glides through without dragging the swirl.
Can I double this recipe for a larger crowd?
Absolutely. Double all the ingredients and use a half-sheet pan (about 13×18 inches). The baking time will be similar, but start checking at 28 minutes. You’ll get about 32 servings, which is perfect for a big party or potluck.
Pin This Recipe!
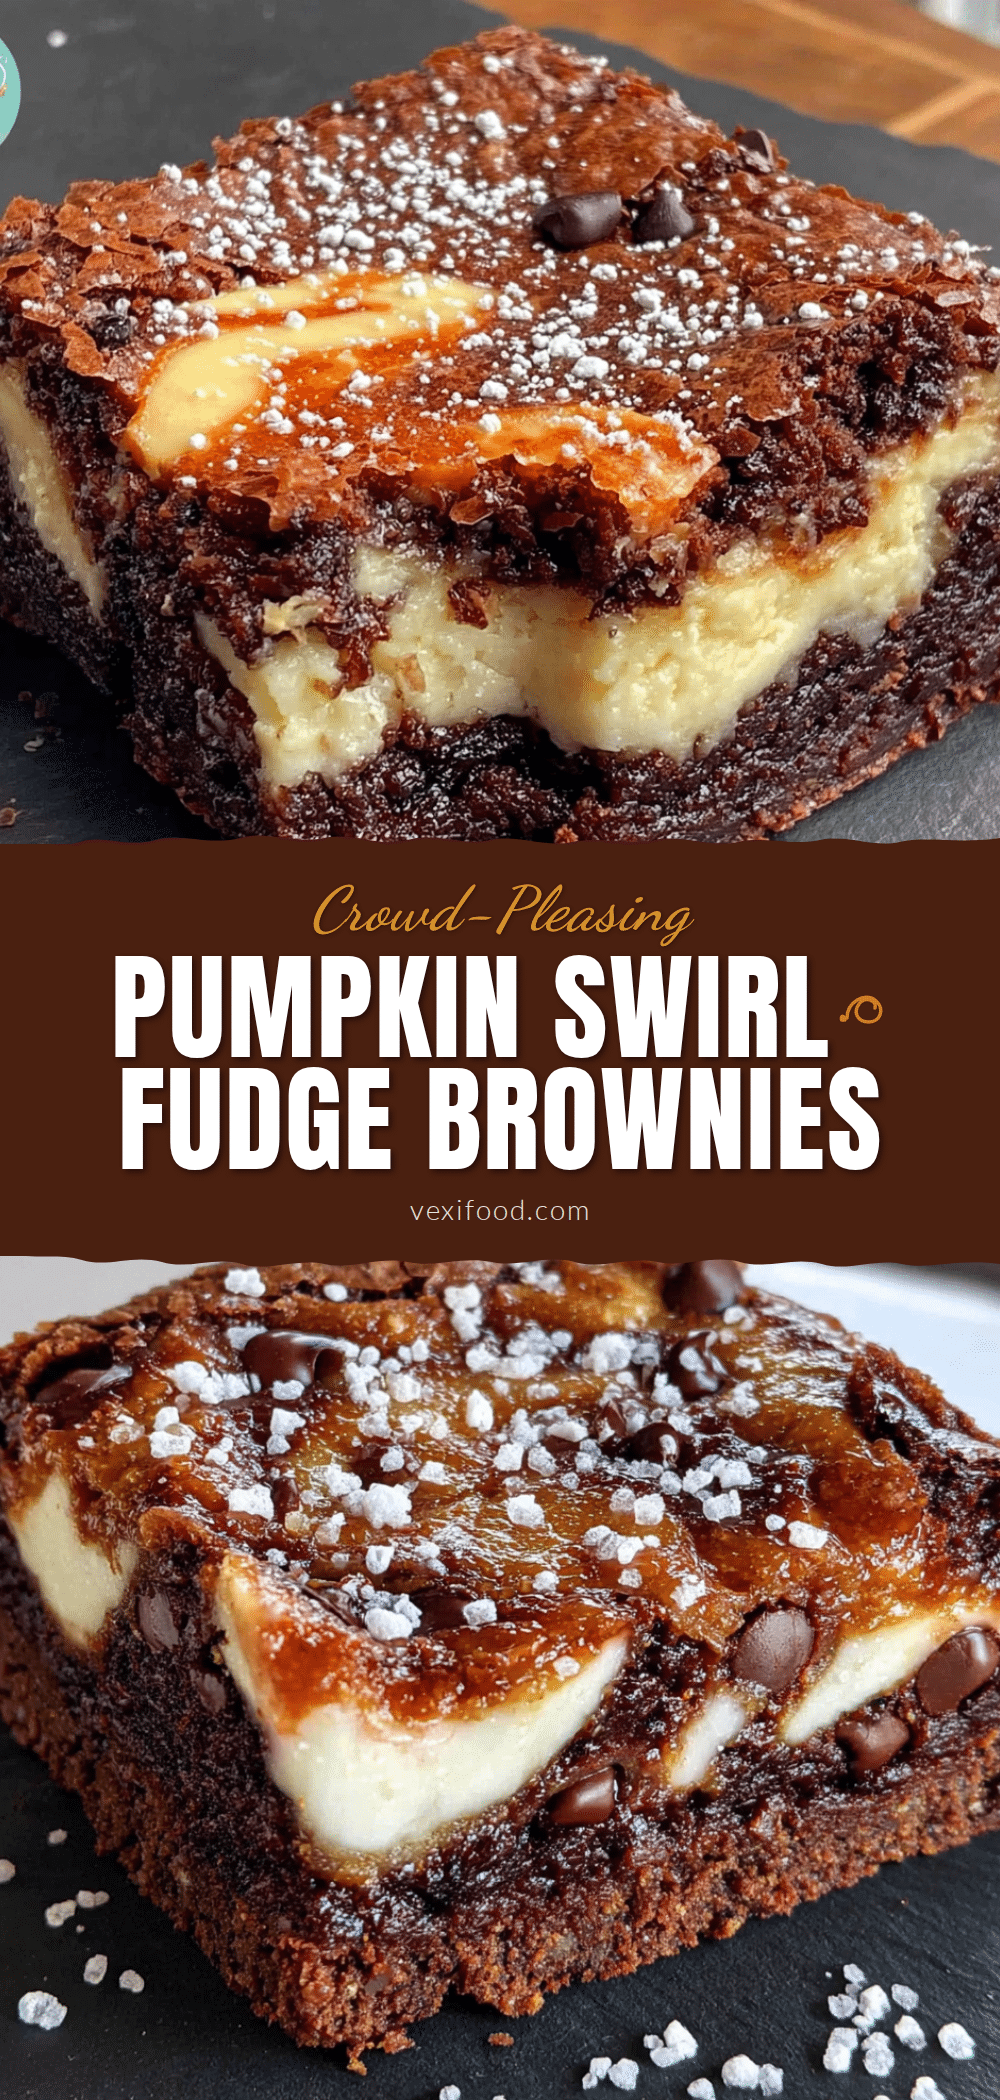
Best Pumpkin Swirl Fudge Brownies: Easy Party Recipe
These pumpkin swirl fudge brownies are the perfect fall dessert, featuring a dense, fudgy chocolate base swirled with creamy, spiced pumpkin. They’re easy to make, stunning to serve, and guaranteed to disappear at any gathering.
- Prep Time: 20 minutes
- Cook Time: 30 minutes
- Total Time: 2 hours 50 minutes (includes cooling)
- Yield: 16 servings 1x
- Category: Dessert
- Cuisine: American
Ingredients
- 1 cup (226g) unsalted butter, melted and slightly cooled
- 2 cups (400g) granulated sugar
- 4 large eggs, room temperature
- 2 teaspoons vanilla extract
- 1 cup (120g) all-purpose flour, spooned and leveled
- 1 cup (85g) unsweetened cocoa powder
- 1/2 teaspoon salt
- 1/2 teaspoon baking powder
- 1 cup (245g) pumpkin puree (not pumpkin pie filling)
- 4 ounces (113g) cream cheese, softened to room temperature
- 1/4 cup (50g) granulated sugar
- 1 large egg yolk
- 1 teaspoon pumpkin pie spice
- 1/2 teaspoon cinnamon
- 1/4 teaspoon vanilla extract
Instructions
- Preheat your oven to 350°F (175°C). Line a 9×13-inch baking pan with parchment paper, leaving overhang on the long sides. Lightly spray with nonstick spray.
- Melt 1 cup unsalted butter in a microwave-safe bowl in 30-second intervals. Set aside to cool slightly.
- In a large bowl, whisk together the melted butter and 2 cups granulated sugar until well combined. Add 4 eggs one at a time, whisking well after each addition. Stir in 2 teaspoons vanilla extract until smooth and glossy.
- In a separate bowl, whisk together 1 cup all-purpose flour, 1 cup cocoa powder, 1/2 teaspoon salt, and 1/2 teaspoon baking powder until no lumps remain.
- Add the dry ingredients to the wet ingredients and fold gently with a rubber spatula until just combined. Do not overmix. The batter will be thick and fudgy.
- Spread the brownie batter evenly into the prepared pan.
- In a medium bowl, beat the softened cream cheese with a hand mixer until smooth. Add 1/4 cup granulated sugar and beat until fluffy. Add pumpkin puree, egg yolk, pumpkin pie spice, cinnamon, and 1/4 teaspoon vanilla extract. Mix until silky and combined.
- Drop spoonfuls of the pumpkin mixture over the brownie batter. Use a butter knife or skewer to swirl in a figure-eight pattern, making about 6 to 8 passes. Do not over-swirl.
- Bake on the center rack for 30 to 35 minutes. The edges should look set and slightly pulling away from the pan, but the center should still look soft. A toothpick inserted into the chocolate part should come out with a few moist crumbs.
- Cool completely in the pan on a wire rack for at least 2 hours (overnight is even better).
- Use the parchment overhang to lift the brownies out of the pan. Place on a cutting board and cut into squares with a sharp knife, wiping the knife clean between cuts.
Notes
Don’t overmix the brownie batter to keep them fudgy. Use room temperature ingredients for best results. Let brownies cool completely before cutting to avoid a mess. For dairy-free, use plant-based butter and dairy-free cream cheese. For gluten-free, use a 1:1 gluten-free baking blend with xanthan gum.
Nutrition
- Serving Size: 1 brownie
- Calories: 320
- Sugar: 28
- Sodium: 180
- Fat: 18
- Saturated Fat: 11
- Carbohydrates: 38
- Fiber: 3
- Protein: 5
Keywords: pumpkin swirl brownies, fudge brownies, fall dessert, pumpkin brownies, easy brownie recipe, party dessert



