Love this? Save it for later!
Share the inspiration with your friends
This was supposed to be a fancy apple galette. I had the beautiful, hand-rolled pastry dough chilling in the fridge, the apples perfectly sliced, and even a little pastry brush ready for the egg wash. Then, my toddler decided the flour canister was a perfect toy, my phone rang, and the oven beeped that it was preheated. In that chaos, I grabbed the wrong baking dish, the pastry dough tore, and I was already ten minutes behind schedule. I stood there, flour up to my elbows, staring at a mess of apples and broken dough. Out of pure frustration (and because I refuse to waste good apples), I tossed everything into the dish, threw together a quick oat crumble from memory, and shoved it in the oven. What came out was nothing like the plan — and better. These quick apple pie bars were born from a total kitchen meltdown, and honestly, they beat that fancy galette any day.
Maybe you’ve been there. You have a vision for a perfect, show-stopping dessert, but life gets in the way. The kids are hungry, you’re tired, and the last thing you have time for is a fussy pastry crust. That’s where this recipe comes in. It gives you all the warm, spiced, comforting flavor of a classic apple pie without any of the rolling, chilling, or stressing. It’s the kind of happy accident that becomes a staple, and I am so glad I messed up that day.
Why You’ll Love This Recipe
I have tested this recipe about a dozen times since that chaotic afternoon, tweaking the oat-to-butter ratio and the spice blend until it was absolutely perfect. These bars are my go-to for fall gatherings, weeknight desserts, and even breakfast (don’t judge me). They are simply the best.
- Quick & Easy: From start to finish, these bars are ready in about 45 minutes. No stand mixer, no pastry cutter, no complicated steps. You just mix, layer, and bake.
- Simple Ingredients: You likely have everything in your pantry right now. Flour, oats, butter, sugar, and apples are all you need. No fancy grocery trips required.
- Perfect for Fall: This is the ultimate easy fall dessert. It tastes like a warm hug on a crisp autumn day and is perfect for Thanksgiving, potlucks, or a cozy night in.
- Crowd-Pleaser: I have brought these to family dinners and neighbor get-togethers, and they always disappear. The oat crumble topping is seriously addictive, and the soft, spiced apples are pure comfort.
- Unbelievably Delicious: The contrast between the buttery, crunchy oat topping and the tender, jammy apple filling is next-level. It is comfort food at its finest.
What makes this recipe different from the rest? It’s the texture. The bottom layer isn’t a traditional pastry crust; it’s a pressed-in oat and flour base that bakes up firm but tender. It acts as the perfect foundation for the apple filling without being soggy or heavy. Plus, the crumble topping is extra generous because, let’s face it, that’s the best part.
This recipe isn’t just good—it is the kind that makes you close your eyes after the first bite. It’s comfort food reimagined—faster, easier, but with the same soul-soothing satisfaction as a slice of homemade pie. Perfect for impressing guests without stress, or turning a simple Tuesday night into something memorable.
What Ingredients You Will Need
This recipe uses simple, wholesome ingredients to deliver bold flavor and satisfying texture without the fuss. Most are pantry staples, making this a perfect last-minute dessert.
For the Crust & Crumble Topping
- All-purpose flour (1 ½ cups / 188g) – This forms the base of both the crust and the crumble. I use King Arthur Flour for consistent results.
- Rolled oats (1 ½ cups / 135g) – Use old-fashioned rolled oats, not quick oats. They give the crumble a much better texture and chew.
- Light brown sugar (1 cup, packed / 200g) – Brown sugar adds moisture and a deep, caramel-like sweetness that pairs perfectly with apples.
- Ground cinnamon (1 teaspoon) – The classic apple pie spice. It warms up the whole dish.
- Salt (½ teaspoon) – Don’t skip this! It balances the sweetness and enhances all the other flavors.
- Unsalted butter (¾ cup / 170g, cold and cut into small cubes) – Cold butter is key for a flaky, sandy crumble texture. If you only have salted butter, just reduce the added salt to ¼ teaspoon.
For the Apple Filling
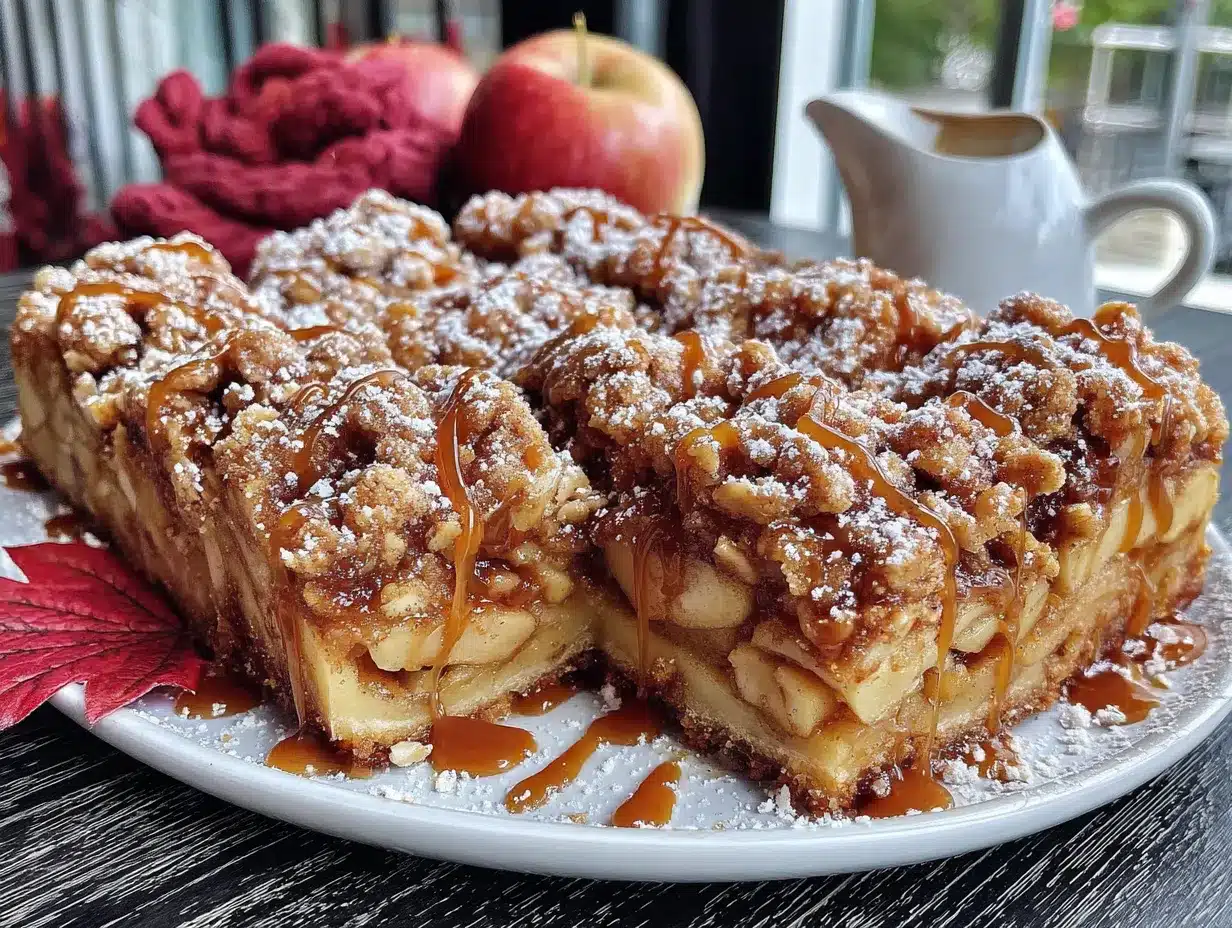
- Apples (5-6 medium, about 2 ½ lbs / 1.1 kg) – I recommend a mix of tart and sweet apples. Granny Smith and Honeycrisp are my favorite combination. The Granny Smiths hold their shape well, while the Honeycrisps break down slightly into a lovely, jammy filling.
- Granulated sugar (¼ cup / 50g) – Just a little to sweeten the apples without making them overly sugary.
- All-purpose flour (2 tablespoons) – This helps thicken the apple juices as they bake, preventing a watery filling.
- Lemon juice (1 tablespoon) – A squeeze of lemon juice brightens the apple flavor and prevents them from browning too much.
- Ground cinnamon (1 ½ teaspoons) – For that unmistakable apple pie warmth.
- Ground nutmeg (¼ teaspoon) – (optional, but adds wonderful depth).
Equipment Needed
You don’t need a lot of fancy gear for this recipe, which is part of why I love it so much. Here is what you will need:
- 9×13-inch baking dish: This is the perfect size for these bars. A metal or ceramic dish works well. If you only have glass, just keep an eye on the baking time as it may take a few minutes longer.
- Mixing bowls: You’ll need one large bowl for the crust/crumble mixture and another for the apples.
- Pastry cutter or two forks: To cut the cold butter into the flour mixture. You can also use your fingertips, but work quickly so the butter doesn’t get too warm. I actually prefer using my hands—it’s messy, but you can feel when the mixture is just right.
- Sharp knife and cutting board: For peeling and chopping the apples.
- Measuring cups and spoons: For accurate ingredient amounts.
If you don’t have a pastry cutter, don’t worry. A simple fork works just fine, or you can pulse the dry ingredients and cold butter in a food processor a few times until it looks like coarse sand. Just be careful not to over-process it into a paste.
Preparation Method
Alright, let’s get these bars in the oven. Trust me, the process is as easy as the ingredient list.
- Preheat and Prep (5 minutes): Preheat your oven to 375°F (190°C). Lightly grease your 9×13-inch baking dish with butter or non-stick spray. This step is crucial so the bars come out cleanly.
- Make the Crust/Crumble Mixture (10 minutes): In a large bowl, whisk together the 1 ½ cups of flour, 1 ½ cups of rolled oats, 1 cup of packed brown sugar, 1 teaspoon of cinnamon, and ½ teaspoon of salt. Add the cold, cubed butter. Using a pastry cutter or your fingers, work the butter into the dry ingredients until the mixture looks like coarse sand with some pea-sized butter lumps remaining. You want some texture here. Set aside about 1 ½ cups of this mixture for the topping.
- Press the Crust (2 minutes): Pour the remaining crust mixture into your prepared baking dish. Press it down firmly and evenly into the bottom of the dish to form the crust. I use the bottom of a flat measuring cup to really pack it in tight. This ensures a solid base that won’t crumble apart when you cut the bars.
- Prepare the Apple Filling (10 minutes): Peel, core, and chop your apples into ½-inch cubes. You don’t want them too thin, or they’ll turn to mush. In a separate bowl, toss the chopped apples with the ¼ cup of granulated sugar, 2 tablespoons of flour, 1 tablespoon of lemon juice, 1 ½ teaspoons of cinnamon, and ¼ teaspoon of nutmeg. Make sure every piece of apple is nicely coated.
- Assemble the Bars (2 minutes): Spread the apple filling evenly over the pressed crust. It will seem like a lot of apples, but they will cook down. Now, take the reserved crumble mixture and sprinkle it evenly over the apples. Don’t press it down—just let it sit on top in a nice, craggy layer.
- Bake (40-45 minutes): Place the dish on a baking sheet to catch any potential drips (trust me on this one). Bake for 40 to 45 minutes, or until the topping is golden brown and the apple filling is bubbly around the edges. Your kitchen will smell like heaven at this point.
- Cool Completely (2+ hours): This is the hardest part. You must let the bars cool completely in the pan on a wire rack before cutting. If you cut them while they are warm, they will fall apart. The filling needs time to set. I usually make these in the morning or the day before I need them. Patience, my friend.
- Cut and Serve: Once completely cool, use a sharp knife to cut into squares. Lift them out with a small spatula.
Cooking Tips & Techniques
After making these bars more times than I can count, I have a few tricks up my sleeve to guarantee perfect results every time.
- Don’t Overwork the Butter: The key to a tender crust and a crunchy crumble is cold butter. If the butter gets too warm, the mixture will become greasy and the texture will be dense. If your kitchen is warm, pop the bowl of crust mixture in the fridge for 10 minutes before pressing it into the pan.
- Go for a Mix of Apples: I learned this lesson the hard way after making a batch with only Granny Smith apples. The filling was too tart and firm. A mix of a firm, tart apple (like Granny Smith) and a softer, sweeter apple (like Honeycrisp or Fuji) gives you the perfect balance of texture and flavor. The soft ones break down into a natural sauce that coats the firmer chunks.
- Use a Sharp Knife: When you are ready to cut the cooled bars, use a long, sharp chef’s knife. Wipe the blade clean between cuts to get those picture-perfect squares. A dull knife will just drag the crumble topping across the bars.
- My Biggest Failure: The first time I made these, I was in a huge rush and didn’t press the crust down firmly enough. I used my fingertips and just sort of patted it in. When I tried to lift out a bar, the entire bottom crust crumbled away. Now, I always use the bottom of a glass or a measuring cup to really compact that base layer. It makes all the difference.
Variations & Adaptations
This recipe is super flexible. Here are a few ways I have changed it up depending on what I have on hand or who I am feeding.
- Gluten-Free Version: I made this for a friend with celiac disease by using a 1:1 gluten-free baking flour blend and certified gluten-free rolled oats. It worked beautifully! The texture was slightly more crumbly, but the flavor was spot on.
- Nutty Crumble: For extra crunch, add a ½ cup of chopped pecans or walnuts to the reserved crumble topping before sprinkling it over the apples. It adds a lovely toasty flavor, especially if you toast the nuts lightly first.
- Berry Apple Mix: In the summer, I sometimes swap out one of the apples for a cup of fresh or frozen blueberries or raspberries. It adds a beautiful color and a tart pop of flavor that is amazing. If using frozen berries, toss them in an extra tablespoon of flour to absorb the extra moisture.
- Spiced Up: For a chai-spiced version, add ½ teaspoon of ground ginger and ¼ teaspoon of ground cardamom to the apple filling. It gives the bars a warm, aromatic kick that is perfect for a cold evening.
Serving & Storage Suggestions
These bars are incredibly versatile when it comes to serving.
- Serving: They are absolutely perfect at room temperature. For an extra-special treat, serve them warm with a scoop of vanilla ice cream or a generous drizzle of salted caramel sauce. They are also fantastic for breakfast with a cup of coffee—no judgment here!
- Storage: Store leftover bars in an airtight container at room temperature for up to 3 days. They will stay soft and delicious. You can also store them in the fridge for up to 5 days, but I find the texture is slightly better at room temperature.
- Freezing: These bars freeze like a dream. Once they are completely cooled, cut them into squares, place them on a baking sheet in a single layer, and freeze for an hour. Then, transfer the frozen squares to a freezer-safe bag or container. They will keep for up to 3 months. To thaw, just leave them on the counter for an hour, or pop a frozen bar in the microwave for 20 seconds.
- Reheating: To reheat a single bar, microwave it for 15-20 seconds. For a whole batch, place them on a baking sheet in a 300°F (150°C) oven for about 10 minutes. The flavors actually get better after a day or two as the apples and spices meld together.
Nutritional Information & Benefits
While this is a dessert, it does have some redeeming qualities! Here is an approximate nutritional breakdown per bar (based on 12 servings):
- Calories: ~380 kcal
- Fat: ~16g
- Carbohydrates: ~58g
- Fiber: ~4g
- Sugar: ~35g
- Protein: ~4g
Health Benefits: Oats are a fantastic source of soluble fiber, which is great for heart health and keeping you feeling full. Apples are packed with antioxidants and vitamin C. This dessert is a much better choice than a processed, packaged treat. It is made with whole ingredients you can feel good about, even if you are having a second slice. Just be mindful of the sugar content if you are watching your intake—you can easily reduce the brown sugar in the crust by a quarter cup without noticing much difference.
Dietary Considerations: This recipe is vegetarian. It can easily be made gluten-free (see variations above). It contains wheat (gluten) and dairy (butter).
Conclusion
These quick apple pie bars are my favorite kind of recipe. They are born from a real-life kitchen disaster, incredibly forgiving, and always, always delicious. They have all the heart and soul of a classic apple pie without any of the fuss. I love that I can make them on a busy Sunday afternoon and have a homemade dessert ready for the whole week.
I honestly hope you give these a try. Don’t be afraid to play around with the spices or the type of apples you use. That is the beauty of a simple recipe like this—it is a perfect canvas for your own creativity. If you make them, I would love to hear about it. Drop a comment below and let me know how they turned out, or share your own twist on the recipe. Happy baking, friends!
Frequently Asked Questions
Can I use quick oats instead of rolled oats?
I wouldn’t recommend it for this recipe. Rolled oats have a much better texture and hold up well during baking. Quick oats are cut smaller and will turn mushy, resulting in a less satisfying crumble topping.
Do I have to peel the apples?
Yes, I highly recommend peeling the apples for these bars. The peel doesn’t soften enough during the baking time and will result in a tough, chewy texture in the filling that is not pleasant. It is a bit of extra work, but totally worth it for the final result.
Why did my bars fall apart when I cut them?
This is almost always because they were cut too soon. The apple filling needs time to cool and set completely. Be patient and let them cool in the pan for at least 2 hours, or even pop them in the fridge for 30 minutes before cutting for the cleanest slices.
Can I make this in an 8×8 pan?
Yes, you can, but you will need to adjust the baking time. The bars will be much thicker, so you will need to bake them for about 50 to 55 minutes. Keep an eye on the topping so it doesn’t burn—you may need to tent it with foil for the last 10 minutes of baking.
How do I know when the bars are done baking?
You are looking for two things. First, the crumble topping should be a deep golden brown. Second, the apple filling should be bubbly and thick around the edges of the pan. If the filling looks watery, it needs more time. The bubbles are a good sign that the filling has thickened up.
Pin This Recipe!
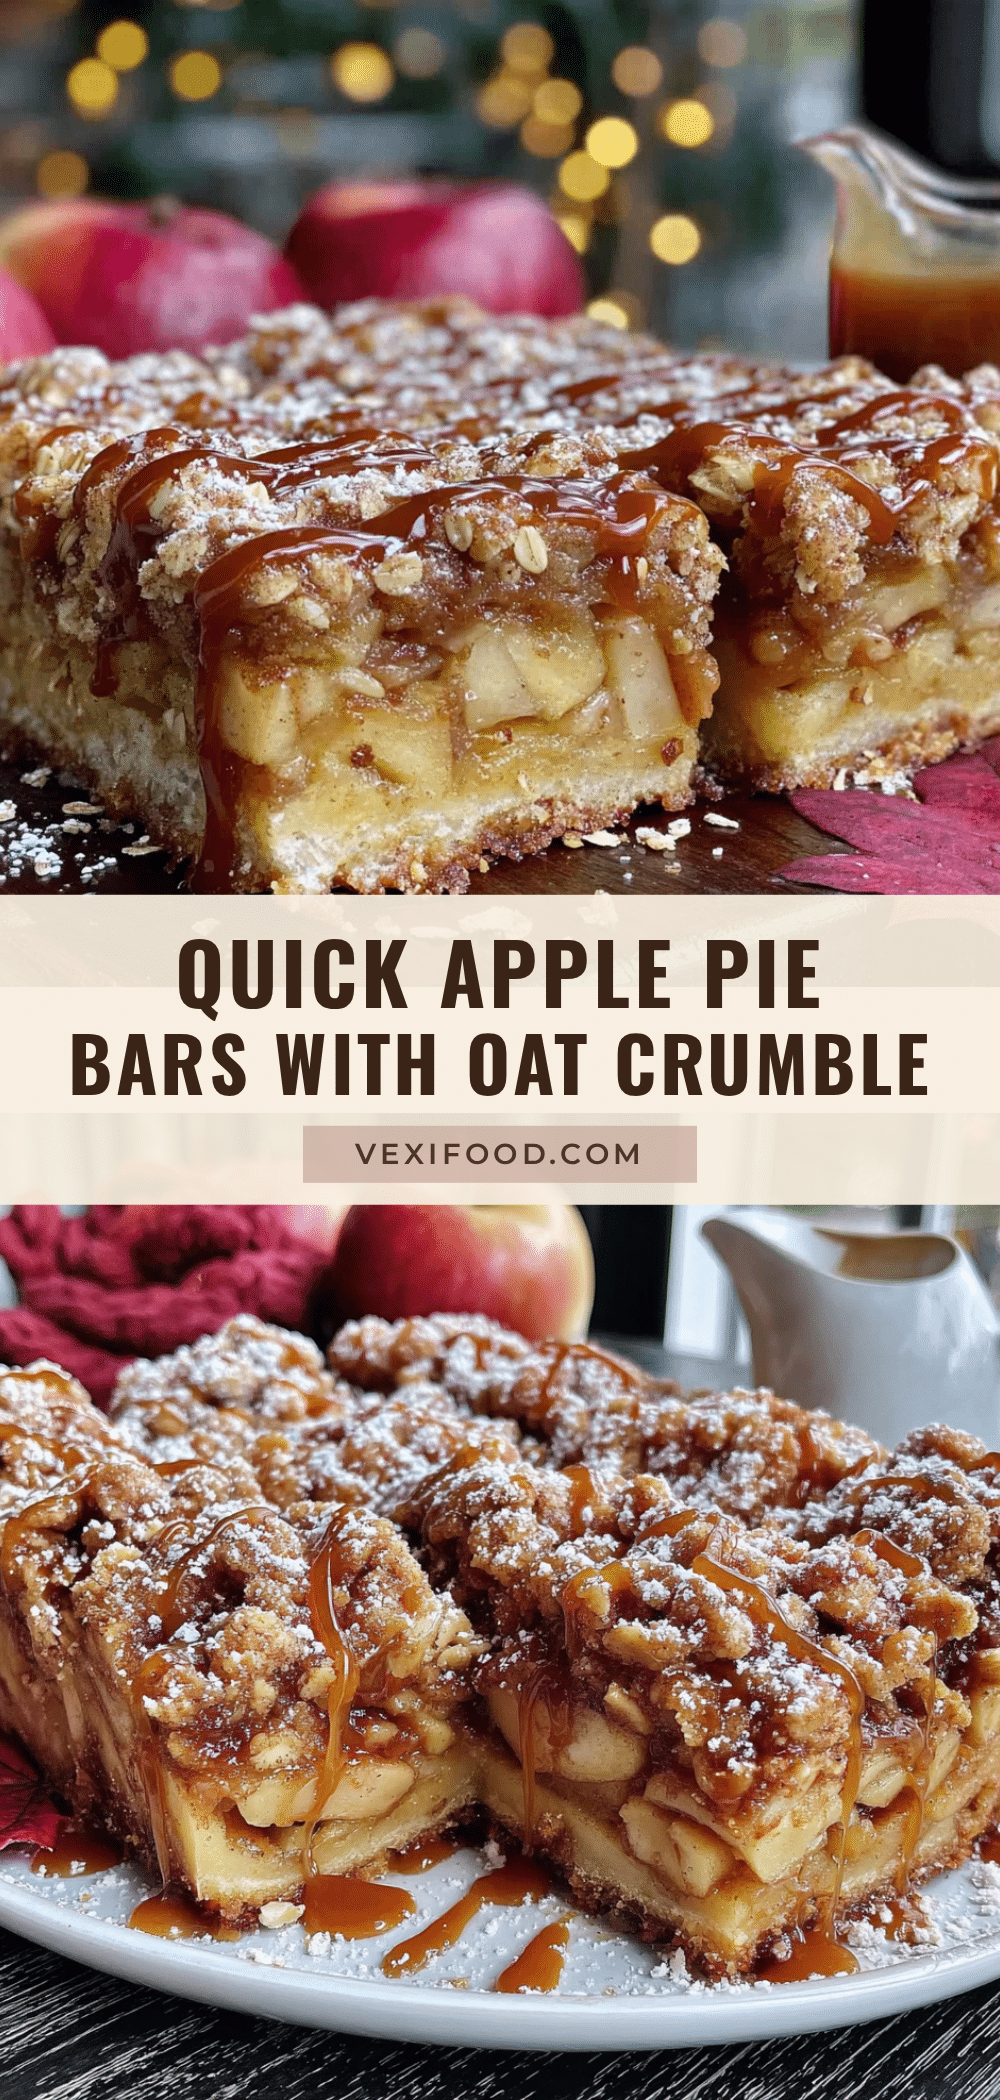
Best Quick Apple Pie Bars with Oat Crumble – Easy Fall Dessert

These quick apple pie bars are born from a real-life kitchen disaster, incredibly forgiving, and always delicious. They have all the heart and soul of a classic apple pie without any of the fuss.
- Prep Time: 15 minutes
- Cook Time: 45 minutes
- Total Time: 1 hour
- Yield: 12 servings 1x
- Category: Dessert
- Cuisine: American
Ingredients
- 1 ½ cups all-purpose flour (188g)
- 1 ½ cups rolled oats (135g)
- 1 cup packed light brown sugar (200g)
- 1 teaspoon ground cinnamon
- ½ teaspoon salt
- ¾ cup unsalted butter, cold and cut into small cubes (170g)
- 5–6 medium apples (about 2 ½ lbs / 1.1 kg), a mix of tart and sweet (e.g., Granny Smith and Honeycrisp)
- ¼ cup granulated sugar (50g)
- 2 tablespoons all-purpose flour
- 1 tablespoon lemon juice
- 1 ½ teaspoons ground cinnamon
- ¼ teaspoon ground nutmeg (optional)
Instructions
- Preheat oven to 375°F (190°C). Lightly grease a 9×13-inch baking dish with butter or non-stick spray.
- In a large bowl, whisk together 1 ½ cups flour, 1 ½ cups rolled oats, 1 cup packed brown sugar, 1 teaspoon cinnamon, and ½ teaspoon salt. Add cold cubed butter. Using a pastry cutter or your fingers, work the butter into the dry ingredients until the mixture looks like coarse sand with some pea-sized butter lumps remaining. Set aside about 1 ½ cups of this mixture for the topping.
- Pour the remaining crust mixture into the prepared baking dish. Press it down firmly and evenly into the bottom to form the crust. Use the bottom of a flat measuring cup to pack it tight.
- Peel, core, and chop apples into ½-inch cubes. In a separate bowl, toss the chopped apples with ¼ cup granulated sugar, 2 tablespoons flour, 1 tablespoon lemon juice, 1 ½ teaspoons cinnamon, and ¼ teaspoon nutmeg (if using). Ensure all apple pieces are coated.
- Spread the apple filling evenly over the pressed crust. Sprinkle the reserved crumble mixture evenly over the apples. Do not press down.
- Place the dish on a baking sheet. Bake for 40 to 45 minutes, or until the topping is golden brown and the apple filling is bubbly around the edges.
- Cool completely in the pan on a wire rack for at least 2 hours before cutting. This allows the filling to set.
- Once completely cool, cut into squares using a sharp knife. Lift out with a small spatula.
Notes
Do not overwork the butter; keep it cold for a tender crust and crunchy crumble. Use a mix of apples (tart and sweet) for best texture. Press the crust firmly to prevent crumbling. Let bars cool completely before cutting to avoid falling apart. For gluten-free, use a 1:1 gluten-free flour blend and certified gluten-free oats. For a nutty crumble, add ½ cup chopped pecans or walnuts to the topping. Store at room temperature for up to 3 days or freeze for up to 3 months.
Nutrition
- Serving Size: 1 bar
- Calories: 380
- Sugar: 35
- Sodium: 150
- Fat: 16
- Saturated Fat: 10
- Carbohydrates: 58
- Fiber: 4
- Protein: 4
Keywords: apple pie bars, oat crumble, easy fall dessert, quick apple dessert, apple bars