Love this? Save it for later!
Share the inspiration with your friends
I was standing in line at the hardware store, of all places, holding a bag of charcoal and a new grill brush, when the man behind me—a retired electrician named Frank—started talking about ribs. I hadn’t asked for advice. I wasn’t even sure I wanted it. But there I was, stuck between a display of fire starters and a stack of chimney starters, listening to Frank describe a brown sugar glaze that he claimed “changed his family’s entire opinion of Sunday dinner.” He was holding a single roll of duct tape and a box of trash bags, looking completely out of place in the grill aisle, and yet he spoke with the kind of authority you only get from decades of trial and error.
Frank told me the secret wasn’t the bourbon—it was the way you let the sugar caramelize without burning it. He said most people rush the glaze and end up with something that tastes like a melted candy bar. “You gotta be patient,” he said, tapping the roll of tape against his palm. “Let it get sticky, but not too sticky. You want it to cling, not glue.” I scribbled his instructions on the back of a receipt, half-convinced I’d never actually try them. But that weekend, I found myself standing in my kitchen, a bottle of decent bourbon in one hand and a rack of ribs in the other, thinking about Frank and his duct tape.
Honestly, I messed up the first batch. The glaze was too thin, and I got impatient with the heat. But the second time? Let me tell you, it was like something clicked. The sugar melted into the bourbon just right, and the ribs came out sticky, glossy, and fall-apart tender. I’ve been making these Sticky Brown Sugar Bourbon Glazed Ribs ever since, and every time I do, I think of Frank. Maybe you’ve been there—taking cooking advice from the most unexpected person and ending up with a recipe that becomes your go-to.
Why You’ll Love This Recipe
These Sticky Brown Sugar Bourbon Glazed Ribs are the kind of dish that makes you look like a grill master without spending all day over a hot fire. I’ve tested this recipe more times than I can count, tweaking the glaze ratio and the cooking time until it was just right. Here’s why it works:
- Foolproof Glaze: No more burnt sugar or watery sauce. This glaze thickens perfectly every time, thanks to a simple technique I learned from Frank himself.
- Rich, Complex Flavor: The bourbon adds warmth without being boozy, and the brown sugar caramelizes into a deep, almost molasses-like sweetness. It’s balanced with a hint of garlic and a touch of heat.
- Fall-Off-The-Bone Texture: We’re using a low-and-slow method that breaks down the collagen without drying out the meat. The result is tender ribs that still have a little bite.
- Simple Ingredients: You probably already have brown sugar, garlic, and soy sauce in your pantry. The bourbon is the only “special” ingredient, and you can skip it or swap it.
- Perfect for Gatherings: These ribs are a crowd-pleaser. I’ve brought them to potlucks, game days, and family barbecues, and they always disappear first. Kids love the sweetness, and adults appreciate the complexity.
- Make-Ahead Friendly: You can prep the glaze and par-cook the ribs a day ahead. Just finish them on the grill or in the oven when you’re ready to serve.
The first time I made these for a group, my brother-in-law—who swears he doesn’t like sweet meat—asked for seconds. That’s when I knew this recipe was special. It’s not just another barbecue sauce; it’s a glaze that clings to every rib, creating a sticky, shiny crust that’s impossible to resist. Close your eyes after that first bite. You’ll understand.
What Ingredients You Will Need
This recipe uses simple, pantry-friendly ingredients to create a glaze that’s anything but basic. Each component plays a specific role, from adding sweetness to balancing the richness of the meat.
- 2 racks baby back ribs (about 4-5 pounds total) – Baby backs are leaner and cook faster than spare ribs, but you can use either. Look for racks with even fat distribution and a good meat-to-bone ratio. I prefer Smithfield or Applegate for consistent quality.
- 1 cup dark brown sugar, packed – Dark brown sugar has more molasses than light, giving the glaze a deeper color and richer flavor. If you only have light brown sugar, add a tablespoon of molasses to mimic the depth.
- ½ cup bourbon – Use a bourbon you’d actually drink, not the cheap stuff. Maker’s Mark or Buffalo Trace work beautifully. The alcohol cooks off, leaving behind a warm, oaky flavor. For a non-alcoholic version, substitute with apple cider or strong brewed coffee.
- ¼ cup low-sodium soy sauce – This adds umami and saltiness to balance the sweetness. Low-sodium is important so the glaze doesn’t become too salty as it reduces. Tamari or coconut aminos work for gluten-free diets.
- 3 cloves garlic, minced – Fresh garlic is non-negotiable here. It adds a pungent kick that mellows as it cooks. Avoid jarred minced garlic; it has a different flavor profile.
- 2 tablespoons tomato paste – This gives the glaze body and a subtle tang. It also helps the glaze adhere to the ribs. You can substitute with ¼ cup ketchup, but the flavor will be slightly sweeter.
- 1 tablespoon apple cider vinegar – The acidity cuts through the richness of the ribs and balances the sweetness. White wine vinegar or lemon juice can be used in a pinch.
- 1 teaspoon smoked paprika – Adds a subtle smokiness that complements the bourbon. Regular paprika works, but the smoked variety is worth seeking out.
- ½ teaspoon cayenne pepper (optional) – For a gentle heat that builds in the background. Omit if you prefer a milder glaze, or increase to 1 teaspoon for more kick.
- ½ teaspoon black pepper – Freshly ground is best.
- ¼ teaspoon salt – Go easy here since the soy sauce is already salty. You can always adjust at the end.
For the Rib Rub:
- 2 tablespoons brown sugar – A light coating helps the rub stick and adds initial sweetness.
- 1 tablespoon smoked paprika
- 1 teaspoon garlic powder
- 1 teaspoon onion powder
- 1 teaspoon black pepper
- ½ teaspoon salt
Pro Tip: If you can’t find baby back ribs, St. Louis-style spare ribs work too. They’re meatier and have more fat, so you’ll need to increase the cooking time by about 30 minutes. Just keep an eye on the internal temperature—you want 190°F to 200°F for tender, pull-apart meat.
Equipment Needed
You don’t need a fancy setup to make these ribs, but a few key tools make the process smoother. Here’s what I use:
- Large baking sheet or roasting pan – For oven-cooking the ribs before glazing. A rimmed baking sheet works perfectly. Line it with foil for easier cleanup.
- Wire rack – Placing the ribs on a rack inside the pan allows air to circulate underneath, promoting even cooking. If you don’t have one, you can skip it, but the bottom of the ribs won’t be as dry.
- Aluminum foil – You’ll need this to cover the ribs during the initial cooking phase. Heavy-duty foil is best; it won’t tear as easily.
- Small saucepan – For making the glaze. A 1- or 2-quart saucepan is ideal. Non-stick is nice for easy cleanup, but stainless steel works fine.
- Basting brush – A silicone brush is my favorite because it doesn’t shed bristles. You can also use a pastry brush or even a spoon to drizzle the glaze.
- Instant-read thermometer – Essential for checking doneness without cutting into the ribs. I use a Thermapen for quick, accurate readings.
- Tongs – For flipping the ribs without tearing the meat. Look for long-handled tongs to keep your hands away from the heat.
- Sharp knife – For trimming the ribs and slicing them after cooking. A chef’s knife or a serrated bread knife works well.
Budget-Friendly Alternatives: If you don’t have a wire rack, you can ball up strips of foil and place them under the ribs to keep them elevated. Not having a basting brush? Use a clean, unused paintbrush from the hardware store—just make sure it’s never been used for paint!
Preparation Method
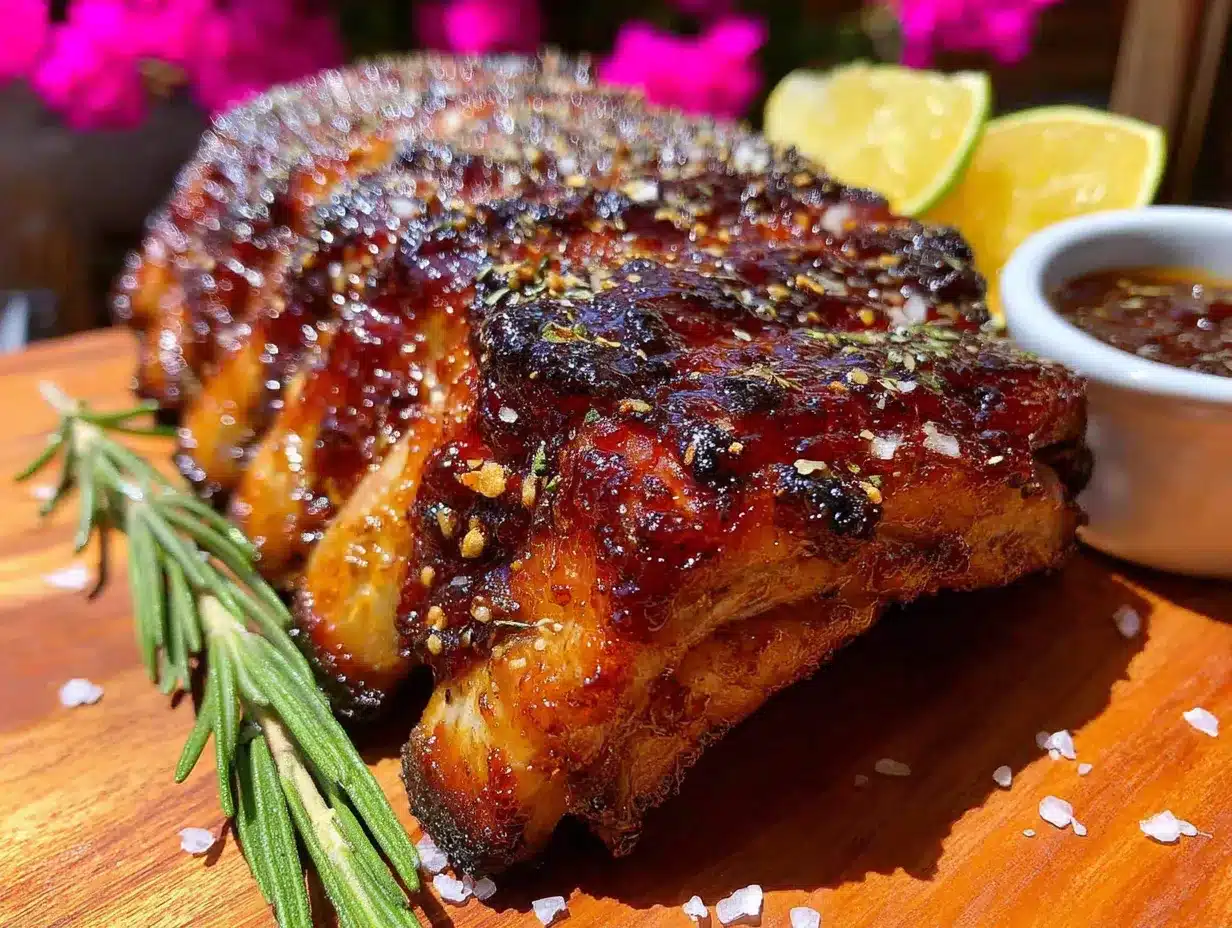
This method breaks the process into three phases: prep the ribs, cook them low and slow, then glaze and finish. Trust the timing, and you’ll end up with sticky, glossy ribs every time.
Phase 1: Prep the Ribs
- Remove the membrane. Flip the ribs bone-side up. Slide a butter knife under the thin, silvery membrane at one end. Grab it with a paper towel (for grip) and peel it off in one piece. This step is crucial—if you leave it on, the ribs will be tough and the glaze won’t penetrate. I’ve forgotten this step before, and the results were chewy and disappointing.
- Trim excess fat. Use a sharp knife to trim any large, hard chunks of fat. Leave a thin layer for moisture and flavor. You’re not trying to make them lean; you’re just removing the gnarly bits.
- Apply the dry rub. In a small bowl, mix the rub ingredients: 2 tablespoons brown sugar, 1 tablespoon smoked paprika, 1 teaspoon garlic powder, 1 teaspoon onion powder, 1 teaspoon black pepper, and ½ teaspoon salt. Pat the ribs dry with paper towels, then sprinkle the rub generously on both sides. Press it in with your hands. Let the ribs sit at room temperature for 30 minutes while you preheat the oven.
Phase 2: Low and Slow Cooking
- Preheat the oven to 275°F (135°C). This low temperature is the secret to tender ribs. If you rush at a higher heat, the meat will tighten up and become tough.
- Wrap the ribs. Place the ribs on a foil-lined baking sheet with a wire rack. Cover the pan tightly with aluminum foil. This traps steam and creates a gentle braising environment. I’ve tried cooking them uncovered, and they always dry out—the foil is non-negotiable.
- Cook for 2½ to 3 hours. The ribs are ready when the meat has pulled back from the bone ends by about ¼ inch and a thermometer inserted between the bones reads 190°F to 200°F. If you’re using spare ribs, add 30 minutes to the cooking time. Don’t rush this step—patience pays off.
Phase 3: Make the Glaze
- While the ribs cook, make the glaze. In a small saucepan, combine 1 cup packed dark brown sugar, ½ cup bourbon, ¼ cup low-sodium soy sauce, 3 minced garlic cloves, 2 tablespoons tomato paste, 1 tablespoon apple cider vinegar, 1 teaspoon smoked paprika, ½ teaspoon cayenne (if using), ½ teaspoon black pepper, and ¼ teaspoon salt.
- Simmer the glaze. Whisk everything together over medium heat. Bring it to a gentle simmer, then reduce the heat to low. Cook for 8-10 minutes, stirring occasionally, until the glaze has thickened and reduced by about a third. It should coat the back of a spoon. Be careful not to let it boil too vigorously, or the sugar can scorch. If it gets too thick, add a splash of water or bourbon to thin it out.
- Set aside. Remove the glaze from the heat. It will continue to thicken as it cools. You can make this a day ahead and refrigerate it; just reheat gently before using.
Phase 4: Glaze and Finish
- Increase the oven temperature to 400°F (200°C). If you’re using a grill, preheat it to medium-high (about 375°F to 400°F).
- Uncover the ribs. Carefully remove the foil. The ribs should be tender and the meat should be starting to separate from the bones. Brush a generous layer of glaze on both sides of the ribs.
- Finish in the oven. Return the ribs to the oven (uncovered) and cook for 10-15 minutes. Then brush on another layer of glaze and cook for another 5-10 minutes. The glaze should be sticky and bubbling. If you prefer a charred finish, switch the oven to broil for the last 2-3 minutes—watch closely so the sugar doesn’t burn.
- Rest and slice. Let the ribs rest for 10 minutes before slicing. This allows the juices to redistribute. Slice between the bones using a sharp knife. Serve with extra glaze on the side.
Sensory Cue: At the end of cooking, the ribs should look like they’re wearing a shiny, caramel-colored coat. When you lift a rib, the glaze should stretch slightly before breaking. That’s the sticky, perfect texture you’re after.
Cooking Tips & Techniques
Over the years, I’ve made plenty of mistakes with ribs. Here’s what I’ve learned so you don’t have to repeat my errors.
Don’t Skip the Membrane. I know it’s fiddly, but leaving the membrane on is the most common reason ribs turn out tough. The membrane acts like a barrier, preventing smoke and glaze from reaching the meat. If you can’t get a good grip, try using a paper towel for traction. It takes 30 seconds and makes a world of difference.
Low Heat Is Your Friend. I once tried to speed up the process by cooking ribs at 350°F. They were dry, tough, and the glaze burned before the meat was tender. Stick to 275°F. The low heat breaks down collagen into gelatin, giving you that melt-in-your-mouth texture. If you’re short on time, you can use a pressure cooker (like an Instant Pot) for the initial cooking, then finish under the broiler. But honestly, the oven method is more forgiving.
Glaze in Layers. Don’t dump all the glaze on at once. Applying it in layers—brushing, cooking, brushing again—builds a thick, sticky coating that doesn’t slide off. If you add all the glaze at the beginning, it will just pool on the pan and burn. I learned this the hard way when I ended up with a smoking, sticky mess.
Watch the Sugar. Brown sugar burns easily at high temperatures. If you’re finishing the ribs under the broiler, keep a close eye on them. The difference between perfectly caramelized and burnt is about 30 seconds. If you see black spots forming, pull them out immediately.
Let Them Rest. I know it’s tempting to dig in right away, but resting the ribs for 10 minutes allows the glaze to set and the juices to redistribute. If you slice too soon, the glaze will run off and the meat will be dry. Use that time to set the table or pour yourself a drink.
Multitasking Tip: While the ribs are in the oven, make the glaze and prep any sides. This way, everything finishes around the same time. I usually make a batch of coleslaw or roasted vegetables while the ribs cook.
Variations & Adaptations
This recipe is flexible. Here are some ways to make it your own:
Spicy Maple Glaze: Swap the brown sugar for ½ cup maple syrup and add an extra teaspoon of cayenne. The maple syrup caramelizes differently, creating a thinner, more delicate glaze. I tried this during a fall barbecue, and it was a hit with people who found the original too sweet.
Honey Bourbon Version: Replace the brown sugar with ½ cup honey. Honey has a lower burning point, so keep the oven temperature at 375°F for the final glazing step. The honey adds a floral note that pairs beautifully with the bourbon. Just be careful—it can bubble over if the pan is too full.
Smoker Method: If you have a smoker, use it for the initial cooking phase. Set it to 225°F and smoke the ribs for 3-4 hours using hickory or applewood. Then glaze and finish in the oven or on the grill. The smoky flavor adds another layer of complexity. I did this once for a Fourth of July party, and people were asking for the recipe all night.
Gluten-Free Adaptation: Use tamari or coconut aminos instead of soy sauce. The rest of the ingredients are naturally gluten-free. Just double-check your bourbon—most are gluten-free, but some flavored varieties may contain additives.
Non-Alcoholic Version: Substitute the bourbon with apple cider or strong brewed coffee. Coffee adds a deep, roasted flavor that mimics the warmth of bourbon. Apple cider gives a fruity sweetness that’s especially nice in the fall.
Oven-Only Method (No Grill): This recipe is already written for the oven, so you don’t need a grill at all. If you want a charred finish without a grill, use the broiler for the last few minutes. Just watch it like a hawk.
Serving & Storage Suggestions
These ribs are best served hot, right off the pan, but they’re also delicious at room temperature. Here’s how to make the most of them.
Serving Temperature: Serve the ribs hot, within 15 minutes of finishing. If you’re serving a crowd, keep them warm in a 200°F oven, loosely covered with foil. The glaze will stay sticky, but the meat won’t dry out.
Presentation: Arrange the ribs on a large platter, bone-side down, with the glazed side facing up. Drizzle a little extra glaze over the top and sprinkle with chopped fresh parsley or green onions for color. I like to serve them with lemon wedges on the side—the acidity cuts through the richness.
Complementary Dishes: These ribs pair well with classic barbecue sides: creamy coleslaw, cornbread, baked beans, or a simple green salad with vinaigrette. For drinks, a cold beer (like a lager or pale ale) or a bourbon cocktail is perfect. If you’re feeling fancy, try my creamy Southern coleslaw for a cool, crunchy contrast.
Storage: Leftover ribs keep well in the refrigerator for up to 4 days. Store them in an airtight container, separated by layers of parchment paper to prevent sticking. The glaze will harden slightly, but it softens when reheated.
Reheating: The best way to reheat ribs is in the oven. Preheat to 300°F, place the ribs on a foil-lined baking sheet, and cover with foil. Heat for 10-15 minutes, then uncover and brush with a little extra glaze or water to refresh the stickiness. Avoid the microwave—it makes the meat rubbery and the glaze gummy.
Freezing: You can freeze the cooked ribs (without the glaze) for up to 3 months. Wrap them tightly in plastic wrap, then foil. When you’re ready to serve, thaw in the refrigerator overnight, then glaze and finish in the oven. The texture is almost as good as fresh.
Flavor Development: The ribs actually taste better the next day. The flavors meld overnight, and the glaze soaks into the meat. If you can resist eating them all, save a few for leftovers. I’ve been known to make a double batch just for this reason.
Nutritional Information & Benefits
These ribs are indulgent, but they also have some surprising nutritional perks. Here’s the breakdown per serving (about 4 ribs, based on 6 servings):
| Nutrient | Amount per Serving |
|---|---|
| Calories | 520 |
| Protein | 32g |
| Fat | 28g |
| Saturated Fat | 10g |
| Carbohydrates | 38g |
| Fiber | 1g |
| Sugar | 34g |
| Sodium | 780mg |
Health Benefits: Pork ribs are a good source of protein, which supports muscle repair and keeps you full. They also contain B vitamins (especially B12) and zinc, which are important for energy and immune function. The brown sugar and bourbon are mostly for flavor, so enjoy them in moderation.
Dietary Considerations: This recipe is naturally dairy-free and egg-free. For a gluten-free version, use tamari instead of soy sauce. If you’re watching your sugar intake, you can reduce the brown sugar by half, but the glaze will be thinner and less sticky. I’ve tried it with a sugar substitute like Swerve, and it works, but the texture isn’t quite the same.
Potential Allergens: Soy (from soy sauce) and gluten (if using regular soy sauce). The bourbon is gluten-free, but check the label if you’re sensitive.
My Personal Take: I don’t make these ribs every week—they’re a treat, not a daily meal. But when I do, I savor every bite. The balance of protein and fat keeps me satisfied, and the sweetness feels like a special occasion. Life’s too short to skip dessert, and sometimes dessert is dinner.
Conclusion
These Sticky Brown Sugar Bourbon Glazed Ribs are more than just a recipe—they’re a story. They started with a chance encounter at a hardware store and turned into a dish I reach for whenever I want to impress someone or just treat myself. The glaze is sticky, sweet, and just a little bit smoky, with a depth of flavor that comes from patience and a few simple ingredients.
I hope you give them a try. Don’t worry if your first batch isn’t perfect—mine wasn’t either. The beauty of cooking is that you can always try again, tweak the glaze, adjust the heat, and find your own version. Maybe you’ll add more cayenne. Maybe you’ll swap the bourbon for whiskey. That’s the fun part.
If you do make these ribs, I’d love to hear about it. Leave a comment below and tell me how they turned out, or share a photo on social media with the hashtag #StickyBourbonRibs. And if you have your own story about an unexpected recipe source, I’m all ears. Frank would be proud.
Happy cooking, and remember: patience makes the glaze.
Frequently Asked Questions
Can I make these ribs without an oven?
Absolutely. You can cook the ribs on a grill using indirect heat. Set up your grill for two-zone cooking (heat on one side, ribs on the other) and maintain a temperature of 275°F. Follow the same timing and glazing steps. The grill adds a nice smoky flavor.
How do I know when the ribs are done?
The most reliable method is using an instant-read thermometer. Insert it between the bones, being careful not to touch the bone itself. You’re looking for 190°F to 200°F. The meat should also have pulled back from the bone ends by about ¼ inch, and the ribs should bend easily when lifted with tongs.
Can I use a different type of alcohol?
Yes. Whiskey, rum, or even brandy work well. Each will impart a slightly different flavor—whiskey is smoky, rum is sweeter, and brandy is fruity. If you don’t want to use alcohol, substitute with apple cider or strong coffee.
Why did my glaze turn out too thin?
The glaze needs to simmer long enough to reduce and thicken. If it’s still thin after 10 minutes, continue cooking over low heat, stirring frequently, until it coats the back of a spoon. Also, make sure you’re using packed brown sugar—loose sugar can throw off the ratio.
Can I prepare these ribs ahead of time?
Yes. You can cook the ribs through the low-and-slow phase (step 6) up to 2 days in advance. Let them cool, then refrigerate in an airtight container. When you’re ready to serve, glaze and finish in the oven. The flavors will be even more developed.
Pin This Recipe!
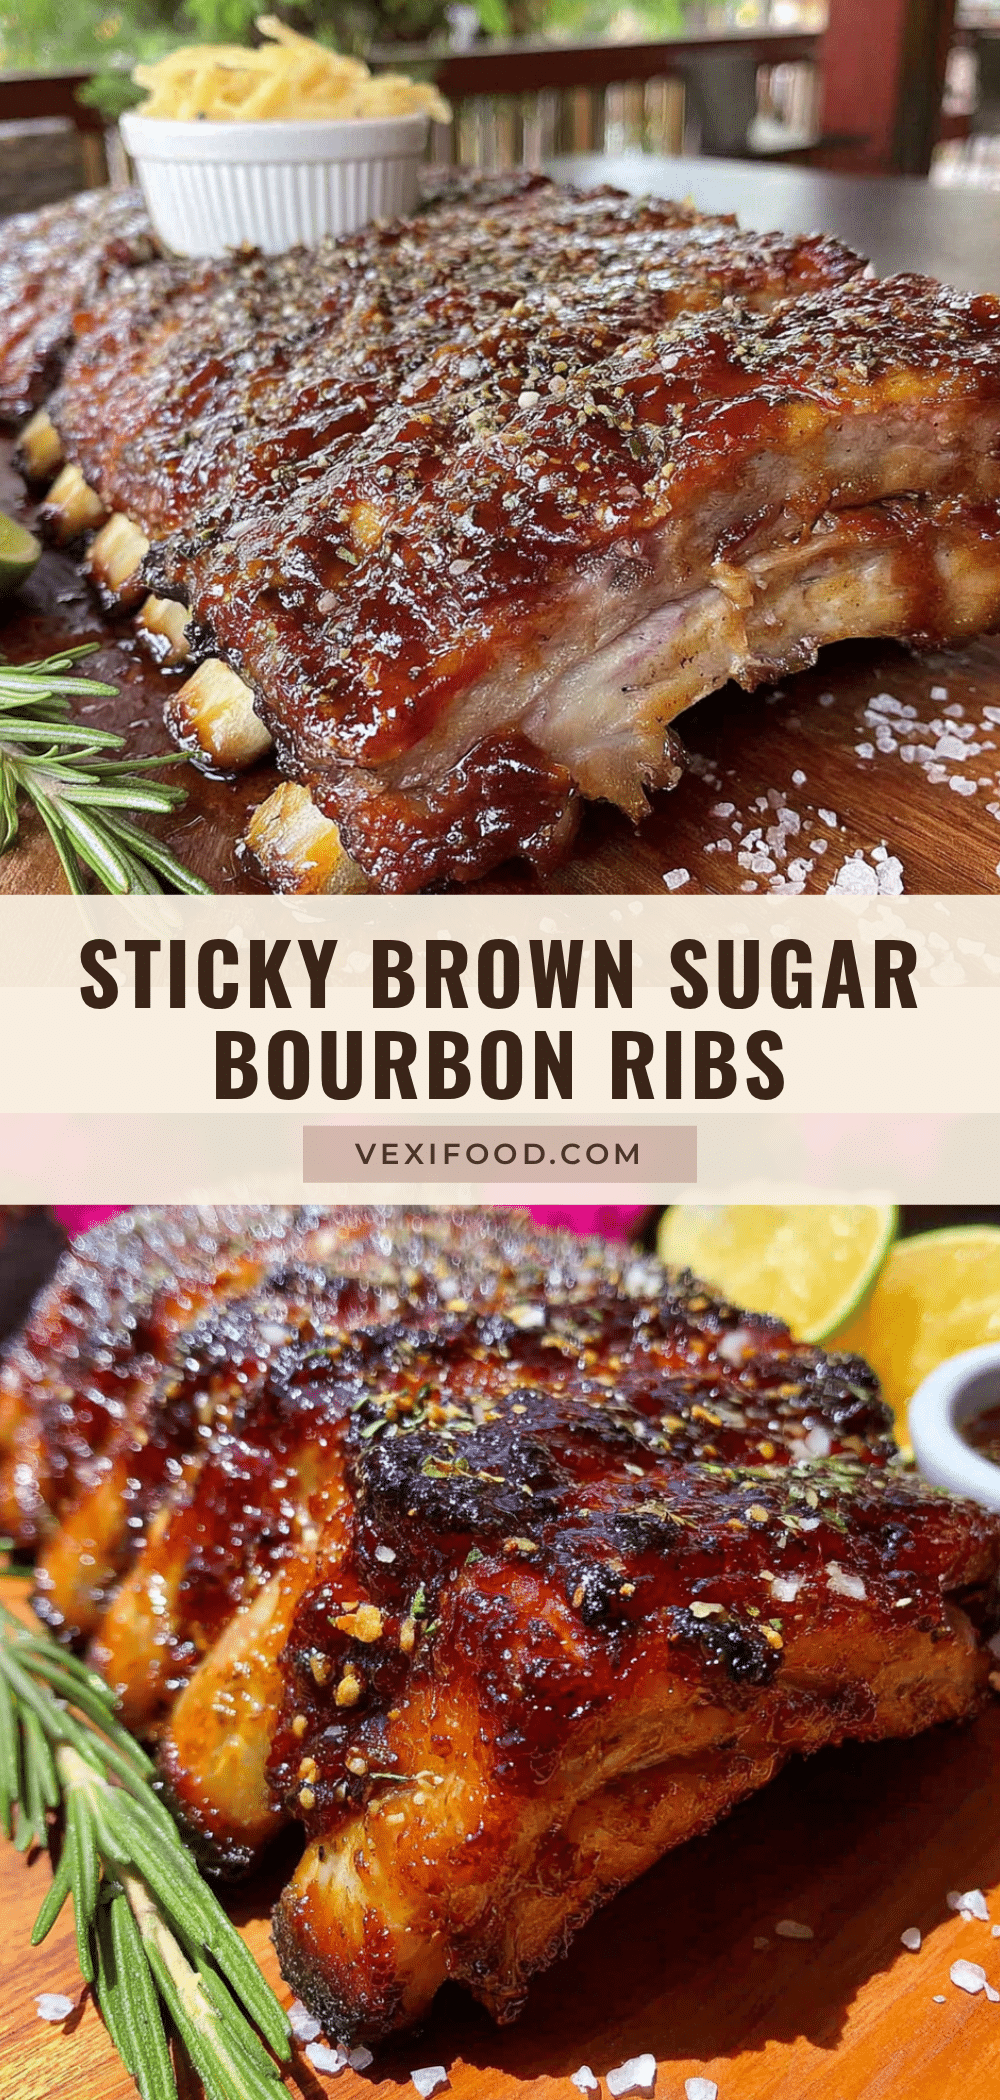
Best Sticky Brown Sugar Bourbon Glazed Ribs Recipe
These Sticky Brown Sugar Bourbon Glazed Ribs are fall-off-the-bone tender with a rich, caramelized glaze that’s perfectly balanced between sweet and savory. A foolproof recipe that turns any cook into a grill master.
- Prep Time: 30 minutes
- Cook Time: 3 hours 30 minutes
- Total Time: 4 hours
- Yield: 6 servings 1x
- Category: Main Course
- Cuisine: American
Ingredients
- 2 racks baby back ribs (about 4–5 pounds total)
- 1 cup dark brown sugar, packed
- ½ cup bourbon
- ¼ cup low-sodium soy sauce
- 3 cloves garlic, minced
- 2 tablespoons tomato paste
- 1 tablespoon apple cider vinegar
- 1 teaspoon smoked paprika
- ½ teaspoon cayenne pepper (optional)
- ½ teaspoon black pepper
- ¼ teaspoon salt
- 2 tablespoons brown sugar (for rub)
- 1 tablespoon smoked paprika (for rub)
- 1 teaspoon garlic powder (for rub)
- 1 teaspoon onion powder (for rub)
- 1 teaspoon black pepper (for rub)
- ½ teaspoon salt (for rub)
Instructions
- Remove the membrane from the ribs by sliding a butter knife under the silvery membrane, grabbing it with a paper towel, and peeling it off.
- Trim excess fat from the ribs, leaving a thin layer for moisture.
- Mix the dry rub ingredients (2 tablespoons brown sugar, 1 tablespoon smoked paprika, 1 teaspoon garlic powder, 1 teaspoon onion powder, 1 teaspoon black pepper, ½ teaspoon salt). Pat ribs dry and apply rub generously on both sides. Let sit at room temperature for 30 minutes.
- Preheat oven to 275°F (135°C).
- Place ribs on a foil-lined baking sheet with a wire rack. Cover tightly with aluminum foil.
- Cook for 2½ to 3 hours, until meat pulls back from bone ends by about ¼ inch and internal temperature reaches 190°F to 200°F.
- While ribs cook, make the glaze: In a small saucepan, combine 1 cup packed dark brown sugar, ½ cup bourbon, ¼ cup low-sodium soy sauce, 3 minced garlic cloves, 2 tablespoons tomato paste, 1 tablespoon apple cider vinegar, 1 teaspoon smoked paprika, ½ teaspoon cayenne (if using), ½ teaspoon black pepper, and ¼ teaspoon salt.
- Simmer the glaze over medium heat, then reduce to low and cook for 8-10 minutes, stirring occasionally, until thickened and reduced by about a third. Set aside.
- Increase oven temperature to 400°F (200°C).
- Uncover ribs and brush a generous layer of glaze on both sides.
- Return ribs to oven (uncovered) and cook for 10-15 minutes. Brush on another layer of glaze and cook for another 5-10 minutes until sticky and bubbling. Optionally, broil for 2-3 minutes for a charred finish.
- Let ribs rest for 10 minutes before slicing between the bones. Serve with extra glaze on the side.
Notes
Don’t skip removing the membrane for tender ribs. Low heat (275°F) is essential for fall-off-the-bone texture. Apply glaze in layers for a thick, sticky coating. Watch the sugar under the broiler to prevent burning. Let ribs rest before slicing.
Nutrition
- Serving Size: 4 ribs
- Calories: 520
- Sugar: 34
- Sodium: 780
- Fat: 28
- Saturated Fat: 10
- Carbohydrates: 38
- Fiber: 1
- Protein: 32
Keywords: sticky brown sugar bourbon glazed ribs, bourbon ribs, brown sugar ribs, glazed ribs, baby back ribs, barbecue ribs, oven ribs