Love this? Save it for later!
Share the inspiration with your friends
This was supposed to be a simple batch of chocolate crinkle cookies for a Halloween party. I had the recipe memorized, the butter was softening on the counter, and I was feeling pretty confident about my whole “organized host” persona. Then I realized I was completely out of cocoa powder. Not a tablespoon left. Not even that dusty half-used can at the back of the pantry. I stood there, staring into the cabinet like the universe had personally betrayed me, with guests arriving in three hours and a dessert table that was looking pretty sad.
I grabbed the wrong thing off the shelf—a jar of black cocoa powder I’d bought on a whim months ago for a recipe I never made. It looked like charcoal. It smelled intensely dark. And honestly, I figured I had nothing left to lose. I tossed it into the mixer anyway, added a little extra sugar to balance the bitterness, and prayed my friends wouldn’t notice the cookies looked like tiny black hockey pucks.
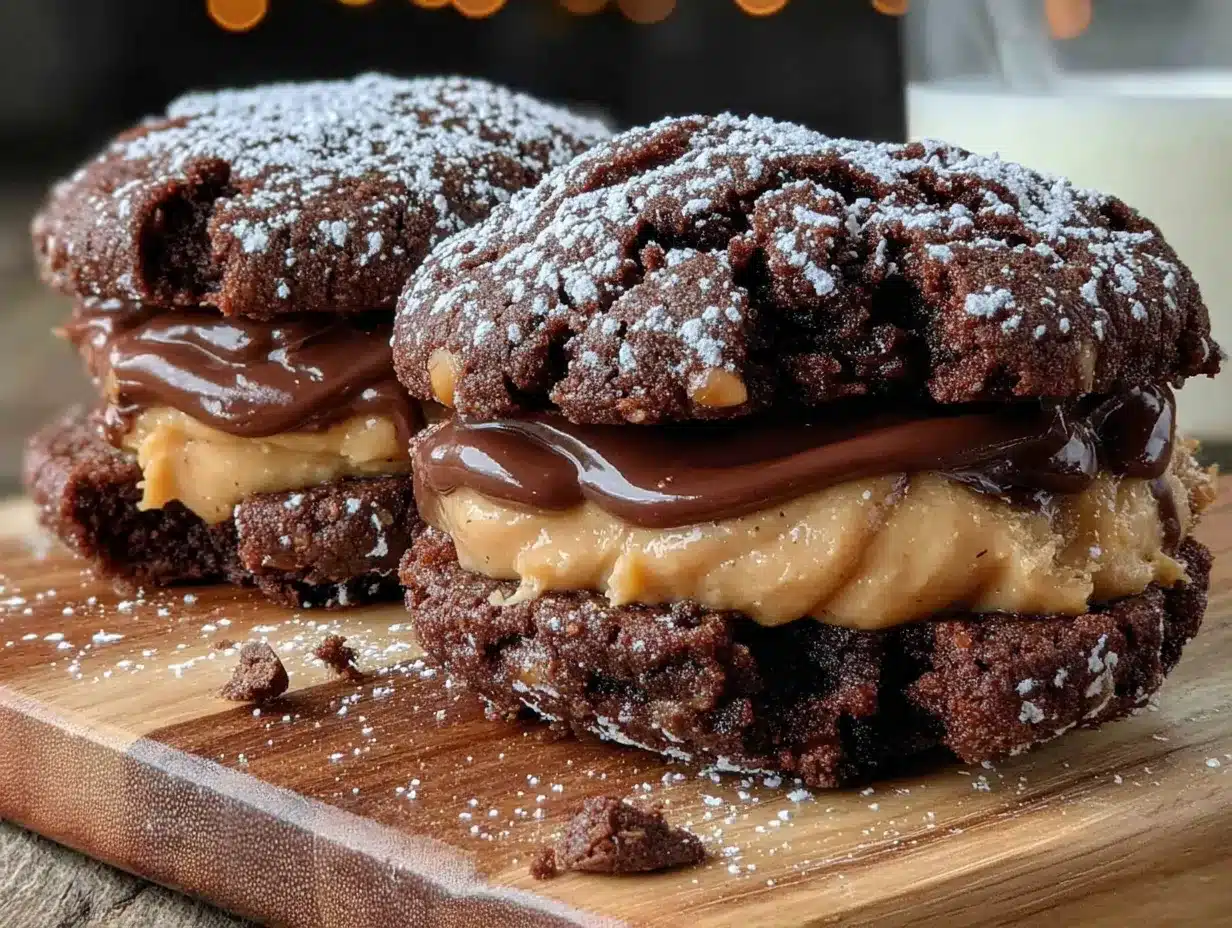
What came out of that oven was nothing like the plan—and so much better. The cookies puffed up dark and dramatic, with this incredible, almost Oreo-like richness I’d never gotten from regular cocoa. I slapped some peanut butter frosting between two of them, thinking maybe I could salvage the situation, and my neighbor walked in mid-bite and asked if I catered. I laughed so hard I almost choked on the cookie. You know that feeling when something goes so wrong it circles back to being completely right? That was this recipe. And honestly, I’ve been making these Black Cat Peanut Butter Cookie Sandwiches every year since—not because I’m trying to recreate a happy accident, but because they genuinely steal the whole dessert table.
Why You’ll Love This Recipe
Let me tell you something about hosting a party—you need desserts that look impressive but don’t make you sweat. These Black Cat Peanut Butter Cookie Sandwiches are exactly that. They’re dramatic, delicious, and deceptively simple to pull off.
- Show-Stopping Visuals : The deep black cookies with creamy peanut butter filling create a stunning contrast that makes people stop mid-conversation. I’ve watched guests literally point at them across the table.
- Make-Ahead Friendly : You can bake the cookies three days in advance and assemble right before guests arrive. That’s less stress and more time for your own party outfit—or another glass of wine.
- Crowd-Pleasing Flavor Combo : The dark cocoa paired with smooth peanut butter frosting hits that sweet-salty note that everyone loves. Kids go for the fun color, adults go for the sophisticated taste.
- Simple Ingredients : Nothing fancy here. Black cocoa powder is the only specialty item, and you can find it at most grocery stores or online. The rest is pantry staples.
- Perfect for Halloween or Any Gathering : Sure, they’re called “Black Cat” cookies, but honestly? I make these for birthday parties, dinner parties, and random Tuesday nights. The color works for any occasion where you want a little drama.
What makes this recipe different from every other cookie sandwich out there? It’s the black cocoa powder. Regular cocoa gives you a brown cookie with frosting—cute, but not memorable. Black cocoa creates this intense, dark color and a flavor that’s almost nostalgic, like the inside of an Oreo but better. The peanut butter filling is silky, not too sweet, and holds its shape without being stiff. I’ve tested this recipe at least a dozen times across different ovens and altitudes, and it works every single time.
This isn’t just a cookie—it’s the one that makes people ask for the recipe before they’ve even finished eating. And as a host, that’s the best compliment you can get.
What Ingredients You Will Need
This recipe uses simple, wholesome ingredients to create something that looks and tastes far more complicated than it actually is. Most of these are probably already in your kitchen—minus the black cocoa powder, which is worth tracking down for the visual payoff alone.
For the Cookies
- 1 cup (226g) unsalted butter, softened to room temperature (I use Land O’Lakes for consistent results)
- 1 cup (200g) granulated sugar
- 1 large egg, room temperature
- 1 teaspoon vanilla extract (pure, not imitation—trust me on this)
- 2 cups (250g) all-purpose flour, spooned and leveled
- 1/2 cup (50g) black cocoa powder (I recommend Rodelle or King Arthur Flour brand—they give the darkest color)
- 1/2 teaspoon baking soda
- 1/4 teaspoon salt (fine sea salt works best)
- 1/4 cup (50g) powdered sugar, for rolling (optional, but adds a nice crackle effect)
For the Peanut Butter Filling
- 1/2 cup (128g) creamy peanut butter (use a standard brand like Jif or Skippy—natural peanut butter that separates will make the filling grainy)
- 1/4 cup (56g) unsalted butter, softened
- 1 cup (120g) powdered sugar, sifted
- 1/2 teaspoon vanilla extract
- 2-3 tablespoons heavy cream (or milk, if that’s what you have)
- Pinch of salt
A quick note on the black cocoa powder—it’s different from regular Dutch-process cocoa. It’s intensely dark, almost black, and has a milder, less acidic flavor. If you can’t find it, you can substitute with Dutch-process cocoa, but your cookies will be dark brown instead of black. The flavor will still be great, just less dramatic visually.
For the peanut butter filling, please don’t use the natural kind that sits with oil on top. I tried it once thinking I was being healthy, and the filling turned out oily and separated. Stick with the creamy processed stuff for this one—it makes a difference in texture and stability.
Equipment Needed
You don’t need a professional bakery setup for these cookies, but a few key tools will make your life easier.
- Electric stand mixer or hand mixer : Creaming the butter and sugar properly is crucial for the cookie texture. I’ve made these with both, and my KitchenAid stand mixer gives the fluffiest results, but a hand mixer works perfectly fine.
- Large mixing bowls (at least two)
- Baking sheets : I recommend heavy-duty aluminum sheets—they distribute heat evenly. My cheap nonstick sheets gave me uneven browning the first time.
- Parchment paper or silicone baking mats : Silicone mats are my personal favorite because the cookies slide right off and cleanup is effortless.
- Cooling rack : Essential for getting the cookies to room temperature before filling—otherwise your frosting will melt into a sad puddle.
- Small cookie scoop (about 1.5 tablespoons): For uniform cookies that bake evenly. I use my Oxo scoop religiously.
- Offset spatula : For spreading the filling neatly. A butter knife works too, but the spatula makes you feel like a pro.
If you don’t have a cookie scoop, just use two spoons—one to scoop and one to scrape the dough onto the sheet. It’s a little messier but gets the job done.
Preparation Method
Step 1: Prepare the Cookie Dough
In a large mixing bowl, beat the softened butter and granulated sugar together on medium speed until light and fluffy—about 3 to 4 minutes. Scrape down the sides of the bowl halfway through. The mixture should look pale and airy, not dense. Add the egg and vanilla extract, then beat until fully combined, about 1 minute. Don’t rush this step—proper creaming gives the cookies their tender texture.
Step 2: Combine Dry Ingredients
In a separate bowl, whisk together the all-purpose flour, black cocoa powder, baking soda, and salt. Make sure there are no lumps in the cocoa powder—black cocoa tends to clump more than regular cocoa. If you see lumps, sift the mixture through a fine-mesh strainer. Gradually add the dry ingredients to the wet mixture, mixing on low speed until just combined. Overmixing will make the cookies tough, so stop as soon as you don’t see any more flour streaks.
Step 3: Chill the Dough
Cover the bowl with plastic wrap and refrigerate the dough for at least 30 minutes. This step is non-negotiable—I learned the hard way when my first batch spread into flat, sad discs. Chilling solidifies the butter, which prevents excessive spreading and gives you thicker, more uniform cookies. You can chill the dough for up to 48 hours if you’re prepping ahead.
Step 4: Shape and Bake
Preheat your oven to 350°F (175°C) and line two baking sheets with parchment paper or silicone mats. Using your cookie scoop or a spoon, portion the dough into 1.5-tablespoon balls (about 20 grams each). Roll each ball between your palms until smooth. If you want that crackled look, roll each ball in powdered sugar before placing on the baking sheet—this gives a subtle snowy contrast against the dark cookie.
Place the dough balls about 2 inches apart on the prepared sheets. Bake for 10 to 12 minutes, rotating the pan halfway through. The cookies should look set around the edges but still slightly soft in the center—they’ll continue baking from residual heat on the sheet. Let them cool on the baking sheet for 5 minutes, then transfer to a wire rack to cool completely. Do not skip this cooling time; the cookies are fragile when hot.
Step 5: Make the Peanut Butter Filling
While the cookies cool, make the filling. In a medium bowl, beat the softened butter and peanut butter together until smooth and creamy—about 2 minutes. Gradually add the sifted powdered sugar, mixing on low speed to prevent a sugar cloud explosion. Add the vanilla extract and a pinch of salt, then beat in the heavy cream one tablespoon at a time until the filling reaches a spreadable consistency. It should be thick enough to hold its shape but soft enough to spread without tearing the cookies.
Step 6: Assemble the Sandwiches
Pair up cookies that are roughly the same size. Spread about 1 tablespoon of filling onto the flat side of one cookie, then gently press the second cookie on top. Don’t press too hard—you want the filling to squish out slightly at the edges, not break the cookies. If you’re serving immediately, go ahead and assemble. If you’re making ahead, store the cookies and filling separately and assemble just before serving to keep the cookies crisp.
Cooking Tips & Techniques
I’ve made these Black Cat Peanut Butter Cookie Sandwiches more times than I can count, and I’ve definitely made my share of mistakes. Here’s what I’ve learned so you don’t have to repeat my errors.
Don’t skip the chilling step. I know it’s tempting to rush, especially when guests are coming. But warm dough spreads like a puddle in the oven. One time I was in a hurry and only chilled the dough for 10 minutes—the cookies came out thin, crispy, and impossible to sandwich. They still tasted good, but they looked nothing like the dramatic black beauties I wanted.
Watch your oven temperature. Every oven runs differently. My old oven ran hot, and I burnt my first batch to charcoal—ironic for black cookies, but not the kind of dark I was going for. Use an oven thermometer if you have one. The cookies should be slightly underbaked in the center when you pull them out. They’ll set up perfectly as they cool.
Use room temperature ingredients. Cold butter doesn’t cream properly, and cold egg can seize the dough. Leave your butter and egg on the counter for about an hour before starting. If you forget, you can soften butter in the microwave in 10-second bursts, but be careful—melted butter changes the cookie texture completely.
Test the filling consistency. If your filling is too thick, it’ll tear the cookies when you spread it. Too thin, and it’ll ooze out the sides like a messy sandwich. Aim for a texture similar to thick frosting—spreadable but stable. Add the cream slowly until you get there.
Bake in batches. Don’t crowd the oven. Bake one sheet at a time on the middle rack for even browning. If you try to bake two sheets at once, the bottom cookies will brown faster than the top ones, and you’ll end up with uneven results.
Variations & Adaptations
One of the best things about this recipe is how flexible it is. Here are some variations I’ve tried and loved.
Halloween-Themed Version
Add orange food coloring to the peanut butter filling for a festive orange-and-black combo. I did this for a Halloween party last year, and guests went wild. You can also press candy eyes into the filling before sandwiching for a fun monster look.
Gluten-Free Adaptation
Swap the all-purpose flour with a 1:1 gluten-free baking flour blend (I like Bob’s Red Mill). The texture will be slightly more crumbly, so handle the cookies gently. Chill the dough for an extra 15 minutes to help them hold their shape.
Chocolate Lover’s Twist
Add 1/2 cup mini chocolate chips to the cookie dough before chilling. The little chocolate bursts against the dark cocoa base are incredible. You can also replace the peanut butter filling with chocolate ganache for a double-chocolate experience.
Vegan Option
Use vegan butter sticks (not tub margarine), a flax egg (1 tablespoon ground flaxseed mixed with 3 tablespoons water), and dairy-free cream. The cookies won’t be quite as tender, but they’re still delicious. I tested this for a vegan friend, and she asked for the recipe immediately.
Spiced Variation
Add 1 teaspoon of cinnamon and 1/4 teaspoon of cayenne pepper to the dry ingredients. The warmth of the spices pairs beautifully with the dark cocoa and peanut butter. It’s unexpected but so good—I made this version for a fall dinner party, and it was the first thing to disappear.
Serving & Storage Suggestions
These Black Cat Peanut Butter Cookie Sandwiches are best served at room temperature, which lets the filling soften slightly and the cookies stay crisp. Arrange them on a dark platter or cake stand for maximum visual impact—the contrast between the black cookies and a white or metallic dish is stunning.
For a dinner party, I like to serve these with a glass of cold milk or a hot coffee. They also pair beautifully with vanilla ice cream—just crumble a cookie over the top for an easy dessert upgrade. If you’re setting up a dessert table, place them on a pedestal stand so they’re at eye level. Trust me, people will gravitate toward them.
Storage: Store assembled sandwiches in an airtight container at room temperature for up to 3 days. The cookies will soften slightly from the filling, which actually makes them even more tender. If you want to keep the cookies crisp, store the cookies and filling separately and assemble just before serving.
Freezer Instructions: You can freeze the baked, unfilled cookies for up to 3 months. Layer them between sheets of parchment paper in a freezer-safe container. Thaw at room temperature, then make the filling fresh. The filling doesn’t freeze well—it can separate and become grainy.
Make-Ahead Tip: Bake the cookies up to 3 days in advance and store them in an airtight container. Make the filling the day of your event, and assemble an hour before guests arrive. This is my go-to strategy for parties—it saves so much stress.
Nutritional Information & Benefits
Let’s be honest—these are a treat, not a health food. But here’s what you’re looking at per sandwich (based on 16 sandwiches):
| Nutrient | Amount Per Sandwich |
|---|---|
| Calories | 285 |
| Total Fat | 17g |
| Saturated Fat | 9g |
| Carbohydrates | 31g |
| Sugar | 20g |
| Protein | 5g |
| Sodium | 180mg |
The peanut butter filling does add some protein and healthy fats, which helps balance the sugar rush slightly. Black cocoa powder also contains antioxidants—more than regular cocoa, actually. So there’s that tiny silver lining. But honestly? These are meant to be enjoyed, not analyzed. Make them for the joy they bring, not the nutritional profile.
If you need a dairy-free option, use vegan butter and dairy-free cream. The cookies are naturally egg-free if you use a flax egg substitution. They are not low-carb or keto-friendly due to the sugar and flour.
Conclusion
These Black Cat Peanut Butter Cookie Sandwiches have become my secret weapon for every gathering I host. They look like they took hours of effort—but between us, they come together in under an hour of active work. The dark, dramatic cookies paired with the creamy, salty-sweet filling create something that feels special without the stress.
I love this recipe because it reminds me that sometimes the best things come from moments of panic and improvisation. That jar of black cocoa powder I bought on a whim? It changed my entire approach to dessert. Now I keep it stocked year-round, not just for Halloween.
I’d love to hear how these turn out for you! Did you try any of the variations? Did your guests fight over the last one? Drop a comment below and let me know—I read every single one. And if you’re looking for another crowd-pleasing dessert, try my chocolate peanut butter bars—they’re equally impressive and just as easy.
Happy baking, friends. Your dessert table is about to get a whole lot more interesting.
Frequently Asked Questions
Can I use regular cocoa powder instead of black cocoa?
Yes, but your cookies will be dark brown instead of black. Use Dutch-process cocoa for the darkest color possible without black cocoa. The flavor will still be delicious, just less dramatic visually.
Why did my cookies spread too much?
Most likely the dough wasn’t chilled long enough, or your butter was too soft. Make sure to chill the dough for at least 30 minutes, and don’t skip this step. Also, check that your baking soda isn’t expired—old leavener can cause spreading.
Can I make these cookies ahead of time for a party?
Absolutely! Bake the cookies up to 3 days in advance and store them in an airtight container. Make the filling the day of your event and assemble an hour before serving. This keeps the cookies crisp and the filling fresh.
How do I get the cookies perfectly round?
Use a cookie scoop for uniform dough balls, and roll them between your palms until smooth. If the cookies come out slightly irregular, you can use a round cookie cutter to “swirl” them into perfect circles while they’re still warm from the oven.
Can I freeze the assembled cookie sandwiches?
I don’t recommend freezing assembled sandwiches because the filling can become grainy and the cookies may soften too much. Instead, freeze the unfilled cookies for up to 3 months and make fresh filling when you’re ready to serve.
Pin This Recipe!

Black Cat Peanut Butter Cookie Sandwiches: Best Easy Dessert

These dramatic black cookies with creamy peanut butter filling are a show-stopping dessert that looks impressive but is deceptively simple to make. Perfect for Halloween or any gathering, they feature an intense Oreo-like richness from black cocoa powder.
- Prep Time: 20 minutes
- Cook Time: 12 minutes
- Total Time: 1 hour 2 minutes (includes 30 minutes chilling)
- Yield: 16 sandwich cookies 1x
- Category: Dessert
- Cuisine: American
Ingredients
- 1 cup (226g) unsalted butter, softened to room temperature
- 1 cup (200g) granulated sugar
- 1 large egg, room temperature
- 1 teaspoon vanilla extract (pure)
- 2 cups (250g) all-purpose flour, spooned and leveled
- 1/2 cup (50g) black cocoa powder
- 1/2 teaspoon baking soda
- 1/4 teaspoon salt (fine sea salt)
- 1/4 cup (50g) powdered sugar, for rolling (optional)
- 1/2 cup (128g) creamy peanut butter (e.g., Jif or Skippy)
- 1/4 cup (56g) unsalted butter, softened
- 1 cup (120g) powdered sugar, sifted
- 1/2 teaspoon vanilla extract
- 2–3 tablespoons heavy cream (or milk)
- Pinch of salt
Instructions
- In a large mixing bowl, beat the softened butter and granulated sugar together on medium speed until light and fluffy, about 3 to 4 minutes. Scrape down the sides halfway through. Add the egg and vanilla extract, then beat until fully combined, about 1 minute.
- In a separate bowl, whisk together the all-purpose flour, black cocoa powder, baking soda, and salt. Sift if there are lumps. Gradually add the dry ingredients to the wet mixture, mixing on low speed until just combined.
- Cover the bowl with plastic wrap and refrigerate the dough for at least 30 minutes (up to 48 hours).
- Preheat oven to 350°F (175°C). Line two baking sheets with parchment paper or silicone mats. Using a cookie scoop or spoon, portion the dough into 1.5-tablespoon balls (about 20 grams each). Roll each ball between your palms until smooth. Optionally, roll each ball in powdered sugar for a crackled look. Place dough balls about 2 inches apart on prepared sheets.
- Bake for 10 to 12 minutes, rotating the pan halfway through. Cookies should look set around the edges but still slightly soft in the center. Let cool on the baking sheet for 5 minutes, then transfer to a wire rack to cool completely.
- While cookies cool, make the filling: In a medium bowl, beat the softened butter and peanut butter together until smooth and creamy, about 2 minutes. Gradually add the sifted powdered sugar, mixing on low speed. Add the vanilla extract and a pinch of salt, then beat in the heavy cream one tablespoon at a time until the filling reaches a spreadable consistency.
- Pair up cookies of similar size. Spread about 1 tablespoon of filling onto the flat side of one cookie, then gently press the second cookie on top. Serve immediately or store separately.
Notes
Don’t skip chilling the dough—it prevents spreading. Use room temperature ingredients for best results. For the darkest color, use black cocoa powder (Rodelle or King Arthur Flour). For the filling, avoid natural peanut butter that separates; use creamy processed peanut butter. Cookies can be baked up to 3 days ahead; assemble just before serving. Freeze unfilled cookies for up to 3 months.
Nutrition
- Serving Size: 1 sandwich cookie
- Calories: 285
- Sugar: 20
- Sodium: 180
- Fat: 17
- Saturated Fat: 9
- Carbohydrates: 31
- Fiber: 1
- Protein: 5
Keywords: black cat cookies, peanut butter cookie sandwiches, Halloween dessert, black cocoa cookies, easy cookie recipe, peanut butter frosting, chocolate peanut butter sandwich



