Love this? Save it for later!
Share the inspiration with your friends
I wasn’t expecting baking advice from my accountant, but there I was, sitting in his cluttered office during tax season, watching him sketch something on a sticky note. “You make cookies, right?” he asked, sliding the yellow square across the desk. On it was a rough drawing of a spider web made of chocolate, with the words “chocolate spider web cookies” scribbled underneath. I laughed at first—honestly, who gets cookie advice from the person doing their taxes? But he insisted. His wife had made them for their office Halloween party, and apparently they vanished faster than a tax refund.
That sticky note sat on my fridge for months. Every time I saw it, I thought, “Maybe I should actually try these.” But life got busy, and Halloween crept up fast. The night before my annual costume party, I panicked. I needed something quick, impressive, and kid-friendly. That sticky note stared at me from behind a magnet shaped like a tomato. Fine. I’d give it a shot.
The first batch came out looking like a spider had a meltdown—lopsided webs and all. But the taste? Let me tell you, even the ugly ones disappeared. By the next Halloween, I’d perfected them. Now I make these chocolate spider web cookies every year, and they’ve become the dish people ask for by name. My accountant still brings them up. “Remember those cookies?” he said last April. “My wife wants the recipe.” Maybe you’ve been there—looking for a dessert that looks fancy but takes almost no real effort. These cookies are exactly that. They’re the kind of treat that makes people think you spent hours in the kitchen when really, you just had a good idea and a sticky note.
Why You’ll Love These Chocolate Spider Web Cookies
These aren’t just another Halloween cookie. They’re the ones that make people stop mid-conversation and point at the dessert table. I’ve tested this recipe at four different parties now, and the response is always the same—wide eyes, quick grabs, and empty plates within an hour.
- Quick & Easy: Comes together in under 30 minutes, perfect for last-minute Halloween prep or when you realize tomorrow is the school party.
- Simple Ingredients: No fancy grocery trips needed. You likely already have butter, sugar, flour, and cocoa powder in your pantry.
- Perfect for Halloween Gatherings: Great for costume parties, potlucks, classroom treats, or spooky movie nights with friends.
- Crowd-Pleaser: Always gets rave reviews from kids and adults alike. I’ve watched grown adults fight over the last one.
- Unbelievably Delicious: The texture is this perfect balance—crispy edges with a soft, fudgy center. And that chocolate web on top? Pure magic.
What makes these different from every other Halloween cookie out there is the technique. Instead of piping complicated designs, you use a simple toothpick drag method that creates perfect spider webs every time. No fancy piping bags, no steady hands required. It’s the kind of recipe that makes you look like a professional baker even if you’ve never decorated a cookie in your life.
This recipe is the one that makes you close your eyes after the first bite. It’s comfort food reimagined—faster, easier, but with the same soul-soothing satisfaction. Perfect for impressing guests without stress, or turning a simple Halloween gathering into something memorable.
What Ingredients You Will Need
This recipe uses simple, wholesome ingredients to deliver bold chocolate flavor and that satisfying cookie texture without the fuss. Most of these are pantry staples, which means you can whip up a batch anytime the Halloween mood strikes.
For the Cookie Base
- Unsalted butter, softened (1 cup / 226g) – Adds richness and that melt-in-your-mouth texture. I prefer using Kerrygold for the best flavor.
- Granulated sugar (1 cup / 200g) – Provides sweetness and helps create those crispy edges.
- Large egg (1, room temperature) – Binds everything together. Cold eggs can make the dough stiff, so let yours sit out for 20 minutes.
- Vanilla extract (1 teaspoon) – Enhances the chocolate flavor. Pure vanilla is worth the splurge here.
- All-purpose flour (1 ½ cups / 190g) – Gives structure. Spoon and level your flour—don’t scoop straight from the bag or your cookies will be dense.
- Unsweetened cocoa powder (½ cup / 50g) – The star of the show. I recommend Ghirardelli or Hershey’s Special Dark for a deeper chocolate taste.
- Baking powder (½ teaspoon) – Helps the cookies spread just a little, giving you room for the web design.
- Salt (¼ teaspoon) – Balances the sweetness and makes the chocolate flavor pop.
For the Spider Web Topping
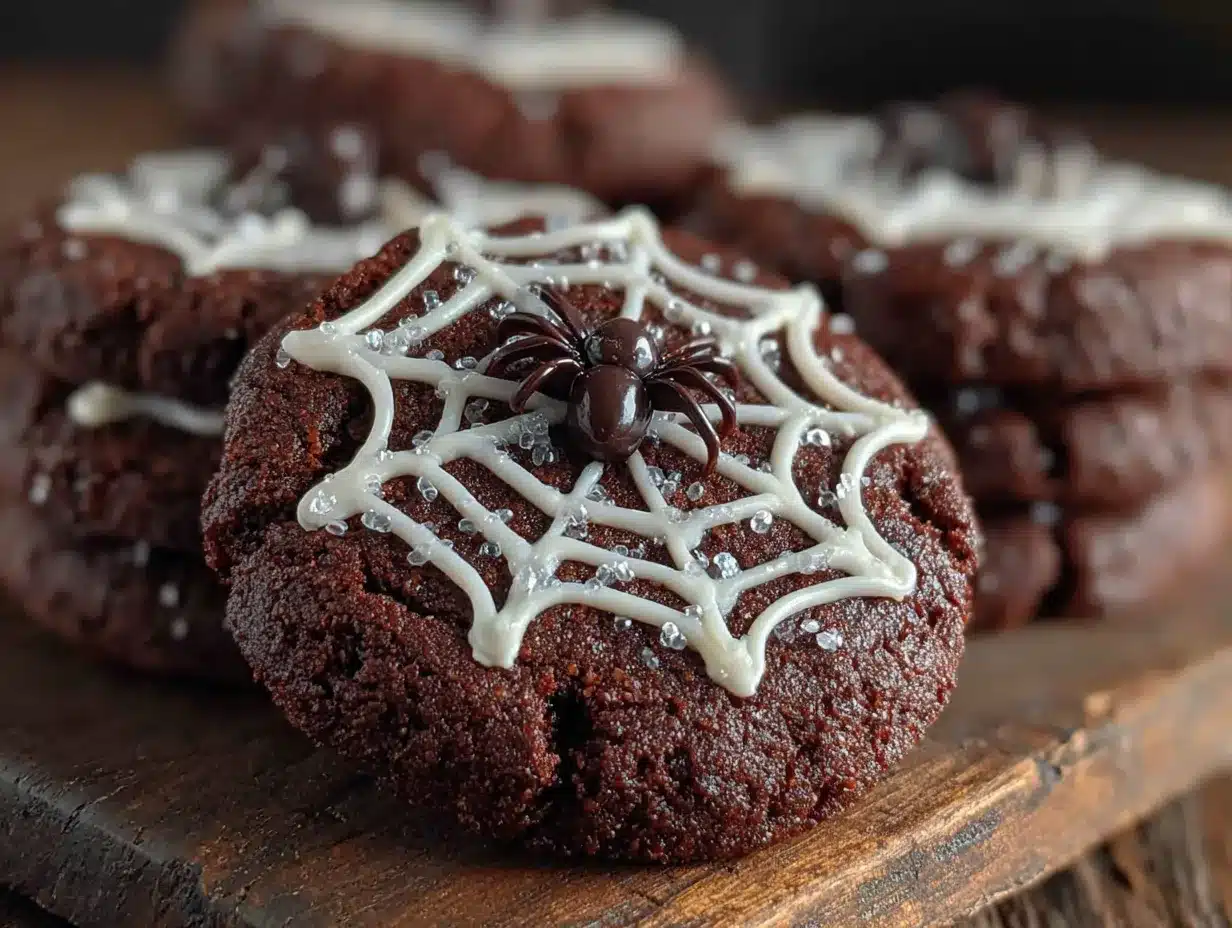
- Semi-sweet chocolate chips (1 cup / 175g) – Melts into the web design. Don’t use milk chocolate—it’s too sweet and doesn’t set as nicely.
- White chocolate chips or melting wafers (½ cup / 90g) – Creates the contrast web lines. Wilton melting wafers work best for smooth piping.
- Coconut oil or vegetable shortening (1 teaspoon) – Helps the chocolate melt smoothly and sets with a nice shine.
Ingredient Tips from My Kitchen
For the cocoa powder, look for one that’s dark and rich. I’ve tried budget brands, and honestly, the difference is noticeable. Your cookies will taste flat if the cocoa is low-quality. For the white chocolate, avoid white chocolate chips that have that waxy coating—they don’t melt smoothly. If you’re dairy-free, use vegan butter and dairy-free chocolate chips. I tested this with Earth Balance and Enjoy Life chocolate chips, and it worked perfectly.
Equipment Needed
- Large mixing bowl – For creaming butter and sugar. A glass or ceramic bowl works best.
- Electric hand mixer or stand mixer – Makes creaming easier, but you can do it by hand with a wooden spoon if you have strong arms.
- Baking sheets (2) – Line them with parchment paper for easy cleanup.
- Parchment paper or silicone baking mats – Prevents sticking and helps cookies bake evenly.
- Small microwave-safe bowls (2) – For melting the chocolate chips and white chocolate separately.
- Toothpicks – The secret weapon for creating the spider web design. Regular wooden toothpicks work best.
- Small piping bag or zip-top bag – For drizzling the white chocolate. A zip-top bag with the corner snipped off works perfectly.
- Wire cooling rack – Lets the cookies cool completely before decorating.
- Measuring cups and spoons – For accuracy. Baking is a science, after all.
Preparation Method
- Preheat your oven to 350°F (175°C). Line two baking sheets with parchment paper. This is non-negotiable—parchment prevents sticking and makes cleanup a breeze. I’ve forgotten this step before, and scraping cookies off a bare pan is not fun.
- Cream the butter and sugar together. In a large mixing bowl, beat 1 cup of softened butter with 1 cup of granulated sugar until light and fluffy. This takes about 2-3 minutes with an electric mixer. The mixture should look pale and slightly increased in volume. Scrape down the sides of the bowl halfway through.
- Add the egg and vanilla. Crack in 1 large egg and add 1 teaspoon of vanilla extract. Beat until just combined. Don’t overmix here—you don’t want to incorporate too much air.
- Mix the dry ingredients separately. In a medium bowl, whisk together 1 ½ cups all-purpose flour, ½ cup cocoa powder, ½ teaspoon baking powder, and ¼ teaspoon salt. This ensures the baking powder is evenly distributed.
- Combine wet and dry ingredients. Gradually add the dry mixture to the wet mixture, mixing on low speed. Stop as soon as the flour disappears. The dough will be soft and slightly sticky—that’s normal.
- Chill the dough (optional but recommended). If your kitchen is warm, pop the dough in the fridge for 15 minutes. This prevents the cookies from spreading too much in the oven. I skipped this once on a hot summer day, and my cookies turned into flat chocolate pancakes.
- Scoop and shape the cookies. Use a tablespoon or cookie scoop to portion the dough into 1-inch balls. Place them on the prepared baking sheets, spacing them about 2 inches apart. Gently flatten each ball slightly with the palm of your hand—this gives you a nice surface for the web design.
- Bake for 8-10 minutes. The cookies should look set around the edges but still soft in the center. They’ll continue baking on the hot pan after you pull them out. Don’t overbake! Slightly underdone cookies are better for the web design.
- Cool completely on the baking sheet. Let the cookies sit on the pan for 5 minutes, then transfer them to a wire cooling rack. Wait until they’re completely cool before decorating. Warm cookies will melt your chocolate design into a puddle.
- Melt the semi-sweet chocolate. Place 1 cup of semi-sweet chocolate chips in a microwave-safe bowl with ½ teaspoon of coconut oil. Microwave in 30-second intervals, stirring between each, until smooth. Let it cool slightly—it should be warm but not hot.
- Spread the chocolate base. Using a small spatula or the back of a spoon, spread a thin layer of melted chocolate over each cookie. Don’t go all the way to the edges—leave a small border for that rustic look.
- Melt the white chocolate. In another bowl, melt ½ cup of white chocolate chips with ½ teaspoon of coconut oil using the same microwave method. Transfer to a small piping bag or zip-top bag with the corner snipped off.
- Create the spider web design. Pipe three to four concentric circles of white chocolate onto each cookie, starting from the center and working outward. Then, drag a toothpick from the center through the circles to the edge, creating the web lines. Repeat this around the cookie, spacing the drags evenly. Wipe the toothpick clean between each drag for crisp lines.
- Let the chocolate set. Allow the cookies to sit at room temperature for about 30 minutes, or pop them in the fridge for 15 minutes if you’re impatient like me. The chocolate should be firm to the touch before serving.
Cooking Tips & Techniques
The toothpick drag is the trickiest part, and honestly, I messed it up my first three times. The secret? Don’t press too hard. You want the toothpick to barely graze the surface of the white chocolate, just skimming through the circles. If you press down, you’ll drag the chocolate base with it and end up with a muddy mess.
Another thing I learned the hard way—temperature matters. If your kitchen is too warm, the chocolate won’t set properly. I made these during a heatwave last summer, and the webs kept sliding off. Pop the decorated cookies in the fridge for a few minutes to help them firm up. Just don’t leave them in there too long, or condensation will ruin the shine.
For consistent cookie sizes, use a cookie scoop. I have this cheap one from the grocery store that I’ve used for years, and it makes all the difference. Uneven cookies bake unevenly, which means some will be too hard for the web design and others too soft.
One more tip—don’t skip the coconut oil in the chocolate. It helps the chocolate melt smoothly and gives it that glossy finish that makes the webs look professional. I’ve tried melting chocolate without it, and the texture was grainy and dull.
Variations & Adaptations
Gluten-Free Version
Swap the all-purpose flour with a 1:1 gluten-free baking flour. I’ve used Bob’s Red Mill, and the cookies turned out slightly crumblier but still delicious. Add an extra tablespoon of butter to help with moisture.
Vegan Adaptation
Use vegan butter and a flax egg (1 tablespoon ground flaxseed mixed with 3 tablespoons water). For the chocolate, use dairy-free semi-sweet and white chocolate chips. Enjoy Life makes great options that melt well.
Spider Web Color Variations
For a more colorful Halloween spread, use colored melting wafers instead of white chocolate. Orange webs on dark chocolate cookies look amazing for fall parties. I did this for a Thanksgiving gathering once, and everyone thought they were pumpkins.
Extra Spooky Touch
Add a small candy spider on each web. Wilton makes little plastic spiders that look creepy but are food-safe. Or use black licorice strings to create actual spider legs sticking out from the center.
Serving & Storage Suggestions
These chocolate spider web cookies are best served at room temperature, which means you can set them out on the dessert table and let guests graze. Arrange them on a dark platter or black cake stand for maximum visual impact—the contrast makes the webs pop.
For a Halloween party spread, pair them with caramel apples, pumpkin cupcakes, and a bowl of candy corn. They also go surprisingly well with a cup of hot apple cider or a warm mug of spiced chai. If you’re serving adults, a glass of red wine or a dark stout beer complements the chocolate beautifully.
Store leftover cookies in an airtight container at room temperature for up to 5 days. Layer them between sheets of parchment paper to prevent the webs from sticking together. Do not refrigerate them unless absolutely necessary—the chocolate can develop condensation and lose its shine.
These cookies freeze beautifully. Place them in a single layer in a freezer-safe container, separated by parchment paper. They’ll keep for up to 3 months. To serve, thaw them at room temperature for about 20 minutes. The chocolate webs might look a little faded after freezing, but the taste is still incredible.
The flavors actually deepen after a day or two. I’ve noticed the chocolate base becomes richer and more fudgy, making these cookies even better as leftovers. Just keep them away from direct sunlight, or the white chocolate can discolor.
Nutritional Information & Benefits
Each cookie (based on a batch of 24) contains approximately 180 calories, 10g of fat, 22g of carbohydrates, 2g of protein, and 14g of sugar. These are estimates and will vary based on ingredient brands and exact measurements.
While these are definitely a treat, the cocoa powder does offer some health benefits. Dark cocoa is rich in antioxidants called flavonoids, which can support heart health and reduce inflammation. The butter provides vitamin A, and the egg adds a small amount of protein and B vitamins.
For those with dietary restrictions, this recipe contains gluten, dairy, and eggs. The gluten-free and vegan variations above work well for accommodating different needs. If you’re watching your sugar intake, you can reduce the granulated sugar to ¾ cup, though the cookies will be slightly less tender.
I’m not a nutritionist, but I believe in balance. These cookies are meant for celebration, not daily consumption. Enjoy them at your Halloween party, share them with friends, and don’t stress about the numbers. Food is about joy, connection, and a little bit of chocolate magic.
Conclusion
These chocolate spider web cookies have become my go-to Halloween dessert for one simple reason—they work. They look impressive, taste incredible, and come together without any stress. That sticky note from my accountant turned out to be the best baking advice I ever received, and now I’m passing it along to you.
I’d love to hear how yours turn out. Did you add candy spiders? Try a different color combination? Make them gluten-free for a friend? Drop a comment below and share your creation. Tag me in your photos on social media—I always love seeing your versions. And if you have a recipe from an unexpected source, tell me about it. Who knew accountants had such good cookie advice?
Happy Halloween, and happy baking! May your cookies be spooky, your webs be perfect, and your dessert table be empty by the end of the night.
Frequently Asked Questions
Can I make the dough ahead of time?
Absolutely. Prepare the dough, wrap it tightly in plastic wrap, and refrigerate for up to 3 days. Let it sit at room temperature for 10 minutes before scooping and baking. You can also freeze the dough balls for up to 3 months—just bake them straight from frozen, adding 2 minutes to the baking time.
Why did my white chocolate seize up?
White chocolate is sensitive to heat and moisture. If even a drop of water gets into the bowl, it can seize into a grainy, clumpy mess. Make sure your bowl and utensils are completely dry. Also, microwave in short bursts and stir frequently. If it does seize, stir in a teaspoon of coconut oil to try to save it.
Can I use a different type of chocolate for the web?
Yes, but the contrast is best with white chocolate on dark cookies. You could try milk chocolate on a lighter cookie base, but the web effect won’t be as dramatic. For a reverse look, use a vanilla cookie base with dark chocolate webs.
How do I transport these cookies without ruining the webs?
Place them in a single layer in a shallow container with a tight-fitting lid. If you need to stack them, separate each layer with a sheet of parchment paper. Avoid stacking more than two layers, as the weight can crack the chocolate webs. For parties, I transport them on the baking sheet covered with plastic wrap.
My cookies spread too much in the oven. What went wrong?
This usually happens when the butter is too soft or the dough isn’t chilled enough. Next time, chill the dough for at least 30 minutes before baking. Also, make sure your butter is softened but not melted—if it’s greasy, your cookies will spread. And always use room temperature eggs.
Pin This Recipe!
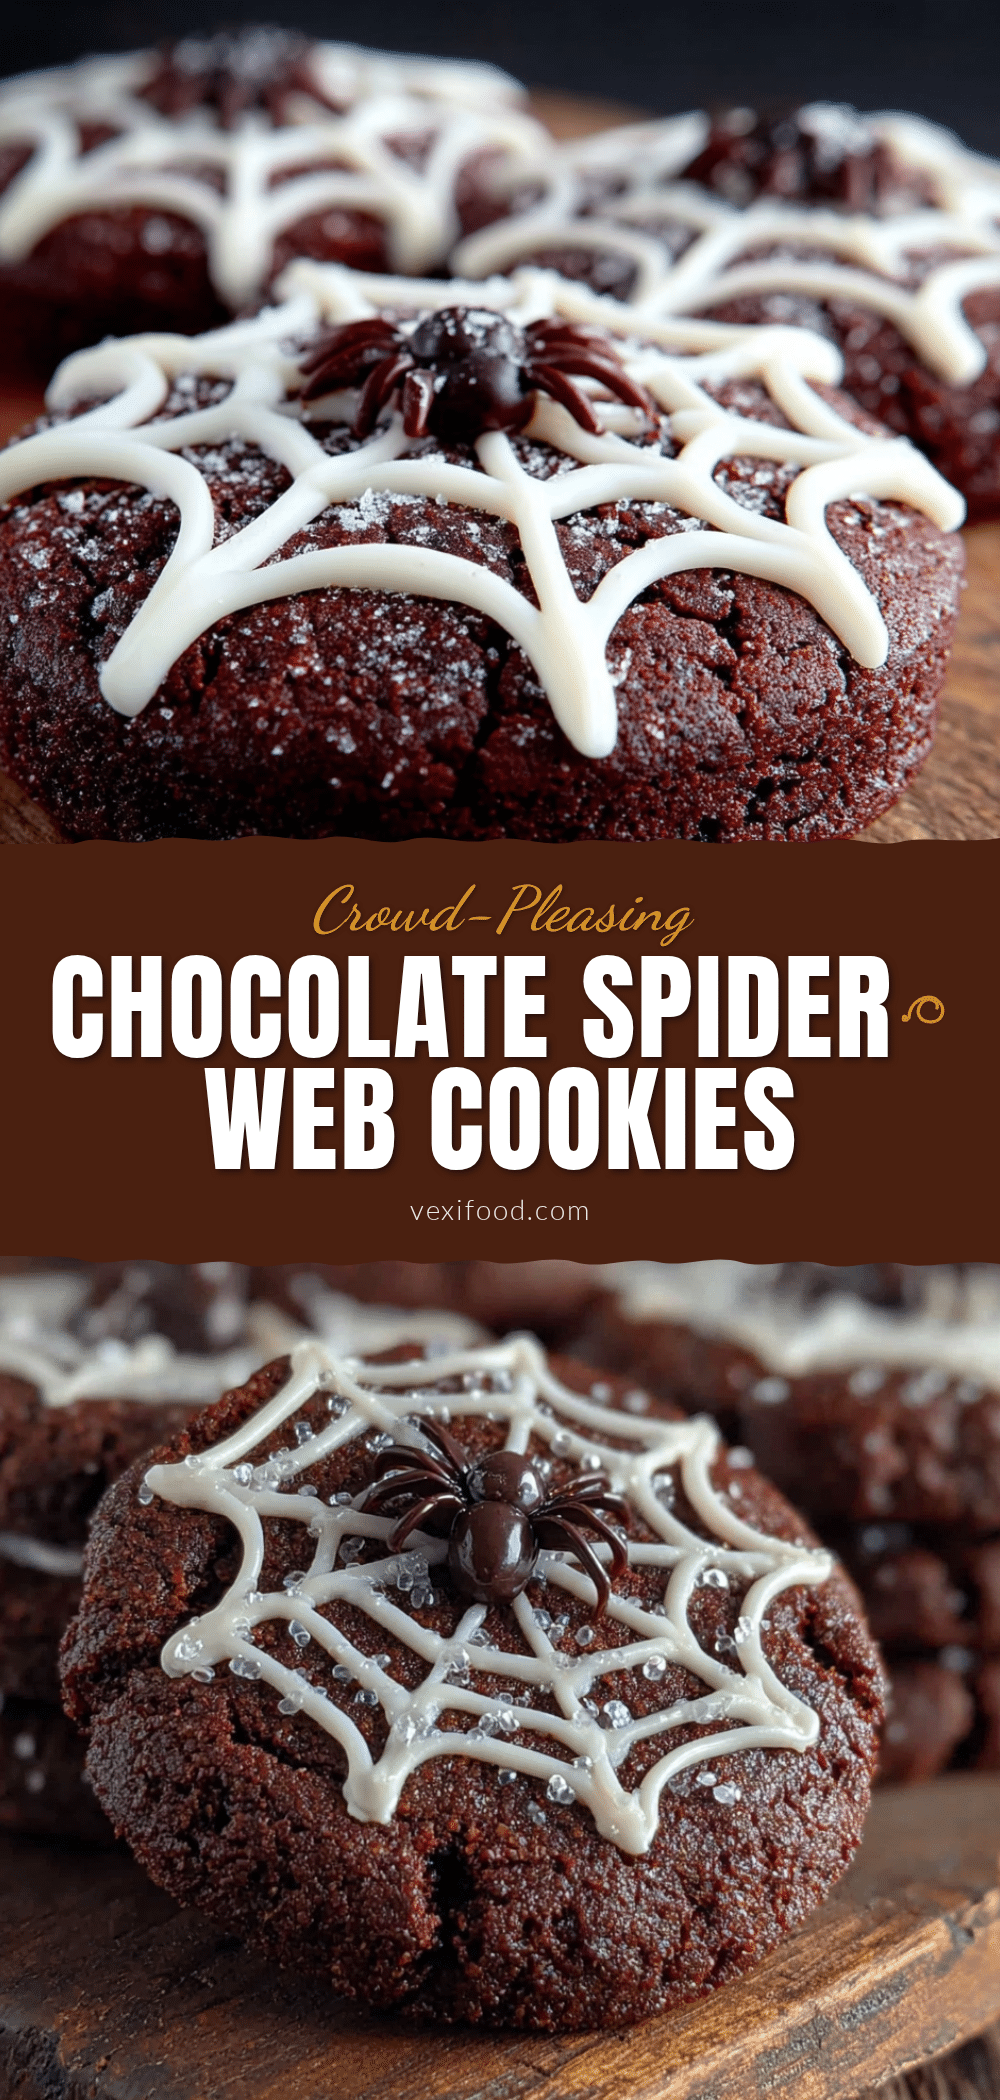
Chocolate Spider Web Cookies: Easy Halloween Dessert
These chocolate spider web cookies are a quick and easy Halloween treat that looks impressive with minimal effort. Using a simple toothpick drag method, you can create perfect spider webs on fudgy chocolate cookies that are sure to be a crowd-pleaser at any spooky gathering.
- Prep Time: 15 minutes
- Cook Time: 10 minutes
- Total Time: 25 minutes
- Yield: 24 servings 1x
- Category: Dessert
- Cuisine: American
Ingredients
- 1 cup (226g) unsalted butter, softened
- 1 cup (200g) granulated sugar
- 1 large egg, room temperature
- 1 teaspoon vanilla extract
- 1 ½ cups (190g) all-purpose flour
- ½ cup (50g) unsweetened cocoa powder
- ½ teaspoon baking powder
- ¼ teaspoon salt
- 1 cup (175g) semi-sweet chocolate chips
- ½ cup (90g) white chocolate chips or melting wafers
- 1 teaspoon coconut oil or vegetable shortening
Instructions
- Preheat your oven to 350°F (175°C). Line two baking sheets with parchment paper.
- In a large mixing bowl, beat 1 cup of softened butter with 1 cup of granulated sugar until light and fluffy, about 2-3 minutes with an electric mixer. Scrape down the sides of the bowl halfway through.
- Add 1 large egg and 1 teaspoon of vanilla extract. Beat until just combined.
- In a medium bowl, whisk together 1 ½ cups all-purpose flour, ½ cup cocoa powder, ½ teaspoon baking powder, and ¼ teaspoon salt.
- Gradually add the dry mixture to the wet mixture, mixing on low speed until just combined. The dough will be soft and slightly sticky.
- If your kitchen is warm, chill the dough in the fridge for 15 minutes to prevent spreading.
- Scoop the dough into 1-inch balls and place them on the prepared baking sheets, spacing them about 2 inches apart. Gently flatten each ball slightly with the palm of your hand.
- Bake for 8-10 minutes, until the edges are set but the centers are still soft. Cool on the baking sheet for 5 minutes, then transfer to a wire rack to cool completely.
- Melt 1 cup of semi-sweet chocolate chips with ½ teaspoon of coconut oil in a microwave-safe bowl in 30-second intervals, stirring between each, until smooth. Let cool slightly.
- Spread a thin layer of melted chocolate over each cooled cookie, leaving a small border around the edges.
- Melt ½ cup of white chocolate chips with ½ teaspoon of coconut oil using the same method. Transfer to a small piping bag or zip-top bag with the corner snipped off.
- Pipe 3-4 concentric circles of white chocolate onto each cookie, starting from the center and working outward.
- Drag a toothpick from the center through the circles to the edge, creating web lines. Repeat around the cookie, spacing the drags evenly. Wipe the toothpick clean between each drag.
- Let the chocolate set at room temperature for about 30 minutes, or refrigerate for 15 minutes, until firm.
Notes
For the best results, use high-quality cocoa powder like Ghirardelli or Hershey’s Special Dark. The toothpick drag should be light—barely graze the surface of the white chocolate to avoid dragging the chocolate base. If your kitchen is warm, refrigerate the decorated cookies for a few minutes to help the chocolate set. Store in an airtight container at room temperature for up to 5 days, or freeze for up to 3 months.
Nutrition
- Serving Size: 1 cookie
- Calories: 180
- Sugar: 14
- Sodium: 75
- Fat: 10
- Saturated Fat: 6
- Carbohydrates: 22
- Fiber: 2
- Protein: 2
Keywords: Halloween cookies, spider web cookies, chocolate cookies, easy Halloween dessert, spooky cookies, chocolate spider web, Halloween baking