Love this? Save it for later!
Share the inspiration with your friends
This was supposed to be my famous pumpkin loaf—the one I bake every October without fail. You know the one. It’s the recipe I’ve perfected over six autumns, the one my neighbor Carla texts me about the second the leaves start turning. But last Tuesday, I was in a rush. I had thirty minutes before picking up my son from school, the oven was preheating, and I grabbed the air fryer basket instead of the loaf pan without even thinking. I mean, honestly, who does that? I was already annoyed at myself—the batter was mixed, the kitchen smelled like cinnamon and nutmeg, and I was staring at this weird little basket thinking, well, this is going to be a disaster.
I poured the batter in anyway. Not gracefully either—it glopped over the edge a little, and I wiped it with my thumb like some kind of maniac. I set the timer for twenty-five minutes, fully expecting to open it to a sad, undercooked puddle. But something happened in that little air fryer. The heat wrapped around it differently—faster, more intense, almost like a tiny convection oven having a really good day. When the timer beeped, I pulled out this perfectly domed, golden-brown loaf with edges that were somehow crispier and more caramelized than my oven version. I stood there in my messy kitchen, holding the basket, and just laughed. I had been making this bread the hard way for years.
That first bite was a revelation. The outside had this delicate crunch—like the best part of a muffin top, but across the whole slice. The inside stayed impossibly soft, almost custard-like, with pockets of melted chocolate that had stayed gooey instead of sinking to the bottom. My son came home, grabbed a piece, and said, “Mom, this is better.” Out of the mouths of six-year-olds, right? I’ve made it four times since that accidental Tuesday, and I’m honestly not going back to the oven. This cozy air fryer pumpkin chocolate chip bread is the happy accident that rewrote my fall baking routine—and it might just rewrite yours too.
Why You’ll Love This Recipe
Let’s be real for a second—pumpkin bread is great, but it can be a commitment. You have to wait for the oven to heat up, then wait another hour for it to bake, and by the time it’s cool enough to slice, you’re already hangry. This air fryer version changes the game completely. It’s faster, it’s easier, and honestly, the texture is better. I’m not exaggerating when I say I’ve converted three friends already.
- Quick & Easy: From mixing bowl to plate in under 40 minutes. The air fryer preheats in three minutes flat—no standing around waiting for the oven to hit 350°F.
- Simple Ingredients: You probably have everything in your pantry right now. Canned pumpkin, flour, sugar, eggs, chocolate chips—nothing fancy, nothing expensive.
- Perfect for Cozy Season: This bread screams fall. It’s the kind of thing you make on a rainy Sunday afternoon when you’re wearing your favorite sweater and the house smells like a bakery.
- Crowd-Pleaser: I brought this to a neighborhood coffee morning and got asked for the recipe by three different people. Kids devour it. Adults pretend to be polite about it while reaching for seconds.
- Unbelievably Delicious: The air fryer creates this magical contrast between a slightly crispy, caramelized crust and a soft, tender crumb. The chocolate chips stay melty in a way they never do in a traditional loaf pan.
What makes this recipe different from every other pumpkin bread out there? It’s the method. The air fryer’s rapid air circulation cooks the bread more evenly and more quickly than a conventional oven. That means the outside gets golden and slightly crisp while the inside stays incredibly moist. Plus, because the cooking time is shorter, the pumpkin flavor stays fresh and bright instead of baking into something muted and flat. This isn’t just another pumpkin bread recipe—it’s the version you’ll actually want to make on a Tuesday afternoon when you’re craving something cozy but don’t have an hour to wait.
What Ingredients You Will Need
This recipe uses simple, wholesome ingredients to deliver bold pumpkin flavor and satisfying texture without the fuss. Most of these are pantry staples, especially if you’ve done any fall baking before. The beauty of this bread is that it doesn’t require anything weird—no specialty flours, no obscure extracts, just good old-fashioned baking ingredients that work together beautifully.
- 1 ¾ cups all-purpose flour (210 grams) — Spoon and level it for the best texture. Too much flour makes the bread dense, and we want it soft and tender.
- 1 teaspoon baking soda — This gives the bread its rise. Make sure it’s fresh—if it doesn’t fizz when you test it in vinegar, toss it and get a new box.
- ½ teaspoon baking powder — Works with the baking soda to create that perfect domed top.
- 1 ½ teaspoons pumpkin pie spice — I use the store-bought blend from McCormick, but homemade works great too. It’s just cinnamon, nutmeg, ginger, and allspice mixed together.
- 1 teaspoon ground cinnamon — Because you can never have too much cinnamon in pumpkin bread. I’m partial to Saigon cinnamon for its warmer, spicier flavor.
- ½ teaspoon salt — Don’t skip this. Salt balances the sweetness and makes the pumpkin flavor pop.
- 1 cup canned pumpkin puree (244 grams) — Not pumpkin pie filling! Make sure you grab the 100% pure pumpkin. Libby’s is my go-to brand—it has the right moisture content and consistent texture.
- ½ cup granulated sugar (100 grams) — Adds sweetness and helps with browning in the air fryer.
- ½ cup packed light brown sugar (100 grams) — The molasses in brown sugar adds depth and keeps the bread moist. Dark brown sugar works too if that’s what you have.
- 2 large eggs, room temperature — Cold eggs can seize the batter. Leave them on the counter for 15 minutes, or float them in warm water for 5 minutes if you’re in a hurry.
- ⅓ cup vegetable oil (80 ml) — Keeps the bread tender without making it greasy. Canola or avocado oil both work well. Melted coconut oil is fine too, but make sure it’s cooled slightly.
- 1 teaspoon vanilla extract — Enhances all the warm spices and rounds out the flavor.
- 1 cup semi-sweet chocolate chips (175 grams) — I prefer Ghirardelli’s mini chips because they distribute more evenly and don’t all sink to the bottom. Regular chips work fine though—just toss them in a tablespoon of flour before folding them in.
Equipment Needed
You don’t need a lot of fancy equipment for this recipe, which is part of why I love it. Here’s what you’ll need:
- Air fryer — Any basket-style air fryer works. I use a 6-quart Cosori, but I’ve also tested this in a 5.8-quart Ninja and it came out perfectly. The key is making sure the loaf pan fits inside with room for air to circulate.
- 6×3-inch loaf pan — This is smaller than a standard loaf pan. You want one that fits inside your air fryer basket. I got mine on Amazon for like eight dollars—it’s nonstick and has held up great.
- Mixing bowls — Two medium bowls, one for dry ingredients and one for wet.
- Whisk — For mixing the dry ingredients together and ensuring there are no lumps.
- Rubber spatula — For folding the batter together without overmixing. A wooden spoon works too, but the spatula gets every last bit of batter.
- Measuring cups and spoons — Dry measuring cups for flour and sugar, liquid measuring cup for oil. Yes, it matters—using a liquid cup for flour compacts it and changes the texture.
- Kitchen scale (optional but recommended) — Weighing ingredients is more accurate and leads to more consistent results. I use a simple OXO scale and it’s worth every penny.
- Parchment paper — Line the loaf pan with a sling of parchment paper so you can lift the bread out easily after baking.
- Cooling rack — Lets air circulate under the bread so the bottom doesn’t get soggy.
Preparation Method
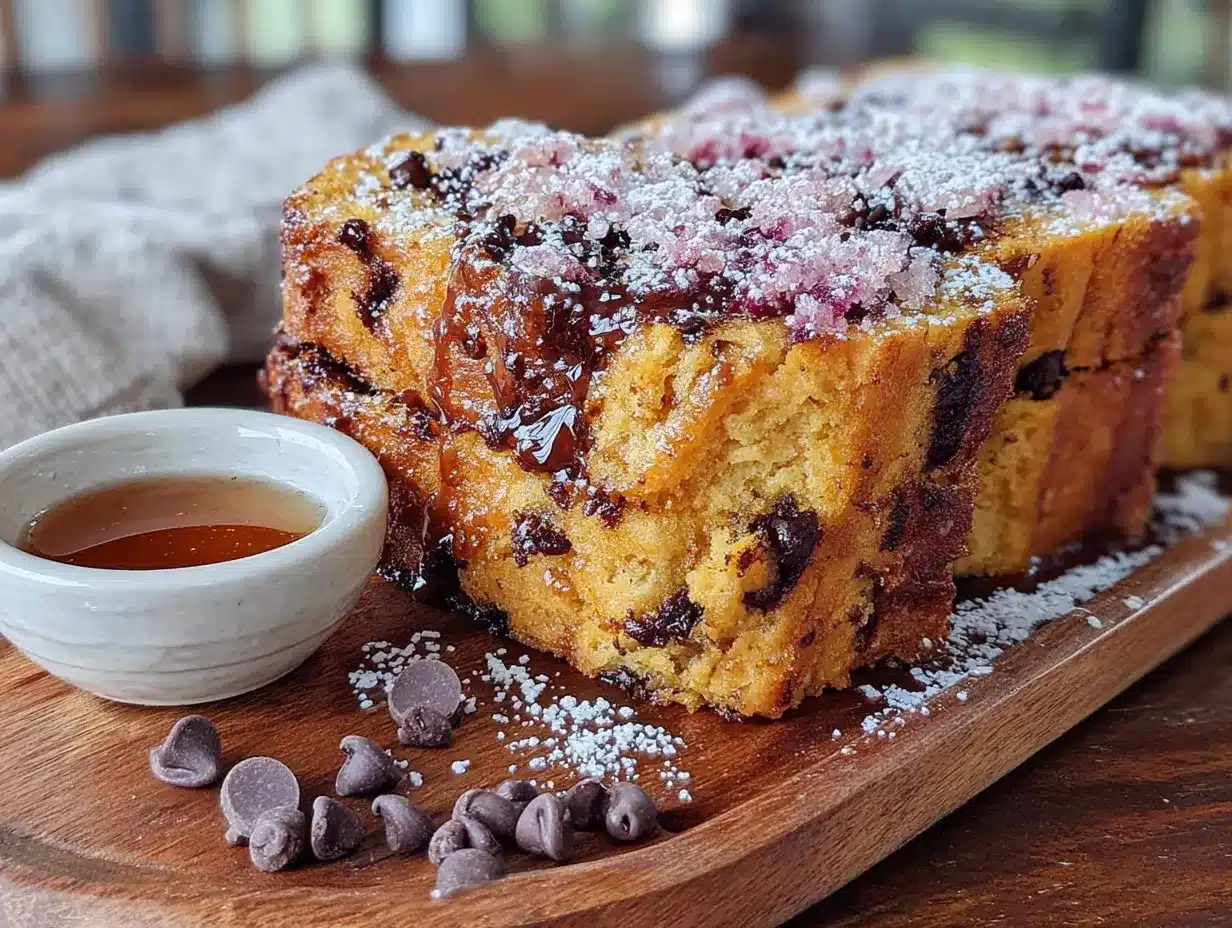
This recipe comes together quickly, so I recommend reading through all the steps before you start. Trust me—I learned the hard way that scrambling for an ingredient mid-mix is not fun. Here’s exactly how to make it:
- Preheat your air fryer to 320°F (160°C). Most air fryers need about 3 minutes to preheat. While it’s heating up, line your 6×3-inch loaf pan with a parchment paper sling. To do this, cut a strip of parchment that’s about 7 inches wide and 14 inches long. Press it into the pan so the excess hangs over the long sides—this will be your handle for lifting the bread out later.
- Mix the dry ingredients. In a medium bowl, whisk together the flour, baking soda, baking powder, pumpkin pie spice, cinnamon, and salt. Whisk for about 15 seconds—this aerates the flour and distributes the leavening agents evenly. Set the bowl aside.
- Combine the wet ingredients. In a larger bowl, whisk together the pumpkin puree, granulated sugar, brown sugar, eggs, vegetable oil, and vanilla extract. Whisk until the mixture is smooth and uniform—about 30 seconds. The brown sugar should be fully dissolved, with no lumps. The batter will look glossy and smell amazing at this point.
- Fold the dry ingredients into the wet. Pour the dry ingredients over the wet mixture. Use your rubber spatula to fold everything together with gentle, sweeping motions. Scrape the bottom of the bowl to make sure no flour is hiding down there. Stop as soon as you no longer see streaks of flour—overmixing will make the bread tough. A few small lumps are totally fine.
- Fold in the chocolate chips. Sprinkle the chocolate chips over the batter and fold them in with just 3 or 4 strokes. If you’re worried about them sinking, toss the chips in a tablespoon of flour before adding them. This creates friction that helps them stay suspended in the batter.
- Pour the batter into the prepared pan. Use your spatula to scrape every last bit in. Spread the batter evenly with the back of the spatula—it should come about two-thirds of the way up the pan. Tap the pan gently on the counter 2 or 3 times to release any air bubbles.
- Place the pan in the air fryer basket. Carefully set the loaf pan in the center of the basket. Make sure there’s at least an inch of space around all sides for air to circulate. If your air fryer is small, you might need to remove the center divider if it has one.
- Bake at 320°F for 25 minutes. Set the timer and resist the urge to open the basket. I know it’s tempting, but every time you open it, the temperature drops and the bread can sink in the middle.
- Check for doneness. After 25 minutes, open the basket and insert a toothpick into the center of the bread. If it comes out clean or with just a few moist crumbs, it’s done. If the toothpick has wet batter on it, bake for another 3 to 5 minutes and check again. The top should be deep golden brown and slightly domed.
- Cool in the pan for 10 minutes. Set the pan on a cooling rack and let it rest. This allows the bread to set so it doesn’t fall apart when you lift it out. After 10 minutes, use the parchment sling to lift the bread out of the pan and transfer it to the cooling rack.
- Cool completely before slicing. I know this is the hardest part—the smell is intoxicating—but slicing warm bread will make it crumble. Let it cool for at least 30 minutes. If you can wait a full hour, the texture will be perfect.
Cooking Tips & Techniques
I’ve made this bread about a dozen times now, and I’ve learned a few things the hard way. Here are my best tips for getting perfect results every time:
Don’t overfill the pan. The bread rises quite a bit in the air fryer, and if your pan is too full, the batter will spill over the edges and make a mess. Fill it no more than two-thirds full. If you have extra batter, make a couple of mini muffins on the side—they bake in about 10 minutes at 320°F.
Check your air fryer’s temperature accuracy. Not all air fryers run at the same temperature. I’ve tested this recipe in three different models, and one of them ran about 25°F hot. If you notice your bread browning too quickly on top but still raw in the middle, reduce the temperature by 10 to 15 degrees next time. You can also tent the top with a piece of foil halfway through baking.
Room temperature eggs matter. I learned this lesson the frustrating way. Cold eggs can cause the batter to seize up slightly, making the bread denser. Leave your eggs on the counter for 15 minutes before starting, or place them in a bowl of warm water for 5 minutes. It makes a real difference in the final texture.
Let the batter rest for 5 minutes before baking. This allows the flour to fully hydrate and the leavening agents to start working. You’ll get a more even rise and a tenderer crumb. I started doing this after a particularly dense batch, and it’s been a game-changer.
Use mini chocolate chips if you can. Regular chocolate chips tend to sink to the bottom of the loaf because they’re heavy. Mini chips stay suspended in the batter much better, giving you chocolate in every bite. If you only have regular chips, toss them in a tablespoon of flour before adding them to the batter—this creates friction that helps them stay put.
Variations & Adaptations
One of the best things about this recipe is how adaptable it is. Here are some variations I’ve tried and loved:
Gluten-Free Version: Substitute the all-purpose flour with a 1:1 gluten-free baking flour blend. I’ve used Bob’s Red Mill 1-to-1 Baking Flour with great results. The texture is slightly more delicate, so be extra gentle when folding the batter. Add an extra tablespoon of oil to compensate for the lack of gluten structure.
Dairy-Free Option: This recipe is already dairy-free if you use dairy-free chocolate chips. Enjoy Life and Hu Kitchen both make excellent options. Everything else in the recipe—pumpkin, oil, eggs—is naturally dairy-free, so you’re good to go.
Nutty Crunch: Fold in ½ cup of chopped pecans or walnuts along with the chocolate chips. Toast them first in a dry skillet over medium heat for 3 to 4 minutes to bring out their flavor. The crunch adds a lovely contrast to the soft bread.
Spice It Up: Add ¼ teaspoon of ground ginger and a pinch of ground cloves to the spice mix for a more complex flavor profile. This version is especially good around Thanksgiving—it pairs beautifully with a cup of spiced chai.
Lower Sugar Version: Reduce the granulated sugar to ¼ cup and the brown sugar to ¼ cup. The bread will be less sweet, but the pumpkin flavor will shine through more. Add an extra ¼ teaspoon of cinnamon to compensate for the lost sweetness. This version is great for breakfast with a smear of butter.
Pumpkin Chocolate Swirl: Reserve ¼ cup of the batter and mix it with 2 tablespoons of cocoa powder. Drop spoonfuls of the chocolate batter into the pan and swirl it through with a knife before baking. It makes for a stunning presentation when sliced.
Serving & Storage Suggestions
This bread is incredibly versatile when it comes to serving. Here’s how I like to enjoy it:
Serve warm or at room temperature. Warm slices are perfect with a pat of butter melting into the crumb. At room temperature, the chocolate chips firm up slightly, giving the bread a different but equally delicious texture. Both ways are wonderful—it really depends on your mood.
Pair with a hot beverage. A cup of coffee, a latte, or a mug of spiced tea is the perfect companion. The bread’s sweetness and spice complement the bitterness of coffee beautifully. For an extra treat, serve it with a dollop of whipped cream and a sprinkle of cinnamon.
Make it a dessert. Warm a slice in the microwave for 15 seconds, top it with vanilla ice cream, and drizzle with caramel sauce. It’s an easy, impressive dessert that comes together in minutes. I served this at a dinner party last week and everyone thought I’d spent hours on it.
Storage: Store the bread in an airtight container at room temperature for up to 4 days. The moisture from the pumpkin keeps it soft, but the chocolate chips help it stay fresh. If your kitchen is warm, you can refrigerate it—just let slices come to room temperature before eating for the best texture.
Freezing: This bread freezes beautifully. Wrap the cooled loaf tightly in plastic wrap, then in a layer of aluminum foil. Freeze for up to 3 months. To thaw, leave it on the counter overnight, or microwave individual slices for 20 to 30 seconds. The flavor actually improves after freezing—the spices meld together and become more pronounced.
Reheating: For that just-baked experience, reheat slices in the air fryer at 300°F for 2 to 3 minutes. The outside gets slightly crispy again while the inside stays soft. You can also use a toaster oven or a regular oven at 350°F for 5 minutes.
Nutritional Information & Benefits
Here’s the nutritional breakdown for one slice (based on 8 slices per loaf):
- Calories: 285
- Total Fat: 12g
- Saturated Fat: 4g
- Cholesterol: 47mg
- Sodium: 280mg
- Total Carbohydrates: 40g
- Dietary Fiber: 3g
- Sugars: 24g
- Protein: 5g
This bread isn’t health food, but it does have some redeeming qualities. Pumpkin is packed with vitamin A—one serving provides about 170% of your daily needs. It’s also a good source of fiber and antioxidants, which support eye health and immune function. The chocolate chips add a touch of magnesium and iron, so you can feel slightly virtuous while enjoying a slice.
Dietary Considerations: This recipe is nut-free (if you skip the optional nuts), can be made dairy-free with the right chocolate chips, and can be adapted to be gluten-free. It contains eggs and wheat, so it’s not suitable for vegan or celiac diets without modifications.
I personally love that this bread feels indulgent without being overly heavy. It’s the kind of treat you can enjoy with your morning coffee or as an after-dinner dessert without feeling like you’ve derailed your whole day. Balance, right?
Conclusion
If you’ve never made bread in an air fryer, I hope this recipe convinces you to try it. The texture is genuinely better than oven-baked bread—crispier on the outside, softer on the inside, and ready in half the time. It’s the kind of recipe that makes you feel like a kitchen genius, even though it’s embarrassingly simple.
I love this bread because it captures everything I want from fall baking: warm spices, cozy flavors, and that feeling of accomplishment when you pull something beautiful out of the kitchen. It’s forgiving enough for beginners and satisfying enough for experienced bakers. Plus, it makes your whole house smell like a pumpkin spice candle, which is never a bad thing.
I’d love to hear how yours turns out! Did you try a variation? Did your family fight over the last slice? Drop a comment below and let me know. And if you’re looking for more cozy fall recipes, check out my cozy pumpkin soup or these air fryer apple chips for another quick treat. Happy baking, friends!
Frequently Asked Questions
Can I use a regular loaf pan in my air fryer?
Only if it fits! Most standard 9×5-inch loaf pans are too large for basket-style air fryers. You need a 6×3-inch pan that leaves at least an inch of space around all sides for air circulation. If your air fryer is on the smaller side, you can also use a 7-inch round cake pan or even ramekins for individual servings.
Why is my pumpkin bread dense and heavy?
This usually happens for one of three reasons: too much flour, overmixing the batter, or opening the air fryer too often during baking. Make sure you’re measuring flour correctly (spoon and level, don’t scoop), fold the batter just until combined, and resist the urge to peek until the 25-minute mark.
Can I use fresh pumpkin instead of canned?
Yes, but you’ll need to roast and puree it first, then drain off any excess liquid. Fresh pumpkin has more water than canned, so the bread can turn out soggy if you don’t squeeze out the moisture. I recommend wrapping the puree in a clean kitchen towel and wringing it out before using.
How do I keep the chocolate chips from sinking to the bottom?
Toss the chocolate chips in 1 tablespoon of flour before folding them into the batter. The flour coating creates friction that helps the chips stay suspended. Using mini chocolate chips instead of regular-sized ones also helps because they’re lighter and distribute more evenly.
Can I make this recipe into muffins instead?
Absolutely! Grease a muffin tin or line it with paper liners. Fill each cup about two-thirds full. Bake at 320°F for 12 to 15 minutes, or until a toothpick inserted in the center comes out clean. You’ll get about 8 to 10 muffins. They’re perfect for grab-and-go breakfasts!
Pin This Recipe!
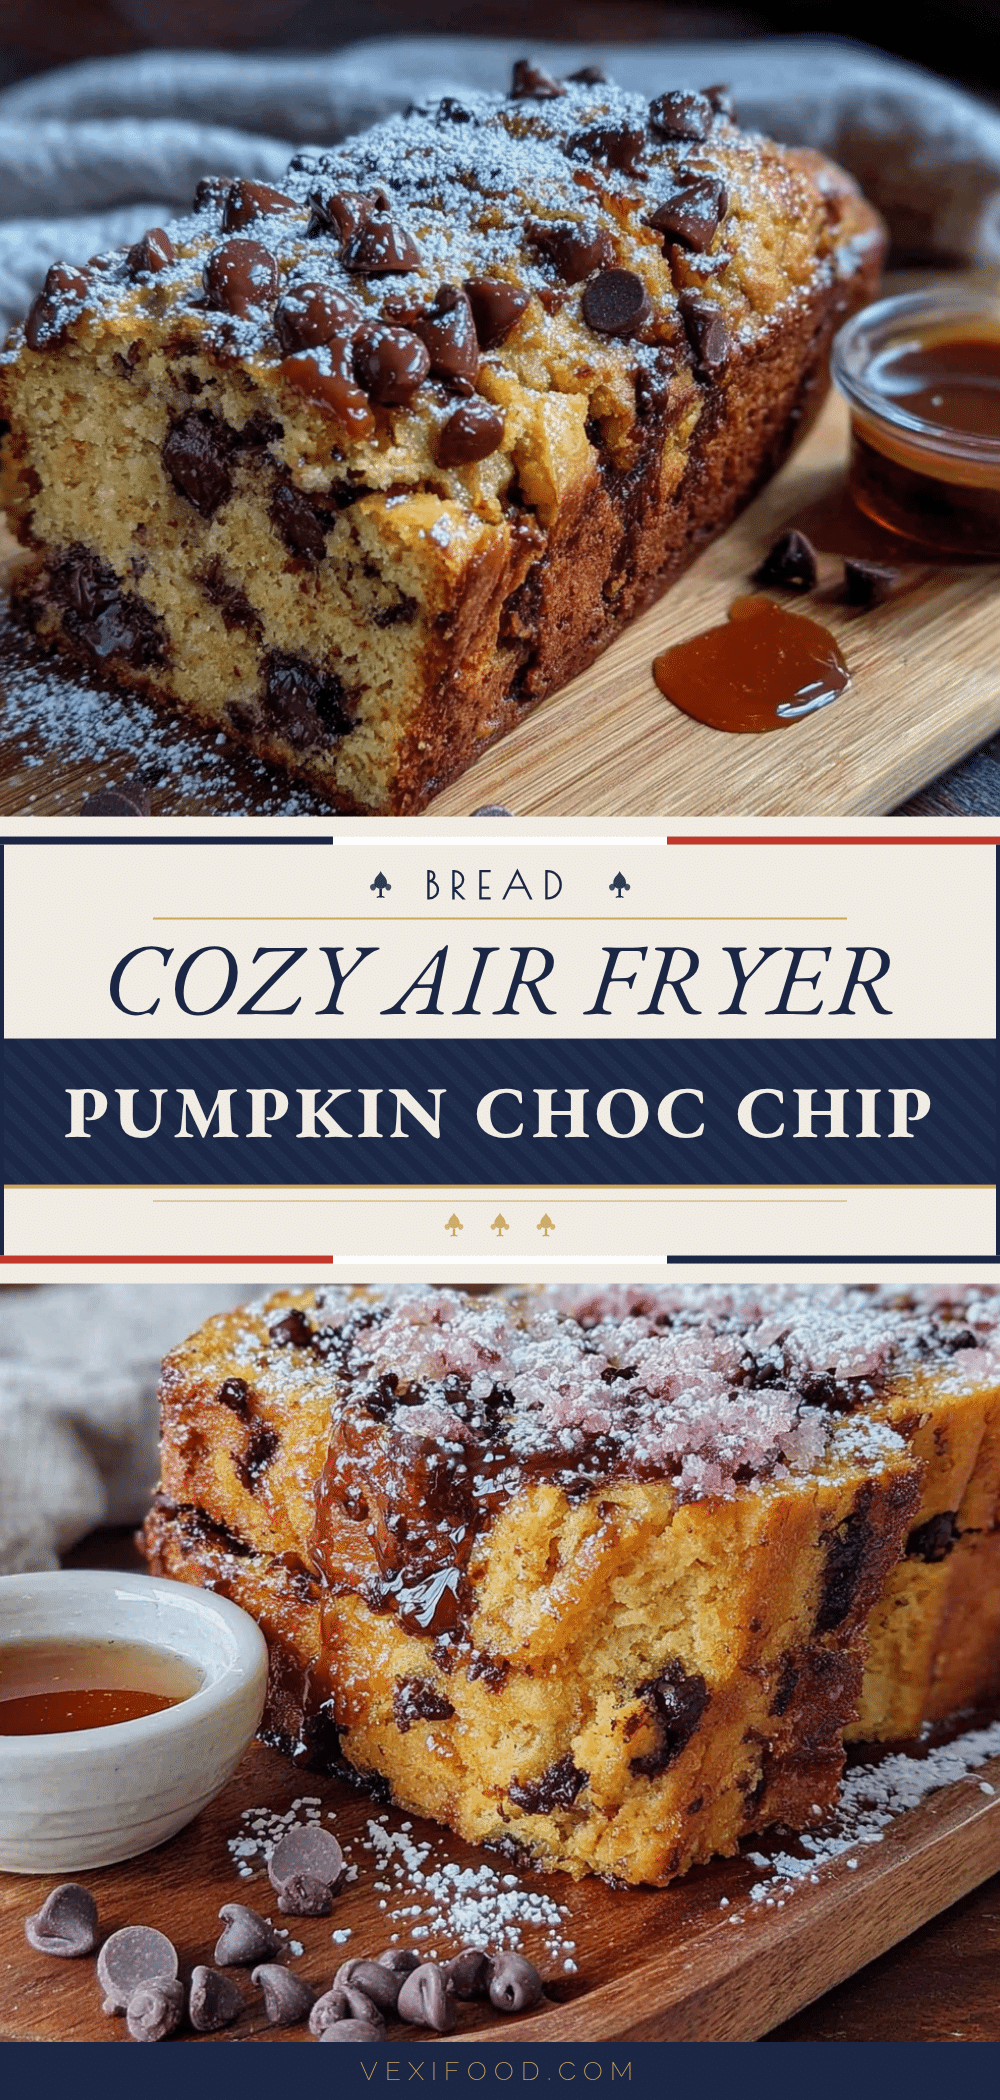
Cozy Air Fryer Pumpkin Chocolate Chip Bread
A quick and easy air fryer pumpkin chocolate chip bread that’s crisp on the outside, soft on the inside, and ready in under 40 minutes. Perfect for cozy fall baking.
- Prep Time: 15 minutes
- Cook Time: 25 minutes
- Total Time: 40 minutes
- Yield: 8 servings 1x
- Category: Dessert
- Cuisine: American
Ingredients
- 1 ¾ cups all-purpose flour (210 grams)
- 1 teaspoon baking soda
- ½ teaspoon baking powder
- 1 ½ teaspoons pumpkin pie spice
- 1 teaspoon ground cinnamon
- ½ teaspoon salt
- 1 cup canned pumpkin puree (244 grams)
- ½ cup granulated sugar (100 grams)
- ½ cup packed light brown sugar (100 grams)
- 2 large eggs, room temperature
- ⅓ cup vegetable oil (80 ml)
- 1 teaspoon vanilla extract
- 1 cup semi-sweet chocolate chips (175 grams)
Instructions
- Preheat your air fryer to 320°F (160°C). Line a 6×3-inch loaf pan with a parchment paper sling.
- In a medium bowl, whisk together the flour, baking soda, baking powder, pumpkin pie spice, cinnamon, and salt.
- In a larger bowl, whisk together the pumpkin puree, granulated sugar, brown sugar, eggs, vegetable oil, and vanilla extract until smooth.
- Pour the dry ingredients over the wet mixture and fold with a rubber spatula until just combined. Do not overmix.
- Fold in the chocolate chips with a few strokes.
- Pour the batter into the prepared pan, spreading evenly. Tap the pan gently on the counter to release air bubbles.
- Place the pan in the air fryer basket, ensuring at least an inch of space around all sides.
- Bake at 320°F for 25 minutes. Check doneness with a toothpick; if it comes out clean or with a few moist crumbs, it’s done. If not, bake for another 3-5 minutes.
- Cool in the pan for 10 minutes, then lift out using the parchment sling and transfer to a cooling rack.
- Cool completely before slicing, at least 30 minutes.
Notes
Do not overfill the pan; fill no more than two-thirds full. Check your air fryer’s temperature accuracy. Use room temperature eggs for best texture. Let batter rest for 5 minutes before baking. Use mini chocolate chips if possible to prevent sinking.
Nutrition
- Serving Size: 1 slice
- Calories: 285
- Sugar: 24
- Sodium: 280
- Fat: 12
- Saturated Fat: 4
- Carbohydrates: 40
- Fiber: 3
- Protein: 5
Keywords: air fryer pumpkin bread, pumpkin chocolate chip bread, easy pumpkin bread, fall baking, air fryer bread