Love this? Save it for later!
Share the inspiration with your friends
Rachel wasn’t trying to impress anyone. I’d stopped by her place on a blustery October Tuesday to grab a cookbook she’d promised to lend me, and the smell hit me before I even got the storm door open. It was warm and nutty, with this deep, almost caramelized sweetness that made absolutely no sense for a Tuesday afternoon.
“Oh, that’s just the pie I’m testing for Thanksgiving,” she said, waving her hand like she’d boiled an egg. She was wearing old sweatpants and a flour-dusted sweater. The kitchen looked like a small explosion had occurred in a spice shop. And there on the counter sat the most beautiful pie I’d ever seen—a deep amber filling set in a dark, crumbly crust that looked nothing like the usual pale, flaky situation.
She cut me a slice without being asked—you know that kind of host—and I took a bite standing right there, leaning against her cluttered kitchen island. The filling was impossibly silky, not dense like so many pumpkin pies can be. And the crust? It had this gentle snap, a warmth from ginger and something else I couldn’t quite name. “Brown butter,” she said when I asked, like it was obvious. “And gingersnaps instead of regular pastry. My grandmother’s trick.”
Honestly, I’ve never been a huge pumpkin pie person. It’s always felt like the polite choice at Thanksgiving—the one you take a sliver of because it’s tradition, not because you’re excited. But this one? I finished that slice and asked for another. Rachel just laughed and handed me the whole pie. “Take it,” she said. “I’ll make another one.”
That was three years ago, and I’ve been making this pie every fall since. It’s the one that changed my mind about pumpkin pie completely. Maybe you’ve had that experience—the recipe that makes you rethink a whole category of food. This is that pie.
Why You’ll Love This Recipe
Let me tell you why this brown butter pumpkin pie with gingersnap crust is different from every other pumpkin pie recipe you’ve seen. I’ve tested this thing about a dozen times across three different ovens, and I can promise you—it delivers every single time.
- Unforgettable Flavor : The brown butter adds this nutty, toasty depth that regular butter just can’t touch. It makes the pumpkin filling taste richer, more complex—like the adult version of the pie you grew up with.
- The Crust is a Game-Changer : No rolling pins, no chilling, no worrying about shrinkage. A gingersnap crust comes together in minutes, and the spicy, molasses-y flavor pairs perfectly with the creamy pumpkin filling. It’s sturdy enough to hold a clean slice, too.
- Make-Ahead Friendly : This pie actually gets better after a day in the fridge. The flavors meld, the texture sets up perfectly, and you can cross one thing off your holiday to-do list. That’s a win in my book.
- No Fuss Technique : If you can stir butter in a pan until it turns golden, you can make this pie. The filling comes together in one bowl, and the crust is a simple press-in situation. No complicated steps.
- Perfect for Fall Gatherings : Whether it’s Thanksgiving, Friendsgiving, or just a cozy Sunday dinner, this pie feels special without requiring hours of work. It’s the kind of dessert that makes people close their eyes after the first bite.
What really sets this recipe apart is the balance. The brown butter adds richness without heaviness. The gingersnap crust brings spice and texture without overpowering the filling. It’s comfort food reimagined—familiar enough to feel like tradition, but different enough to become your new favorite.
What Ingredients You Will Need
This recipe uses simple, wholesome ingredients that come together to create something truly special. Most of these are pantry staples, but a few key players make all the difference. Let’s walk through what you’ll need.
For the Gingersnap Crust
- 2 cups (about 8 ounces) gingersnap cookie crumbs — I prefer Nabisco or Anna’s Ginger Thins for consistent texture. You can crush them in a food processor or by hand in a sealed bag with a rolling pin. (Pro tip: leave a few slightly larger crumbs for texture.)
- 5 tablespoons unsalted butter, melted — The butter binds the crumbs and adds richness. Use salted butter if that’s what you have, just reduce any added salt elsewhere.
- 2 tablespoons granulated sugar — Just a touch to balance the ginger’s bite. You can skip this if your cookies are already very sweet.
- Pinch of salt — Optional, but it helps round out the flavors. Skip if your cookies are salted.
For the Brown Butter Pumpkin Filling
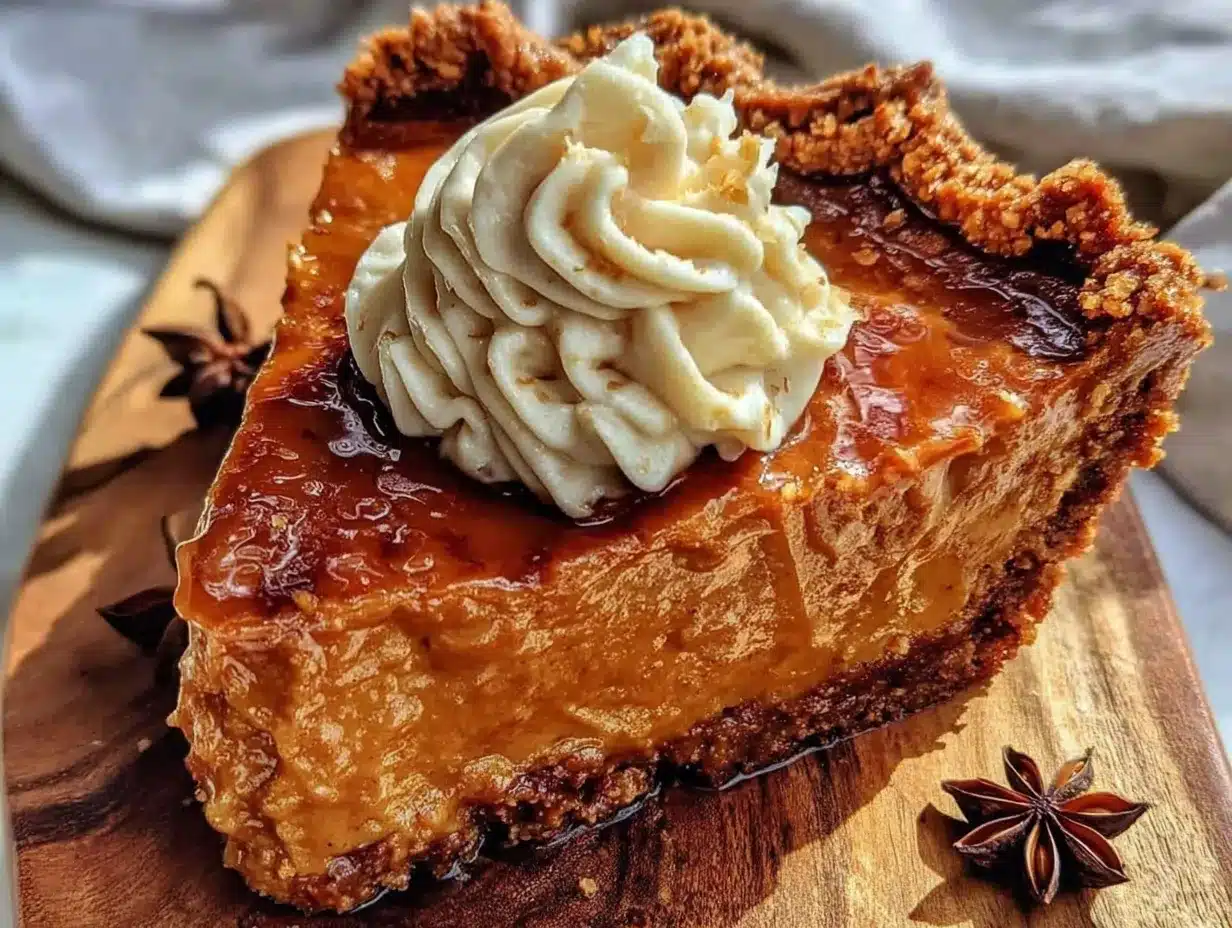
- 4 tablespoons unsalted butter — This will be browned, so use a light-colored pan to watch the color change. I like using European-style butter (like Kerrygold) for its higher fat content and richer flavor.
- 1 can (15 ounces) pumpkin puree — Not pumpkin pie filling! Make sure you grab 100% pure pumpkin. Libby’s is my go-to for consistent texture and flavor.
- 3/4 cup packed light brown sugar — Brown sugar adds molasses notes that complement the brown butter and ginger. Dark brown sugar works too for a deeper flavor.
- 2 large eggs, room temperature — Room temperature eggs blend more smoothly into the filling. Set them out 30 minutes before starting.
- 1 cup heavy cream — For that luscious, silky texture. Half-and-half works in a pinch, but the filling won’t be quite as rich.
- 1 teaspoon vanilla extract — Pure vanilla extract makes a difference here. Imitation will work, but the flavor won’t be as warm and complex.
- 1 1/2 teaspoons ground cinnamon — The backbone of pumpkin pie spice. Fresh spices make a noticeable difference.
- 1/2 teaspoon ground ginger — This echoes the crust’s ginger flavor and adds warmth.
- 1/4 teaspoon ground nutmeg — Freshly grated if you have it. The aroma is incredible.
- 1/4 teaspoon ground cloves — A little goes a long way. Too much can make the filling taste medicinal.
- 1/4 teaspoon salt — Salt balances the sweetness and brightens all the flavors.
Ingredient Selection Tips : For the best brown butter, use a light-colored stainless steel or enamel pan—dark nonstick pans make it hard to see the color change. For the pumpkin puree, avoid brands that are watery or have a metallic taste. I’ve found that organic canned pumpkins often have a deeper, sweeter flavor.
Substitution Guidance : For a dairy-free version, use a high-quality vegan butter for both the crust and the browning step, and swap the heavy cream with full-fat coconut cream. The flavor will shift slightly, but the texture remains lovely. For a gluten-free crust, use certified gluten-free gingersnaps—there are several good options available now.
Equipment Needed
You don’t need a fancy kitchen to make this pie. Here’s what you’ll actually use:
- 9-inch pie dish — Glass or ceramic works best. Glass lets you see the crust browning on the bottom, which is helpful. I use a standard Pyrex dish.
- Light-colored saucepan or skillet — For browning the butter. Dark pans make it nearly impossible to see when the butter turns from golden to burnt. Trust me on this one—I learned the hard way.
- Food processor or zip-top bag and rolling pin — For crushing the gingersnaps. A food processor is faster and gives more consistent results, but a bag and rolling pin work just fine. It’s also a great way to work out some pre-holiday stress.
- Mixing bowls — One medium bowl for the crust, one larger bowl for the filling.
- Whisk — For smoothing out the filling. A fork works in a pinch, but a whisk gives you that silky texture.
- Measuring cups and spoons — Standard set. For the brown sugar, pack it firmly into the cup.
- Spatula — For scraping every last bit of brown butter out of the pan. You don’t want to leave any of that liquid gold behind.
- Cooling rack — Essential for even cooling. Placing a hot pie dish directly on the counter can cause the glass to crack.
If you don’t have a food processor, no worries. I’ve made this crust with a bag and a heavy-bottomed glass more times than I can count. The texture ends up a little more rustic, which I actually prefer. And if you don’t have a cooling rack, use an upside-down baking sheet or even a trivet. Just give that pie some air circulation.
Preparation Method
Alright, let’s make this pie. I’ve broken it down into clear steps with all the little notes I wish someone had told me the first time I made it.
Step 1: Brown the Butter (10 minutes)
Place the 4 tablespoons of butter in your light-colored saucepan over medium heat. Let it melt completely, then continue cooking, swirling the pan occasionally. The butter will foam up, then subside, and you’ll start to see brown specks forming at the bottom. This is the milk solids toasting—that’s where the flavor lives. Once the butter smells nutty and has turned a deep amber color (think the color of maple syrup), remove it from the heat immediately. Pour it into a heat-safe bowl to stop the cooking process. Set it aside to cool slightly while you make the crust.
Warning : Brown butter can go from perfect to burnt in about 15 seconds. Keep your eyes on it. If you see black specks, you’ve gone too far and should start over. Burnt butter tastes bitter, not nutty.
Step 2: Make the Gingersnap Crust (15 minutes)
Preheat your oven to 350°F. In a medium bowl, combine the gingersnap crumbs, 2 tablespoons sugar, and a pinch of salt. Pour in the 5 tablespoons of melted butter and stir with a fork until every crumb is moistened. The mixture should look like wet sand and hold together when squeezed in your fist.
Transfer the mixture to your 9-inch pie dish. Use the bottom of a measuring cup or a flat-bottomed glass to press the crumbs firmly into an even layer on the bottom and up the sides. Take your time here—a well-packed crust holds together better. Make sure the edges are even and the thickness is consistent.
Bake the crust for 8-10 minutes, until it’s fragrant and slightly darker at the edges. Set it on a cooling rack while you make the filling. Leave the oven on at 350°F.
Step 3: Make the Filling (10 minutes)
In a large bowl, whisk together the brown sugar and the slightly cooled brown butter until smooth. It should look like a thick, glossy paste. Add the eggs one at a time, whisking well after each addition, until the mixture is light and creamy.
Whisk in the pumpkin puree until fully combined. The mixture will be thick and vibrant orange. Slowly pour in the heavy cream and vanilla, whisking gently until smooth. Don’t whisk too vigorously here—you don’t want to incorporate too much air, which can cause cracks during baking.
Add the cinnamon, ginger, nutmeg, cloves, and salt. Whisk just until the spices are evenly distributed. Give the bowl a good scrape with your spatula to make sure nothing’s hiding at the bottom.
Step 4: Assemble and Bake (50-60 minutes)
Place your pre-baked crust on a baking sheet—this makes it easier to move in and out of the oven and catches any potential spills. Pour the filling into the warm crust. It will come right up to the rim, which is perfect.
Carefully transfer the baking sheet to the middle rack of your 350°F oven. Bake for 50-60 minutes. The pie is done when the edges are set and puffed slightly, but the center still jiggles gently when you shake the pan—like a firm Jell-O. A knife inserted about 2 inches from the edge should come out clean, but the very center will still be a little wobbly.
Sensory cue : Your kitchen will smell absolutely incredible at this point—like a fall candle that you can actually eat. The filling will have darkened to a rich, deep amber.
Step 5: Cool and Set (At least 4 hours)
Place the pie on a cooling rack and let it cool completely at room temperature. This takes about 2 hours. Then transfer it to the refrigerator and chill for at least 2 more hours, or overnight. This step is non-negotiable—the pie needs time to set up properly. A warm pumpkin pie is a runny pumpkin pie.
Once fully chilled, the pie will slice cleanly and hold its shape. Serve cold or at room temperature, depending on your preference.
Cooking Tips & Techniques
After making this pie more times than I can count, I’ve collected a few tricks that make the process smoother and the results more consistent. Let me share what I’ve learned—including the mistakes.
Don’t skip the blind bake. The first time I made this, I thought I could skip pre-baking the crust and just bake everything together. Big mistake. The gingersnap crust needs that head start to stay crisp and sturdy. Without it, the crust gets soggy and the bottom doesn’t set properly. That 8-minute pre-bake is worth every second.
Watch your oven temperature. Ovens run hot or cold, and pumpkin pie is sensitive to temperature swings. If your pie is browning too quickly on top (after about 30 minutes), tent it loosely with aluminum foil. I keep a piece of foil ready just in case. Also, if your filling starts to puff up dramatically, your oven might be too hot—reduce the temperature by 25 degrees next time.
Strain your brown butter. This is a trick I picked up from a pastry chef friend. After browning the butter, pour it through a fine-mesh strainer into your bowl. This catches any burnt milk solids that might have gotten too dark, ensuring your butter is perfectly nutty without any bitter notes. I do this every time now.
Room temperature ingredients matter. Cold eggs and cold cream can cause the brown butter to seize up, creating a lumpy filling. Set your eggs and cream out on the counter 30 minutes before you start. If you forget, place the eggs in a bowl of warm water for 5 minutes and microwave the cream for 10 seconds.
Don’t overmix. Whisking too vigorously or too long incorporates air bubbles into the filling, which can cause cracks during baking. Mix until everything is just combined. A few small bubbles are fine—they’ll rise to the surface and pop. Large bubbles? Gently tap the pie dish on the counter before baking to release them.
Let it rest. I know it’s hard to wait, especially when your house smells like heaven. But that overnight chill in the refrigerator is what transforms this from a good pie to a great one. The flavors meld, the texture sets up perfectly, and the crust firms up. I actually think this pie tastes better on day two.
Variations & Adaptations
One of the things I love about this recipe is how adaptable it is. Here are a few variations I’ve tried over the years, each with its own charm.
Bourbon Brown Butter Pumpkin Pie
Add 2 tablespoons of good bourbon to the filling along with the vanilla. The bourbon’s warmth and oakiness deepen the brown butter notes beautifully. I use a wheated bourbon like Maker’s Mark for a smoother finish. Just don’t skip the overnight chill—the alcohol needs time to mellow into the filling.
Maple Pecan Gingersnap Crust
For the crust, substitute 1/2 cup of the gingersnap crumbs with finely chopped pecans. Add 2 tablespoons of maple syrup along with the melted butter. This gives the crust a nutty, caramelized flavor that pairs beautifully with the pumpkin filling. Toast the pecans first for extra depth.
Dairy-Free Version
Use a high-quality vegan butter (I like Miyoko’s or Country Crock Plant Butter) for both the crust and the browning step. Swap the heavy cream with full-fat coconut cream from a can (refrigerated overnight and scooped from the top). The coconut flavor is subtle and complements the spices nicely. The texture is slightly less rich but still very satisfying.
Spiced Pumpkin Cheesecake Hybrid
For a richer, creamier filling, reduce the heavy cream to 3/4 cup and add 8 ounces of room-temperature cream cheese. Beat the cream cheese with the brown sugar and brown butter until smooth before adding the eggs. This creates a denser, cheesecake-like texture that’s absolutely decadent. You’ll need to bake it about 10 minutes longer.
Mini Pie Version
Use a muffin tin and press the crust into 12 greased muffin cups. Bake the crusts for 6-7 minutes, then fill each cup about 3/4 full with the filling. Bake for 18-22 minutes, until the edges are set. These mini pies are perfect for parties or portion control. They also freeze beautifully.
Serving & Storage Suggestions
This pie is wonderful on its own, but a few thoughtful accompaniments can take it to the next level.
Serving Temperature : I prefer this pie served cold, straight from the refrigerator. The filling is firm and sliceable, and the flavors are clean and bright. But I know plenty of people who prefer it at room temperature—the texture is softer and the spices feel more aromatic. Try it both ways and see what you like. If serving at room temperature, let it sit out for about 20 minutes before slicing.
Topping Ideas : A dollop of lightly sweetened whipped cream is the classic choice, and for good reason—the cool, airy cream balances the rich, dense pie. For something different, try a spoonful of crème fraîche (its tanginess cuts through the sweetness beautifully) or a drizzle of salted caramel sauce. A dusting of freshly grated nutmeg on top adds a lovely finishing touch.
Complementary Beverages : This pie begs for a warm drink. A cup of strong black coffee, a chai latte, or a spiced apple cider all work wonderfully. For an adult pairing, a dark rum or a bourbon old-fashioned echoes the warm spices in the pie.
Storage Instructions : Cover the pie loosely with plastic wrap or aluminum foil and store it in the refrigerator for up to 5 days. The crust will soften slightly over time, but the flavor actually improves. To freeze, wrap the fully chilled pie (still in its dish) in a layer of plastic wrap, then a layer of foil. Freeze for up to 3 months. Thaw overnight in the refrigerator before serving.
Reheating : I don’t recommend reheating this pie—the filling can become grainy and the crust can get soggy. If you prefer a warm pie, let individual slices sit at room temperature for 15-20 minutes before serving. For a quick warm-up, microwave a slice for 10-15 seconds, but watch it carefully.
Nutritional Information & Benefits
Let’s be honest—this is a special occasion dessert, not a health food. But it does have a few redeeming qualities worth mentioning.
Estimated Nutritional Values (per slice, 1/8 of pie) : Calories: 380, Fat: 22g, Saturated Fat: 13g, Cholesterol: 105mg, Sodium: 260mg, Carbohydrates: 42g, Fiber: 3g, Sugar: 28g, Protein: 5g.
Health Highlights : Pumpkin is rich in vitamin A (beta-carotene), which supports eye health and immune function. It’s also a good source of fiber, which aids digestion. The ginger in the crust has anti-inflammatory properties and can help with digestion—which is handy after a big holiday meal. Cinnamon is packed with antioxidants and may help regulate blood sugar levels.
Dietary Considerations : This recipe contains gluten, dairy, and eggs. For gluten-free and dairy-free adaptations, see the Variations section above. It’s naturally nut-free (unless you add the pecan variation) and contains no soy.
Personal Wellness Perspective : I believe in enjoying treats without guilt. This pie is made with real ingredients—butter, cream, eggs, pumpkin—and that’s a far cry from processed desserts full of artificial flavors and preservatives. One slice of this pie, shared with people you love, is a beautiful thing. Balance is everything.
Conclusion
This brown butter pumpkin pie with gingersnap crust is the recipe that changed my mind about pumpkin pie forever. It’s the one I make every fall, the one friends request for Thanksgiving, the one that makes people say “I didn’t know pumpkin pie could taste like this.” And honestly, I love that about it.
The brown butter adds a nutty depth that feels sophisticated without being fussy. The gingersnap crust is sturdy, spicy, and utterly delicious—no rolling pins required. And the filling? It’s silky, perfectly spiced, and just sweet enough. It’s comfort food reimagined, and it deserves a spot on your holiday table.
I’d love to hear how this pie turns out for you. Did you try one of the variations? Did you add your own twist? Leave a comment below and let me know—I read every single one. And if you share a photo on social media, tag me so I can see your beautiful creation. Happy baking, friends!
Frequently Asked Questions
Can I use a store-bought crust instead of making the gingersnap crust?
You absolutely can, but you’ll lose some of the magic. The gingersnap crust is what makes this pie special—it adds texture, flavor, and a beautiful dark color that contrasts with the creamy filling. If you’re short on time, look for a pre-made gingersnap crust at the store, or use a regular graham cracker crust and add a teaspoon of ground ginger to the filling.
Why did my filling crack?
Cracks happen when the filling is overmixed (too much air incorporated) or baked at too high a temperature. Make sure you’re whisking gently and that your oven temperature is accurate. An instant-read thermometer is helpful here—the internal temperature of the pie should reach 175-180°F when done. If your pie does crack, don’t worry! A layer of whipped cream or a dusting of powdered sugar hides a multitude of sins.
Can I make this pie ahead of time?
Yes, and I actually recommend it. This pie needs at least 4 hours to chill and set, but it’s even better after 24 hours. You can make it up to 3 days in advance and store it covered in the refrigerator. You can also freeze the baked, cooled pie for up to 3 months—just wrap it well and thaw overnight in the fridge before serving.
Can I use fresh pumpkin instead of canned?
You can, but I don’t recommend it for this recipe. Fresh pumpkin has a much higher water content than canned pumpkin puree, which can make the filling watery and prevent it from setting properly. If you really want to use fresh pumpkin, roast and puree it, then strain it through cheesecloth overnight to remove excess moisture. Even then, the texture won’t be as consistent as canned. Libby’s is my go-to for a reason.
How do I know when the pie is done baking?
The edges should be set and slightly puffed, but the center should still jiggle gently when you shake the pan—think firm Jell-O, not liquid. A knife inserted about 2 inches from the edge should come out clean, but the very center will still be a little wobbly. The pie will continue to set as it cools, so don’t overbake it. Overbaked pumpkin pie can become grainy and develop cracks.
Pin This Recipe!
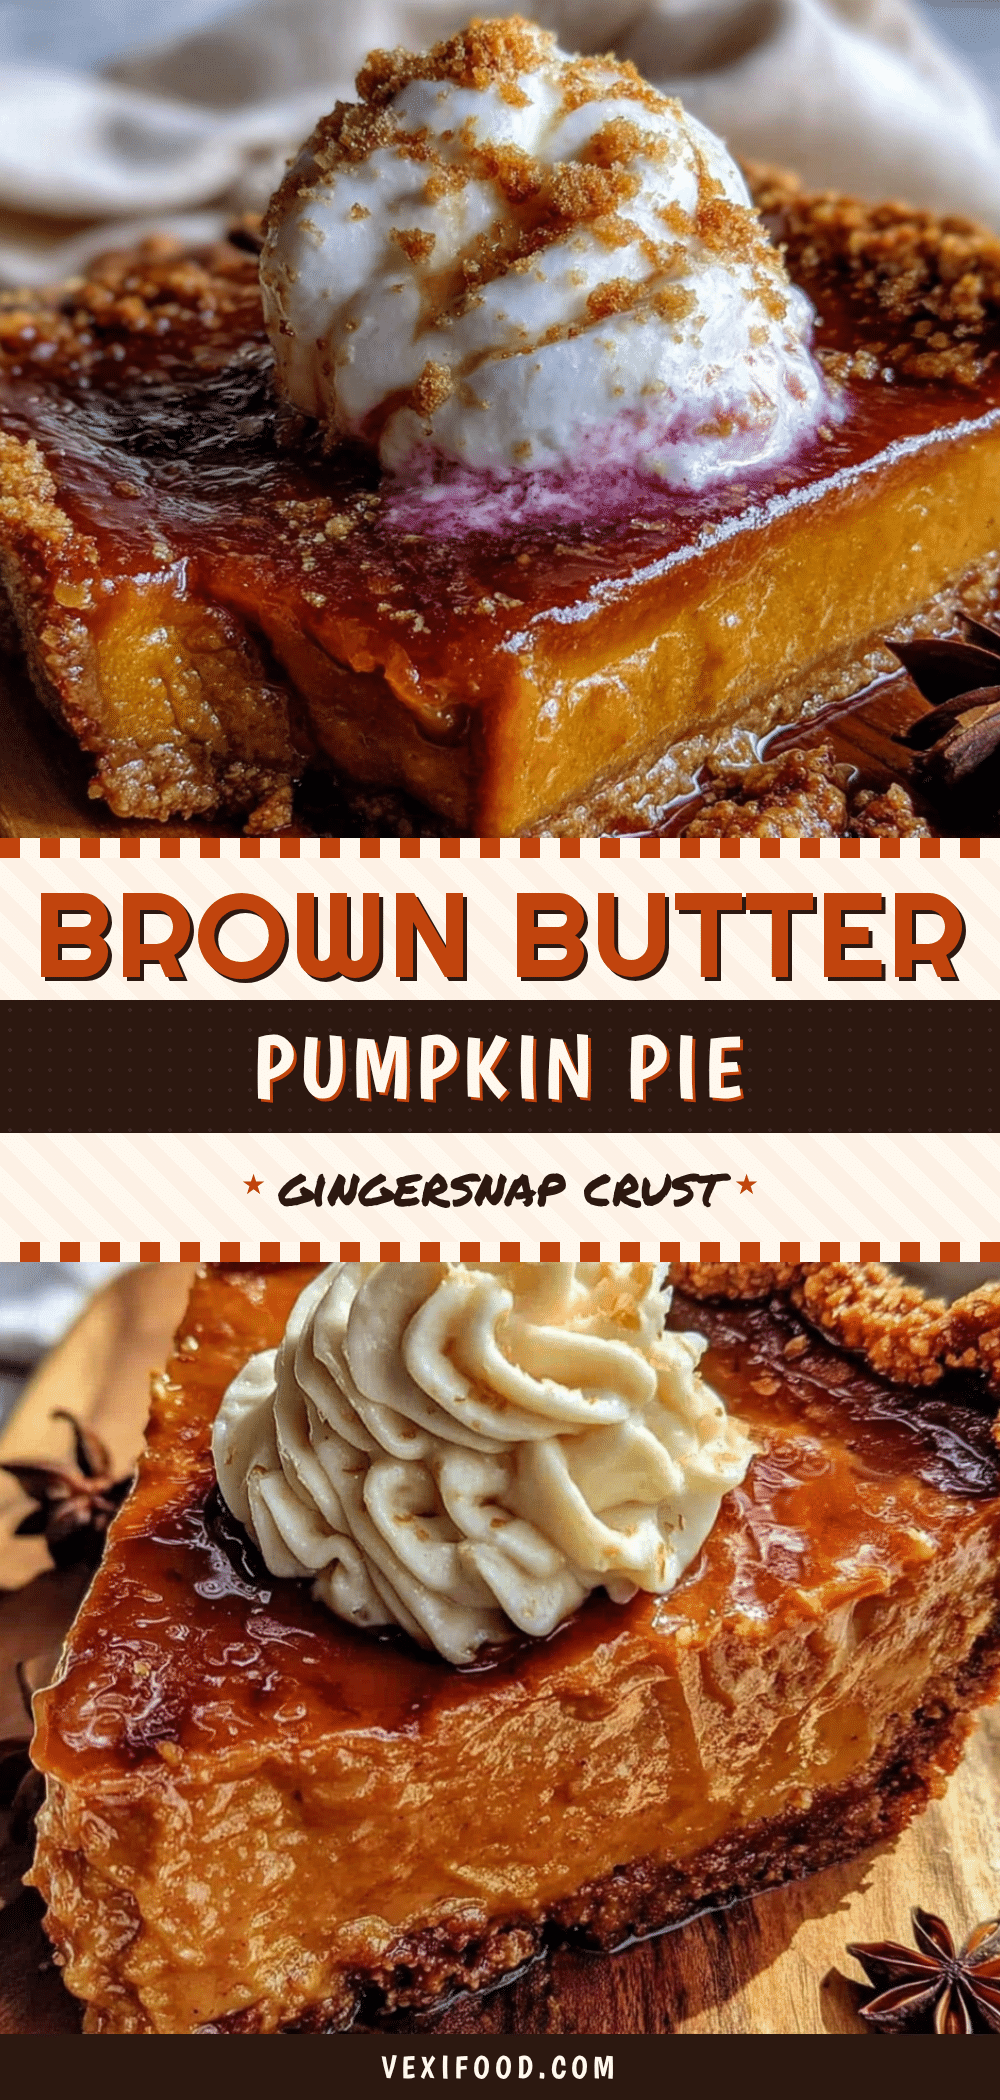
Cozy Brown Butter Pumpkin Pie with Gingersnap Crust
A silky, nutty pumpkin pie with a spicy gingersnap crust that will change your mind about pumpkin pie forever. Perfect for fall gatherings and Thanksgiving.
- Prep Time: 30 minutes
- Cook Time: 60 minutes
- Total Time: 4 hours 30 minutes (includes chilling)
- Yield: 8 servings 1x
- Category: Dessert
- Cuisine: American
Ingredients
- 2 cups (about 8 ounces) gingersnap cookie crumbs
- 5 tablespoons unsalted butter, melted
- 2 tablespoons granulated sugar
- Pinch of salt
- 4 tablespoons unsalted butter (for browning)
- 1 can (15 ounces) pumpkin puree
- 3/4 cup packed light brown sugar
- 2 large eggs, room temperature
- 1 cup heavy cream
- 1 teaspoon vanilla extract
- 1 1/2 teaspoons ground cinnamon
- 1/2 teaspoon ground ginger
- 1/4 teaspoon ground nutmeg
- 1/4 teaspoon ground cloves
- 1/4 teaspoon salt
Instructions
- Brown the butter: Place 4 tablespoons butter in a light-colored saucepan over medium heat. Cook until melted, then continue cooking, swirling occasionally, until the butter foams, subsides, and turns a deep amber color with a nutty aroma. Remove from heat immediately and pour into a heat-safe bowl to stop cooking. Set aside to cool slightly.
- Make the crust: Preheat oven to 350°F. In a medium bowl, combine gingersnap crumbs, 2 tablespoons sugar, and a pinch of salt. Pour in 5 tablespoons melted butter and stir until every crumb is moistened. Press mixture firmly into a 9-inch pie dish, covering bottom and sides evenly. Bake for 8-10 minutes until fragrant and slightly darker at edges. Set on a cooling rack. Leave oven on.
- Make the filling: In a large bowl, whisk together brown sugar and slightly cooled brown butter until smooth. Add eggs one at a time, whisking well after each. Whisk in pumpkin puree until fully combined. Slowly pour in heavy cream and vanilla, whisking gently until smooth. Add cinnamon, ginger, nutmeg, cloves, and salt; whisk just until evenly distributed.
- Assemble and bake: Place pre-baked crust on a baking sheet. Pour filling into warm crust. Bake at 350°F for 50-60 minutes, until edges are set and puffed slightly but center still jiggles gently. A knife inserted 2 inches from edge should come out clean.
- Cool and set: Place pie on a cooling rack and cool completely at room temperature (about 2 hours). Then refrigerate for at least 2 more hours, or overnight, until fully set. Serve cold or at room temperature.
Notes
Don’t skip the blind bake of the crust to prevent sogginess. Watch the brown butter carefully as it can go from perfect to burnt in seconds. Room temperature ingredients help prevent the brown butter from seizing. For best results, chill the pie overnight to allow flavors to meld and texture to set.
Nutrition
- Serving Size: 1 slice (1/8 of pie)
- Calories: 380
- Sugar: 28
- Sodium: 260
- Fat: 22
- Saturated Fat: 13
- Carbohydrates: 42
- Fiber: 3
- Protein: 5
Keywords: pumpkin pie, brown butter, gingersnap crust, Thanksgiving, fall dessert, holiday pie



