Love this? Save it for later!
Share the inspiration with your friends
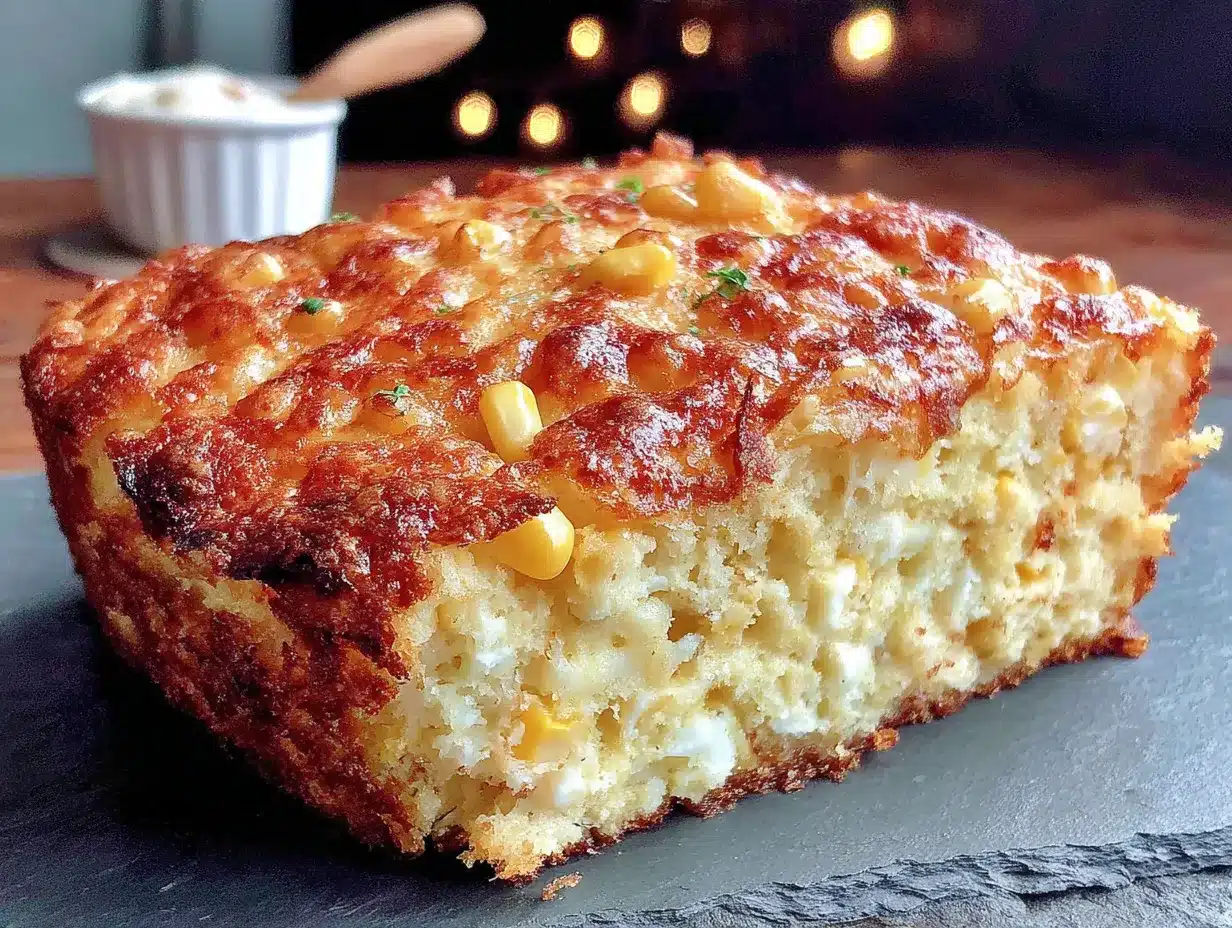
There used to be a little diner off Highway 61 in Missouri called Millie’s Place that made a corn casserole that ruined me for all others. When they closed in 2018—the building got sold to a chain chicken spot—I literally stood in the parking lot with my aunt, staring at the empty sign. That corn casserole was the reason we drove forty minutes out of our way every Thanksgiving weekend. It was golden on top, creamy in the middle, with these little pockets of melted cheddar that stretched when you pulled your fork away. After twelve tries—twelve, and I burned two of them badly enough to set off the smoke detector—I finally got it. This cozy Jiffy corn casserole with sour cream and sharp cheddar is the one. Honestly, I think Millie would approve.
Why You’ll Love This Recipe
Let me tell you, this isn’t just another corn casserole you throw together for a holiday potluck and forget about. This is the one people stand around the kitchen island eating straight from the dish before it even hits the table. I know because I’ve watched it happen. Multiple times.
- Quick & Easy : From fridge to oven in under ten minutes. No chopping, no precooking, no complicated steps. You mix, pour, and bake. That’s it.
- Simple Ingredients : You probably have most of this in your pantry and fridge right now. If you don’t, a quick run to the store will cost you under fifteen bucks.
- Perfect for Cozy Evenings : Cold weather, rough day, or just one of those nights when you need something warm and comforting—this casserole delivers every single time.
- Crowd-Pleaser : I’ve served this to kids who “don’t like corn” and adults who claim they’re watching carbs. Both groups went back for seconds.
- Unbelievably Delicious : The sour cream keeps it impossibly moist, the sharp cheddar adds that savory punch, and the Jiffy mix gives it that slightly sweet, cornbread-like texture that just works.
What makes this different from every other corn casserole recipe out there? It’s the ratio. I spent months tweaking the amounts of sour cream, butter, and cheese until the texture was exactly right—not too wet, not too dry, with those glorious cheesy pockets throughout. It’s comfort food at its finest, and it comes together with almost no effort.
What Ingredients You Will Need
This recipe uses simple, everyday ingredients that work together to create something truly special. Most of these are pantry staples, which makes this perfect for those nights when you need something cozy without a special grocery trip.
- Jiffy Corn Muffin Mix (2 boxes, 8.5 oz each) — This is the base, and honestly, I’ve tried making this from scratch with homemade cornbread mix and it’s just not the same. Jiffy has that specific sweetness and fine texture that makes this casserole work. Don’t overthink it.
- Creamed Corn (1 can, 14.75 oz) — Adds moisture and sweetness. I prefer Del Monte or Libby’s, but any brand works fine. Don’t drain it—you need that liquid.
- Whole Kernel Corn (1 can, 15.25 oz), drained — Gives you those pops of texture throughout. Make sure you drain this one well, otherwise the casserole gets too watery.
- Sour Cream (1 cup, full-fat) — This is the secret to the creamy texture. I’ve tried low-fat and it works okay, but full-fat gives you that rich, velvety consistency that makes this casserole unforgettable. Daisy is my go-to brand.
- Unsalted Butter (½ cup, melted) — Adds richness and helps the top get that beautiful golden crust. If you only have salted butter, just reduce the added salt a bit.
- Sharp Cheddar Cheese (2 cups, shredded) — Please, please shred this yourself. Pre-shredded cheese has anti-caking agents that prevent it from melting smoothly. Sharp cheddar gives you the most flavor—mild cheddar just won’t cut it here. I use Tillamook or Cabot.
- Large Eggs (2) — Helps bind everything together and adds structure. Let them come to room temperature if you remember, but honestly, I’ve used cold eggs and it still turned out fine.
- Salt (½ teaspoon) — Enhances all the flavors. If you’re using salted butter, you might want to cut this back to ¼ teaspoon.
- Black Pepper (¼ teaspoon) — Just a little for background warmth. Don’t skip it—it makes the cheese taste cheesier somehow.
Equipment Needed
You don’t need a fancy kitchen for this one. Here’s what you’ll need:
- 9×13 inch baking dish — Glass or ceramic works best. I’ve used both and prefer glass because I can see how the bottom is browning. Metal works too, just watch the baking time.
- Large mixing bowl — Big enough to hold everything without splashing. I use my grandmother’s old ceramic one, but any large bowl works.
- Whisk or wooden spoon — A whisk works great for smoothing out lumps, but a sturdy wooden spoon gets the job done too.
- Measuring cups and spoons — For accuracy, especially with the sour cream and melted butter.
- Cheese grater — If you’re smart and shredding your own cheese. A box grater is fine, or use the shredding disc on a food processor if you have one.
- Non-stick cooking spray or butter — For greasing the dish. Don’t skip this, or you’ll be scraping casserole off the bottom for an hour.
Preparation Method
Preheat your oven to 350°F (175°C). Grease your 9×13 baking dish thoroughly—bottom and sides both. I use butter because I like the flavor, but cooking spray works perfectly fine.
Step 1: Mix the dry ingredients. In your large bowl, combine both boxes of Jiffy corn muffin mix with the salt and pepper. Whisk them together to break up any lumps. The mix will look pale yellow and smell sweet—that’s exactly right.
Step 2: Add the wet ingredients. Add the creamed corn (undrained), drained whole kernel corn, sour cream, melted butter, and eggs. Stir until just combined. Don’t overmix—a few small lumps are totally fine. Overmixing can make the casserole tough. The batter should look thick and creamy, like a thick pancake batter.
Step 3: Fold in the cheese. Reserve about ½ cup of the shredded cheddar for the top. Fold the remaining 1½ cups into the batter gently. You want the cheese distributed throughout but not completely incorporated—those little pockets of melted cheese are what make this special.
Step 4: Pour and top. Pour the batter into your prepared baking dish and spread it evenly with a spatula. Sprinkle the reserved ½ cup of cheddar evenly over the top. Don’t press it in—let it sit on top where it will melt and get golden.
Step 5: Bake. Place the dish on the middle rack of your preheated oven. Bake for 45-55 minutes. At 45 minutes, check it—the top should be golden brown and the edges should be pulling away from the sides of the dish slightly. A toothpick inserted in the center should come out clean or with just a few moist crumbs. If it’s still jiggly in the center, give it another 5-10 minutes.
Step 6: Rest. This is the hardest part. Let the casserole rest for at least 10 minutes before serving. I know you want to dig in immediately—trust me, I’ve burned my tongue doing exactly that. The resting time lets the casserole set up so it slices cleanly instead of turning into a soupy mess on your plate.
Cooking Tips & Techniques
I’ve made this casserole more times than I can count, and I’ve learned a few things the hard way. Let me save you some trouble.
Don’t overmix the batter. I learned this lesson after making a casserole that came out dense and tough. Stir until the dry ingredients are just moistened. A few lumps are your friend here.
Shred your own cheese. I know it’s tempting to buy the bagged shredded cheese. I’ve done it. But the anti-caking powders in pre-shredded cheese prevent it from melting smoothly, and you end up with a grainy texture instead of those beautiful cheesy pockets. It takes two extra minutes to shred a block of cheddar—worth every second.
Watch your oven temperature. Ovens vary wildly. My old oven would burn this casserole at 350°F, so I had to drop it to 325°F and bake longer. Get to know your oven’s quirks. If your casserole is browning too fast on top but still jiggly in the middle, tent it loosely with foil for the last 15 minutes.
Room temperature ingredients matter. Cold eggs and sour cream straight from the fridge can make the batter lumpy and affect baking time. Let everything sit out for about 20 minutes before you start. If you forget, like I often do, microwave the sour cream for 10 seconds and run the eggs under warm water for a minute.
Test for doneness properly. The toothpick test works, but also look for the edges pulling away from the dish and the top being a deep golden brown. If you jiggle the dish gently, the center should be mostly set with just a slight wobble.
Variations & Adaptations
This recipe is wonderfully adaptable. Here are some variations I’ve tried and loved:
Spicy Southwest Version: Add one can of drained diced green chiles, ½ teaspoon of cumin, and a dash of cayenne pepper. Swap half the sharp cheddar for pepper jack cheese. The heat cuts through the richness beautifully.
Bacon and Chive Version: Cook 6 strips of bacon until crispy, crumble them, and fold into the batter along with ¼ cup of chopped fresh chives. Reserve a few bacon pieces for the top. This version disappears fastest at potlucks—I’ve seen it happen.
Gluten-Free Adaptation: Use two boxes of gluten-free corn muffin mix instead of Jiffy. I’ve used Bob’s Red Mill with good results. The texture will be slightly more crumbly, but the flavor is still fantastic. Make sure your other ingredients are certified gluten-free if that’s a concern.
Lighter Version: Use reduced-fat sour cream, substitute two egg whites for one of the whole eggs, and reduce the butter to ¼ cup. It won’t be quite as rich, but it’s still delicious and cuts the calories significantly.
Herb Garden Version: Fold in 2 tablespoons of fresh chopped parsley, 1 tablespoon of fresh thyme leaves, and 1 teaspoon of fresh rosemary. The herbs brighten up the casserole and make it feel more sophisticated. I made this for Easter brunch last year and got three requests for the recipe.
Serving & Storage Suggestions
This casserole is best served warm, right after that 10-minute rest. The cheese is still melty, the texture is perfect, and the aroma filling your kitchen is absolutely irresistible.
Serving ideas: This pairs beautifully with roasted chicken, grilled pork chops, or a simple green salad with vinaigrette. For holiday meals, it’s a natural alongside ham or turkey. I’ve also served it as a main dish with a side of black beans and a dollop of Greek yogurt—satisfying and comforting.
Storage: Cover the dish tightly with foil or transfer leftovers to an airtight container. It will keep in the refrigerator for up to 4 days. The flavors actually meld and deepen overnight, so leftovers are often even better the next day.
Reheating: The oven is best. Place the casserole in a 350°F oven for 10-15 minutes, or until warmed through. The microwave works in a pinch, but the texture gets a bit softer and the top loses its crispness. If you’re reheating a single serving, the microwave is fine—just cover it with a damp paper towel to prevent drying out.
Freezing: This casserole freezes beautifully. Bake it completely, let it cool, then wrap tightly in plastic wrap and foil. Freeze for up to 3 months. Thaw overnight in the refrigerator and reheat in a 350°F oven until warmed through. I often make two and freeze one for busy weeks.
Nutritional Information & Benefits
Here’s the honest truth—this is comfort food, not health food. But that doesn’t mean it’s without redeeming qualities.
| Nutrient | Amount Per Serving (1/12 of recipe) |
|---|---|
| Calories | 320 |
| Total Fat | 18g |
| Saturated Fat | 10g |
| Cholesterol | 75mg |
| Sodium | 580mg |
| Total Carbohydrates | 34g |
| Dietary Fiber | 2g |
| Sugars | 8g |
| Protein | 9g |
| Calcium | 180mg |
| Iron | 1mg |
The corn provides fiber and antioxidants like lutein and zeaxanthin, which are good for eye health. The eggs add high-quality protein and choline, which supports brain function. And the cheese gives you a solid dose of calcium for bone health. Plus, there’s something to be said for the mental health benefits of eating something warm and familiar on a cold day.
Conclusion
This cozy Jiffy corn casserole with sour cream and sharp cheddar is more than just a side dish—it’s a warm hug in casserole form. It’s the recipe I turn to when I need something reliable, something that tastes like home, something that makes the kitchen smell like comfort. After all those failed attempts trying to recreate Millie’s version, I finally have a recipe that feels like my own, and I’m so excited to share it with you.
Make it for your next family dinner. Make it for a potluck. Make it on a Tuesday when you just need something good. And when you do, I’d love to hear about it—leave a comment below and tell me how it turned out, or share your own twist on the recipe. Did you add bacon? Throw in some jalapeños? I want to know. This recipe is meant to be shared, adapted, and loved. Go make some memories with it.
Frequently Asked Questions
Can I use low-fat sour cream in this recipe?
Yes, you can. The casserole will still be creamy, but it won’t be quite as rich. If you’re watching calories, reduced-fat sour cream works fine. Just don’t use non-fat—it gets watery and the texture suffers.
Can I make this casserole ahead of time?
Absolutely. You can assemble the casserole up to 24 hours in advance, cover it, and keep it in the refrigerator. Let it sit at room temperature for 20 minutes before baking, and add about 5-10 minutes to the baking time since it’s starting from cold.
Why did my casserole turn out watery?
This usually happens if the whole kernel corn wasn’t drained well enough, or if you used a larger can of creamed corn. Make sure to drain the whole kernel corn thoroughly. Also, letting the casserole rest for 10 minutes after baking helps the texture set up properly.
Can I use a different type of cheese?
Sharp cheddar is my first choice because of its bold flavor, but you can experiment. Monterey Jack melts beautifully, pepper jack adds heat, and a smoked gouda gives a lovely smoky flavor. Just avoid pre-shredded cheese for the best texture.
How do I know when the casserole is fully baked?
The top should be golden brown, the edges should be pulling away from the dish, and a toothpick inserted in the center should come out clean or with just a few moist crumbs. If the center still jiggles when you shake the dish, give it more time.
Pin This Recipe!

Cozy Jiffy Corn Casserole with Sour Cream & Cheddar

A creamy, cheesy corn casserole made with Jiffy mix, sour cream, and sharp cheddar. Perfect for cozy evenings and holiday gatherings, this easy side dish comes together in minutes and delivers rich, comforting flavor.
- Prep Time: 10 minutes
- Cook Time: 50 minutes
- Total Time: 1 hour
- Yield: 12 servings 1x
- Category: Side Dish
- Cuisine: American
Ingredients
- 2 boxes (8.5 oz each) Jiffy Corn Muffin Mix
- 1 can (14.75 oz) creamed corn, undrained
- 1 can (15.25 oz) whole kernel corn, drained
- 1 cup full-fat sour cream
- ½ cup unsalted butter, melted
- 2 cups sharp cheddar cheese, shredded (divided)
- 2 large eggs
- ½ teaspoon salt
- ¼ teaspoon black pepper
Instructions
- Preheat oven to 350°F (175°C). Grease a 9×13 inch baking dish thoroughly.
- In a large bowl, combine both boxes of Jiffy corn muffin mix with salt and pepper. Whisk to break up lumps.
- Add creamed corn (undrained), drained whole kernel corn, sour cream, melted butter, and eggs. Stir until just combined; do not overmix. Batter should be thick and creamy.
- Reserve ½ cup of shredded cheddar for topping. Fold remaining 1½ cups into the batter gently, leaving some cheese pockets.
- Pour batter into prepared dish and spread evenly. Sprinkle reserved cheddar on top.
- Bake on middle rack for 45-55 minutes, until top is golden brown, edges pull away from dish, and a toothpick inserted in center comes out clean or with moist crumbs.
- Let casserole rest for at least 10 minutes before serving.
Notes
Shred your own cheese for best melting. Let ingredients come to room temperature for 20 minutes before starting. For a spicier version, add diced green chiles, cumin, and cayenne. For a lighter version, use reduced-fat sour cream, substitute two egg whites for one egg, and reduce butter to ¼ cup. Casserole can be assembled up to 24 hours ahead; add 5-10 minutes to baking time if starting cold. Leftovers keep in refrigerator for up to 4 days; reheat in oven at 350°F for 10-15 minutes. Freezes well for up to 3 months.
Nutrition
- Serving Size: 1/12 of recipe
- Calories: 320
- Sugar: 8
- Sodium: 580
- Fat: 18
- Saturated Fat: 10
- Carbohydrates: 34
- Fiber: 2
- Protein: 9
Keywords: corn casserole, Jiffy corn casserole, sour cream casserole, cheesy corn casserole, easy side dish, holiday side dish, comfort food



