Love this? Save it for later!
Share the inspiration with your friends
I’m not supposed to play favorites with recipes, but this one has me completely hooked. Last December, I stopped by my neighbor Margaret’s house to borrow a cookie sheet—mine was buried under a pile of holiday chaos—and the smell that hit me when she opened the door stopped me cold. It was warm, spicy, and creamy all at once, like Christmas had been distilled into a single breath. She was standing there in her slippers, holding a saucepan, totally unfazed. “Oh, that’s just my eggnog,” she said, like it was nothing special. But let me tell you, it was everything special.
Margaret’s kitchen was a mess, honestly. There were flour handprints on the counter, a cracked mug holding a whisk, and nutmeg dust all over the cutting board. She didn’t apologize for any of it. She just poured me a small cup while it was still warm, and I stood there in my coat, holding that mug like it was a treasure. The first sip was this incredible wave of vanilla and nutmeg, with a texture so velvety it felt like a hug from the inside out. I mean, I’ve had store-bought eggnog before, and it’s fine—but this was a completely different animal.
I asked her for the recipe, and she waved her hand like it was no big deal. “It’s just the old-fashioned way,” she said. “You cook it, you strain it, you don’t skip the fresh nutmeg.” That was it. No secret ingredients, no fussy techniques. Just a simple, honest method that turns out the most incredible eggnog you’ll ever taste. I’ve been making it ever since, and now I can’t imagine the holidays without it. Maybe you’ve had a moment like that—where someone’s casual cooking changes how you think about a dish forever. That’s what this eggnog is for me.
Why You’ll Love This Recipe
This isn’t your average store-bought eggnog, and it’s not the raw, boozy version that makes you nervous about salmonella. This cozy old-fashioned cooked eggnog is the Goldilocks of holiday drinks—safe, silky, and absolutely packed with flavor. I’ve tested this recipe at least a dozen times across different stovetops and with different milk fat percentages, and I can tell you with confidence: it works every single time.
- Perfectly Safe: Cooking the egg base eliminates any worries about raw eggs, so you can serve this to grandma, the kids, and anyone with a nervous stomach.
- Incredibly Creamy: The gentle cooking process creates a texture that’s thick and luxurious without being heavy—like drinking melted custard.
- Real Flavor: Freshly grated nutmeg makes all the difference here. It’s warm, aromatic, and nothing like the pre-ground stuff that sits in your pantry for years.
- Make-Ahead Friendly: This eggnog actually gets better after a day in the fridge. The flavors meld and deepen, so you can prep it for your holiday party without any last-minute stress.
- Crowd-Pleaser: I’ve served this at three different holiday gatherings now, and every time, someone asks for the recipe. It’s that good.
What makes this recipe different from all the others? It’s the technique. Most cooked eggnog recipes rush the tempering process or use too much heat, leaving you with scrambled eggs in your milk. I’ve dialed in the exact temperature and timing so you get a smooth, velvety result every time. Plus, the fresh nutmeg isn’t just a garnish—it’s the star of the show. When you grate it yourself, the oils are still potent, giving you that warm, slightly peppery kick that makes eggnog taste like Christmas morning.
This is the kind of recipe that makes you close your eyes after the first sip. It’s comfort in a cup, reimagined the old-fashioned way—simple, honest, and absolutely soul-soothing.
What Ingredients You Will Need
This recipe uses simple, wholesome ingredients that you probably already have in your kitchen. The magic comes from how they work together and the quality of a few key players. Here’s what you’ll need:
- 6 large egg yolks – Save the whites for an omelet or meringue cookies. The yolks are what give this eggnog its rich, velvety texture.
- ½ cup granulated sugar – Standard white sugar works best here. It dissolves easily and doesn’t compete with the warm spices.
- 2 cups whole milk – Don’t skimp on the fat content. Whole milk gives the eggnog that signature creaminess. I’ve tried 2%, and it’s thinner and less satisfying.
- 1 cup heavy cream – This adds richness and body. You can substitute with half-and-half in a pinch, but the texture won’t be as luxurious.
- 1 teaspoon vanilla extract – Pure vanilla extract, not imitation. It adds a warm, floral note that complements the nutmeg beautifully.
- ½ teaspoon ground cinnamon – A subtle background warmth. I prefer Ceylon cinnamon for its milder, sweeter profile, but Cassia works too.
- ¼ teaspoon salt – Just a pinch to balance the sweetness and enhance all the flavors.
- 1 whole nutmeg – This is non-negotiable. You need a whole nutmeg that you grate fresh yourself. I buy mine from the spice aisle at the grocery store, and one nutmeg will last you through several batches.
- Optional: ½ cup bourbon, rum, or brandy – If you want a boozy version, add this after cooking. I personally love a good dark rum, but bourbon adds a lovely vanilla-tinged warmth.
Ingredient Tips: For the best results, use room-temperature eggs. Cold eggs can cause the mixture to seize up when you’re tempering. Also, look for a nutmeg that feels heavy for its size—that means it’s fresh and full of aromatic oils. I recommend the brand The Spice House for their whole nutmegs, but any brand from a well-stocked grocery store will work.
If you’re dairy-sensitive, you can substitute the whole milk with oat milk and the heavy cream with full-fat coconut cream. The flavor will change slightly, but it still makes a delicious, creamy eggnog. Just know that the texture won’t be quite as thick.
Equipment Needed
You don’t need any fancy gadgets for this recipe, which is part of its charm. Here’s what you’ll need:
- Medium saucepan – A heavy-bottomed saucepan is ideal because it distributes heat evenly and prevents scorching. I use my trusty 3-quart stainless steel pot.
- Whisk – A standard wire whisk is essential for tempering the eggs and keeping the mixture smooth. A silicone-coated whisk is nice because it won’t scratch your pan.
- Fine-mesh strainer – This catches any stray bits of cooked egg that might sneak through. It’s the secret to that silky-smooth texture.
- Microplane or fine grater – For grating the fresh nutmeg. A Microplane is perfect because it produces tiny, fluffy shards that dissolve easily into the eggnog.
- Large mixing bowl – For whisking the egg yolks and sugar together.
- Ladle – For slowly adding the hot milk to the eggs during tempering. A measuring cup with a spout works too.
- Glass pitcher or jar – For storing the finished eggnog in the fridge. A quart-sized mason jar is perfect.
Budget-Friendly Tip: If you don’t have a fine-mesh strainer, you can use a clean kitchen towel or cheesecloth lined in a colander. It works just as well, though it’s a bit messier. And if you don’t have a Microplane, the smallest holes on a box grater will do the job—just be careful not to grate your knuckles!
Preparation Method
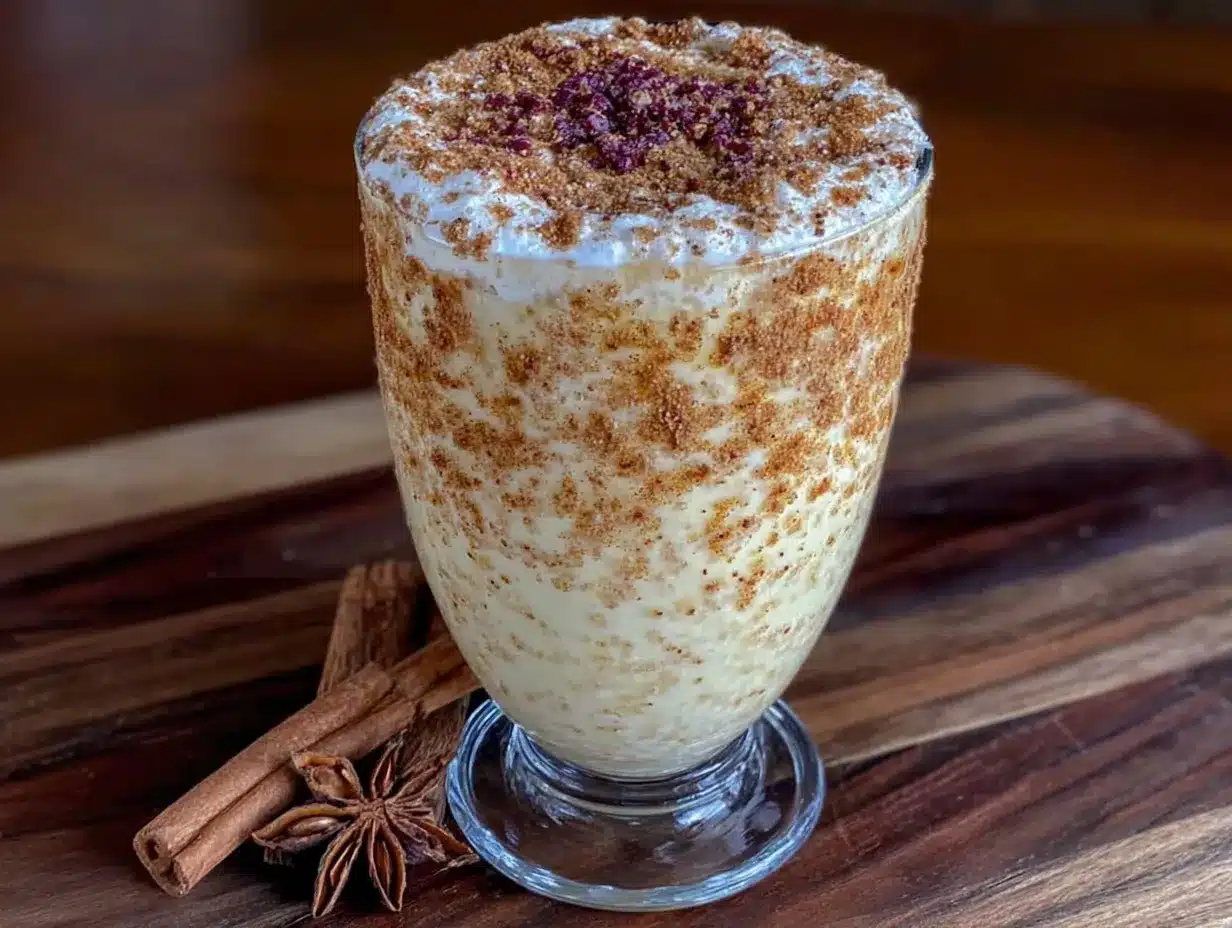
Making this cozy old-fashioned cooked eggnog is easier than you think. The key is patience and a gentle hand. Follow these steps, and you’ll have the most incredible eggnog of your life.
- Prep your ingredients. Separate the eggs, placing only the yolks in a large mixing bowl. Save the whites for another use. Measure out your milk, cream, sugar, and spices. Grate about 1 teaspoon of fresh nutmeg using your Microplane—you’ll add more later for garnish.
- Whisk the yolks and sugar. Add the sugar to the egg yolks and whisk vigorously for about 2 minutes, until the mixture turns pale yellow and thickens slightly. You’re looking for a “ribbon stage” where the mixture falls off the whisk in a smooth, continuous ribbon. This step is crucial for incorporating air and ensuring a creamy texture.
- Heat the milk and cream. In your medium saucepan, combine the whole milk, heavy cream, ground cinnamon, salt, and about ½ teaspoon of the freshly grated nutmeg. Heat over medium heat, stirring occasionally, until the mixture is hot but not boiling. You’ll see small bubbles forming around the edges of the pan, and steam will rise from the surface. This takes about 4-5 minutes. Do not let it boil, or you’ll risk curdling the milk.
- Temper the eggs. This is the most important step. Slowly drizzle about ½ cup of the hot milk mixture into the egg yolk mixture while whisking constantly. This gradually raises the temperature of the eggs without scrambling them. Then, slowly pour the tempered egg mixture back into the saucepan with the remaining hot milk, whisking continuously. I like to use a ladle for this—it gives me better control over the pour.
- Cook the eggnog. Return the saucepan to medium-low heat. Cook, stirring constantly with your whisk, for about 5-7 minutes. You’ll notice the mixture start to thicken and coat the back of a spoon. When you run your finger across the back of the spoon and the line holds, it’s ready. The temperature should reach 160°F (71°C) on an instant-read thermometer. Do not let it boil, or the eggs will scramble.
- Strain the eggnog. Immediately remove the saucepan from the heat. Pour the eggnog through your fine-mesh strainer into a clean pitcher or jar. This catches any tiny bits of cooked egg that might have formed. Trust me, this step makes a huge difference in the final texture.
- Add vanilla and optional alcohol. Stir in the vanilla extract. If you’re adding bourbon, rum, or brandy, stir it in now. The alcohol will also help preserve the eggnog and mellow the flavors.
- Cool and chill. Let the eggnog cool to room temperature, then cover and refrigerate for at least 4 hours, preferably overnight. The eggnog will thicken further as it chills, and the flavors will meld together beautifully.
- Serve with fresh nutmeg. When you’re ready to serve, pour the chilled eggnog into mugs. Grate a generous amount of fresh nutmeg over the top of each serving. This isn’t just for looks—the fresh nutmeg adds a burst of aromatic flavor that makes every sip magical.
Troubleshooting Tip: If you see any small lumps forming while cooking, don’t panic. Immediately remove the pan from the heat and whisk vigorously. If the lumps are small, they’ll often dissolve. If not, the strainer will catch them.
Cooking Tips & Techniques
I’ve made this eggnog more times than I can count, and I’ve learned a few things the hard way. Here are my best tips for perfect results every time.
Don’t rush the tempering process. I know it’s tempting to just dump the hot milk into the eggs, but that’s how you end up with sweetened scrambled eggs. Take your time. Add the hot milk in a slow, steady stream while whisking constantly. If you’re nervous, ask someone to help—one person pours, the other whisk. I’ve done it solo plenty of times, though, so don’t stress.
Use a thermometer if you have one. The ideal temperature for cooked eggnog is 160°F (71°C). This is hot enough to kill any potential bacteria but not so hot that the eggs scramble. If you don’t have a thermometer, look for the “coat the back of a spoon” test. When you can run your finger through the coating on the spoon and the line stays clean, it’s ready.
One time I got distracted by my phone ringing and let the eggnog get too hot. The mixture started to separate, and I had these tiny curds floating around. I managed to save it by immediately pulling it off the heat, whisking like crazy, and straining it twice. It still tasted good, but the texture wasn’t as silky. So put your phone on silent and give this recipe your full attention for those 10 minutes.
Fresh nutmeg is a game-changer. I can’t stress this enough. Pre-ground nutmeg has already lost most of its volatile oils and flavor. A whole nutmeg, grated fresh, has a warmth and complexity that’s completely different. It’s slightly sweet, a little peppery, and incredibly aromatic. I keep a whole nutmeg in a tiny jar on my counter so I can grate it whenever I need it.
Make it ahead for the best flavor. This eggnog actually improves after a day or two in the fridge. The flavors meld and mellow, and the texture becomes even more velvety. I always make mine at least 24 hours before I plan to serve it. It’s one less thing to worry about on the day of your party.
Variations & Adaptations
This cozy old-fashioned cooked eggnog is incredibly versatile. Here are some ways to make it your own:
Dairy-Free Version: Substitute the whole milk with full-fat oat milk or cashew milk, and use full-fat coconut cream instead of heavy cream. The coconut adds a subtle tropical note that actually pairs beautifully with the nutmeg. I’ve made this for a friend who’s lactose intolerant, and she said it was the best eggnog she’d ever had.
Spiced Variation: Add a cinnamon stick, 2 whole cloves, and a star anise to the milk while it heats. Let it steep for 10 minutes before removing the spices and proceeding with the recipe. This adds a warm, complex chai-like flavor that’s perfect for cold winter nights.
Lower-Sugar Option: Reduce the sugar to ⅓ cup and add a tablespoon of maple syrup or honey for a different kind of sweetness. The eggnog won’t be as thick, but it will still be delicious. I’ve tried this with honey, and it adds a lovely floral note.
Chocolate Eggnog: Whisk in 2 tablespoons of unsweetened cocoa powder with the sugar and egg yolks. The chocolate and nutmeg combination is surprisingly wonderful—like a boozy hot chocolate with a kick.
Vegan Version: Use 6 tablespoons of cornstarch mixed with ¼ cup of water as a thickener instead of egg yolks. Combine with your favorite plant-based milk and cream. The texture won’t be identical, but it’s still creamy and delicious. I’ve only tried this once, and it was pretty good for a vegan alternative.
Serving & Storage Suggestions
This eggnog is best served cold, straight from the fridge, in a cozy mug. I love using clear glass mugs so you can see the beautiful pale golden color. Top each serving with a generous grating of fresh nutmeg—don’t be shy with it. The nutmeg should form a light dusting over the surface.
For a festive touch, add a cinnamon stick as a stirrer and a dollop of lightly sweetened whipped cream. You can also rim the glass with a mixture of sugar and cinnamon for an extra special presentation.
What to serve with it: This eggnog pairs beautifully with gingerbread cookies, shortbread, or a slice of spiced apple cider donuts. For a savory contrast, try it alongside a cheese board with sharp cheddar and crackers. The richness of the eggnog balances the saltiness of the cheese perfectly.
Storage: Keep the eggnog in an airtight container in the refrigerator for up to 5 days. The flavor actually improves after the first day as the spices meld. Give it a good stir before serving, as some settling is natural.
Reheating: If you prefer warm eggnog, gently reheat it in a saucepan over low heat, stirring constantly. Do not let it boil. You can also microwave individual servings in 30-second bursts, stirring between each. Warm eggnog is especially comforting on a cold night, and the fresh nutmeg on top smells incredible when it hits the warm liquid.
Freezing: You can freeze this eggnog for up to 3 months. Pour it into a freezer-safe container, leaving about an inch of headspace for expansion. Thaw in the refrigerator overnight and whisk well before serving. The texture might be slightly thinner after freezing, but the flavor remains excellent.
Nutritional Information & Benefits
Here’s the approximate nutritional breakdown for one serving (about ½ cup, without alcohol):
- Calories: 310
- Fat: 22g
- Saturated Fat: 13g
- Carbohydrates: 24g
- Sugar: 22g
- Protein: 7g
- Calcium: 15% of the Daily Value
- Vitamin D: 10% of the Daily Value
This eggnog is a treat, no doubt about it, but it does have some redeeming qualities. The egg yolks are rich in choline, which supports brain health, and they provide high-quality protein. The milk and cream offer calcium and vitamin D for strong bones. And nutmeg has been used in traditional medicine for its anti-inflammatory properties and ability to aid digestion.
Dietary Considerations: This recipe contains dairy and eggs. For a gluten-free option, it’s naturally gluten-free as written. If you’re watching your sugar intake, try the lower-sugar variation I mentioned earlier. And if you’re serving this to children or pregnant women, skip the alcohol and make sure the eggnog reaches 160°F during cooking.
I believe in balance, and this eggnog is part of my holiday tradition. It’s a special treat that I look forward to all year, and I think that’s perfectly okay. One cup of this won’t derail your health goals, but it will absolutely make your heart happy.
Conclusion
This cozy old-fashioned cooked eggnog with fresh nutmeg is more than just a drink—it’s a moment of pure holiday magic. The process of making it, from tempering the eggs to grating the nutmeg, is itself a comforting ritual. And the result? A creamy, aromatic, soul-warming cup of nostalgia that tastes like Christmas morning.
I love this recipe because it’s honest. It doesn’t rely on fancy techniques or hard-to-find ingredients. It’s just good food made with care, the way Margaret made it in her messy kitchen that December afternoon. Every time I make it, I think of her standing there in her slippers, holding that saucepan like it was no big deal. But it was a big deal. It was a gift.
Now I’m passing that gift to you. Try this recipe, and don’t be afraid to make it your own. Add a little extra nutmeg, swap in your favorite spirit, or serve it warm on a snowy night. Whatever you do, I hope it brings you the same warmth and comfort it’s brought me.
I’d love to hear how it turns out for you! Drop a comment below and let me know your favorite way to enjoy this eggnog. Did you add bourbon? Try the chocolate variation? Share your photos and tag me—I can’t wait to see your cozy holiday moments. Happy sipping, friends!
Frequently Asked Questions
Can I make this eggnog without a thermometer?
Absolutely. Use the “coat the back of a spoon” test instead. Dip a clean spoon into the eggnog while it’s cooking. If the mixture coats the back of the spoon and leaves a clean line when you run your finger through it, it’s ready. Just make sure you’re cooking it over medium-low heat and stirring constantly.
Why did my eggnog turn out thin?
This usually happens if the eggnog wasn’t cooked long enough or if the heat was too low. The eggs need to reach about 160°F to thicken properly. Next time, cook it a few minutes longer and look for that coating-the-spoon consistency. Also, remember that the eggnog will thicken more as it chills, so don’t worry if it seems thin when it’s still warm.
Can I use pre-ground nutmeg instead of fresh?
You can, but I really don’t recommend it. Freshly grated nutmeg has a warmth and complexity that pre-ground nutmeg just can’t match. The pre-ground stuff has already lost most of its aromatic oils and flavor. If you absolutely have to use it, double the amount called for in the recipe and add it gradually, tasting as you go.
How far ahead can I make this eggnog?
You can make this eggnog up to 5 days in advance. In fact, it tastes even better after a day or two in the fridge because the flavors have time to meld. Just keep it in an airtight container and give it a good stir before serving. If you’re adding alcohol, it will also help preserve the eggnog a bit longer.
Can I serve this eggnog warm?
Yes! Warm eggnog is incredibly comforting on a cold night. To reheat, gently warm it in a saucepan over low heat, stirring constantly. Do not let it boil, or it might curdle. You can also microwave individual servings in 30-second bursts, stirring between each. Top with fresh nutmeg right before serving for the best aroma.
Pin This Recipe!
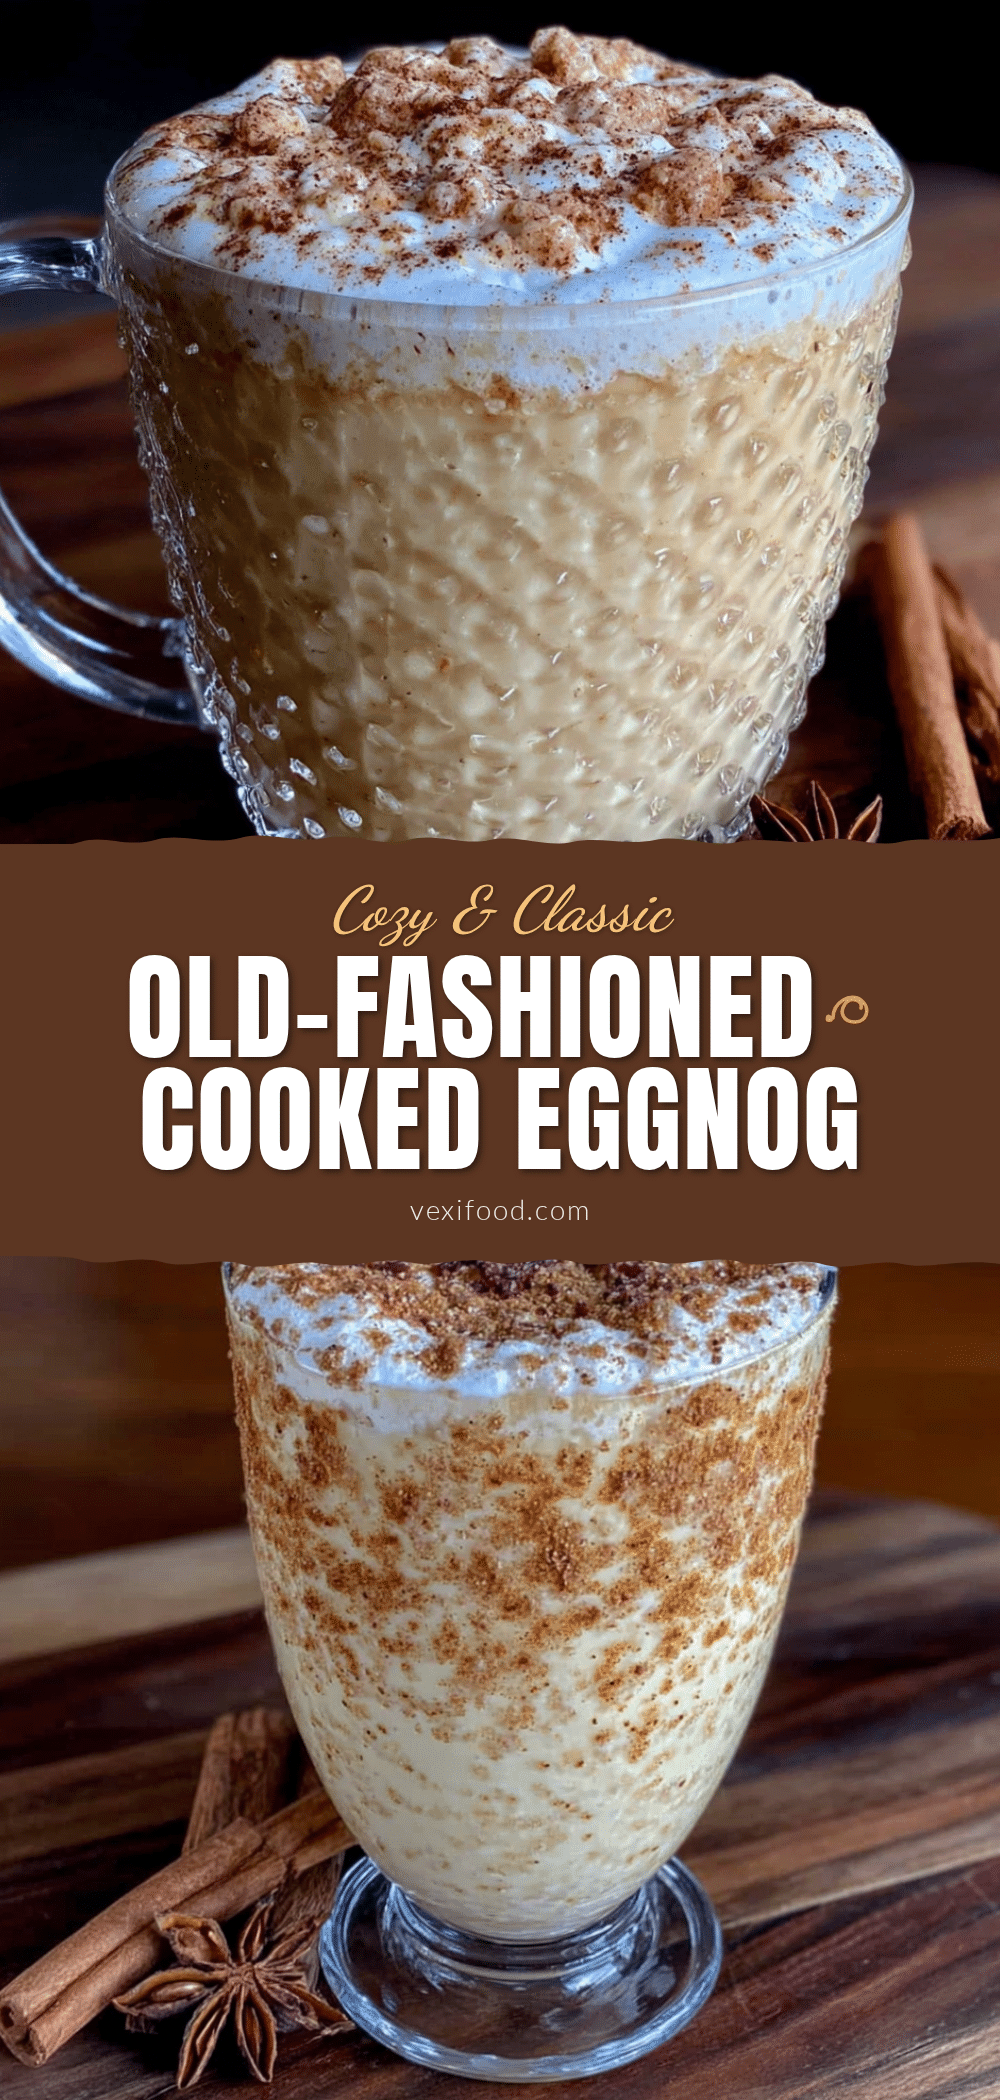
Cozy Old-Fashioned Cooked Eggnog with Fresh Nutmeg
This cozy old-fashioned cooked eggnog is safe, silky, and packed with flavor. Made with fresh nutmeg and a gentle cooking process, it’s the perfect holiday drink that tastes like Christmas morning.
- Prep Time: 15 minutes
- Cook Time: 15 minutes
- Total Time: 4 hours 30 minutes (includes chilling)
- Yield: 4 servings 1x
- Category: Beverage
- Cuisine: American
Ingredients
- 6 large egg yolks
- ½ cup granulated sugar
- 2 cups whole milk
- 1 cup heavy cream
- 1 teaspoon vanilla extract
- ½ teaspoon ground cinnamon
- ¼ teaspoon salt
- 1 whole nutmeg (for grating)
- Optional: ½ cup bourbon, rum, or brandy
Instructions
- Prep your ingredients. Separate the eggs, placing only the yolks in a large mixing bowl. Save the whites for another use. Measure out your milk, cream, sugar, and spices. Grate about 1 teaspoon of fresh nutmeg using your Microplane—you’ll add more later for garnish.
- Whisk the yolks and sugar. Add the sugar to the egg yolks and whisk vigorously for about 2 minutes, until the mixture turns pale yellow and thickens slightly. You’re looking for a ‘ribbon stage’ where the mixture falls off the whisk in a smooth, continuous ribbon.
- Heat the milk and cream. In your medium saucepan, combine the whole milk, heavy cream, ground cinnamon, salt, and about ½ teaspoon of the freshly grated nutmeg. Heat over medium heat, stirring occasionally, until the mixture is hot but not boiling. You’ll see small bubbles forming around the edges of the pan, and steam will rise from the surface. This takes about 4-5 minutes. Do not let it boil.
- Temper the eggs. Slowly drizzle about ½ cup of the hot milk mixture into the egg yolk mixture while whisking constantly. Then, slowly pour the tempered egg mixture back into the saucepan with the remaining hot milk, whisking continuously.
- Cook the eggnog. Return the saucepan to medium-low heat. Cook, stirring constantly with your whisk, for about 5-7 minutes. You’ll notice the mixture start to thicken and coat the back of a spoon. When you run your finger across the back of the spoon and the line holds, it’s ready. The temperature should reach 160°F (71°C) on an instant-read thermometer. Do not let it boil.
- Strain the eggnog. Immediately remove the saucepan from the heat. Pour the eggnog through your fine-mesh strainer into a clean pitcher or jar.
- Add vanilla and optional alcohol. Stir in the vanilla extract. If you’re adding bourbon, rum, or brandy, stir it in now.
- Cool and chill. Let the eggnog cool to room temperature, then cover and refrigerate for at least 4 hours, preferably overnight.
- Serve with fresh nutmeg. When you’re ready to serve, pour the chilled eggnog into mugs. Grate a generous amount of fresh nutmeg over the top of each serving.
Notes
Don’t rush the tempering process. Use a thermometer if you have one. Fresh nutmeg is a game-changer. Make it ahead for the best flavor. If you see any small lumps forming while cooking, immediately remove the pan from the heat and whisk vigorously.
Nutrition
- Serving Size: ½ cup
- Calories: 310
- Sugar: 22
- Sodium: 150
- Fat: 22
- Saturated Fat: 13
- Carbohydrates: 24
- Protein: 7
Keywords: eggnog, cooked eggnog, old-fashioned eggnog, holiday drink, Christmas drink, fresh nutmeg, homemade eggnog



